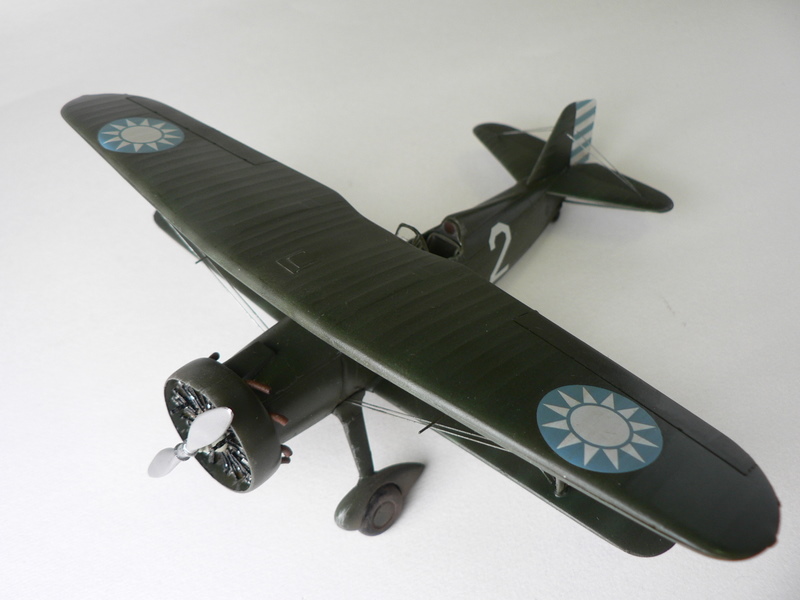
Curtiss Hawk II Chinese Air Force – Classic Airframes

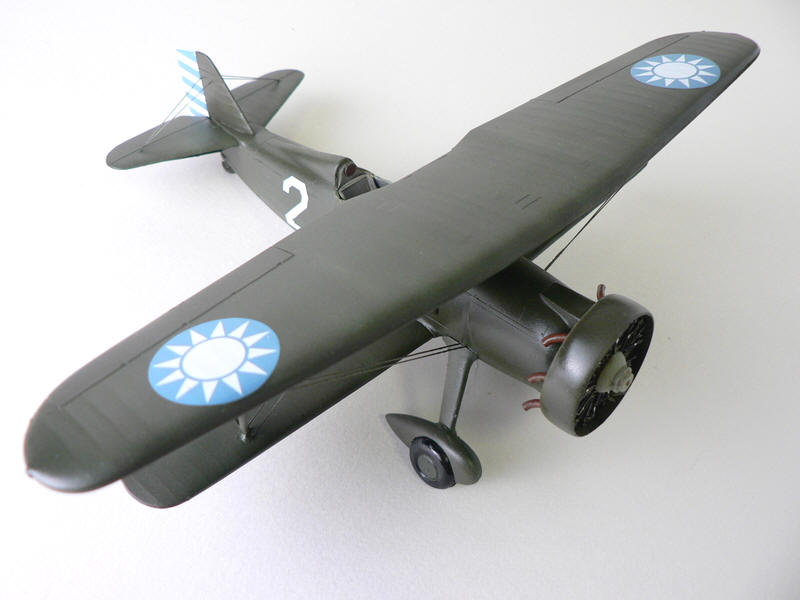
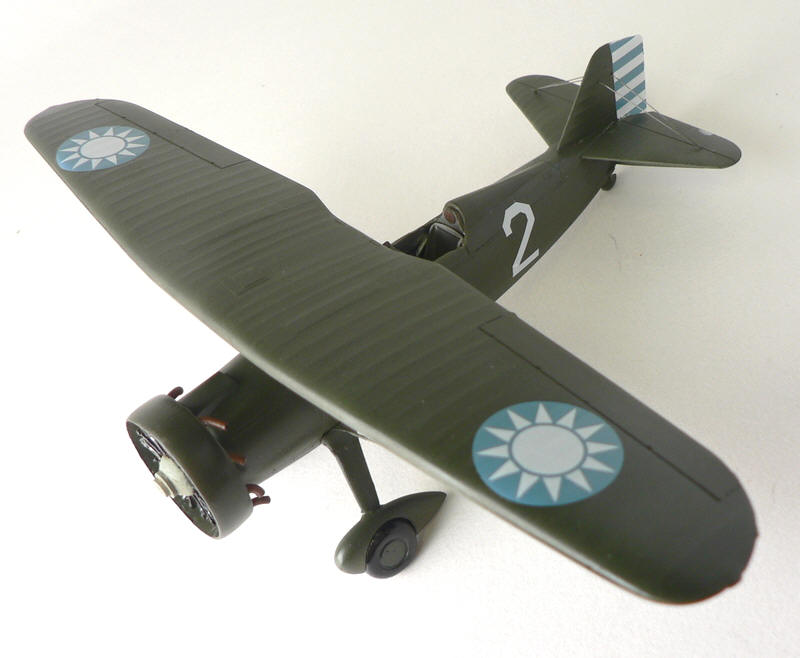
Classic Aiframes Curiss Hawk II, painted in the scheme of Chinese Nationalist Airforce, early 1930s as flown by Chinese American pilot Arthur Chin.
Curtiss Hawk II
The Curtiss company had been putting out a successful line of biplane fighters in the 1930’s including the F11C-2 (later changed to BFC-2). The export version of which was named Hawk II. Examples were sold to Germany when Udet saw a demonstration of its dive bombing capabilities, to Cuba, Turkey, and 50 to China after Jimmy Doolittle gave a demonstration in Shanghai on April 1933. Doolittle of course would gain fame nine years later leading his B-25 raid into Tokyo.
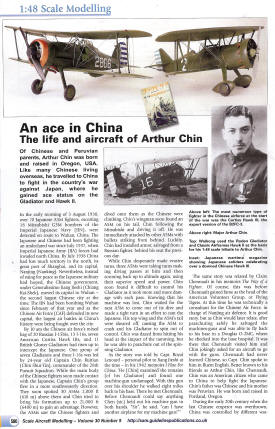
The 50 Hawks sold to China was actually to different factions. The first 18 Hawks were sold to the Guangdong warlord who nominally pledged allegence to the Central government. As mentioned in the article, this Guangdong Air Force was the one which Arthur Chin first joined. These hawks equipped the 6th and 7th Air Group. The Central government also purchased 32 additional Hawk II’s in 1934, some of which were donated by civilians and oversea Chinese. The air training schools also received Hawk II’s for training and with the start of the Sino-Japanese war, they participated in the fighting.
Classic Airframes 1/48 Hawk II
This kit is currently out of production, but may still be found for trade or purchase online. As with other Classic Airframes earlier boxings, the cockpit and engine is comprised of resin and the rest in styrene. There are no locating pins molded into the kit. Decals are supplied for both a Cuban aircraft and a Chinese Aircraft.
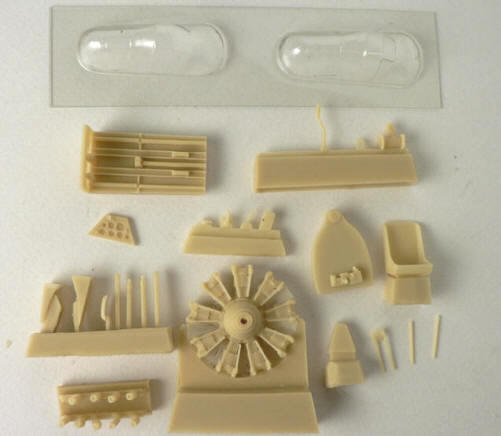
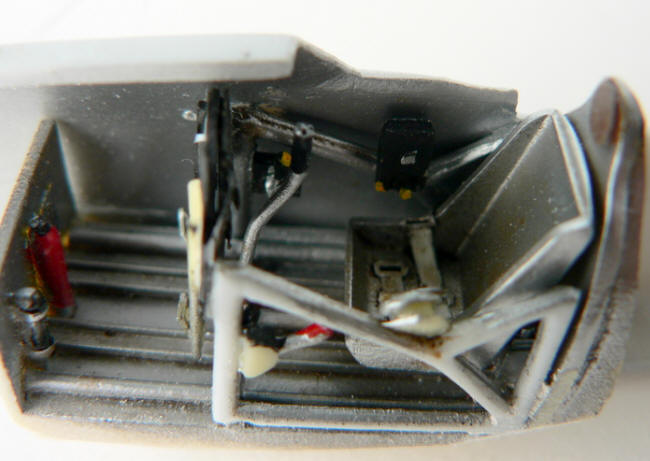
The resin cockpit has not sidewalls, instead the plastic replicates the tube structure. These are too thick as expected and thinned down before attaching the resin throttle and cranks. The instrument panel consists of the top and bottom plate in which a clear acetate with instrument faces are to be sandwiched. On my example, one of the delicate rudder mechanism was broken and had to replaced with styrene rods. Once everything was glued together, I put down a coat of Tamiya primer followed by Alclad aluminum. The details were picked out with a 3/0 brush and then a brown oil brush made all the details pop, especially the seat belts that was molded in. I gave those a coat of dirty white to finish them off. This was then attached to the side fuselage with CA glue.
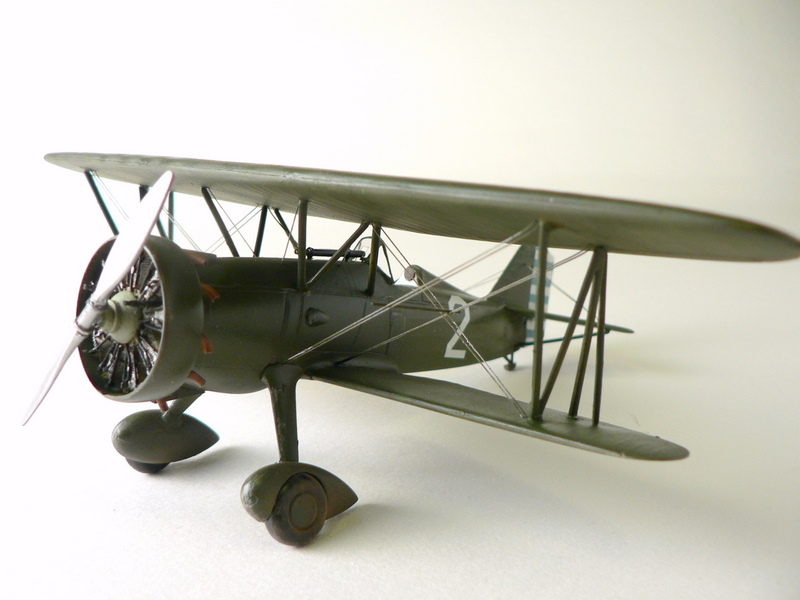
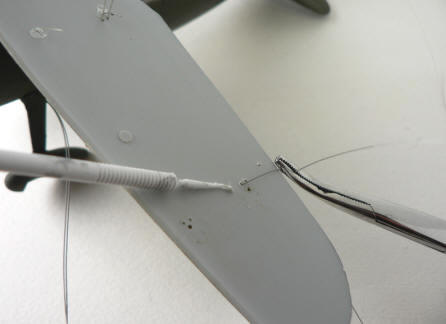
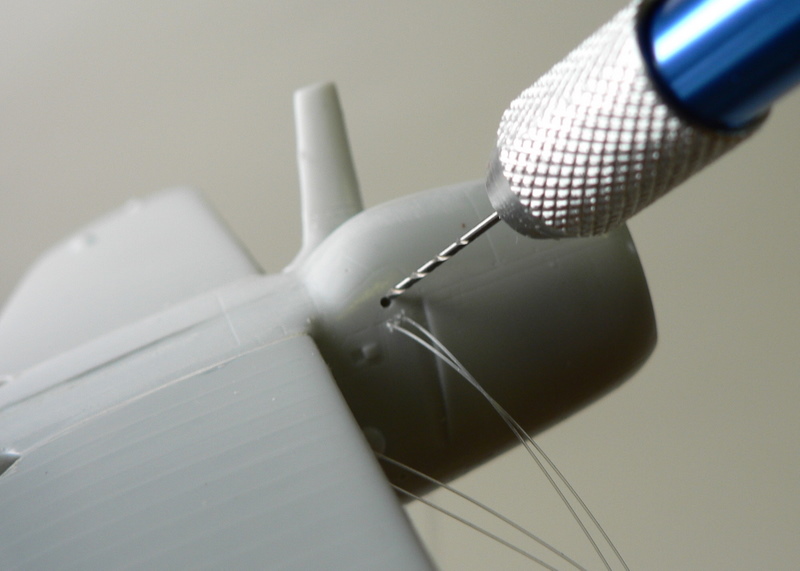
At this point, I decided to improve on my rigging technique. While the Gladiator rigging was okay, it was not as smooth as I had hoped and took a bit too much time trying fix up afterwards. Also there were two differences in this kit with the Gladiator. First, once the fuselage was closed up, you can no longer access the inside for fix the rigging. I have seen suggestions to pull the rigging from the cockpit with a homemade hook, but that seemed much too challenging for me. So I decided to install the rigging before the fuselage was closed up, I just had to make sure I had enough excess to work with afterwards. The second difference was that the top wing consisted of 2 pieces, a top and bottom, creating a small hollow center. So instead of drilling through the lower wing and needing to fixup the hole later on, I drilled half way through the lower wing to attach the rigging first. Later I will attach the bottom of the upper wing and secure the rigging inside the top wing. Once the wing is closed, there will be nothing to clean up. With this method, only the tail rigging needed fixing afterwards.
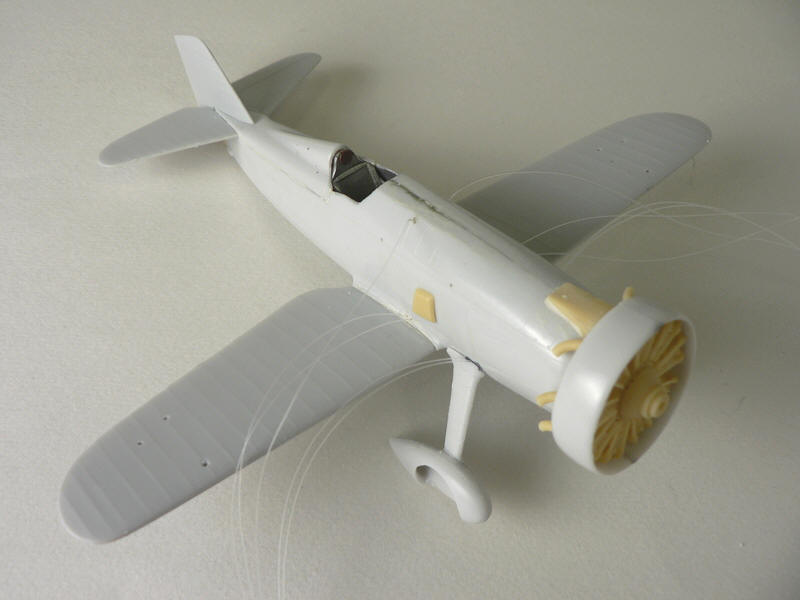
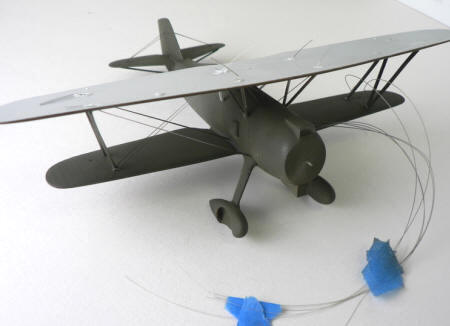
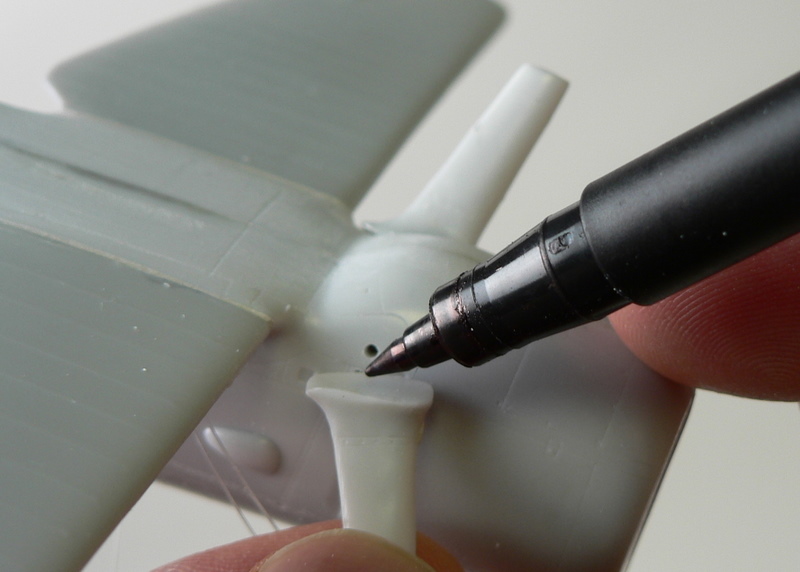
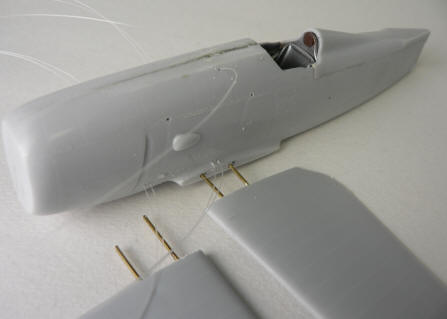
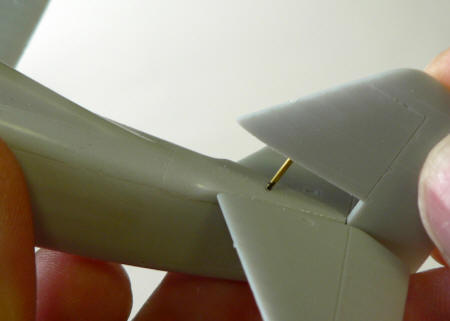
As with most limited run kits, all the wing and tail joints were butt joints. This of course is too weak to leave as is. So I used brass rods to secure them through holes drilled with a pin vise to add strength to these assemblies. The landing gear also benefitted from this treatment as this would have bore the weight of the whole plane when finished. One quick way to know where to drill is to first attach the rod to one side, then darken the protruding end with a black marker. Now place the piece into the mating surface and you will get a black dot where the hole should fit. Drilling a hole a little bigger than required will give you a bit of leeway in terms of how accurate the position of the hole needed to be.
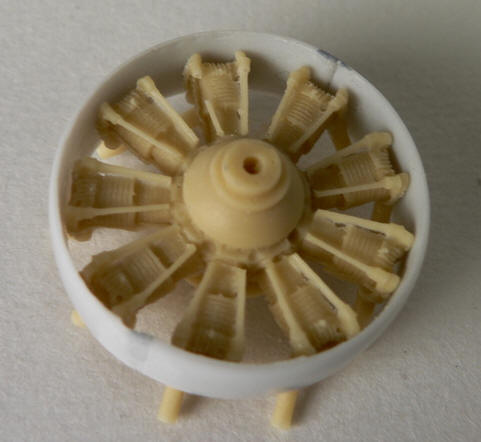
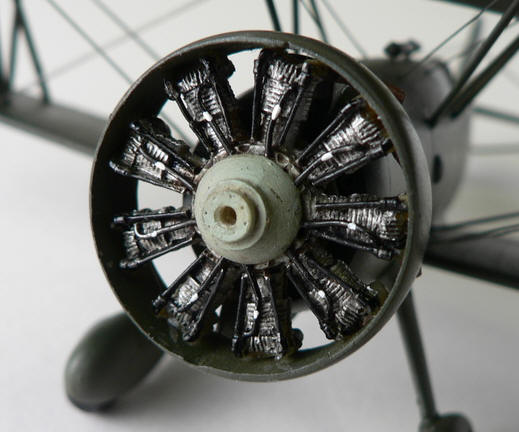
Next was the resin engine, and thankfully the cylinders are cast as one piece. My previous experience with Classic Airframes rotary engines were separate casting for each cylinder, which created much more work without any noticeable benefits. This engine then needed to be sanded down a bit all around to fit the cowling. Again, this is fairly standard for limited run kits. The exhausts stacks are provided separately and had to be carefully attached one by one. I finished the engine off with some solder to act as wiring. The whole engine was painted with Alclad aluminum and then a dark black oil was used to fill in all the recesses.
The tail skid was then attached next much more forward than indicated in the instructions. Based on photographs and Squadron’s Curtiss Hawks in Action, this was the correct position. This piece was made for styrene and somewhat flimsy. Sure enough, the supporting rods broke after setting the plane down few times and had to be replaced brass rods.
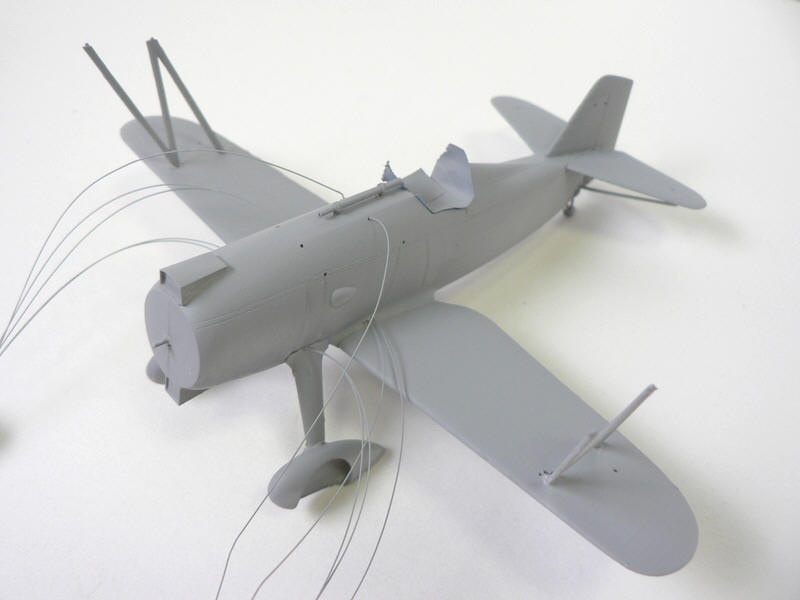
At this point, all the major assembly were done except for the top wing. I added all the rigging as described previously and gave the plane a coat of primer. I added the inter plane structs next with slow setting CA gel glue and then attached the top wing. Like the Gladiator, this was bit tough to get alignment right, but the carbane structs fitted very well. The rigging were then pulled through predrilled holes in the top wing, secured, and then the wing was closed up.
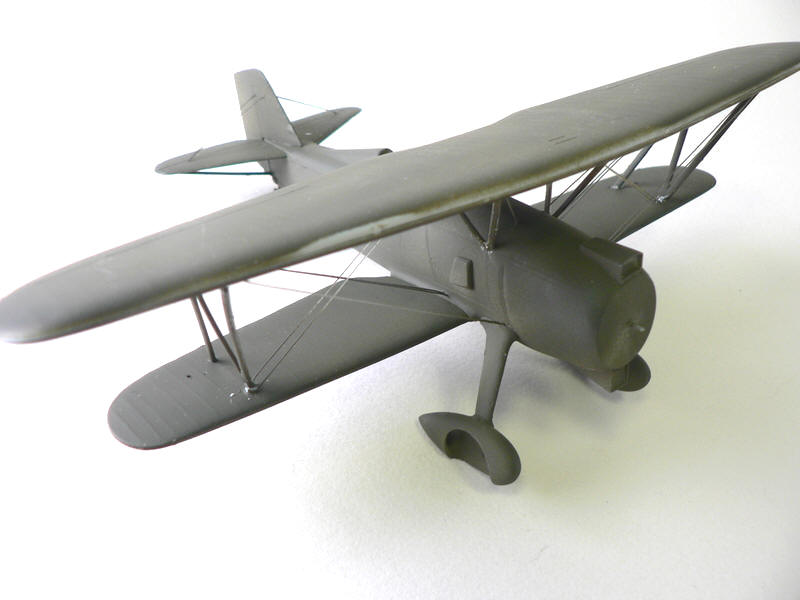
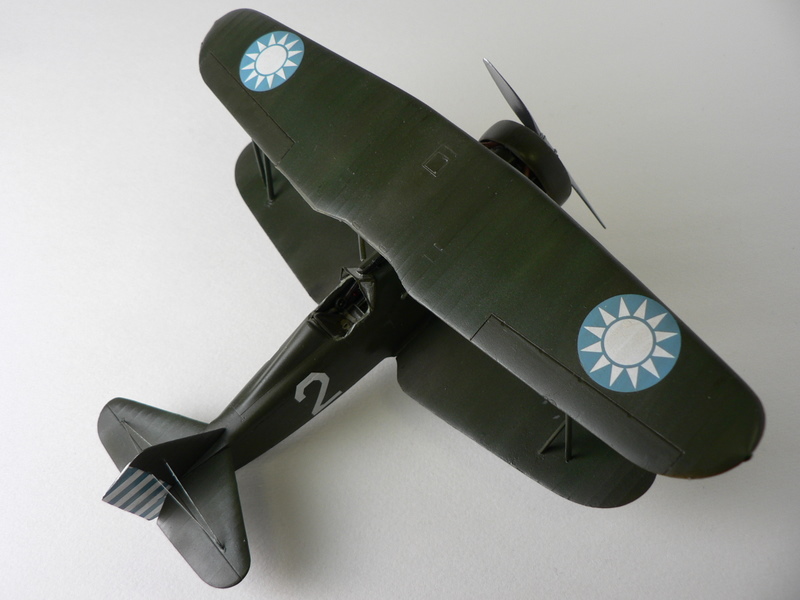
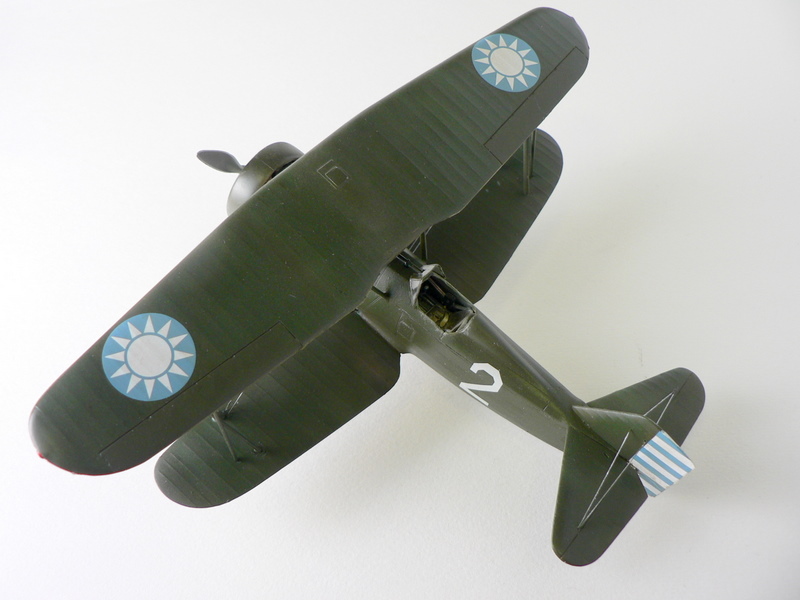
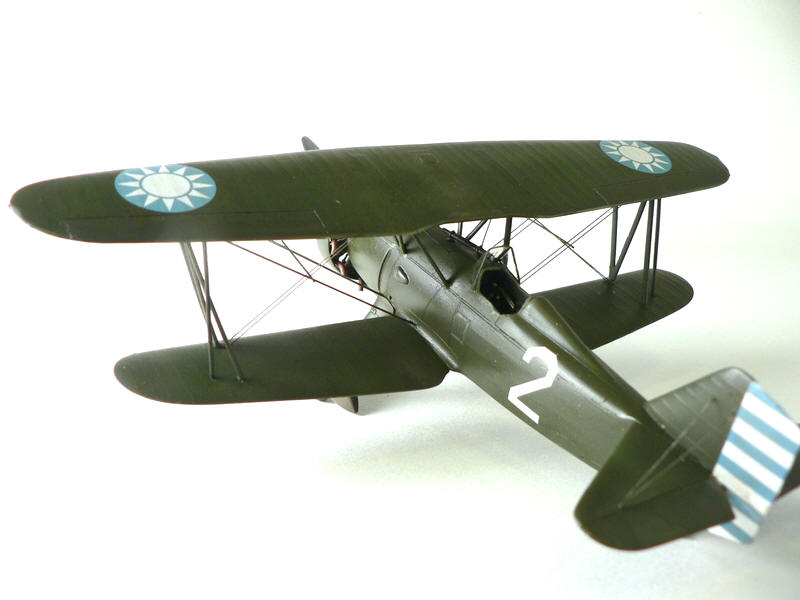
Now the complete plane were painted IJN green mixed with a bit of Olive drab. This was followed with some random shading of a lighter shaded of the base color. I lightened this again and streaked paint in light passes from front to back along the wings. The flight control surfaces were painted with this lightest shade to show uneven weathering. After letting this dry overnight, a coat of Future was added to prepare for decals and oil wash. The kit decals provided the star and tail stripes, they consisted of faded blue so the aircraft had to be made a bit more weathered than the Gladiator to fit. The provided serials however were not the one’s I needed, so I used a white letter/number decal sheet meant for F-86 Sabres to get #2 serial. A dark brown oil was then applied as wash and filter, especially to the decals to dirty them up a bit and blend everything in. A final coat of Microscale Satin took down the shine and the last major piece was the windscreen.
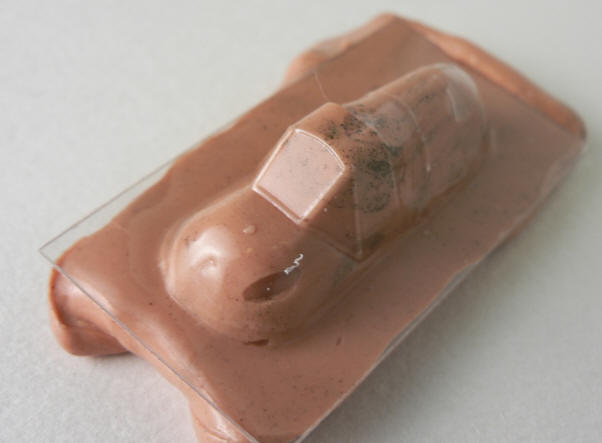
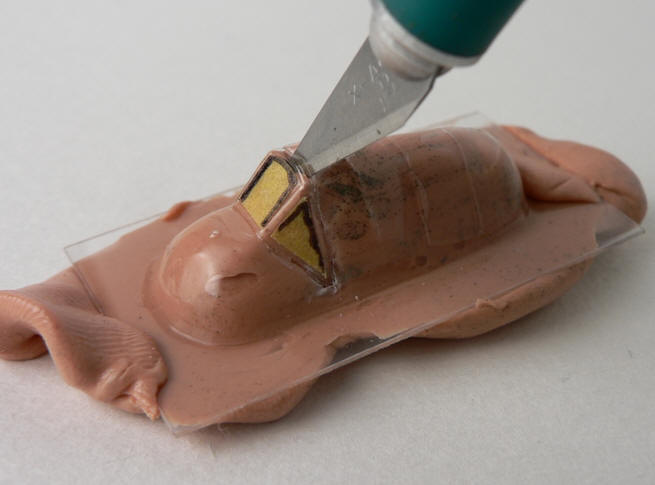
Now, I have a love-hate relationship with Acetate windscreens, while they are nice and thin, they have very little lateral strength and needed to put cut out. My usual method is to support the acetate with clay or silly putty. Then using a sharp new #11 blade, cut the windscreen out. After dipping in Future to get it nice and clear, the screen was masked and painted.
This was then attached to the airplane. I gave the wheel area a nice treatment of earth pigment powder and the kit was finished.