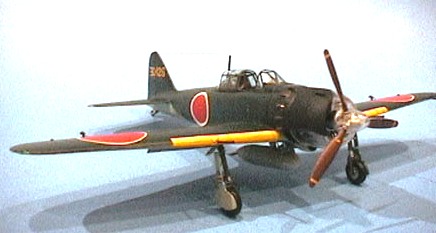
Mitsibushi A6m5 – Hasegawa clear edition
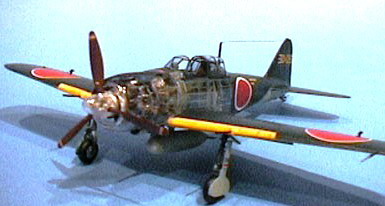
This is Hasegawa’s “clear” edition of the famous “zero” fighter. The kit looks to be their basic A6m5 offering with the main body parts recast in clear styrene. In addition, a cast metal ‘firewall’ section, a cast metal engine, and 2 frets of etch-metal for the airframe are added . One can of course ignore all airframe and paint the entire plane and it would be it would be indistinquishable from the ‘normal’ edition. My observation is that most ‘serious’ modelers disklike these clear edition kits, I guess since they are somehow ‘toylike’? Yet the same modelers will be very excited to see a ‘cut away’ model. I’m not quite sure the rationnel behind that, but using these clear kits as a shortcut to creating your own ‘cutaway’ seems logical to me. Perhaps in a future project.
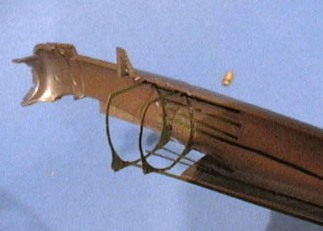
Unlike most planes, you will probally start this one off with the photoetched airframe. The frame consists of the multiple bulkheads with small slits, in which you are suppose ot fit and glue the stringer. This is then fitted into the fueselage halves. Well, thats the theory anyway. I had a devil of a time making the metal conform as the shape has a slight curve. Once I glued more than 1/2 of the stringers on, the old ones started popping their joints when I tried to glue new ones. Perhaps in hindsight I should have heated the metal first to made them more malleable.
In anycase, after a week of frustration, I decided to only use the forward bulkheads & stringers. As the model is meant to be displayed clear on one side and painted on the other. I decided to just paint over the rear fuselage area where there are no additional details besides the stringers. Now, on to the cockpit…
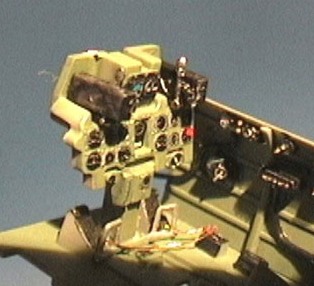
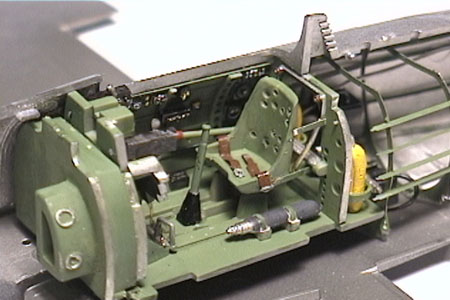
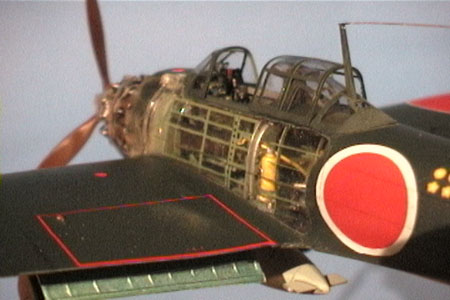
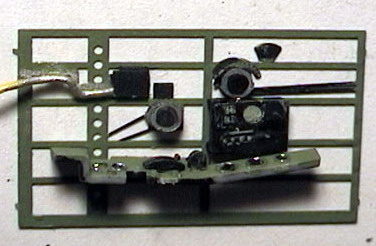
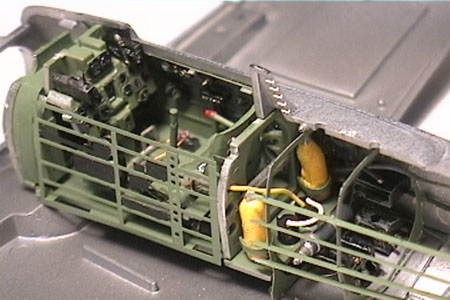
The cockpit is wonderfully detailed out of the box. The instructment faces were cutout from the decal sheet and applied to the panel. All interior was painted with Tamiya Japanese interior green, followed by a wash of thinned smoke and then drybrushed with sliver. The various boxes, hoses, and oxygen tanks were then added. I scratched built the seat bracing as that was not depicted in the kit. I then drilled out the lightening holes in the seat and attached the photoetched belt. The entire assembly was then glued to the right fueselage. The Firewall consists of a one piece white cast metal . The left side of the cockpit is the clear side, and a single piece photoetched ribbing is provided to add details here. The included parts meant for this area in the nonclear version is provided. So it was a simple matter to add those pieces to the photoetch along with some wiring to add details to this area.
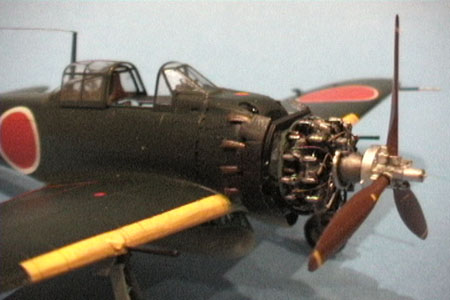
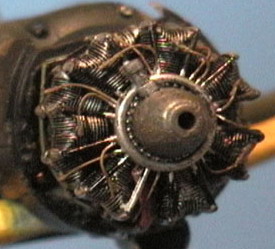
I then closed up the fuesalage.The next area of attention is the engine. This too is provided as white cast metal and is nicely detailed. I just painted it in Master Modeller’s ‘GunMetal’, followed by drybrushing with silver. Wiring details were added with thin copper wiring and some leftover photoetch band. Before attaching the engine, you need to glue the metal exhaust stacks and the cowling flaps over the stacks. There was a fit problem here and careful dryfitting is required. Once that’s accomplished, the engine assembly was then glued with cyanoacrylate glue (Superglue).
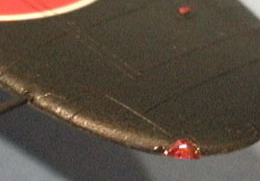
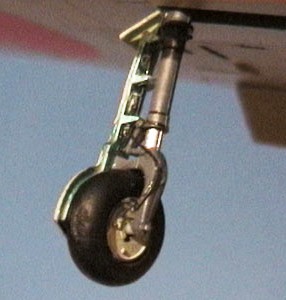
Painting and decaling then went out somewhat conventionally. Final details suchs as drilling out the landing gear to accept brakelines made with copper wire, and creating the navigation lights. The lights were created with a base layer of enamel silver, followed by tamiya clear green and red. Finally, a some future was added over the lense area giving a quite convincing effect. In my mind, this is much simplier to the cutting out – replace with clear sprue – and sand to fit mehtod.