TBD Devastator – Tex Hill: Revell Monogram
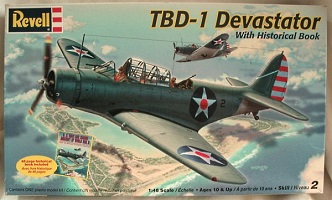
Revell (Monogram) kit of the TBD Devastator. First in a series of articles dedicated to “Tex” Hill of the American Volunteer Group – featured in the Oct Issues of Scaled Aircraft Modeller International.
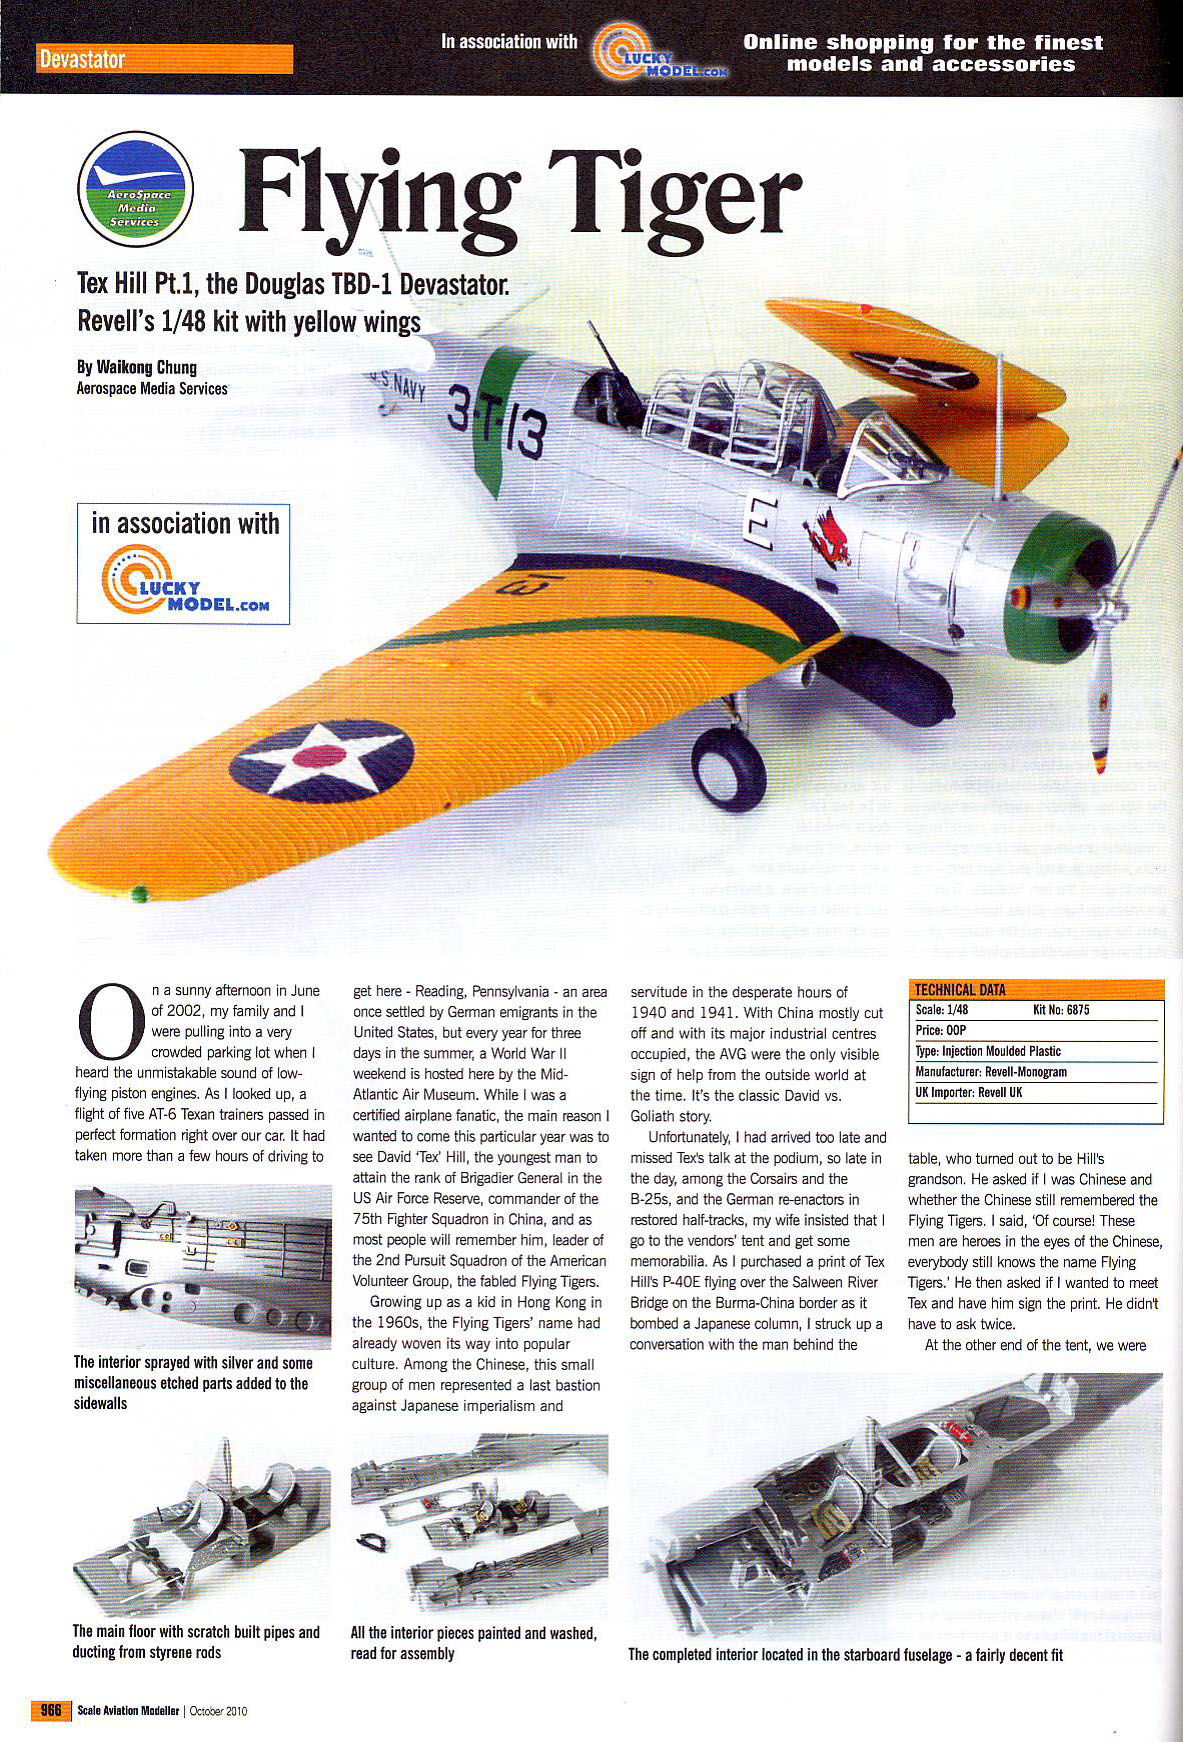
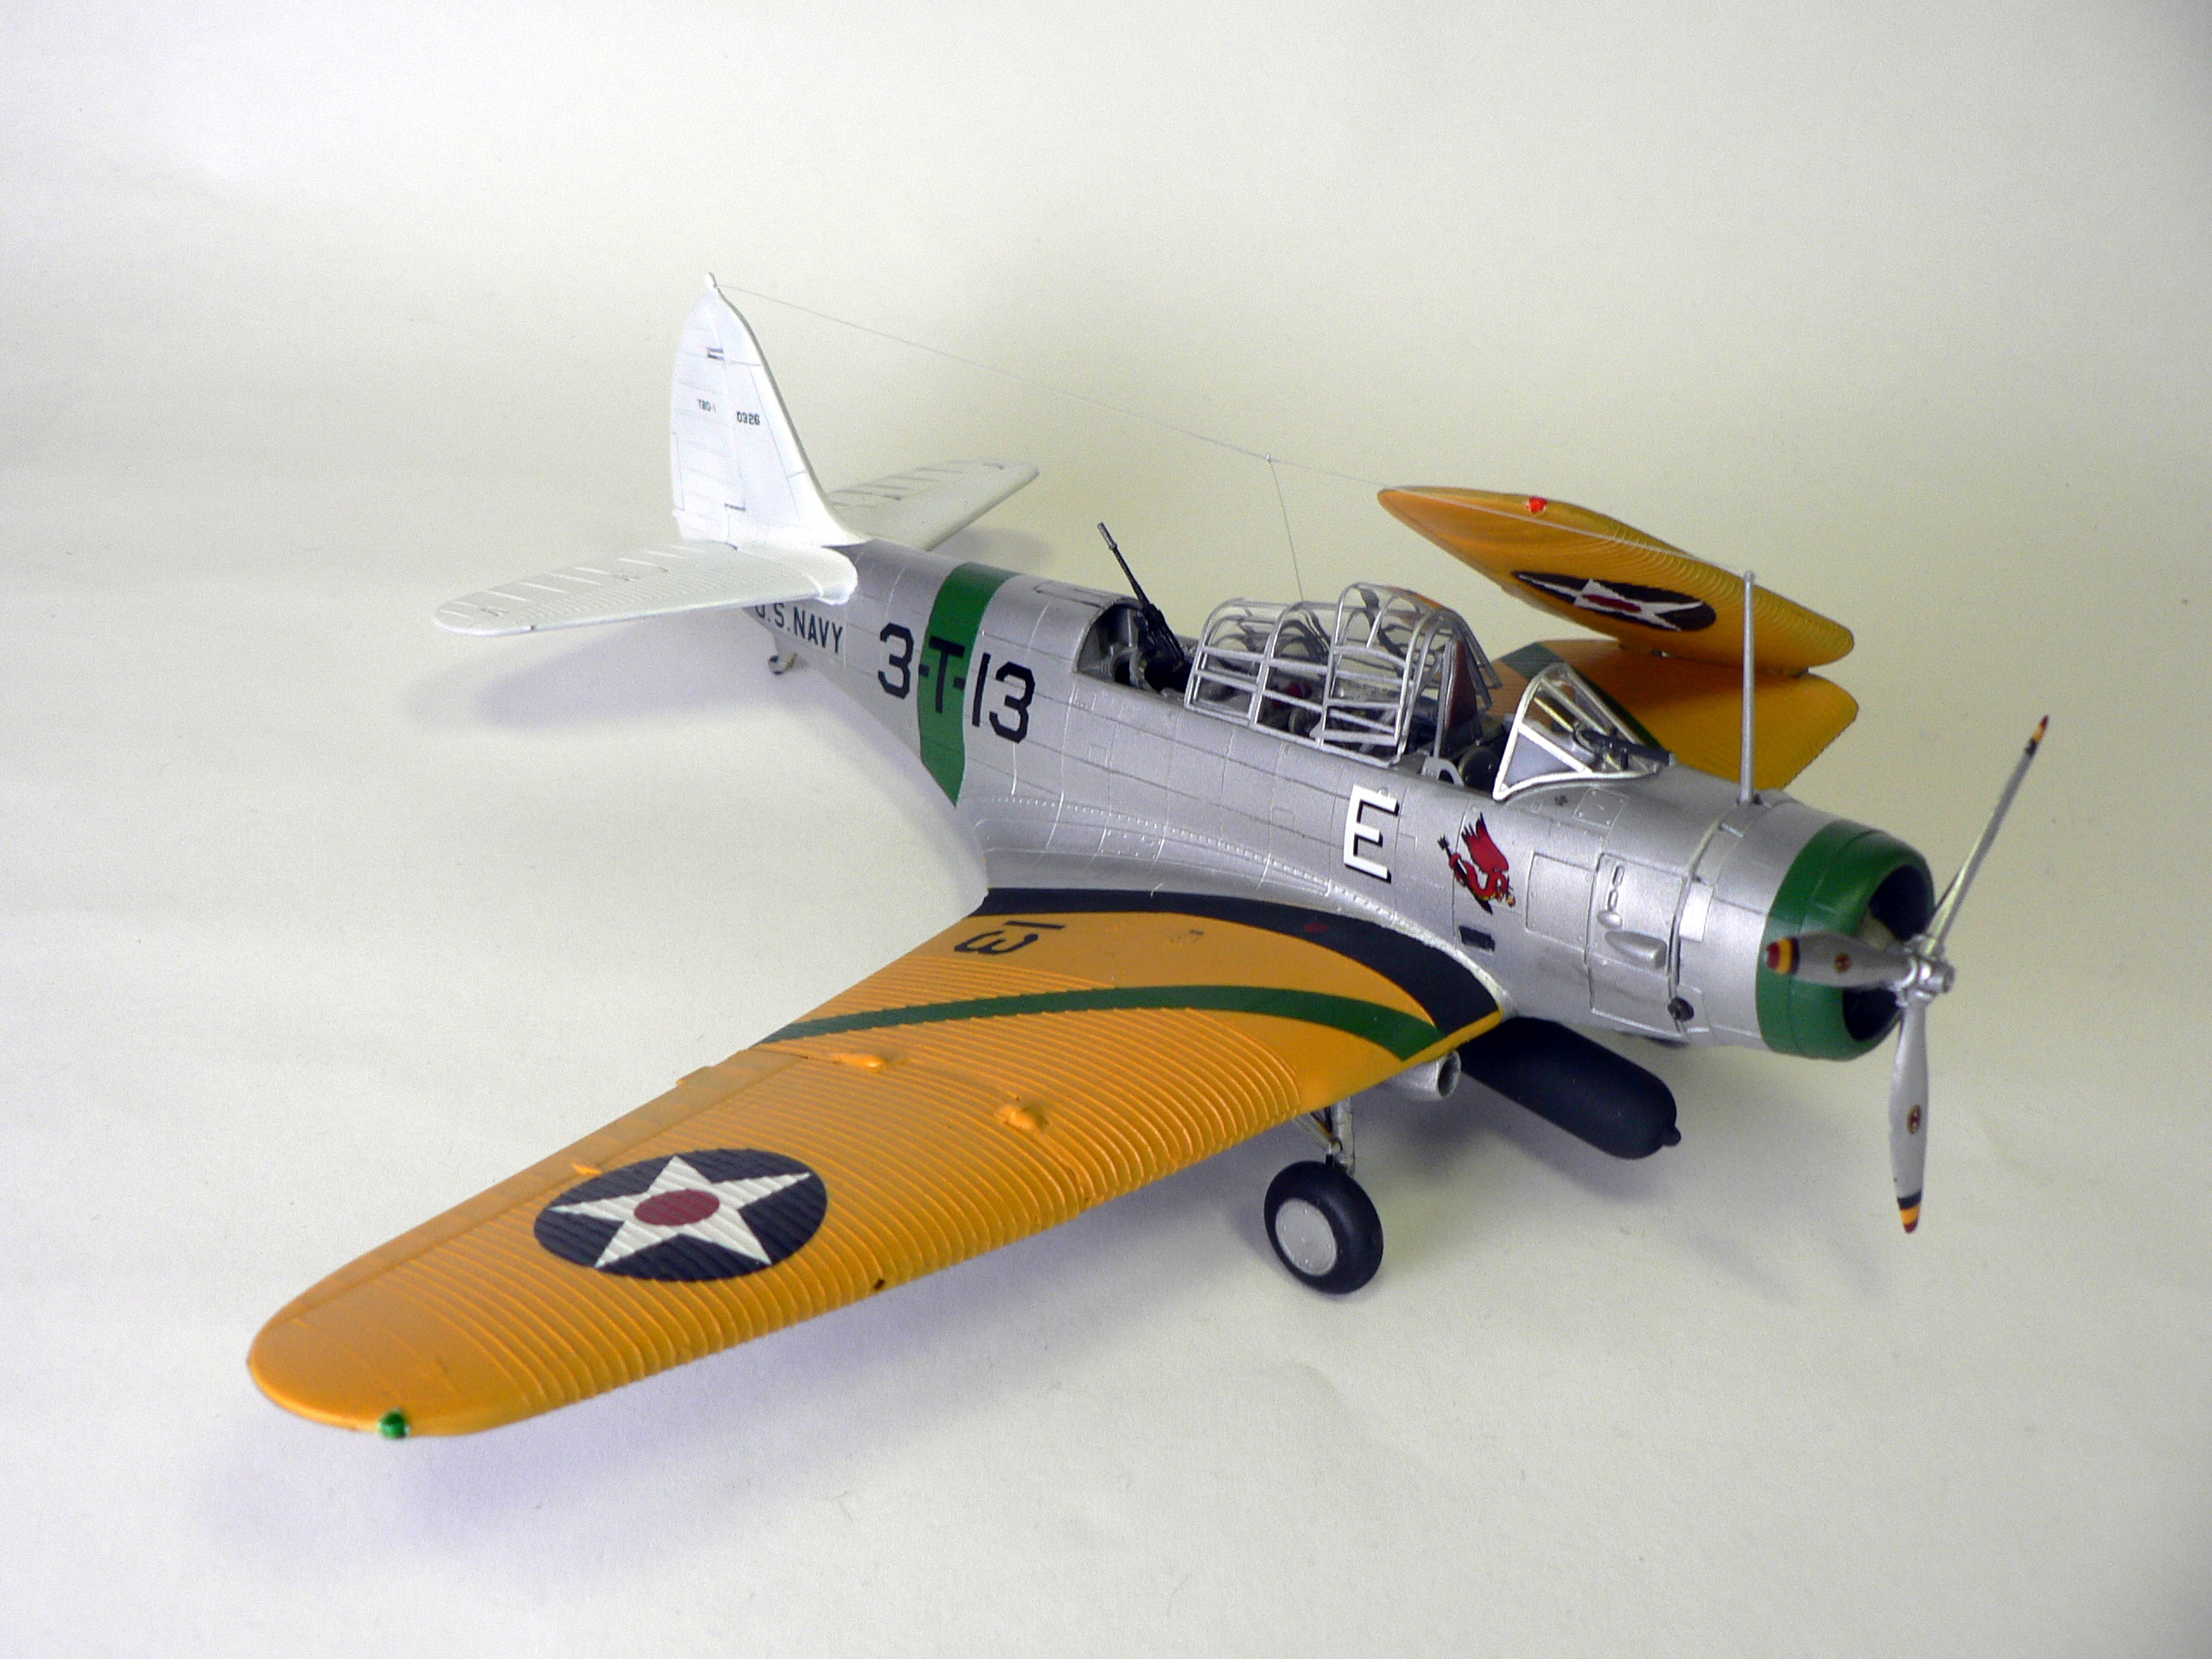
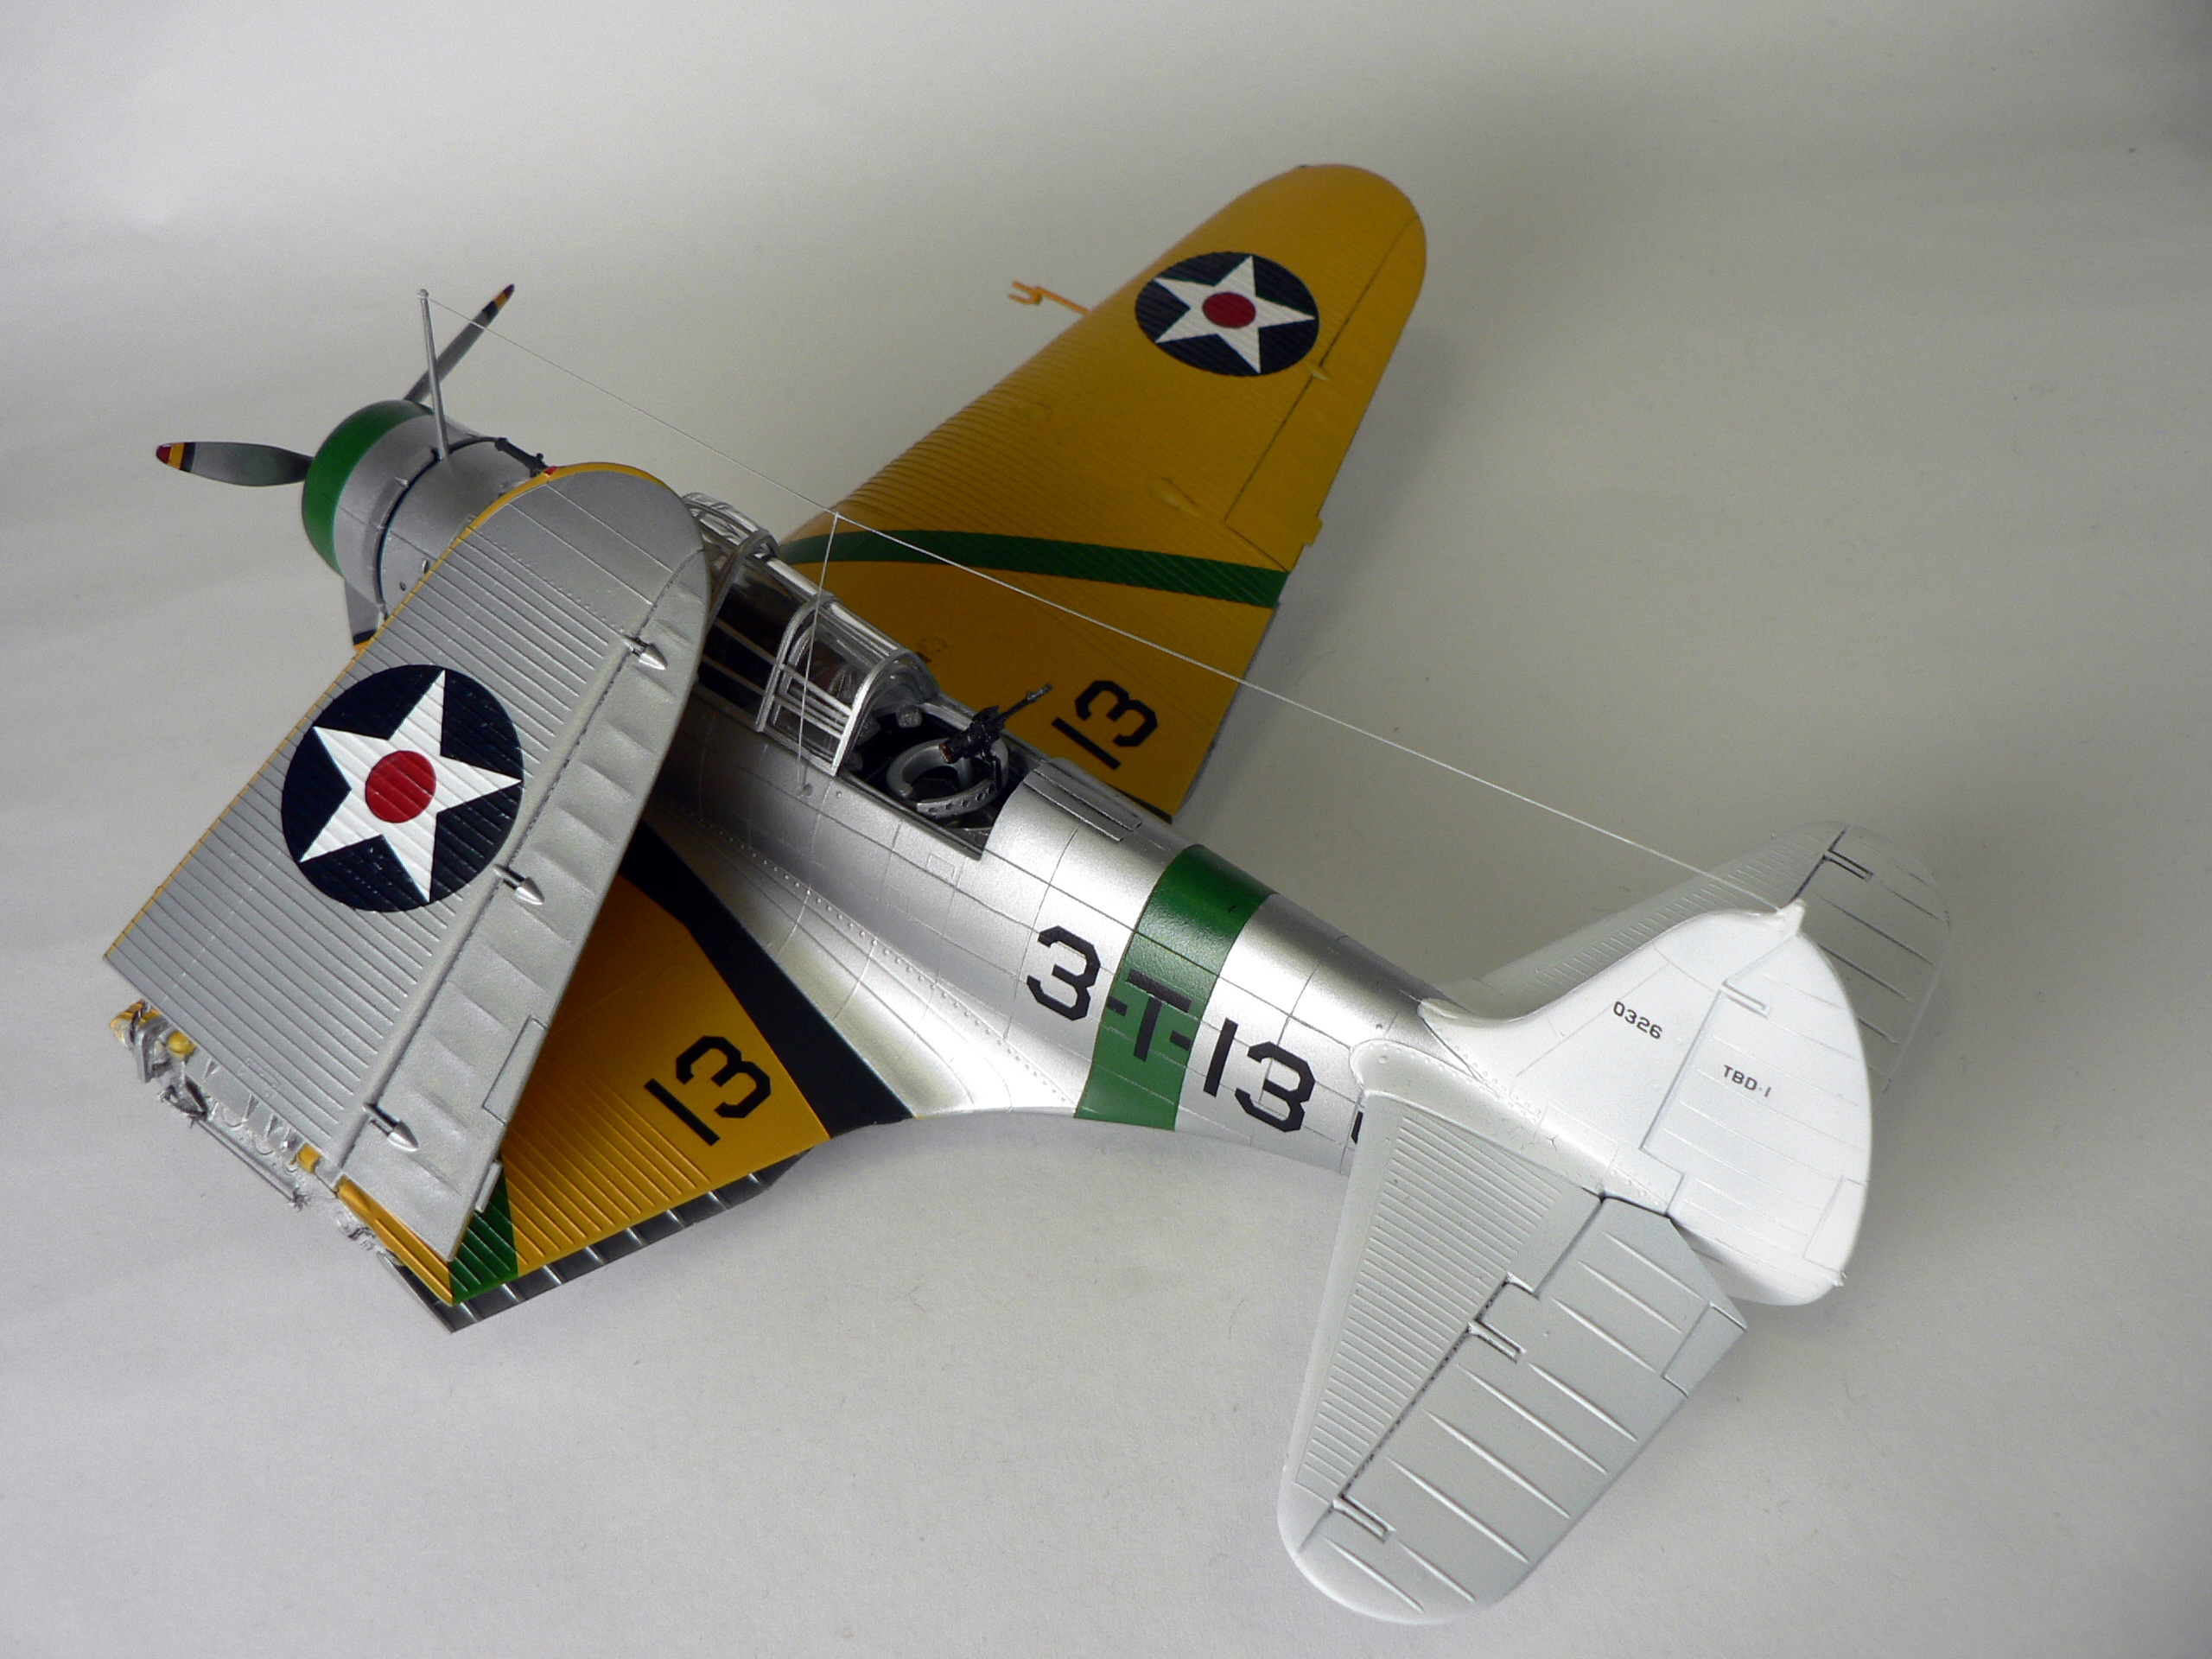
To build the TBD-1 Devastator in 1/48, you have one choice – the old Monogram kit now being sold by Revell. (Updated: Great Wall Models now has a state of the art version of this plane) Besides some flash and the use of raised panel lines, the kit is actually still quite good. It even comes with ‘operable’ wing folds. For the markings, I used Yellow-Wings Decals sheet 48-003 for the unit insignia and sheet 48-002 for the squadron markings and serials.
As usual, the work started with the cockpit, which had good details. A bit of scratch building was added to the cockpit area with styrene rods and solder. A large handle (which I can’t seem to find the purpose for) on the pilot’s right hand panel was also added with styrene rod. I then proceeded with a coat of Talon acrylic metallic paint Aluminum. I usually use Alcald metal paints, but I use acrylic paints otherwise and have found the Talon line to be a good alternative. It’s not quit as tough or shiny, but does its job. I another handle on the left side, and used a drop of CA glue as the knob.
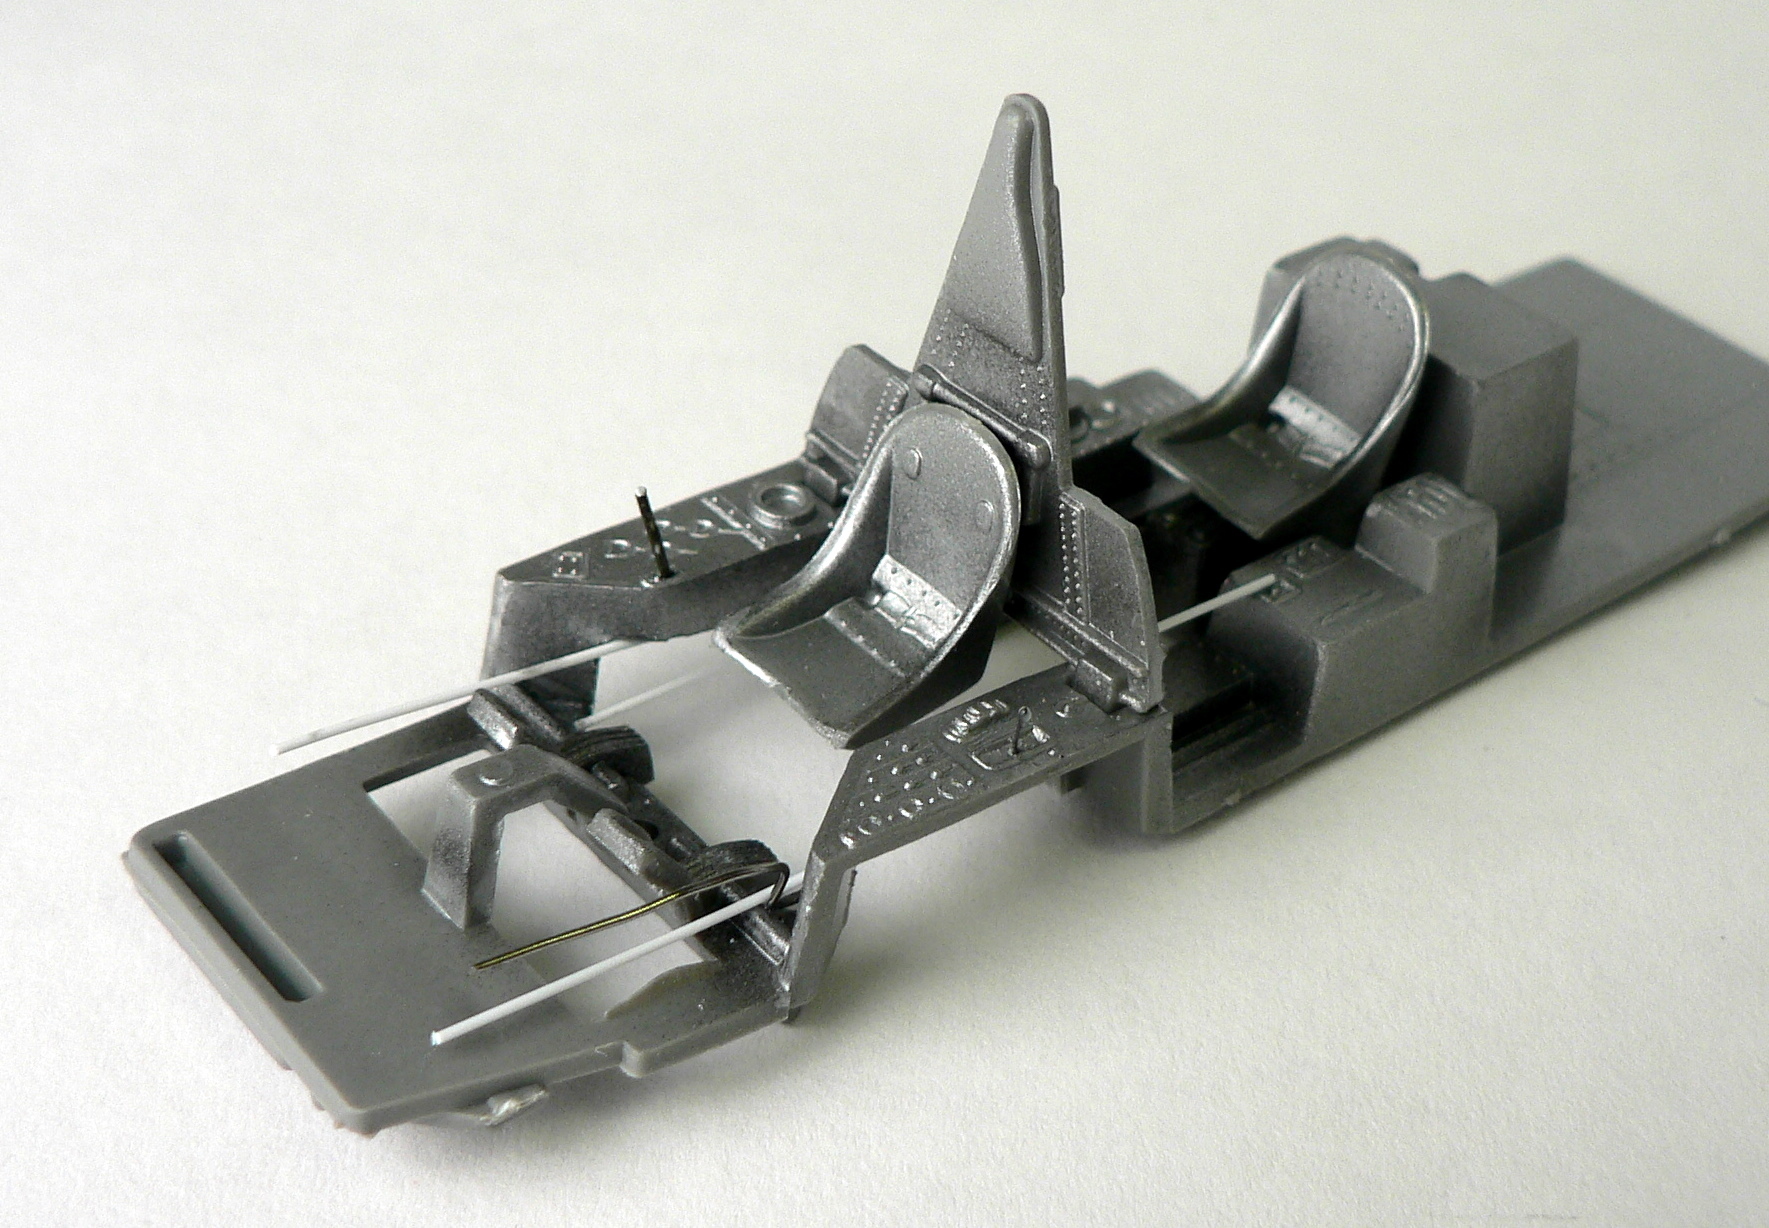
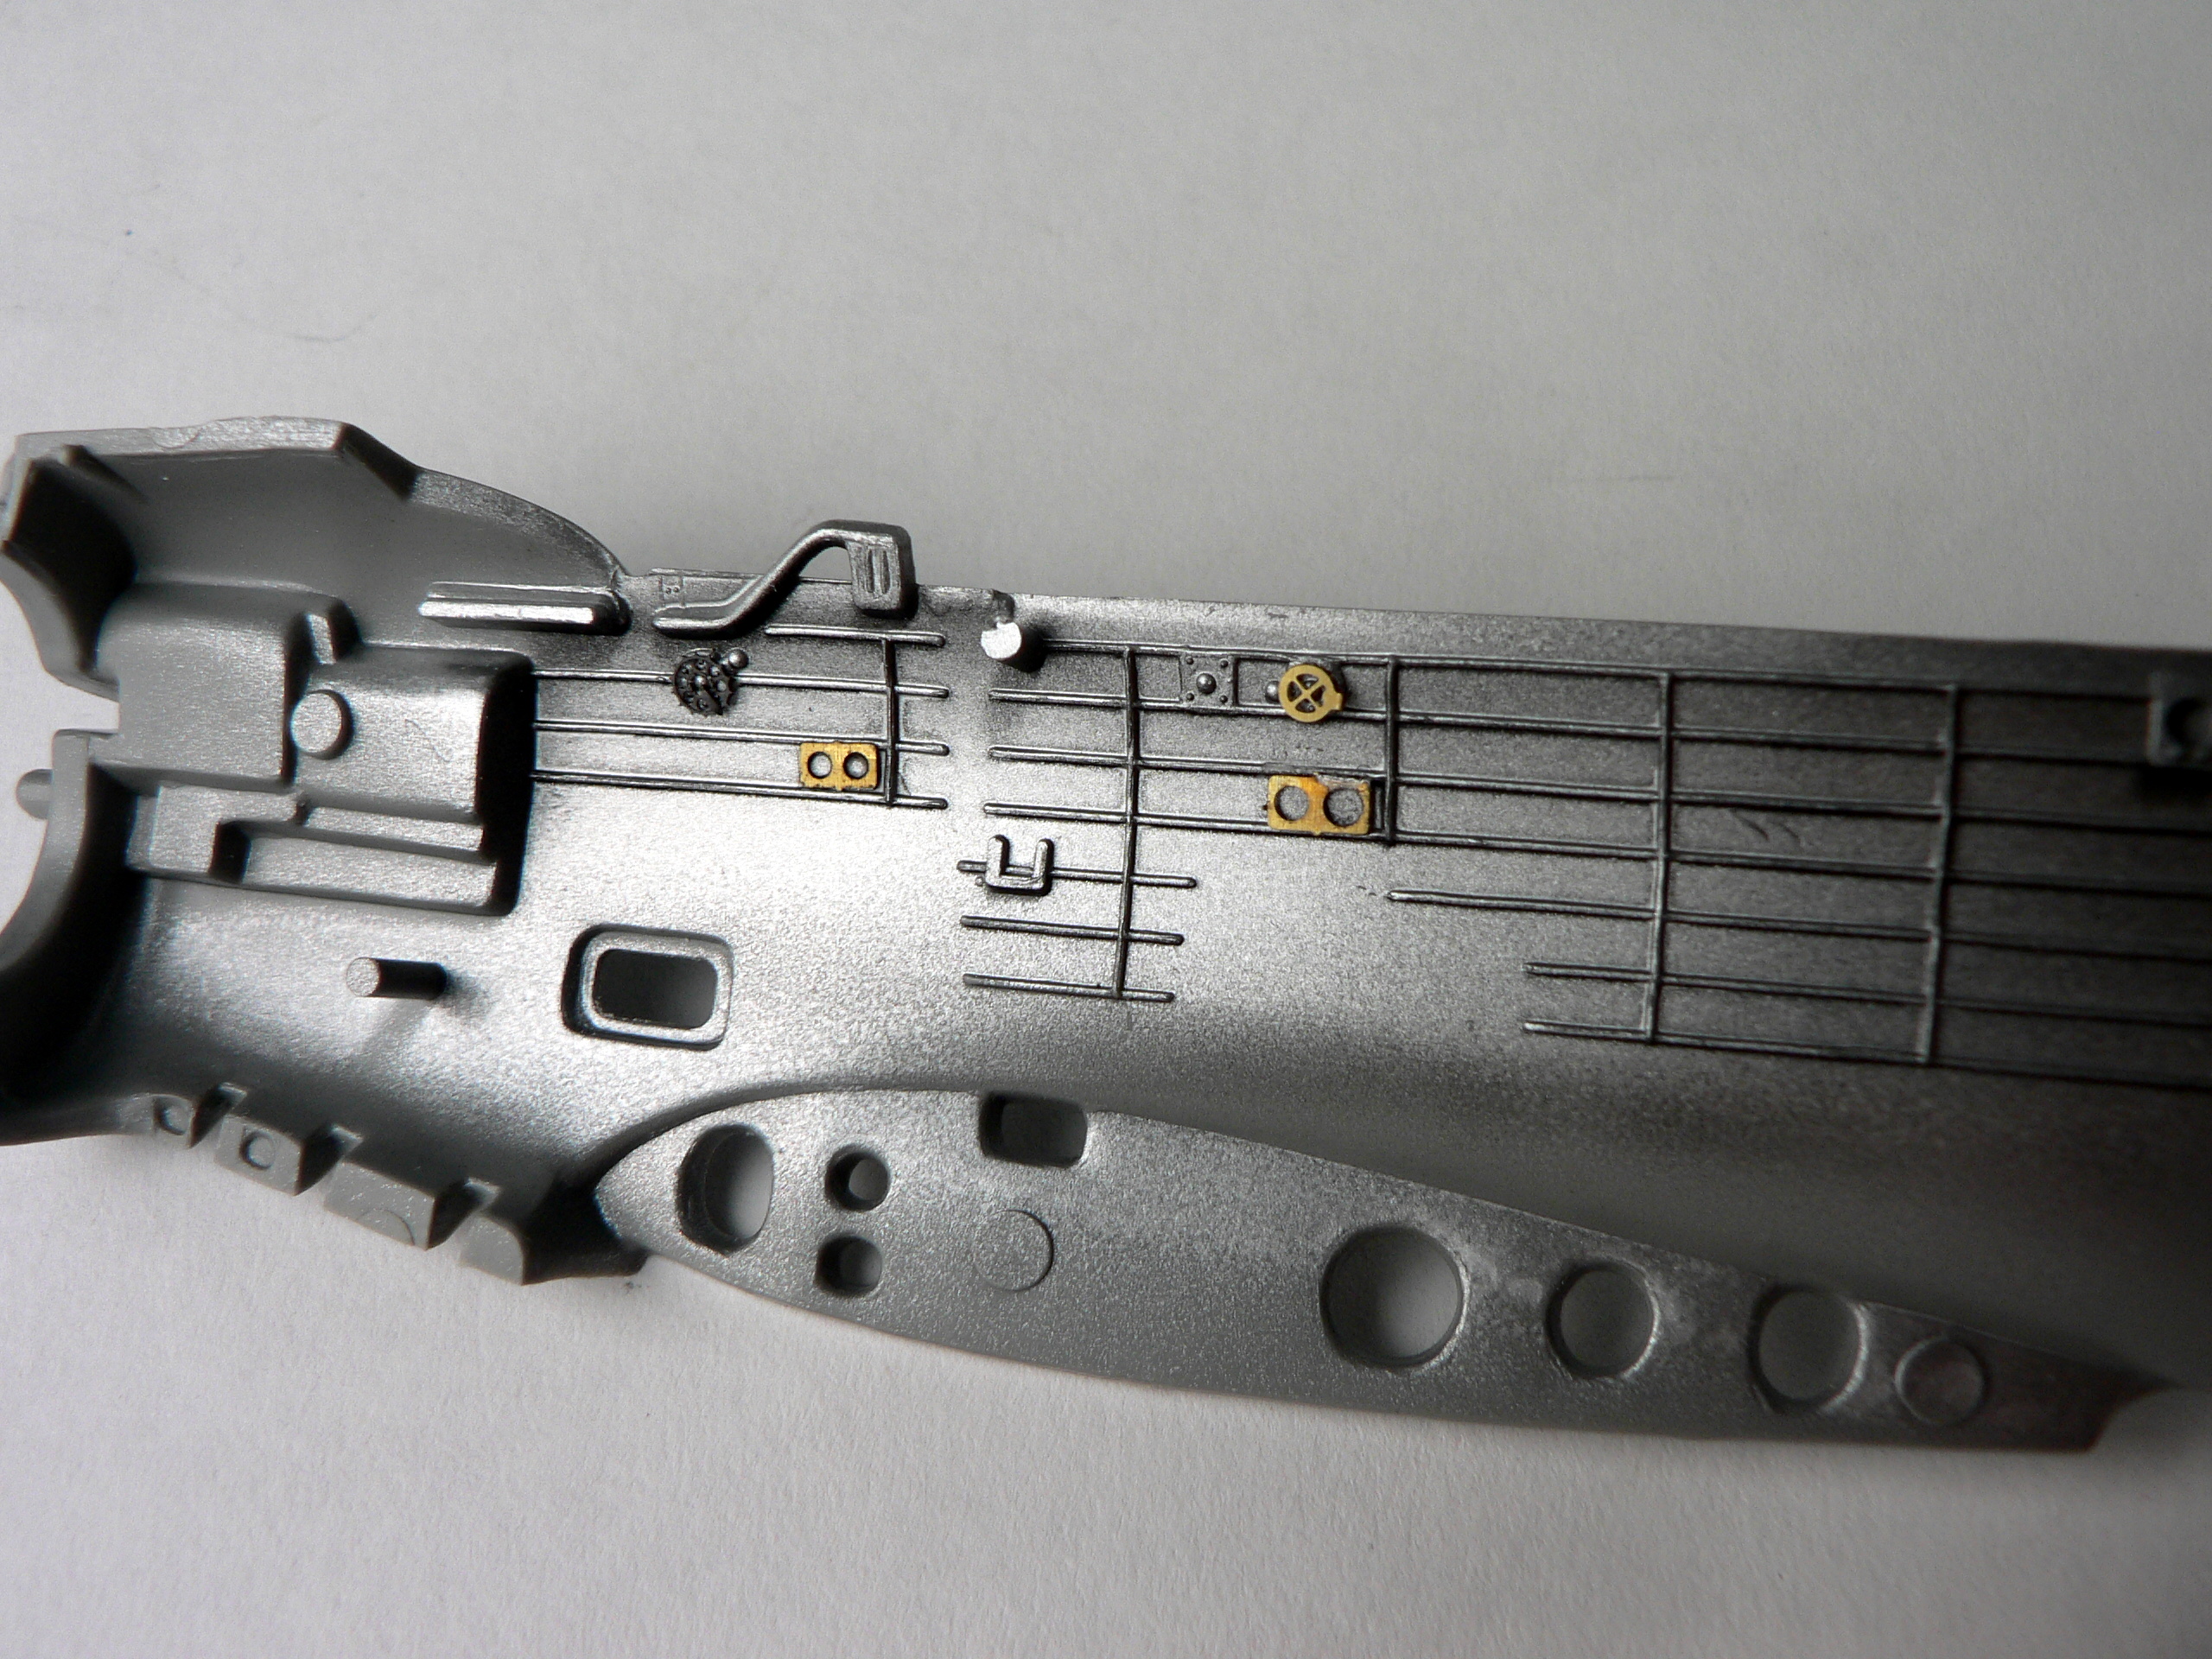
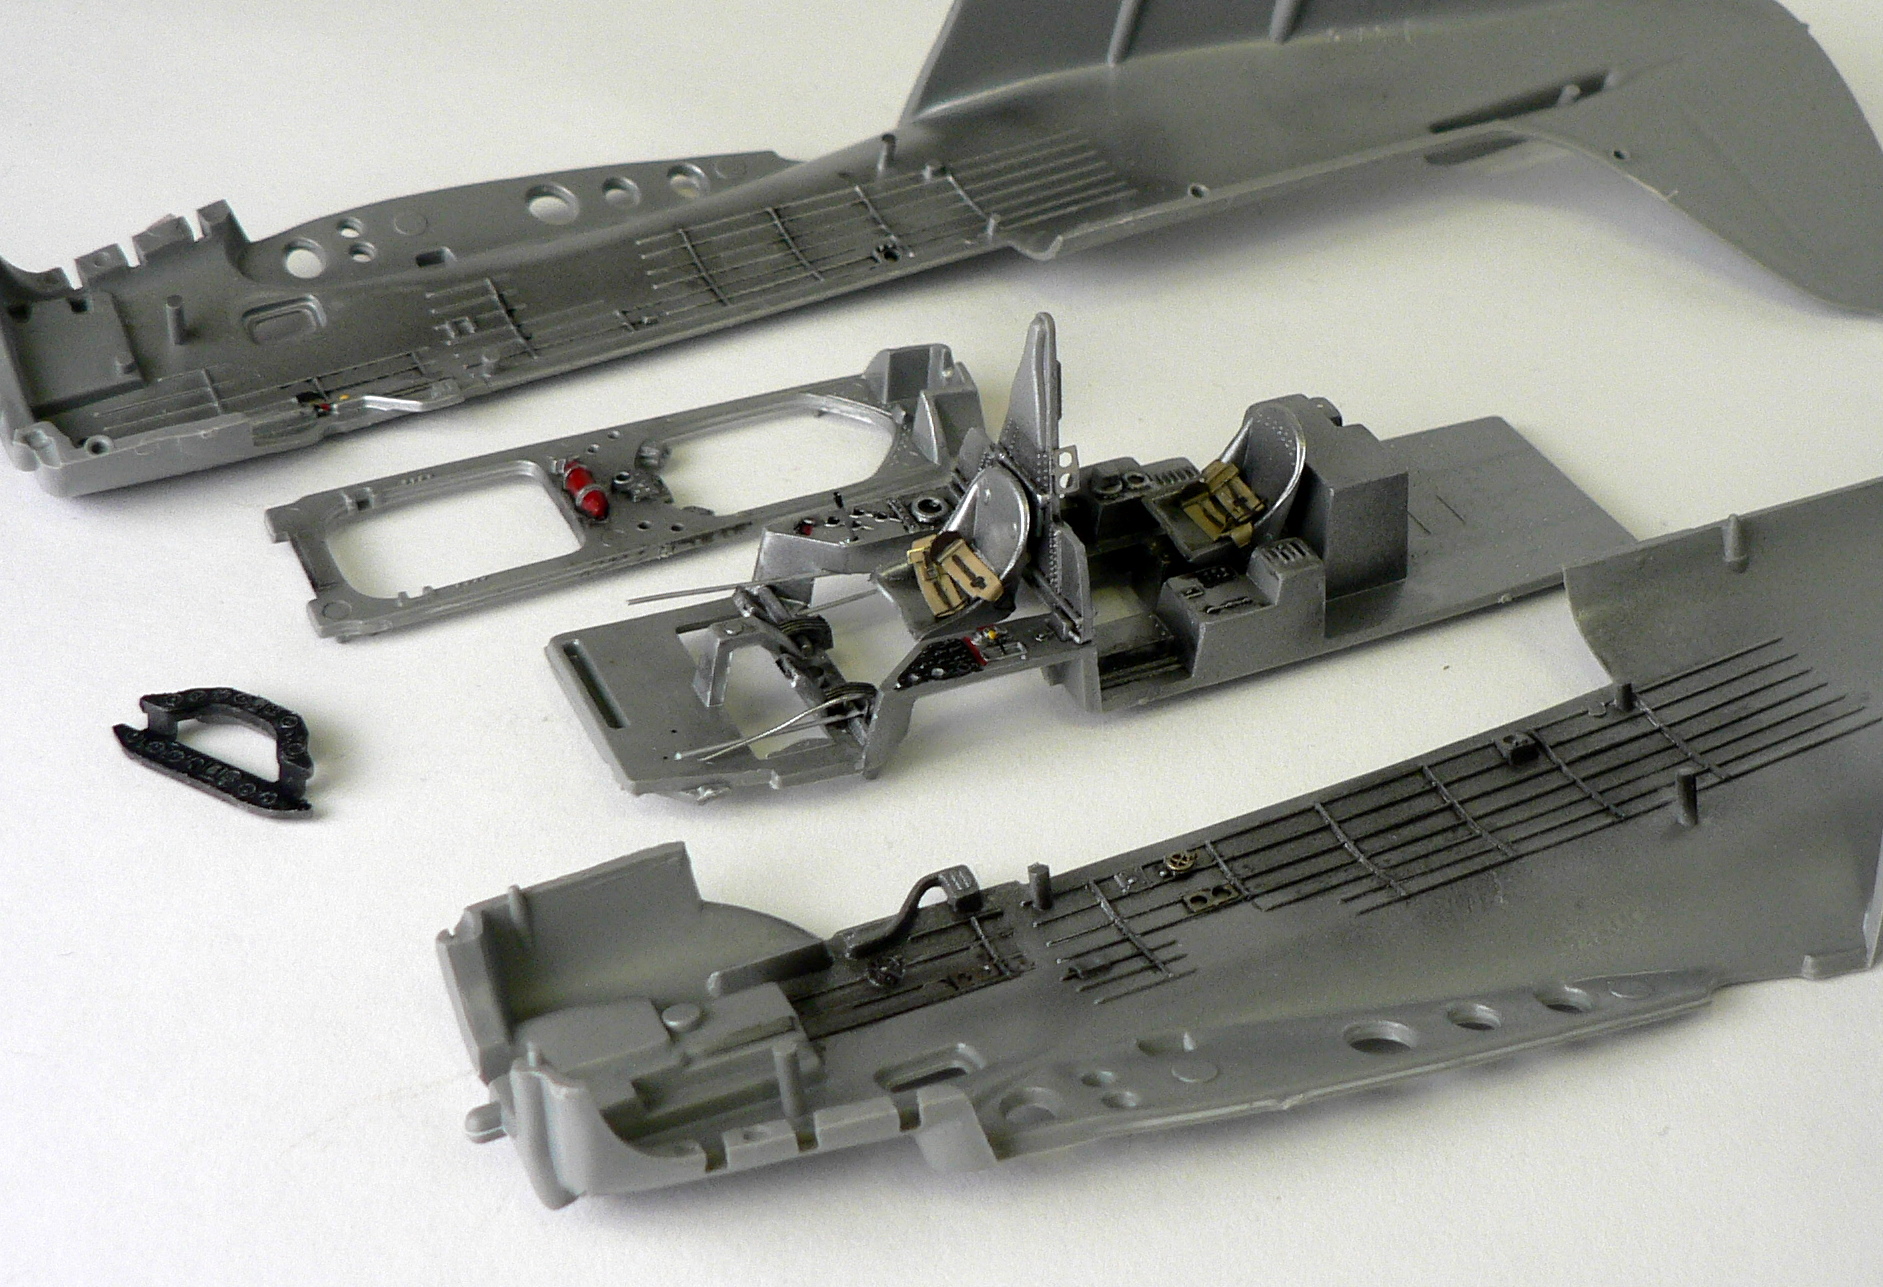
The side wall of the cockpit area has good ribbing detail, I first spray this area with a light coat of flat black from the bottom. Then I sprayed the aluminum from top, being careful with my angle. This technique creates some deep artificial shadows when the cockpit is closed up. Based on reference pictures, I then added a few miscellaneous PE details from my extras box.
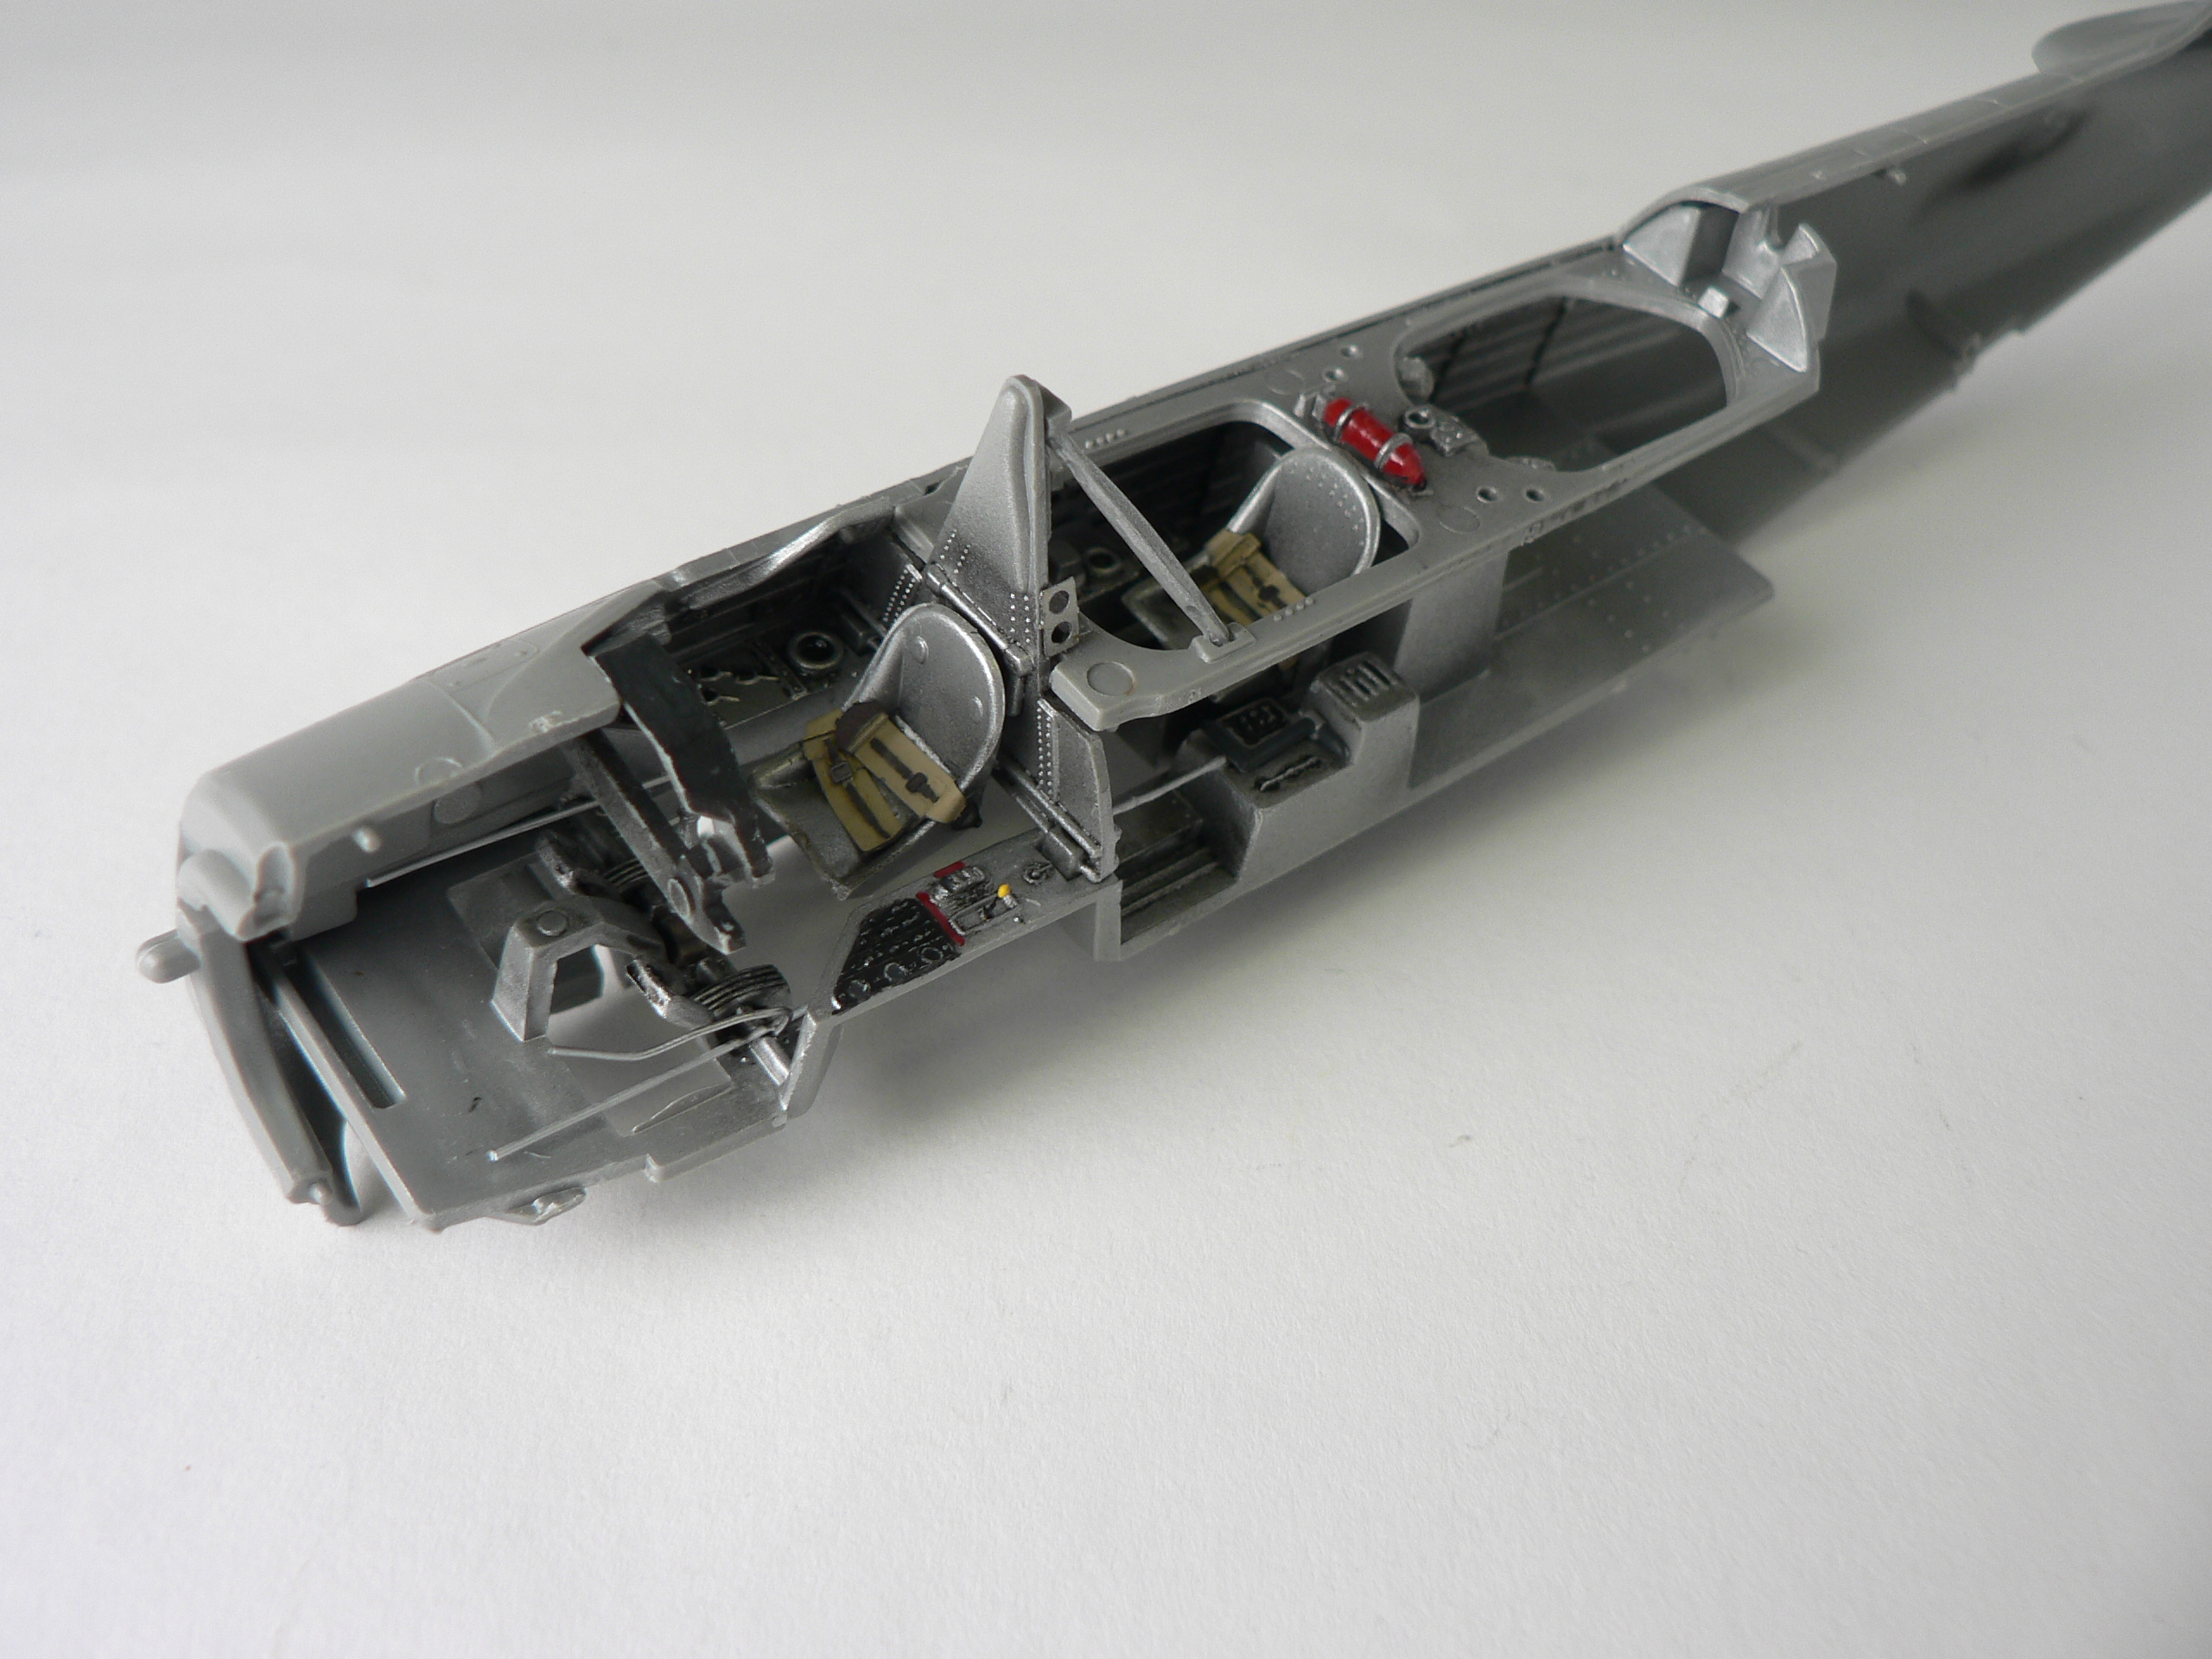
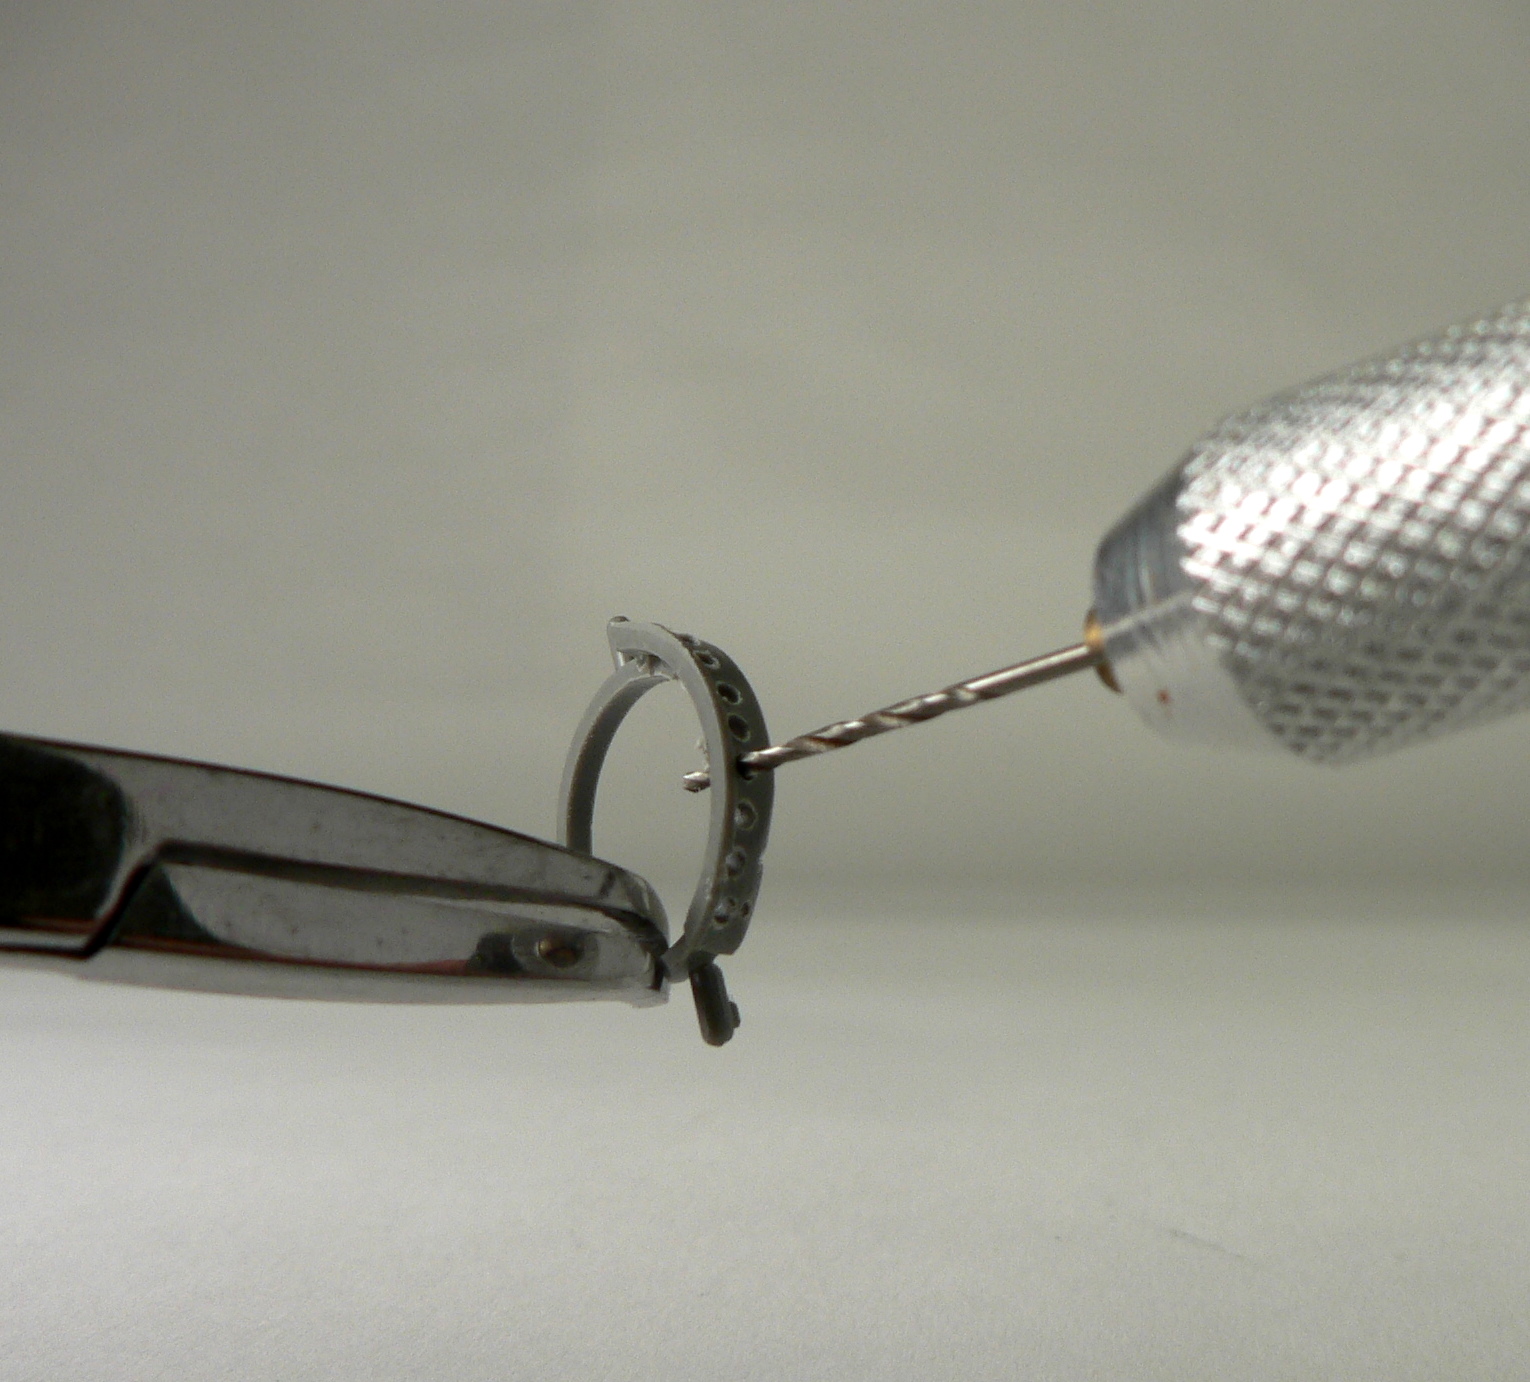
The instrument panel was painted Tamiya NATO black, and the dials picked out with a sharpened silver color pencil. The rest of the cockpit details were picked out with paint and brush. I then proceeded to drill out the rear gunner’s seat ring. In reality, there were 2 rows of holes and the plastic piece is a bit out of scale, a nice PE replacement would have worked well here. Since once the ring was glued down, the second row of holes were not easily seen, I cheated and just applied a single row.
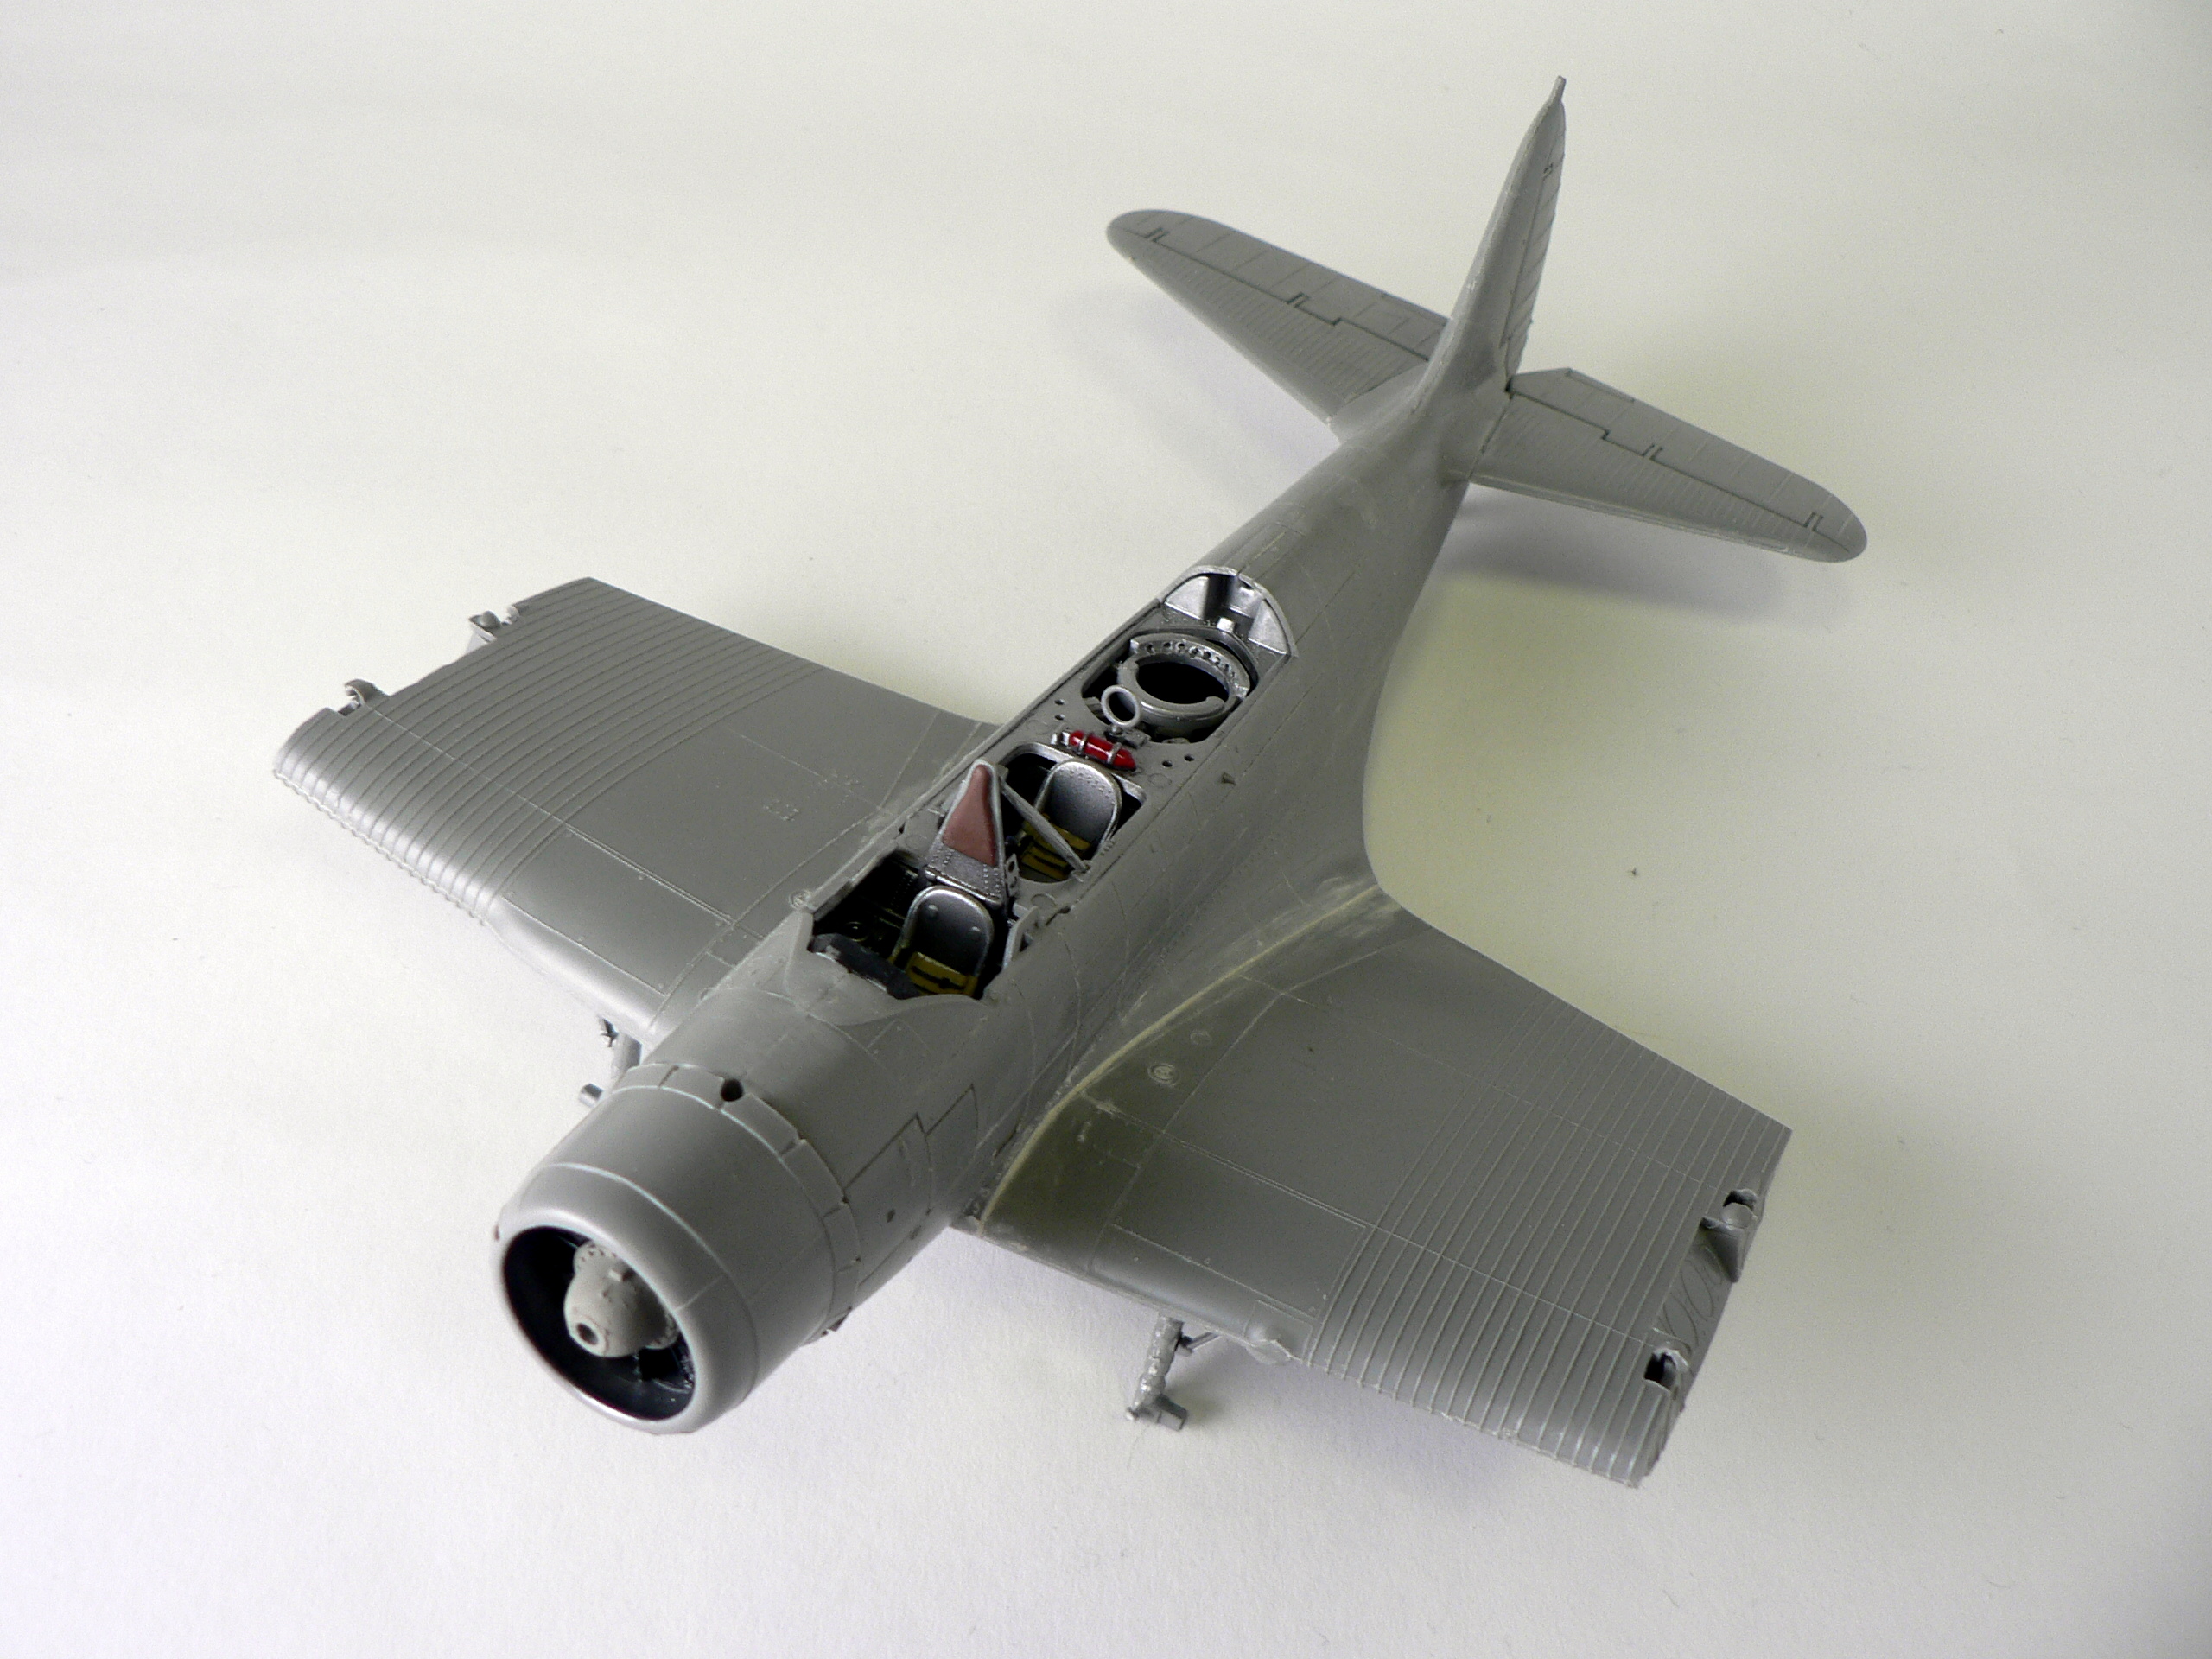
After an oil wash of sienna and black, I added Eduard color seat belts and the cockpit was ready to be closed up. At this step, you come to first major fit problem, the upper wing parts next to fuselage has large gaps both at the upper/lower wing joint and at the upper wing fuselage joint. Some liberal use of Squadron white filler was required. To compound the problem here, the raised ribbing details on the wings makes sanding very difficult, as it is I was not able to successfully completely sand this area smooth without the danger of removing the ribbing. Note that one should be careful how the upper wings fit, as I was not and misaligned them so that the right wings ribbing do not line up properly. Unfortunately, I only saw this after the glue was dried and had to live with it.
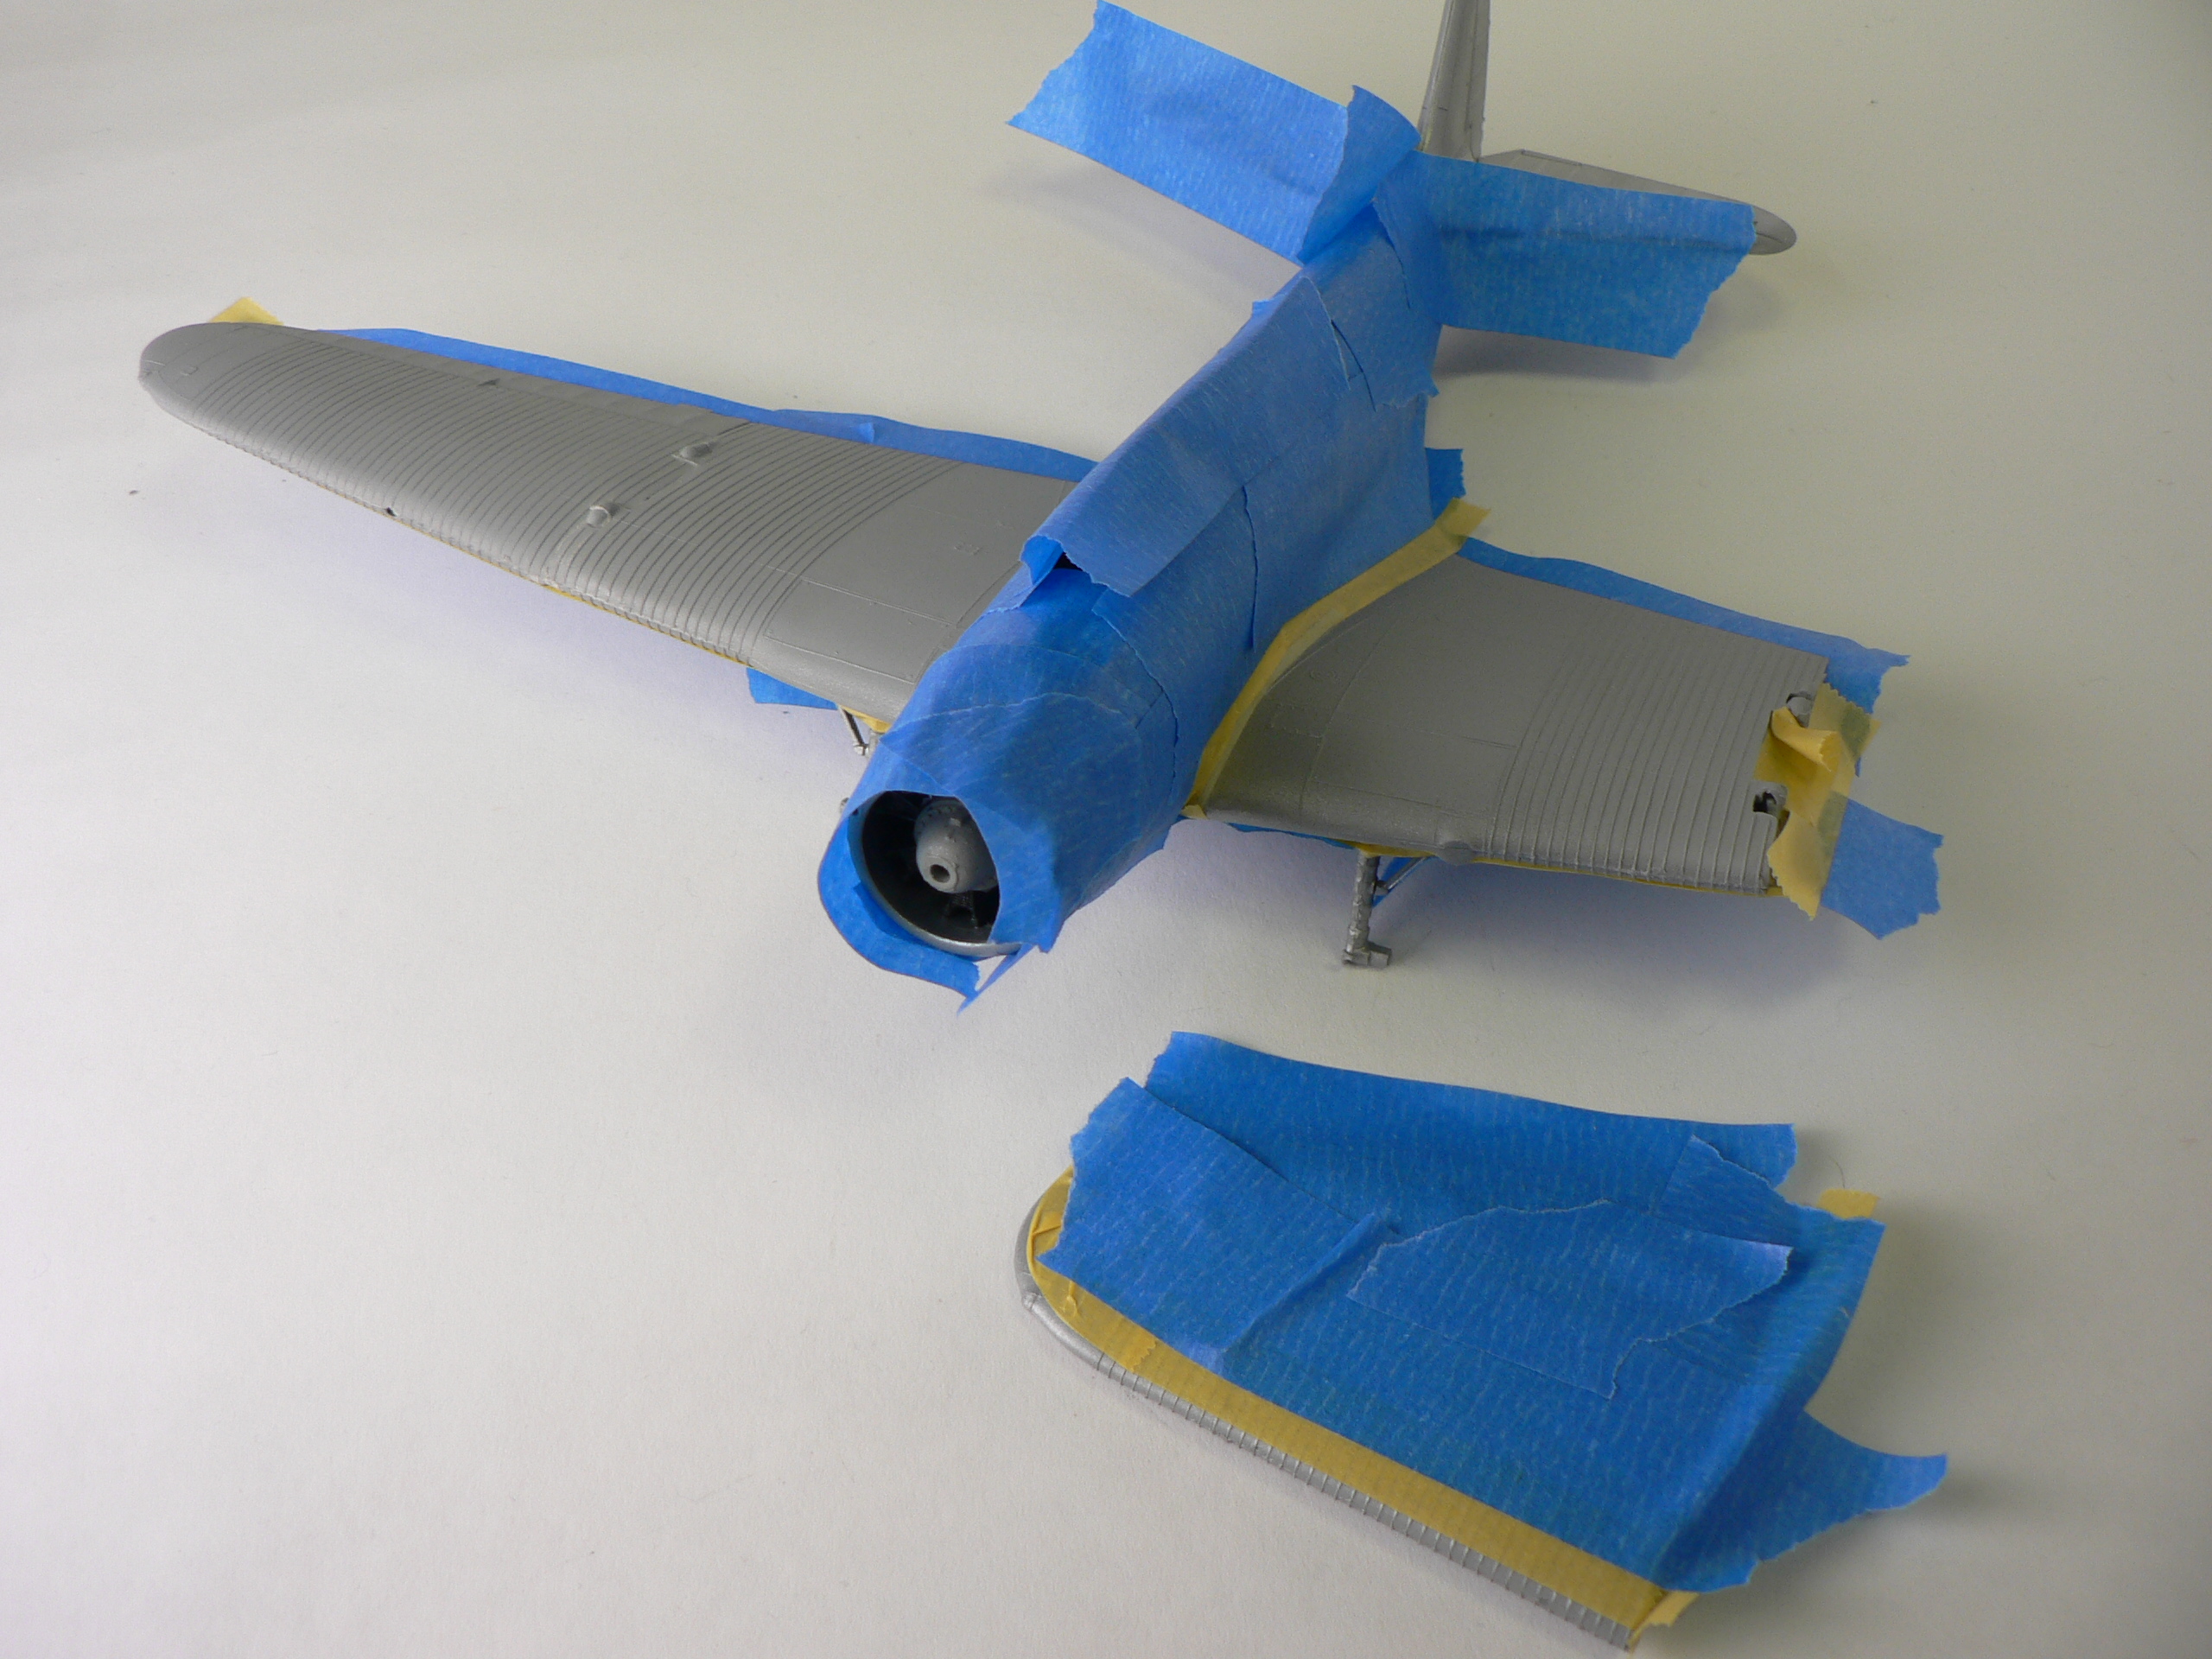
At this point, I did some rescribing of the fuselage just because I got a scribing tool and wanted to try it out. Afterwards, a coat of Aluminum paint was applied. Just make sure to mask the small clear window on the lower right side of the fuselage first.
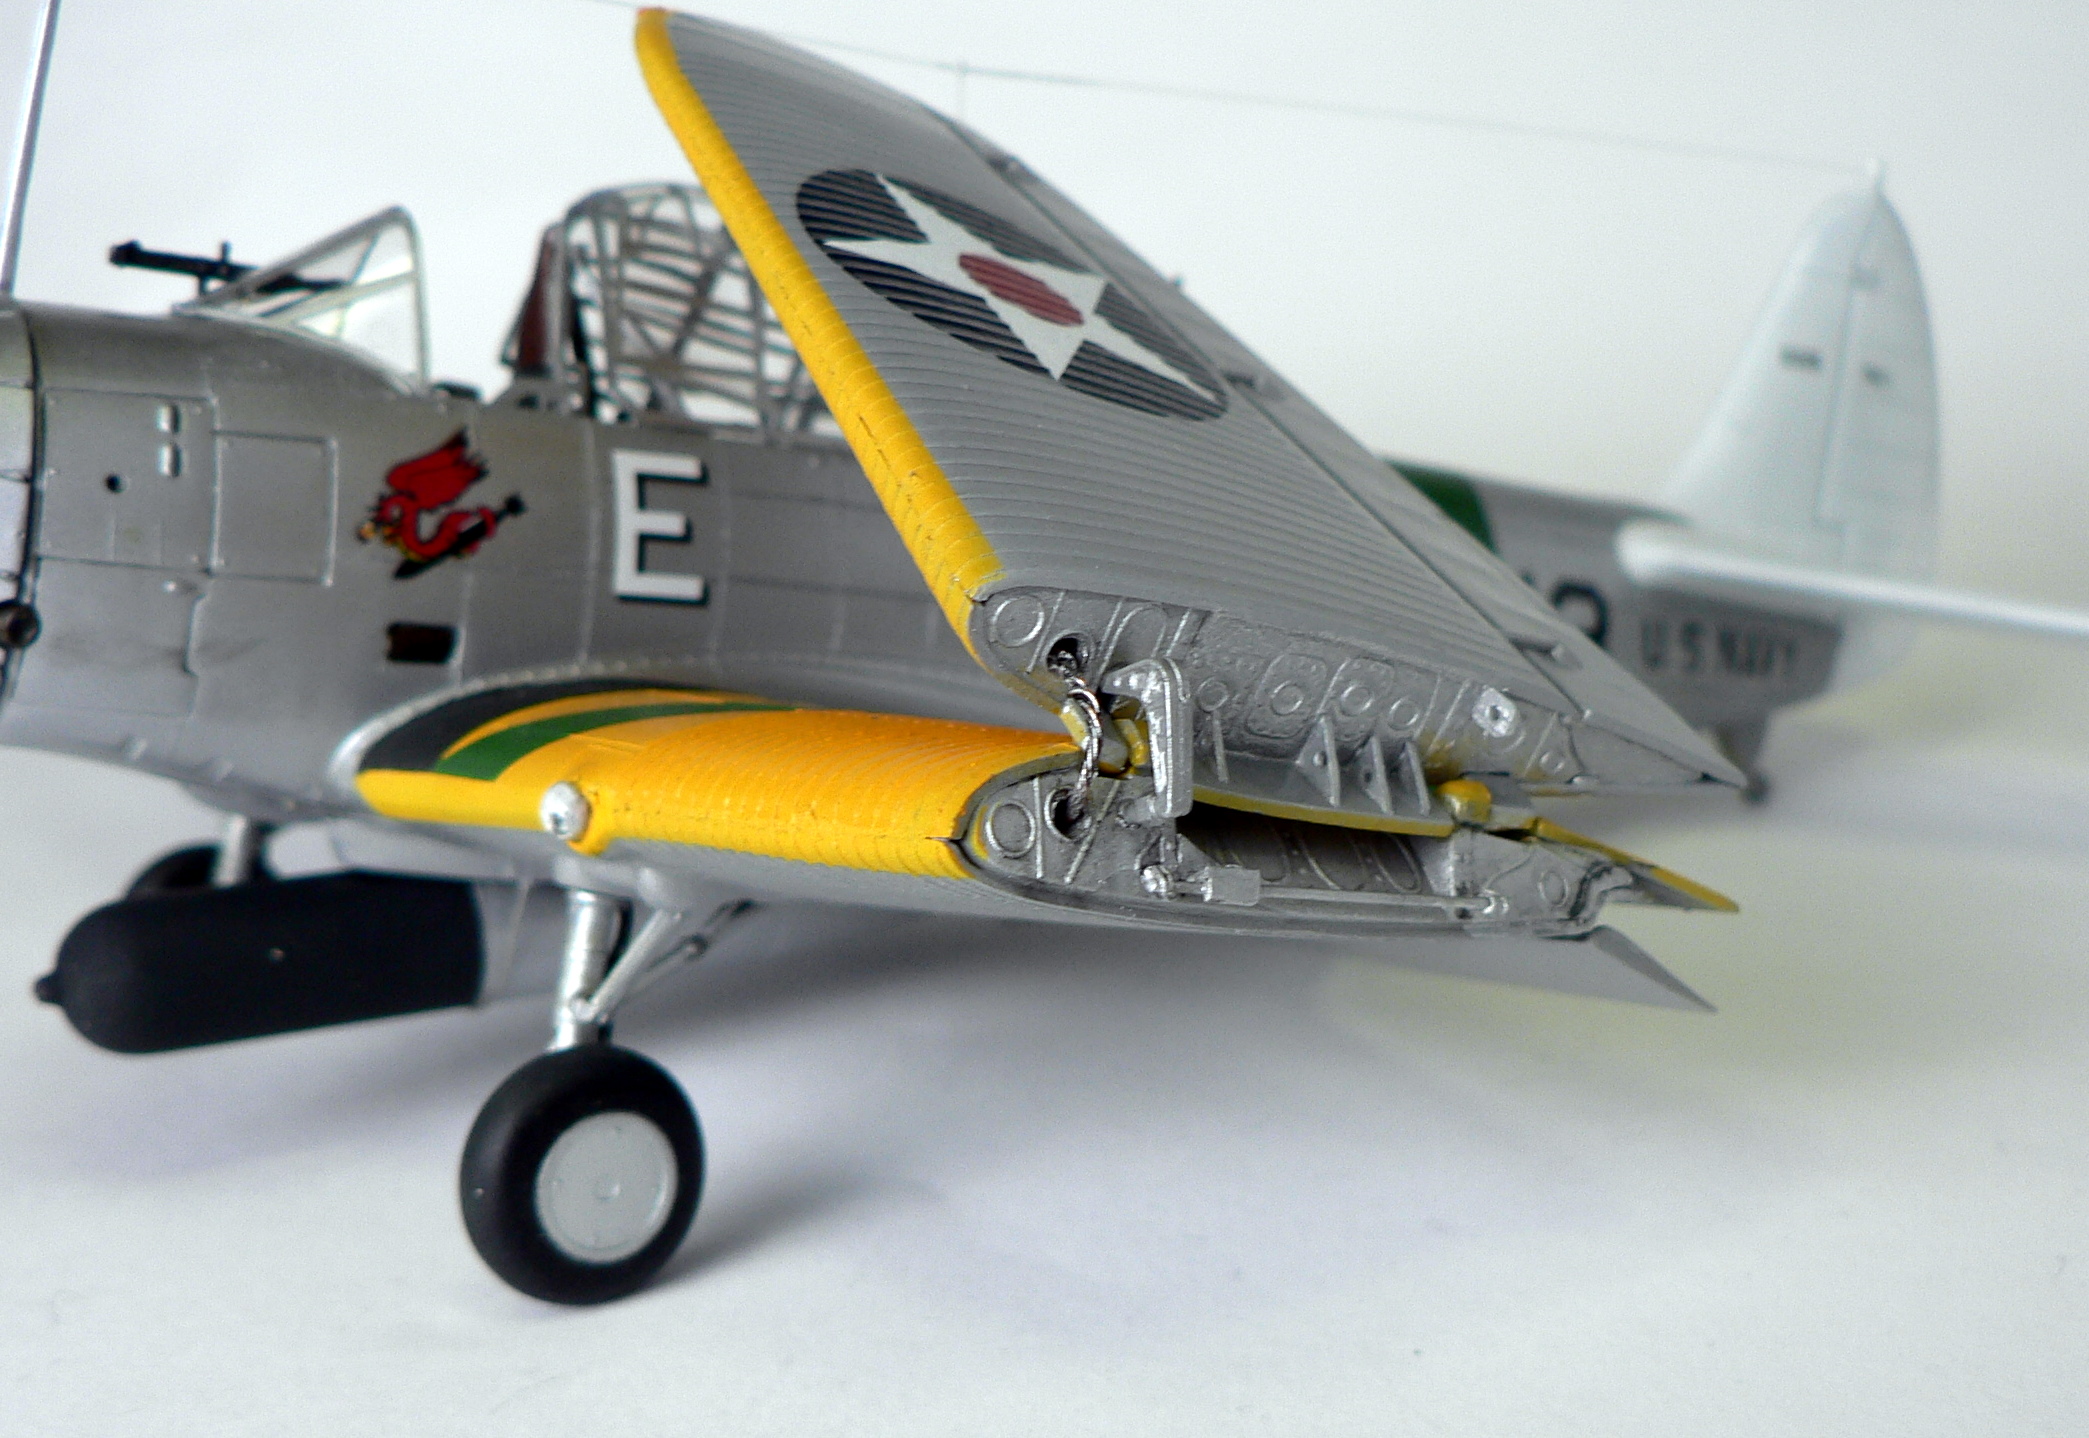
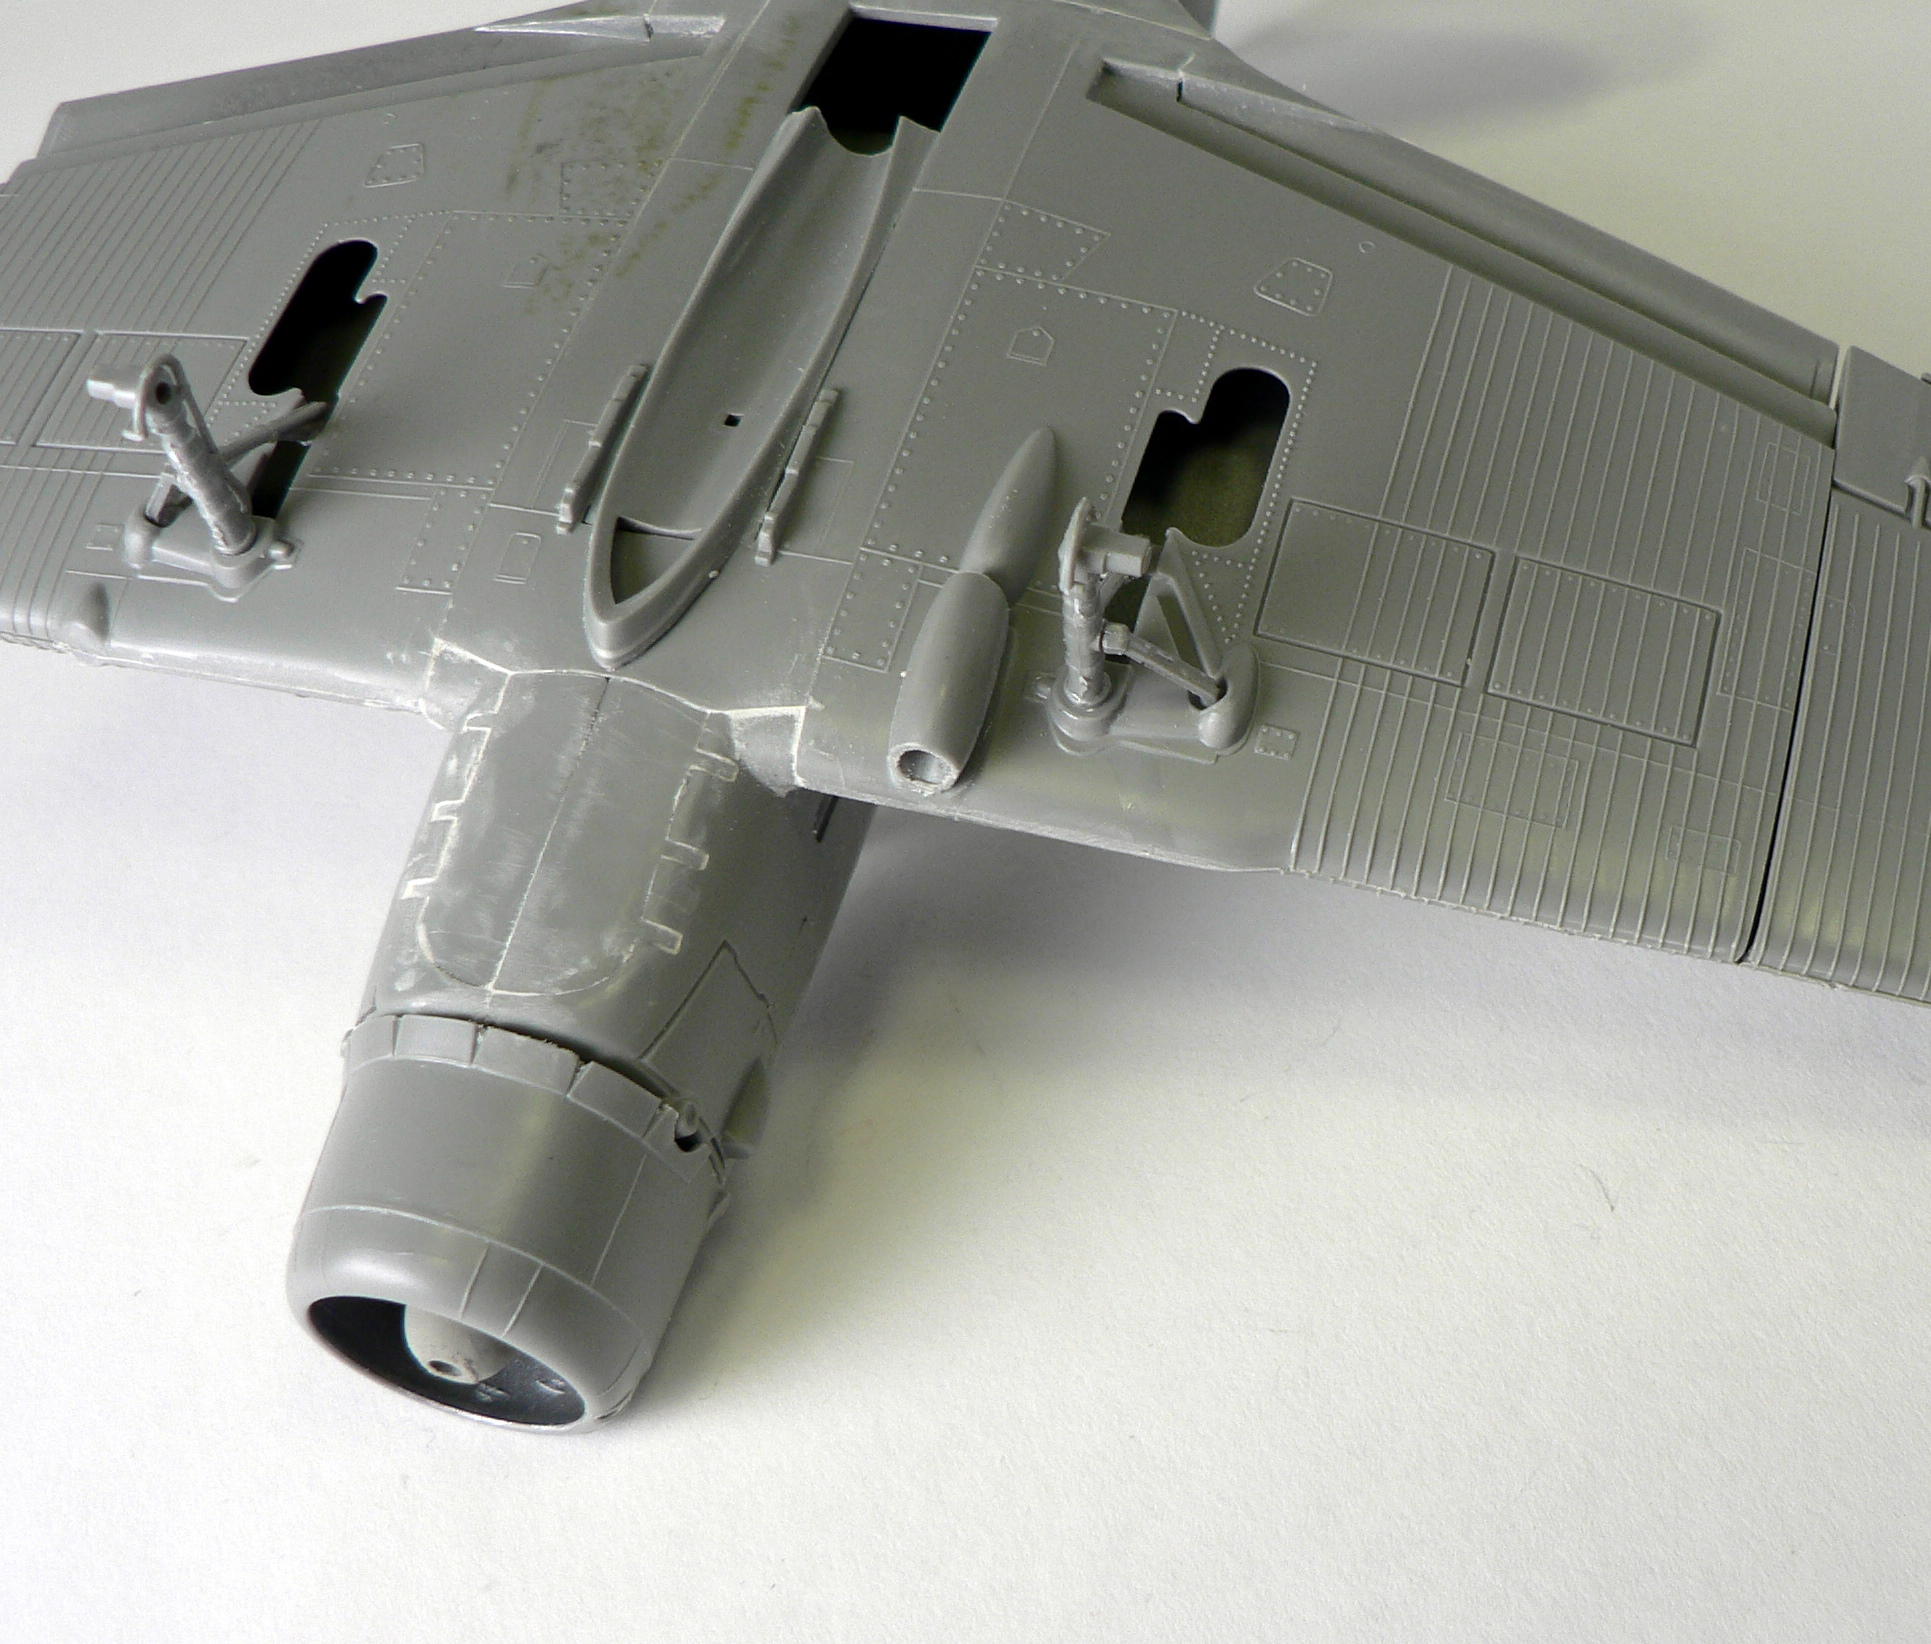
Knowing ahead of time, that the ‘operable’ wing fold was going to be an issue – as these features offered in the old Monogram kits often sacrificed details and scale fidelity in exchange. I was planning to pose one wing down and one wing up permanently. Sure enough, if you pose the wing down, there is a significant gap between the wing halves at the fold. More putty to the rescue, but don’t but that tube away yet, the bombardier station doors also have major fit issues. If you were planning to build the dive bomber version of the TBD-1, these were meant to be opened. But for the Torpedo version we are building, these are closed.
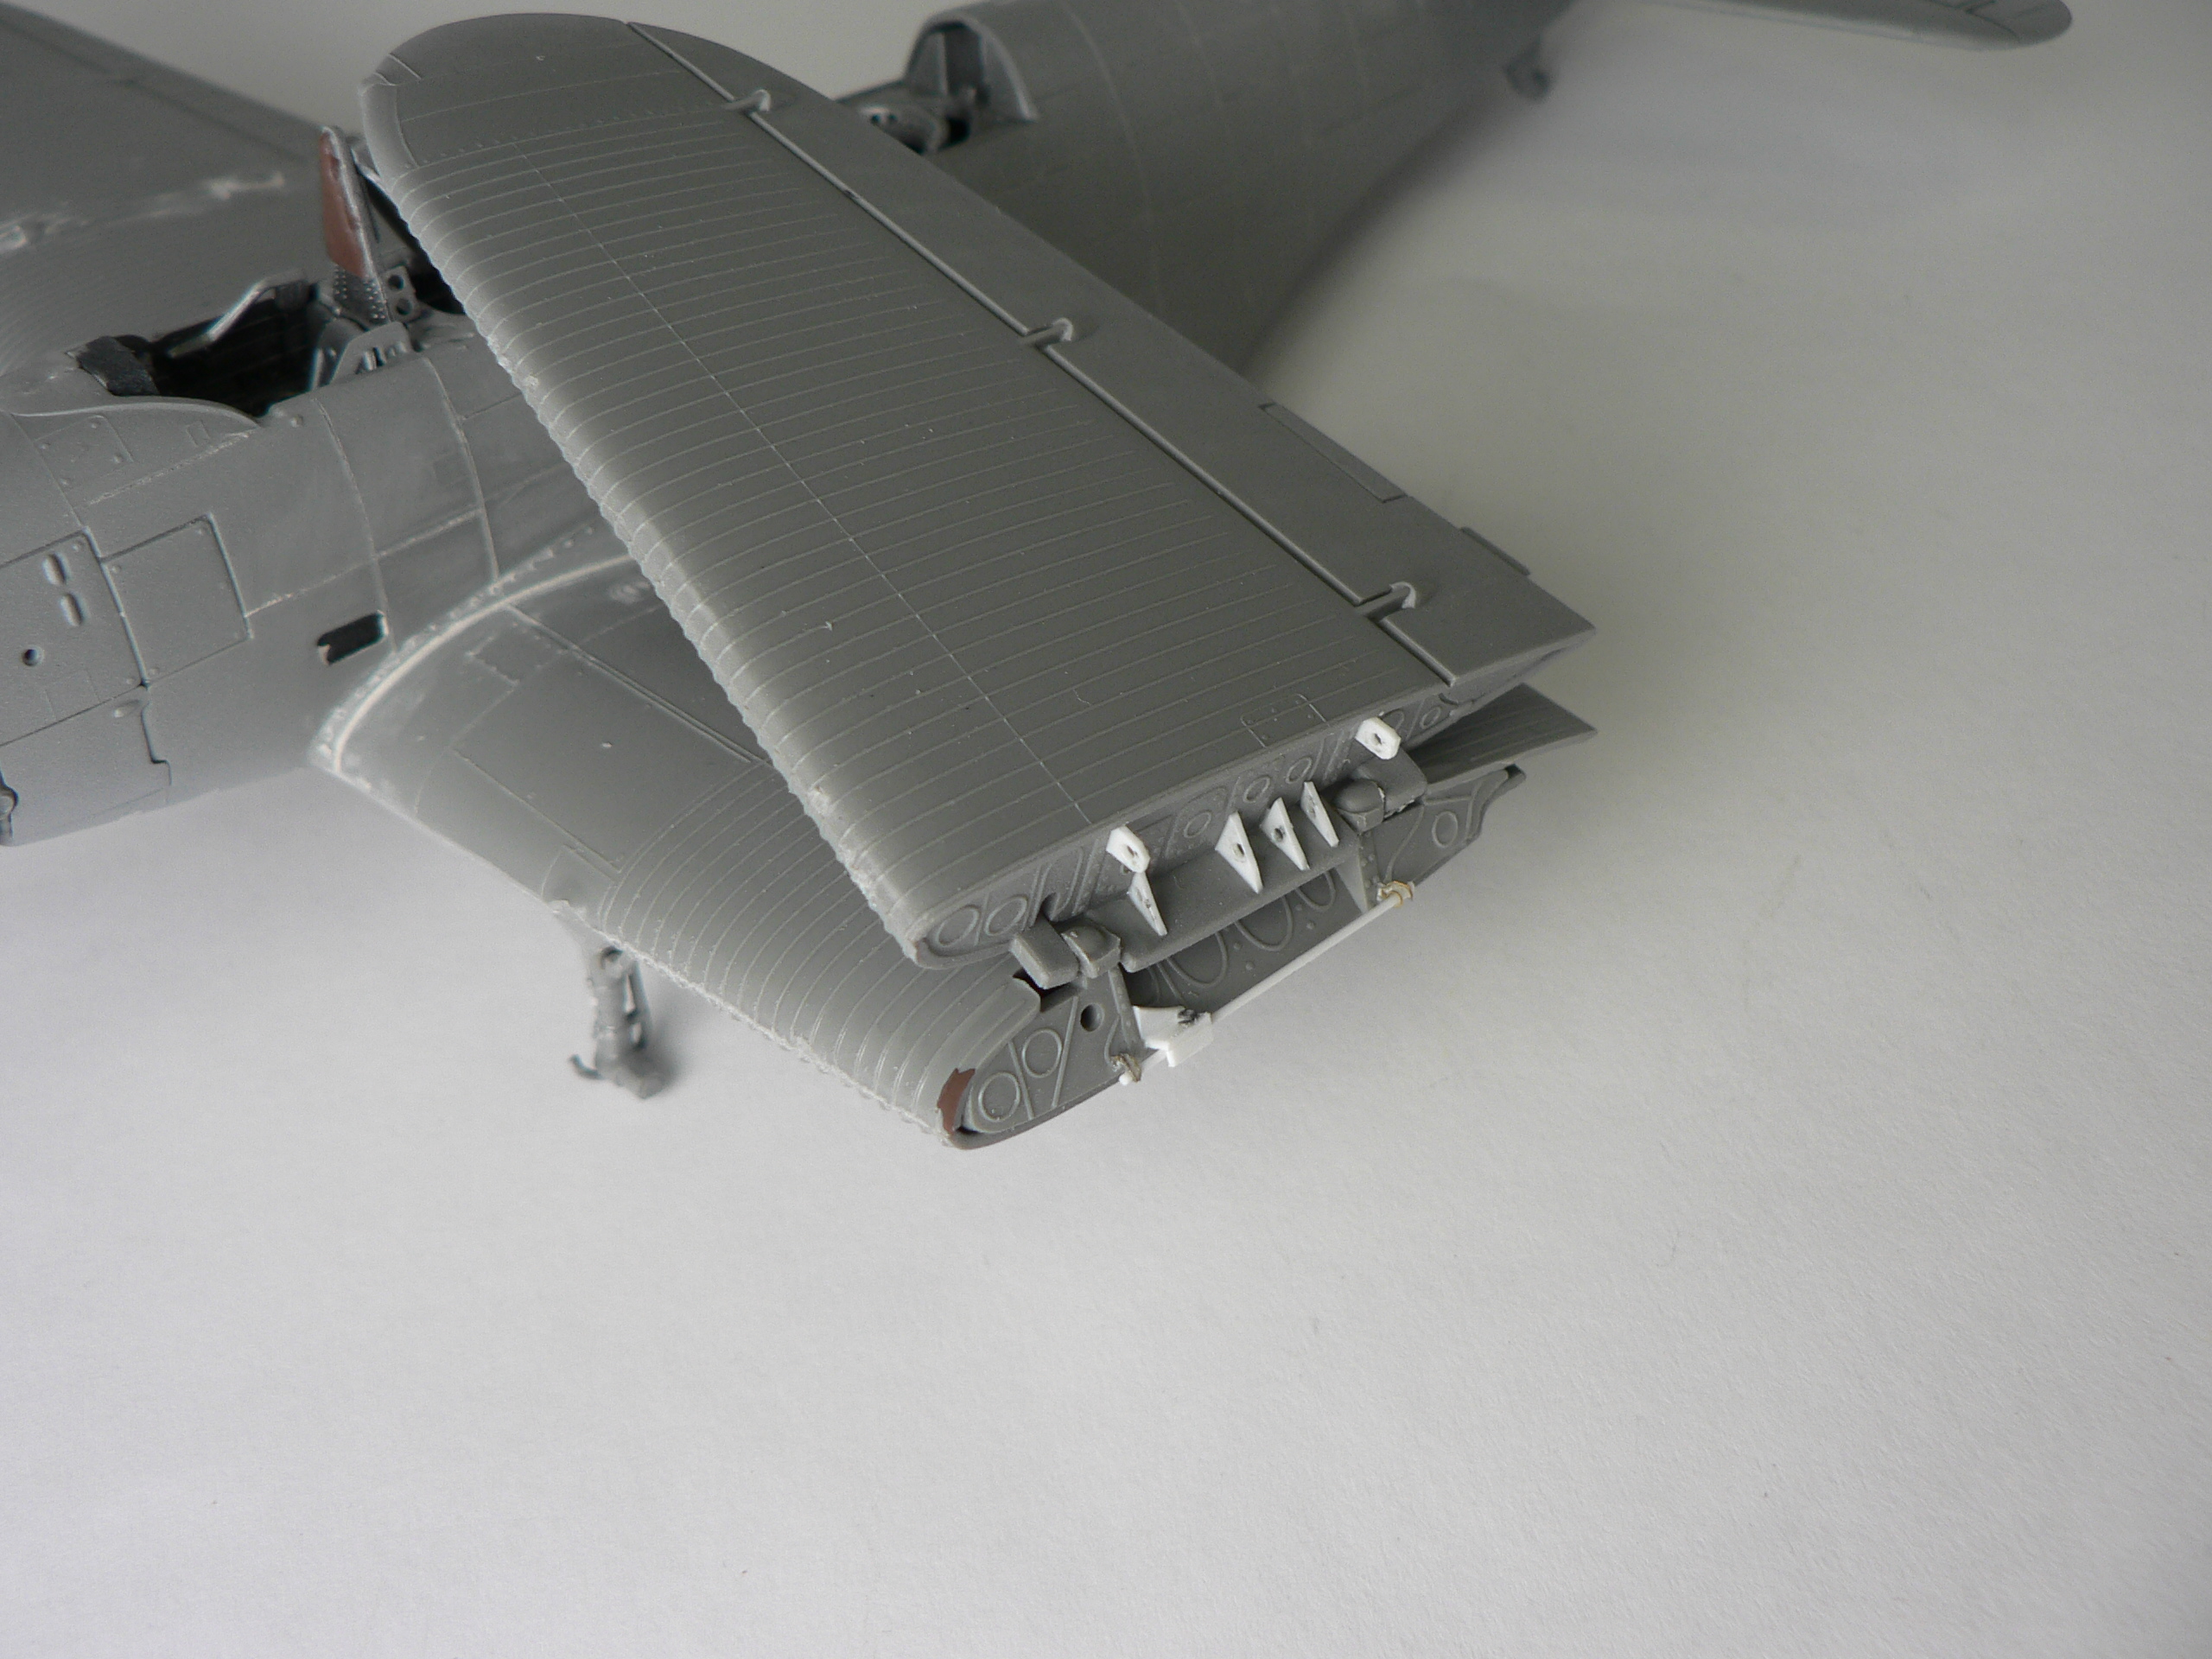
Now In reality, it would be very unusual to have one wing folded while the other is down. But for those who are display shelf limited like me and the fact that having one down and one up allows to you to see the plane’s true shape better – this is a worthwhile compromise. The first thing was to temporary friction fit the wing folds and then add details using plastic card and rod. Just a few pieces really ‘busy’ up this area.
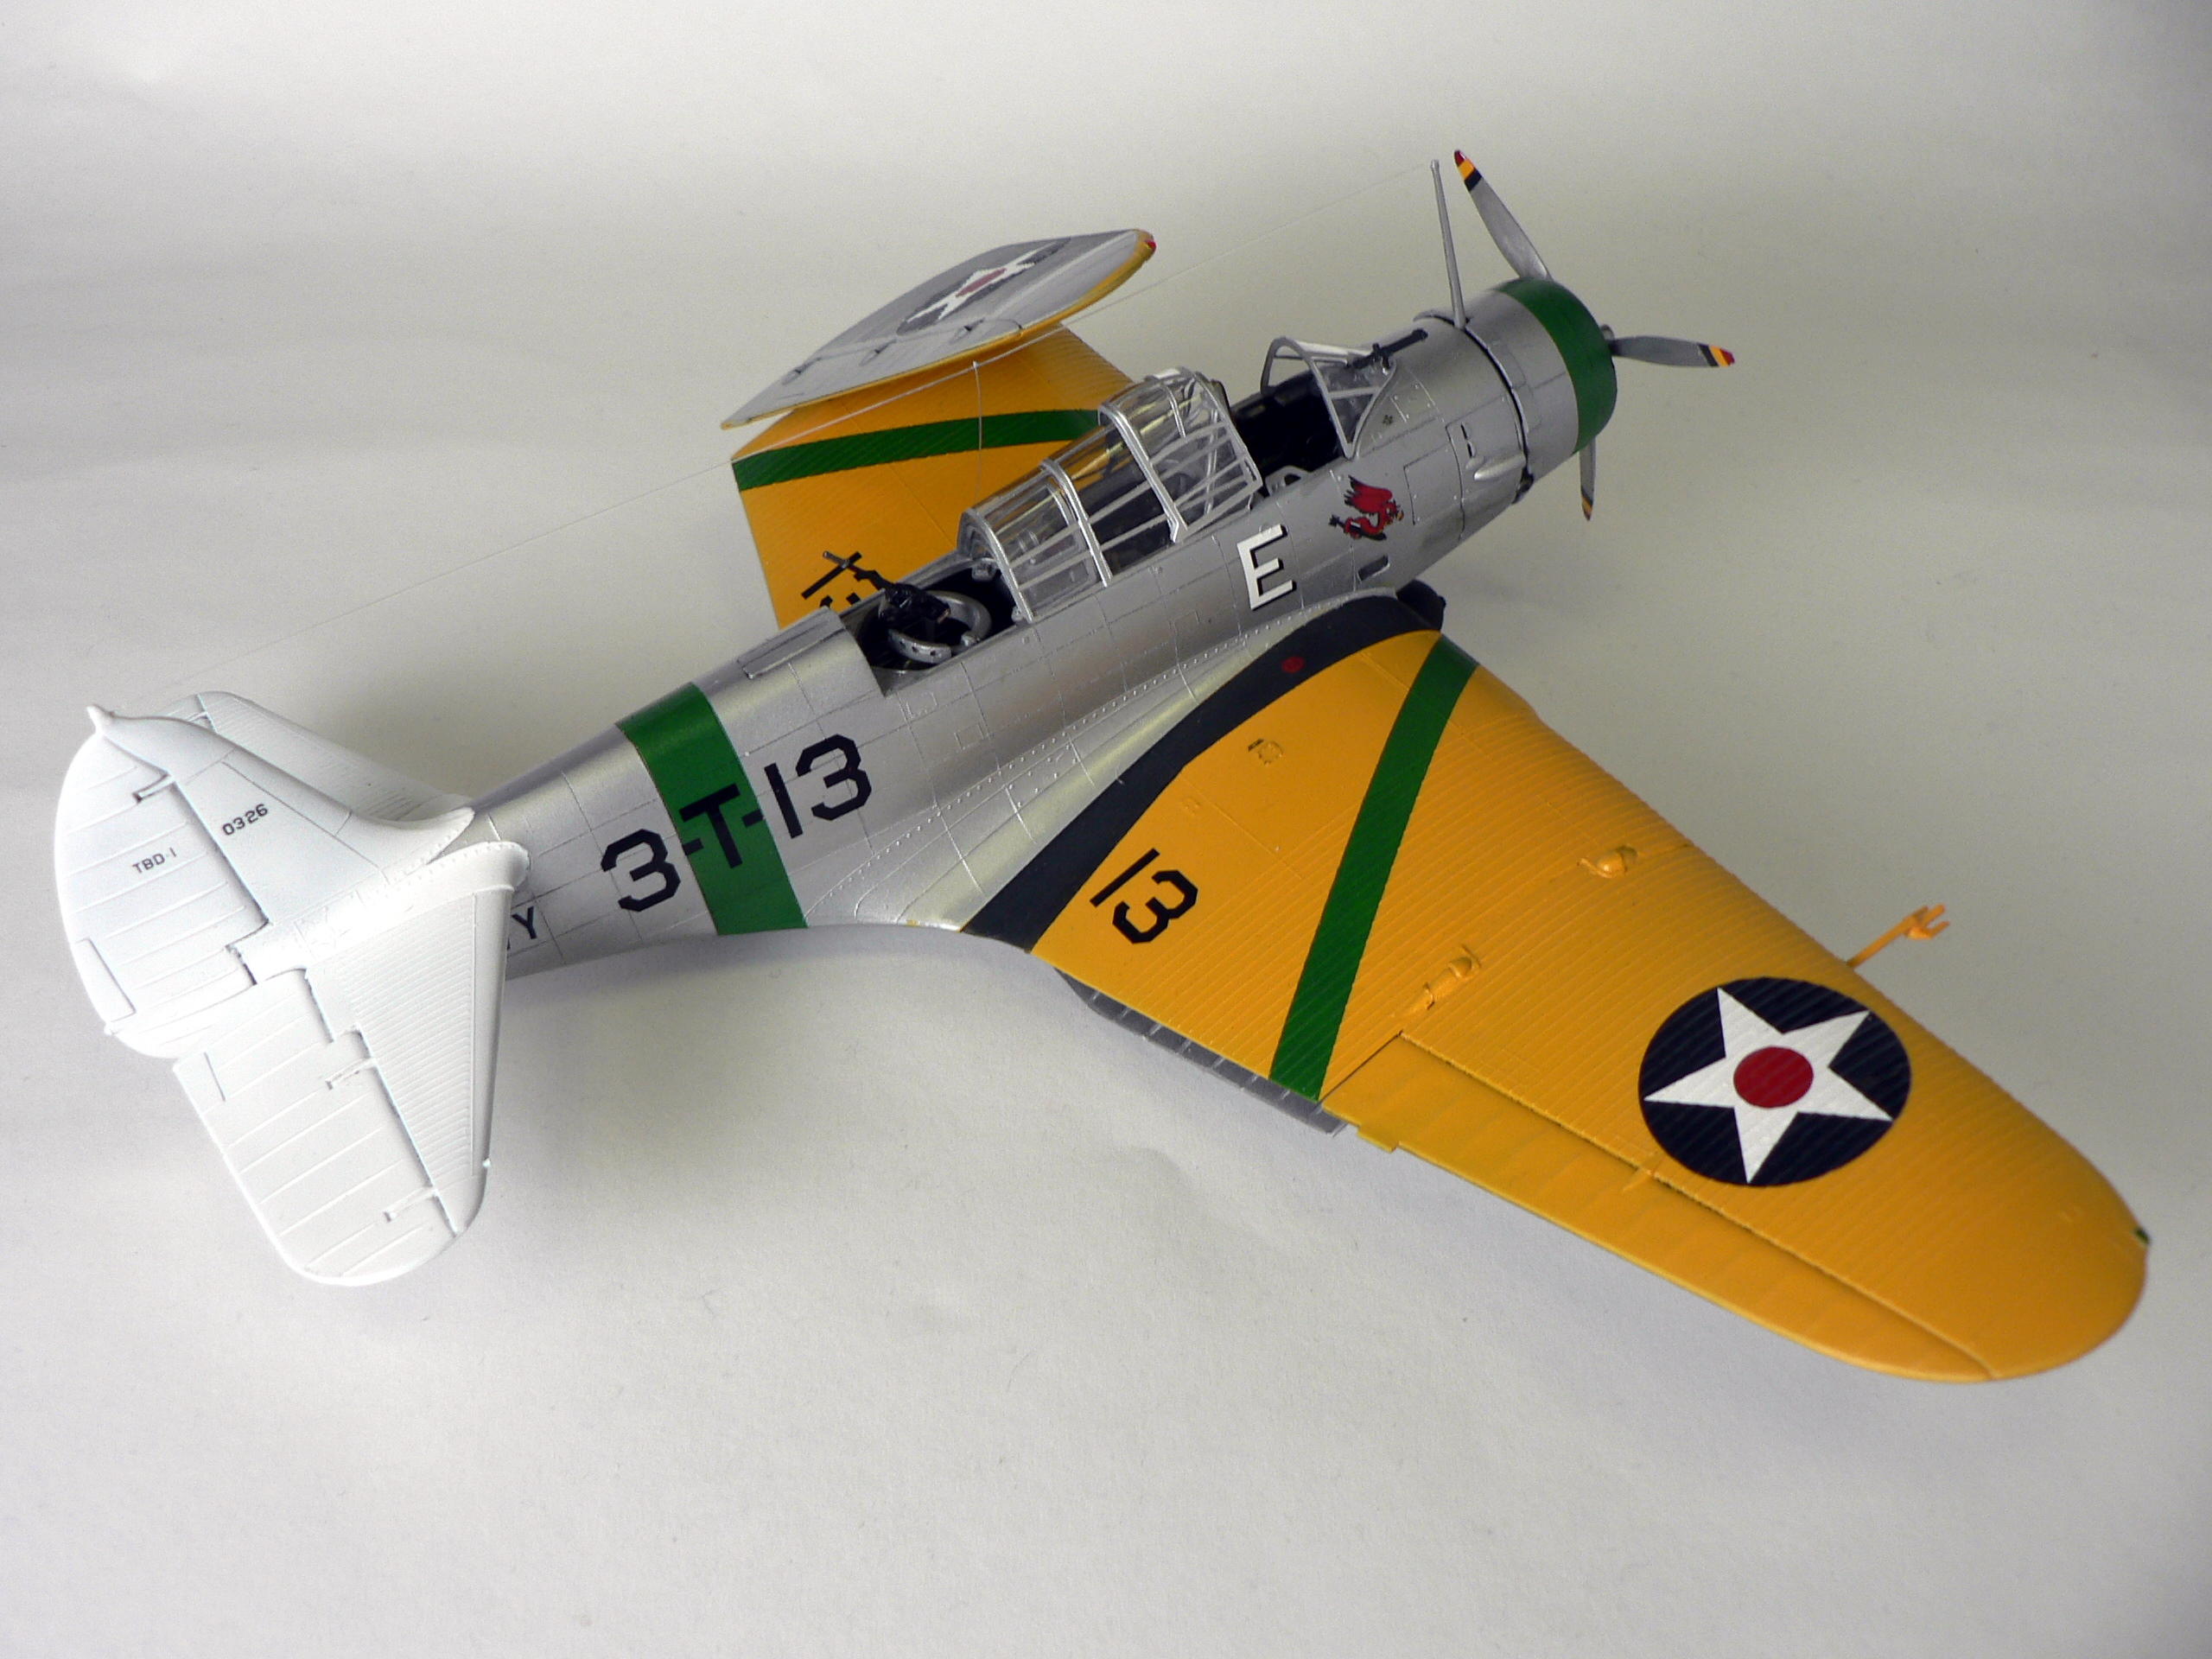
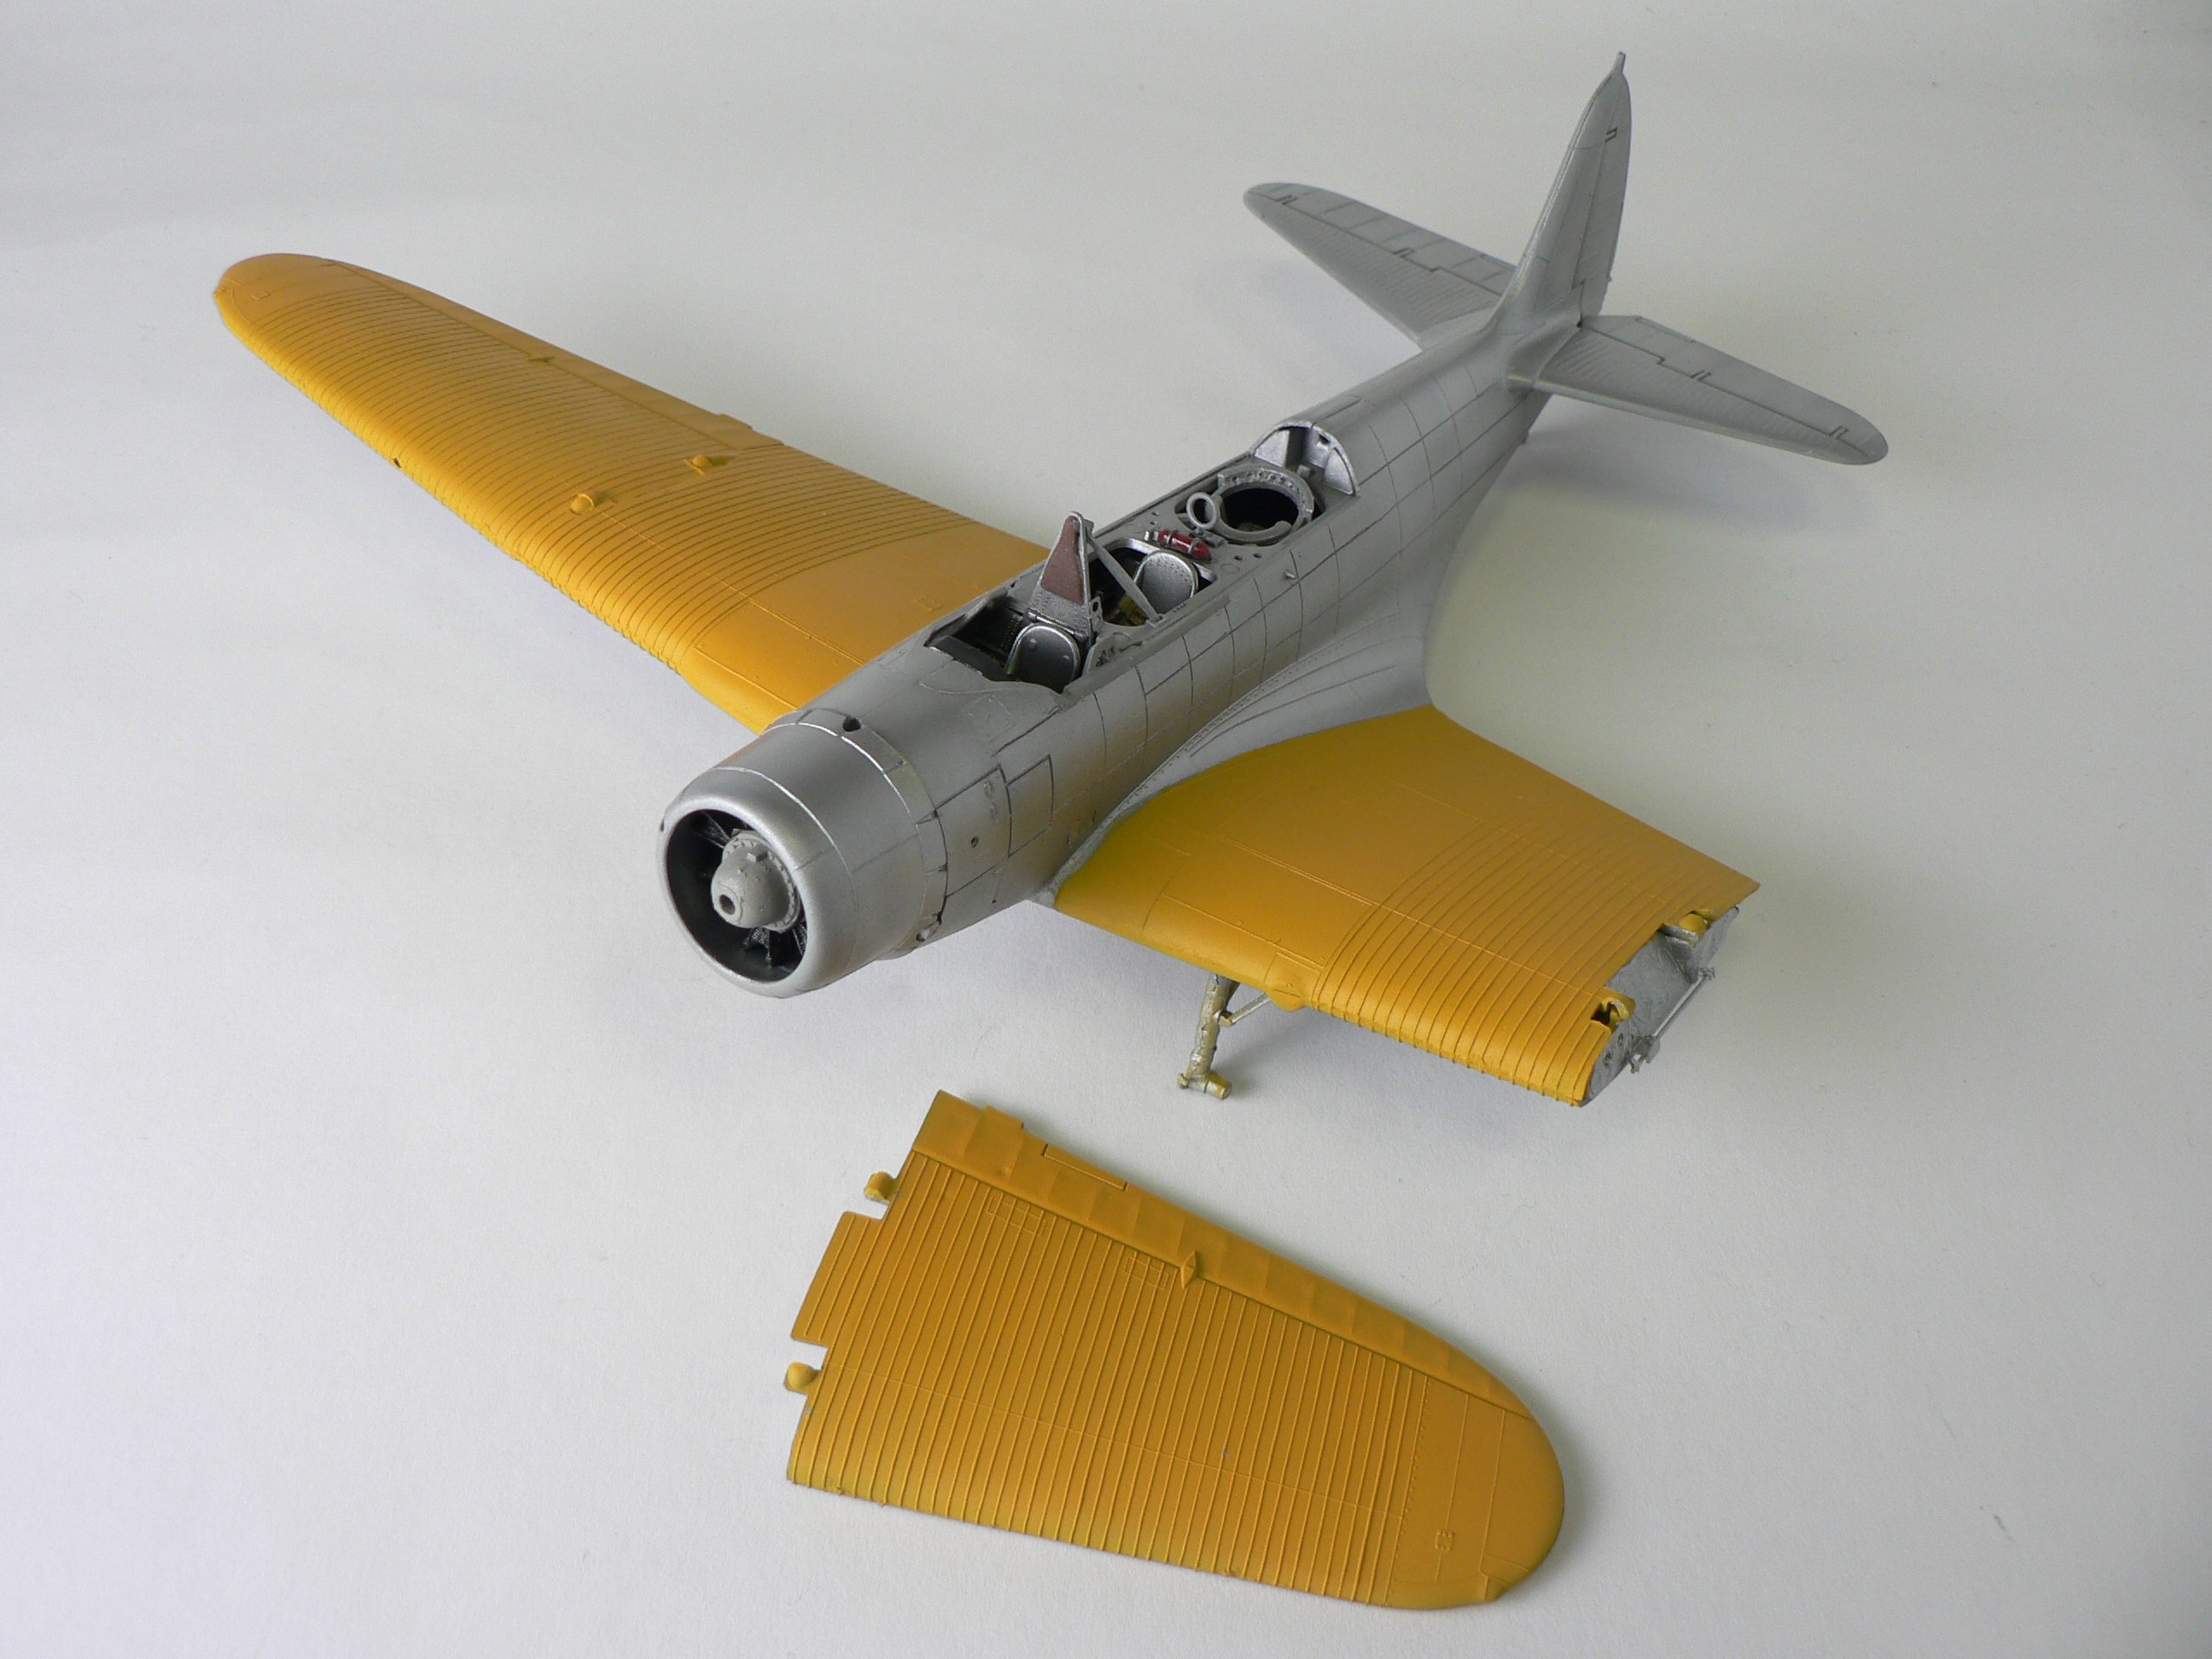
Painting was now ready to start in earnest. I started by masking for the yellow wings, but do remember that the yellow paint wrapped around the front edge of the wings. I used Tamiya yellow with a bit of red added for the US prewar ‘yellow-orange’ color. Next up was the white tail used to identify the Saratoga’s planes. While I had decals for wing bands and walk ways, I decided that trying to conform the decals to the ribbing was going to be a major headache. So I masked them off instead, and used NATO black for the walkways and Green for the bands and cowling area.
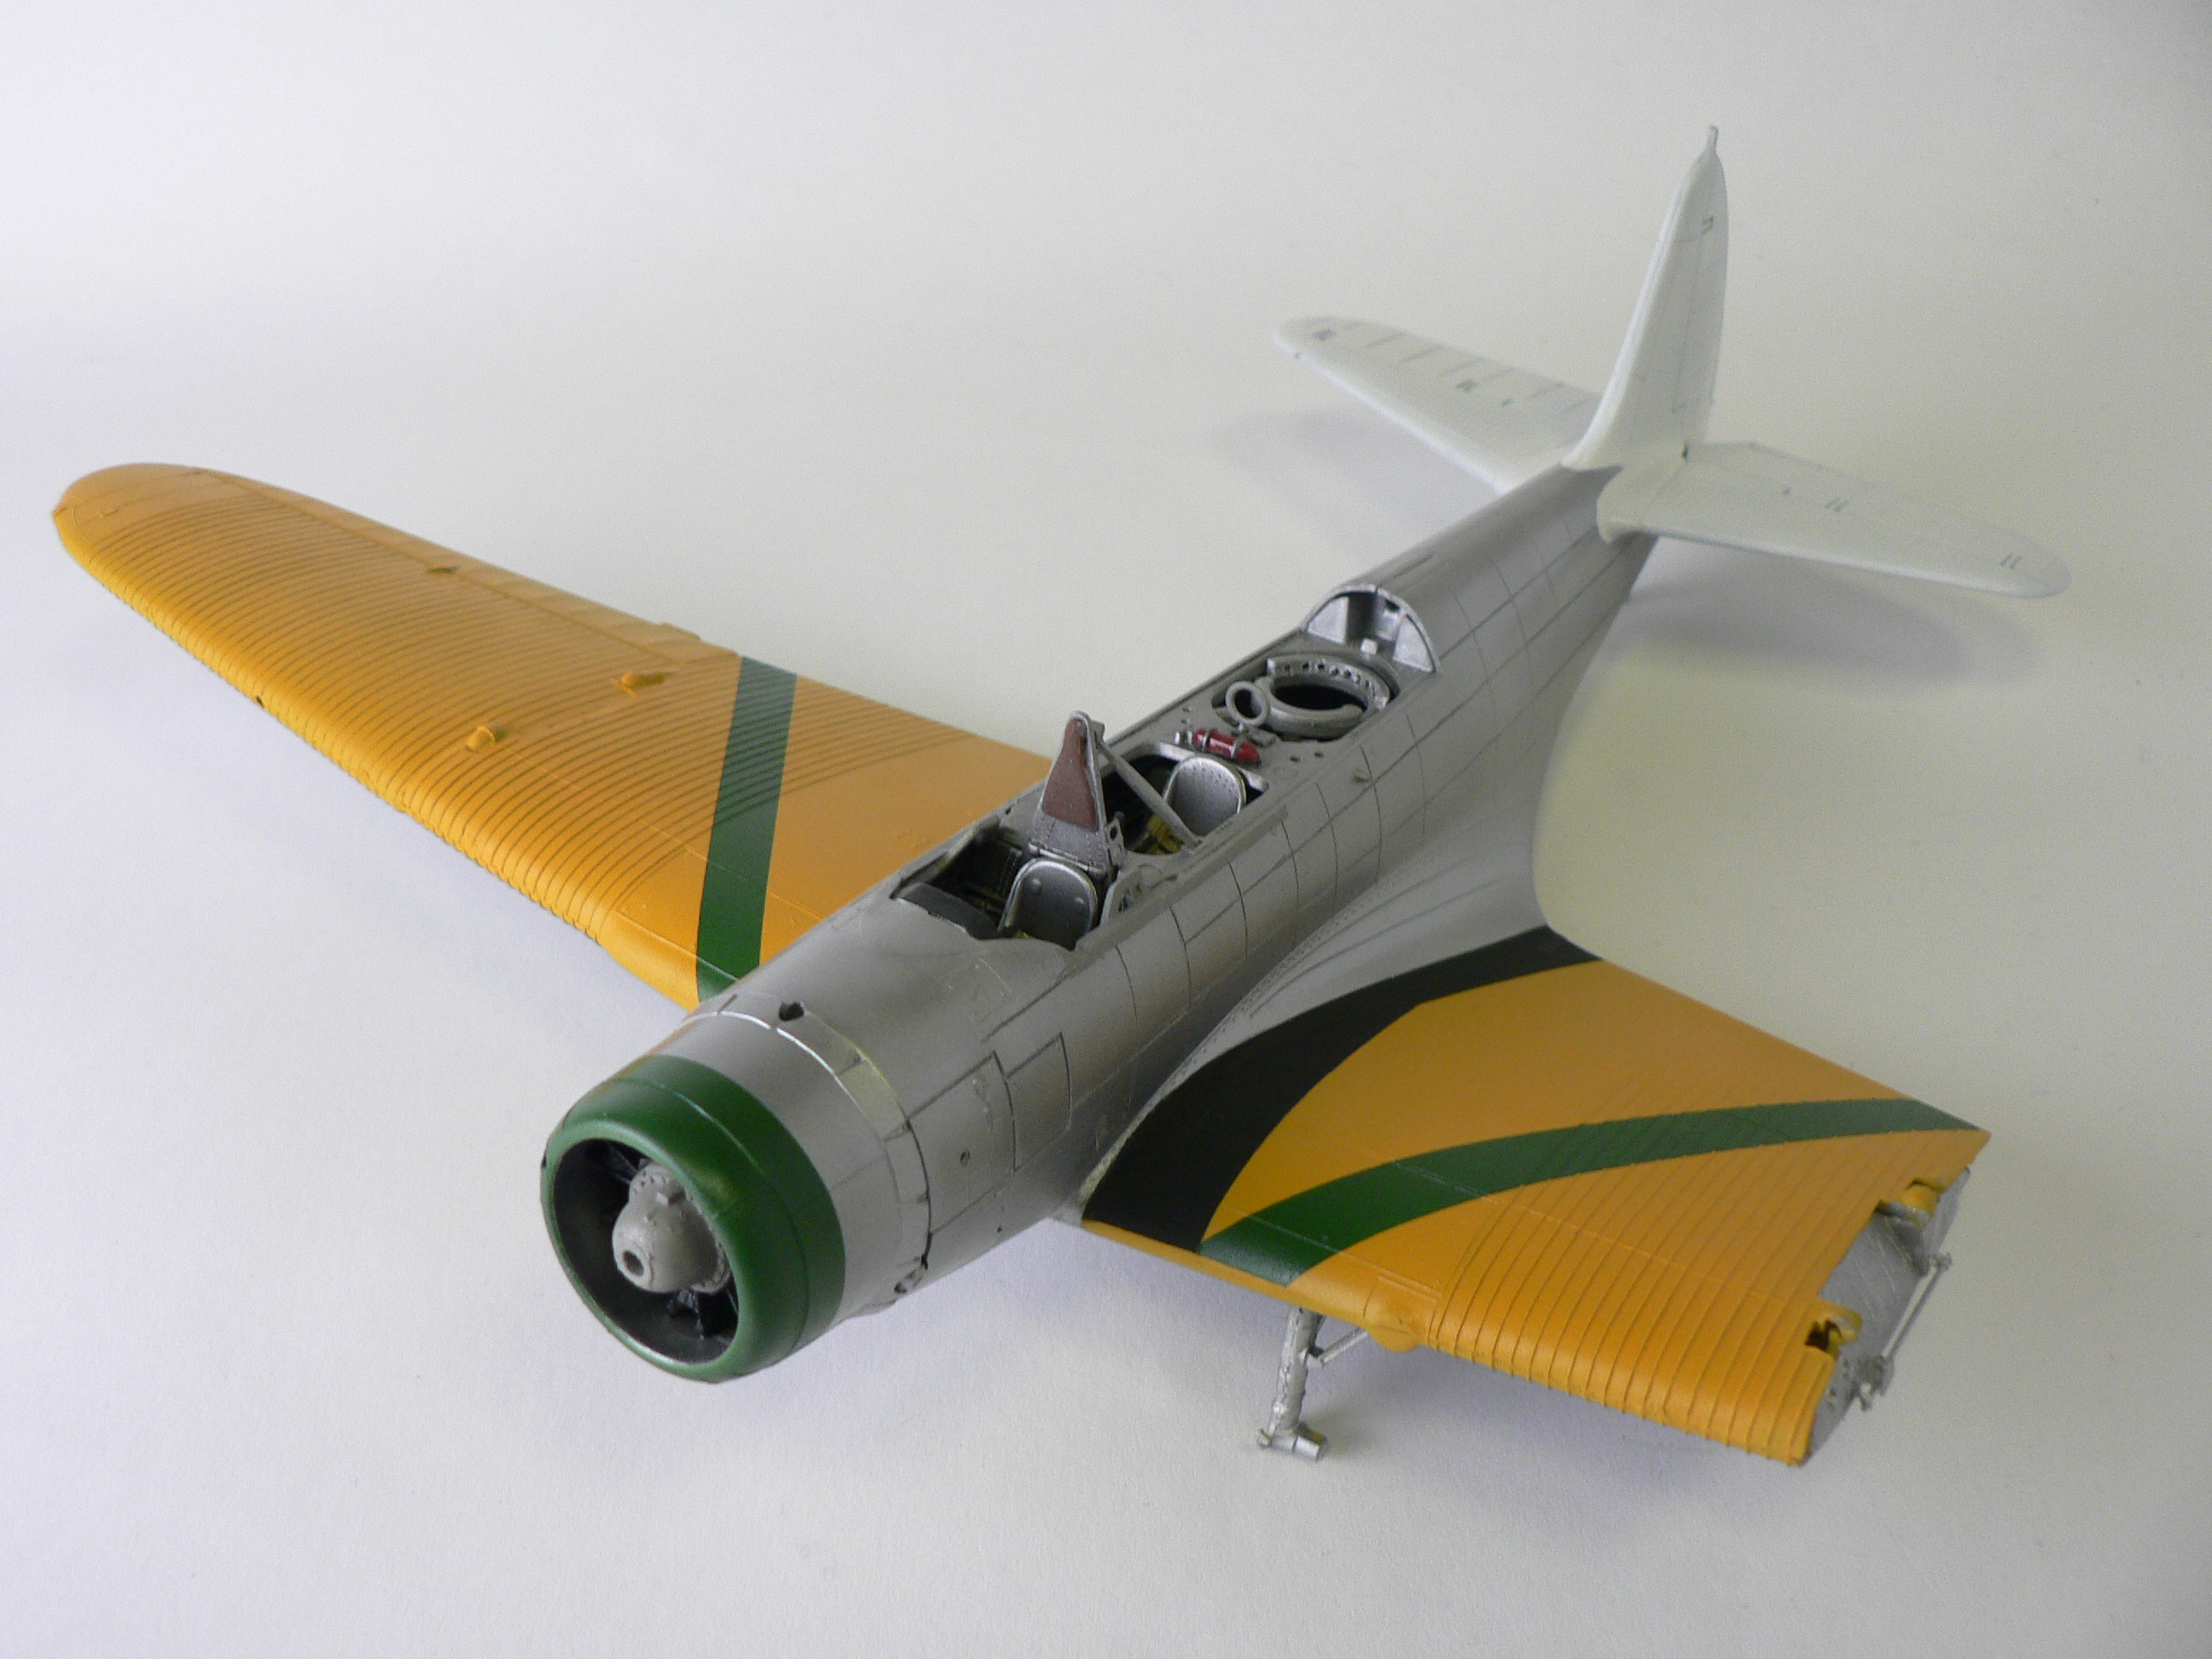
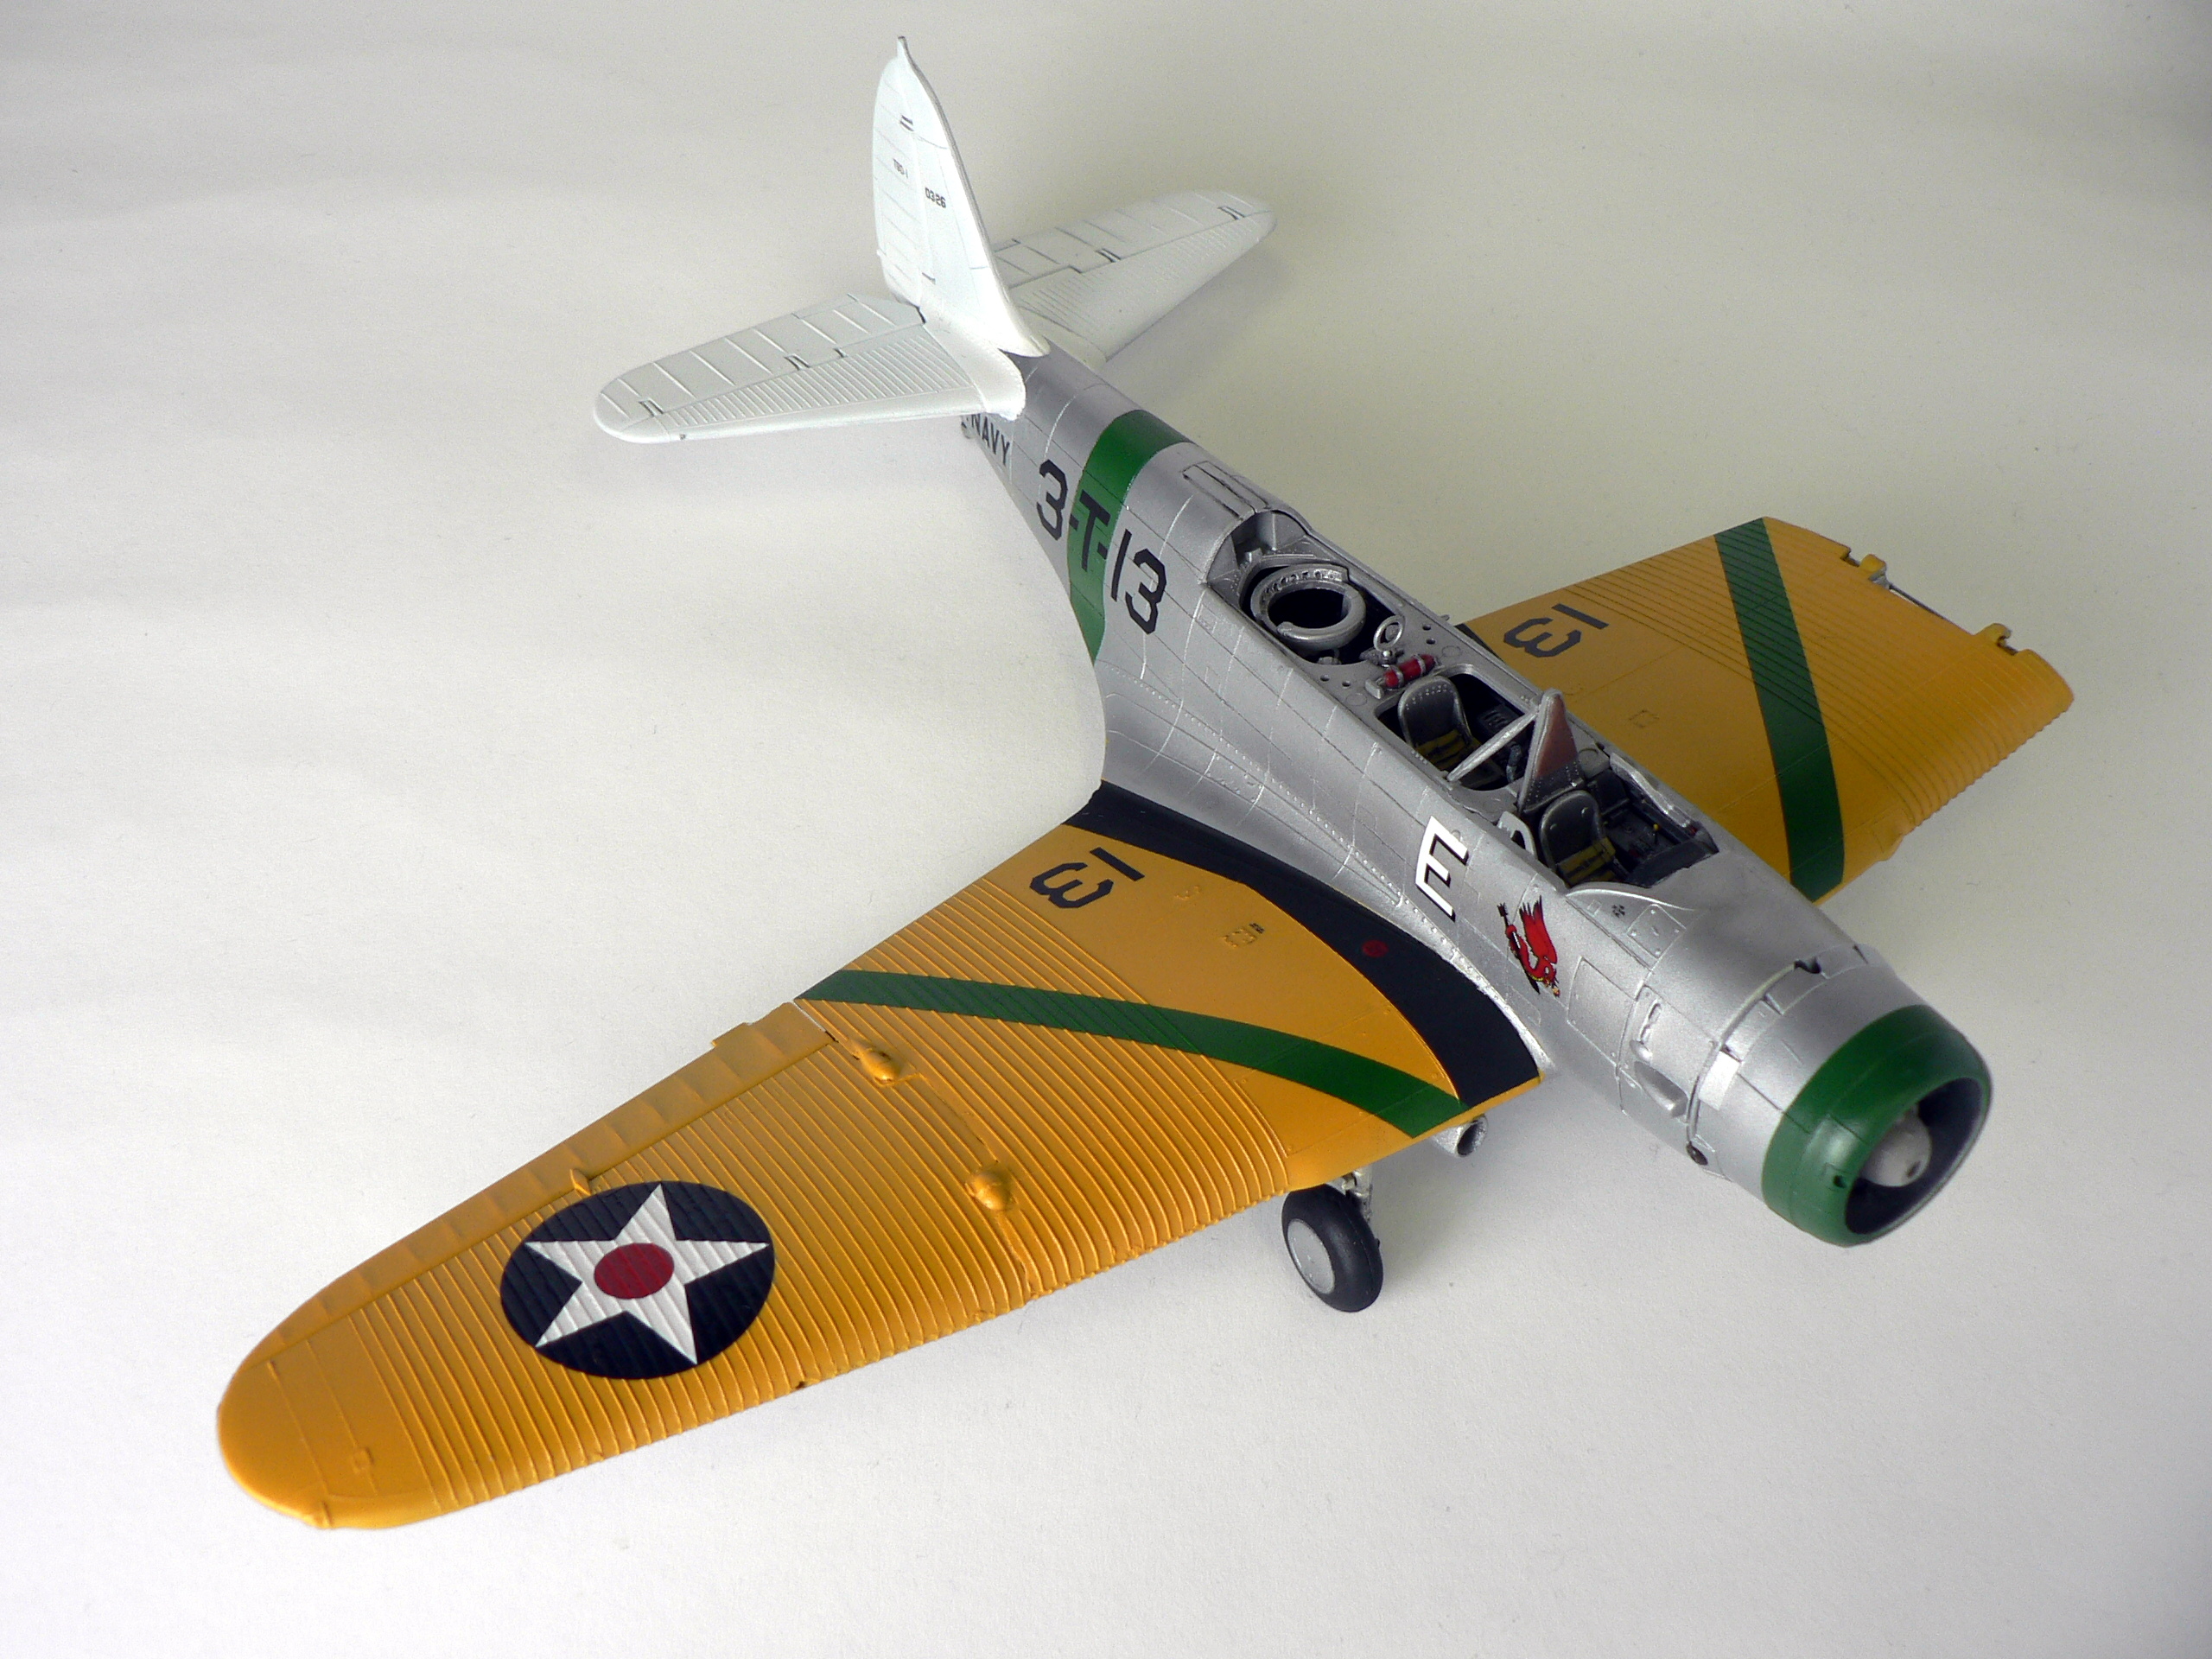
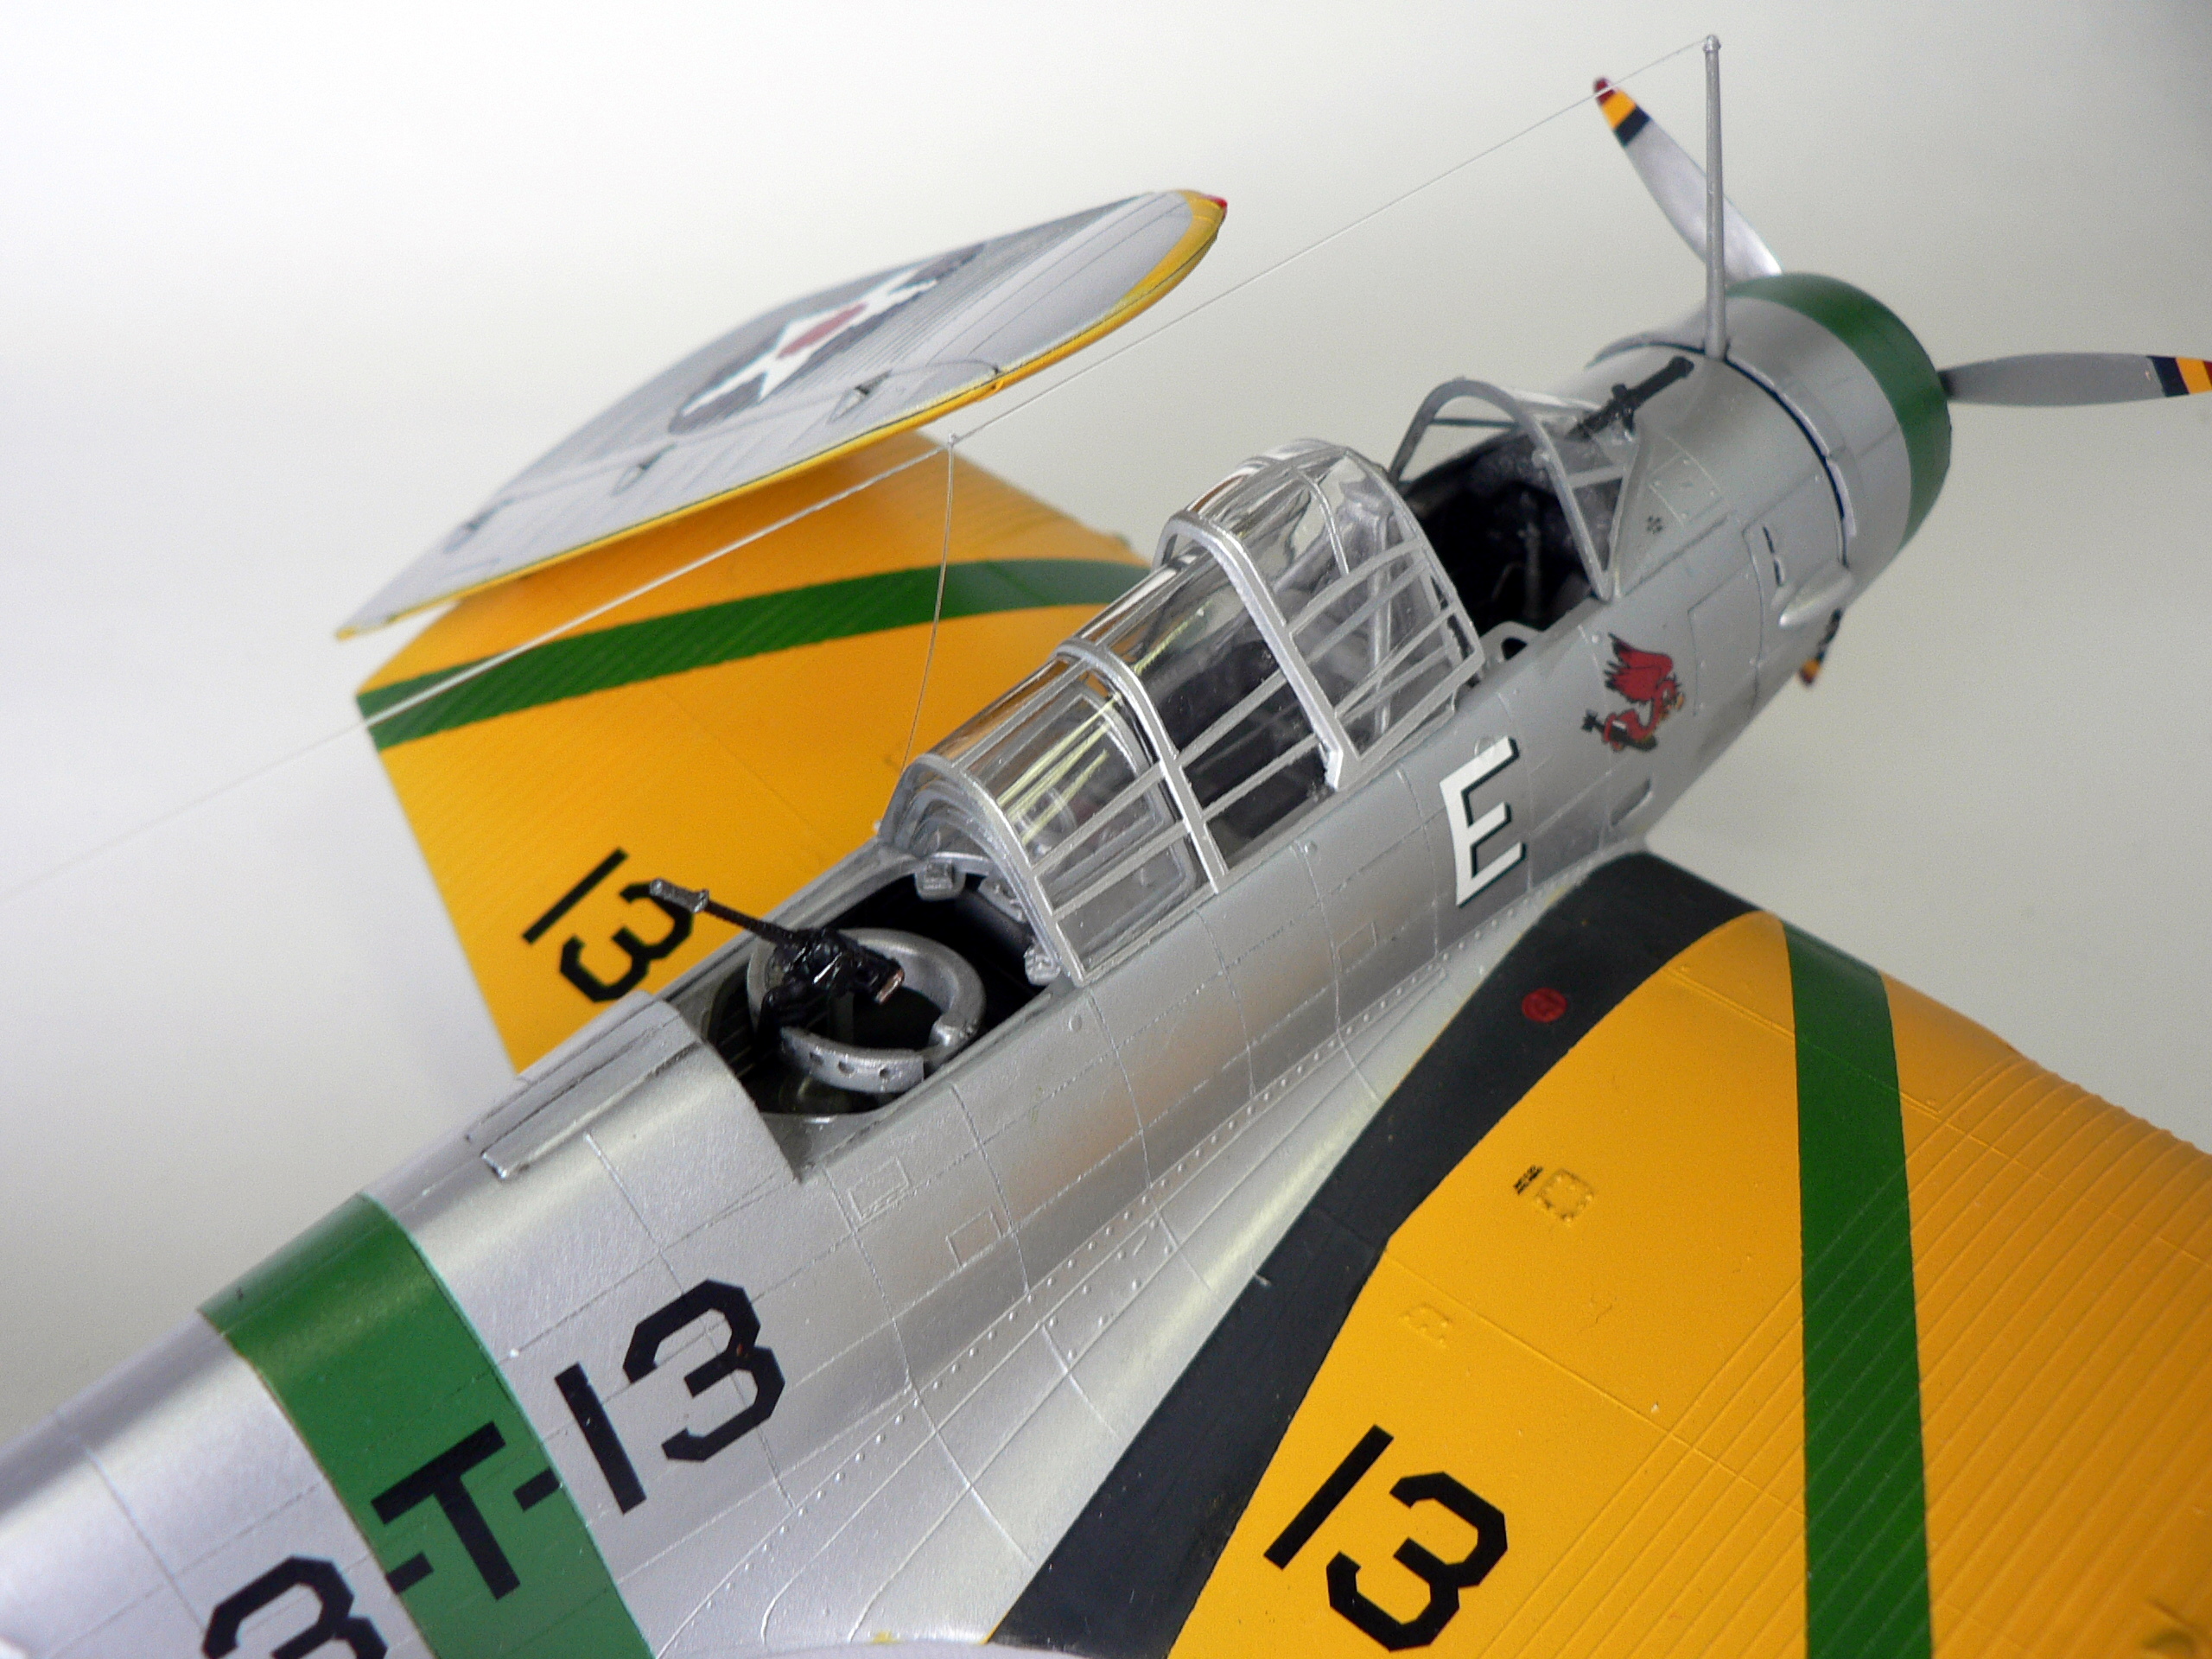
Decals from the two different sheets of Yellow Wings Decals were used to get all the markings right for this plane. Note especially the squadron mascot and the large E on the sides of the fuselage.
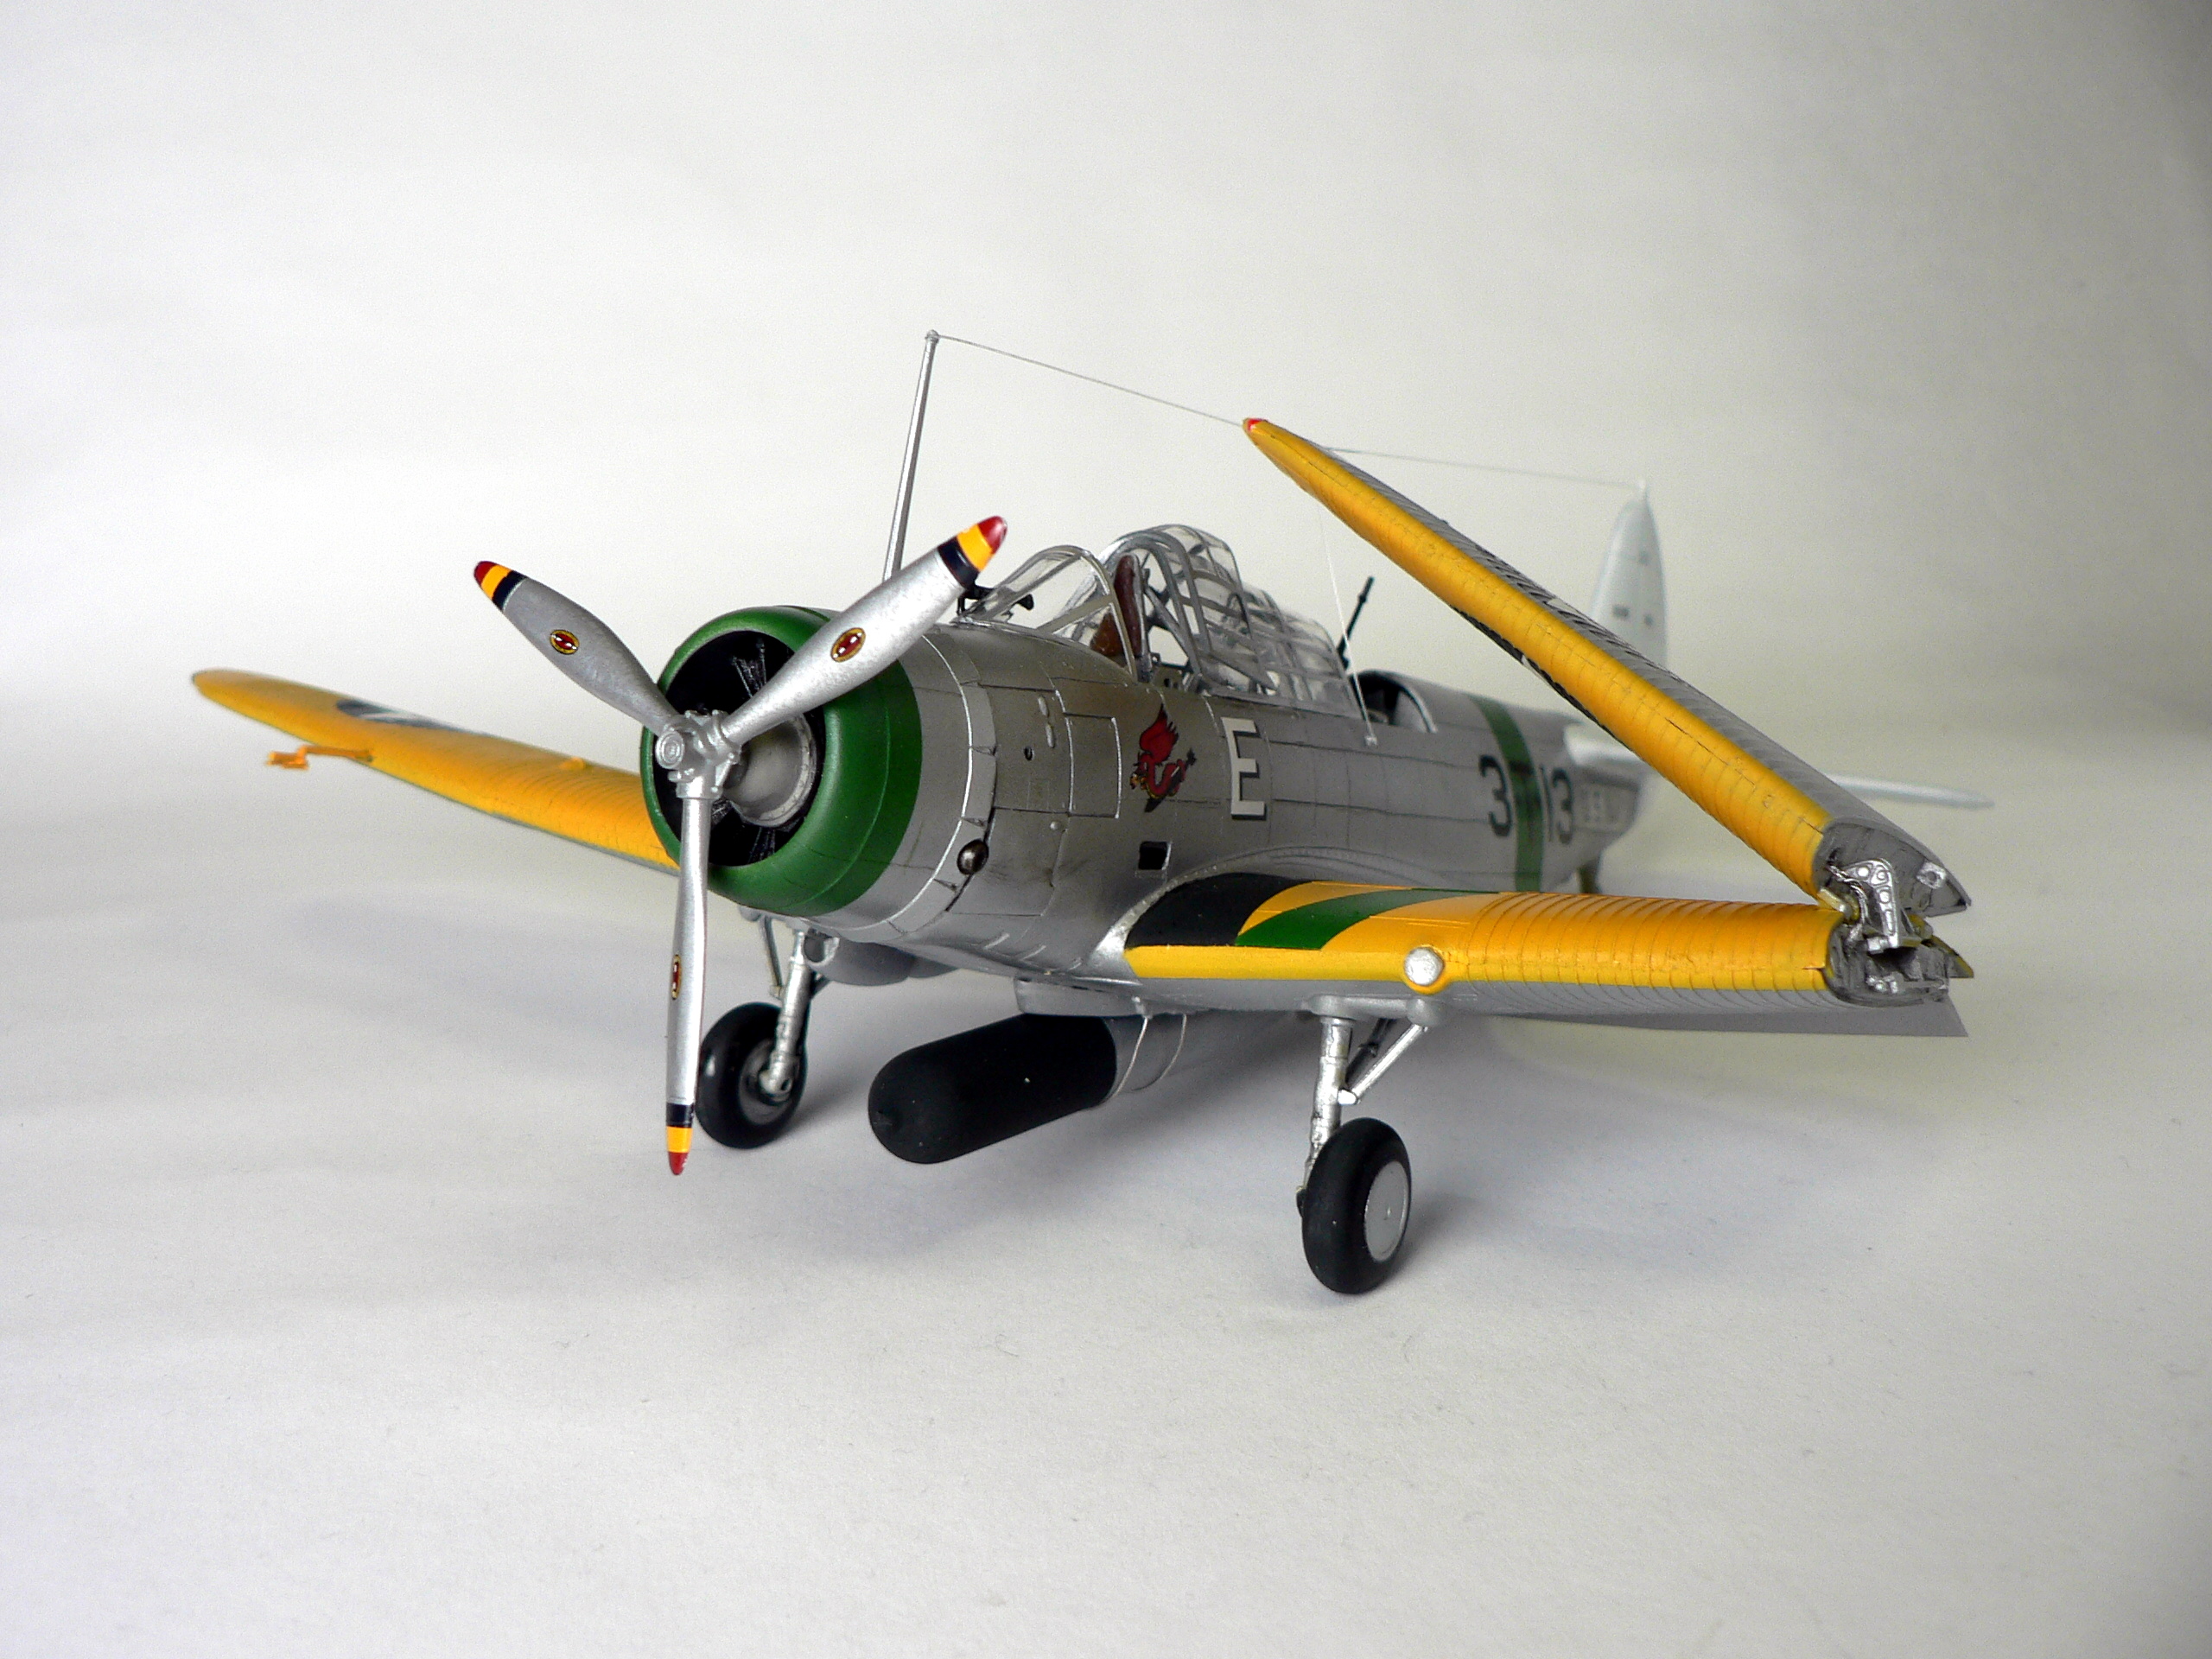
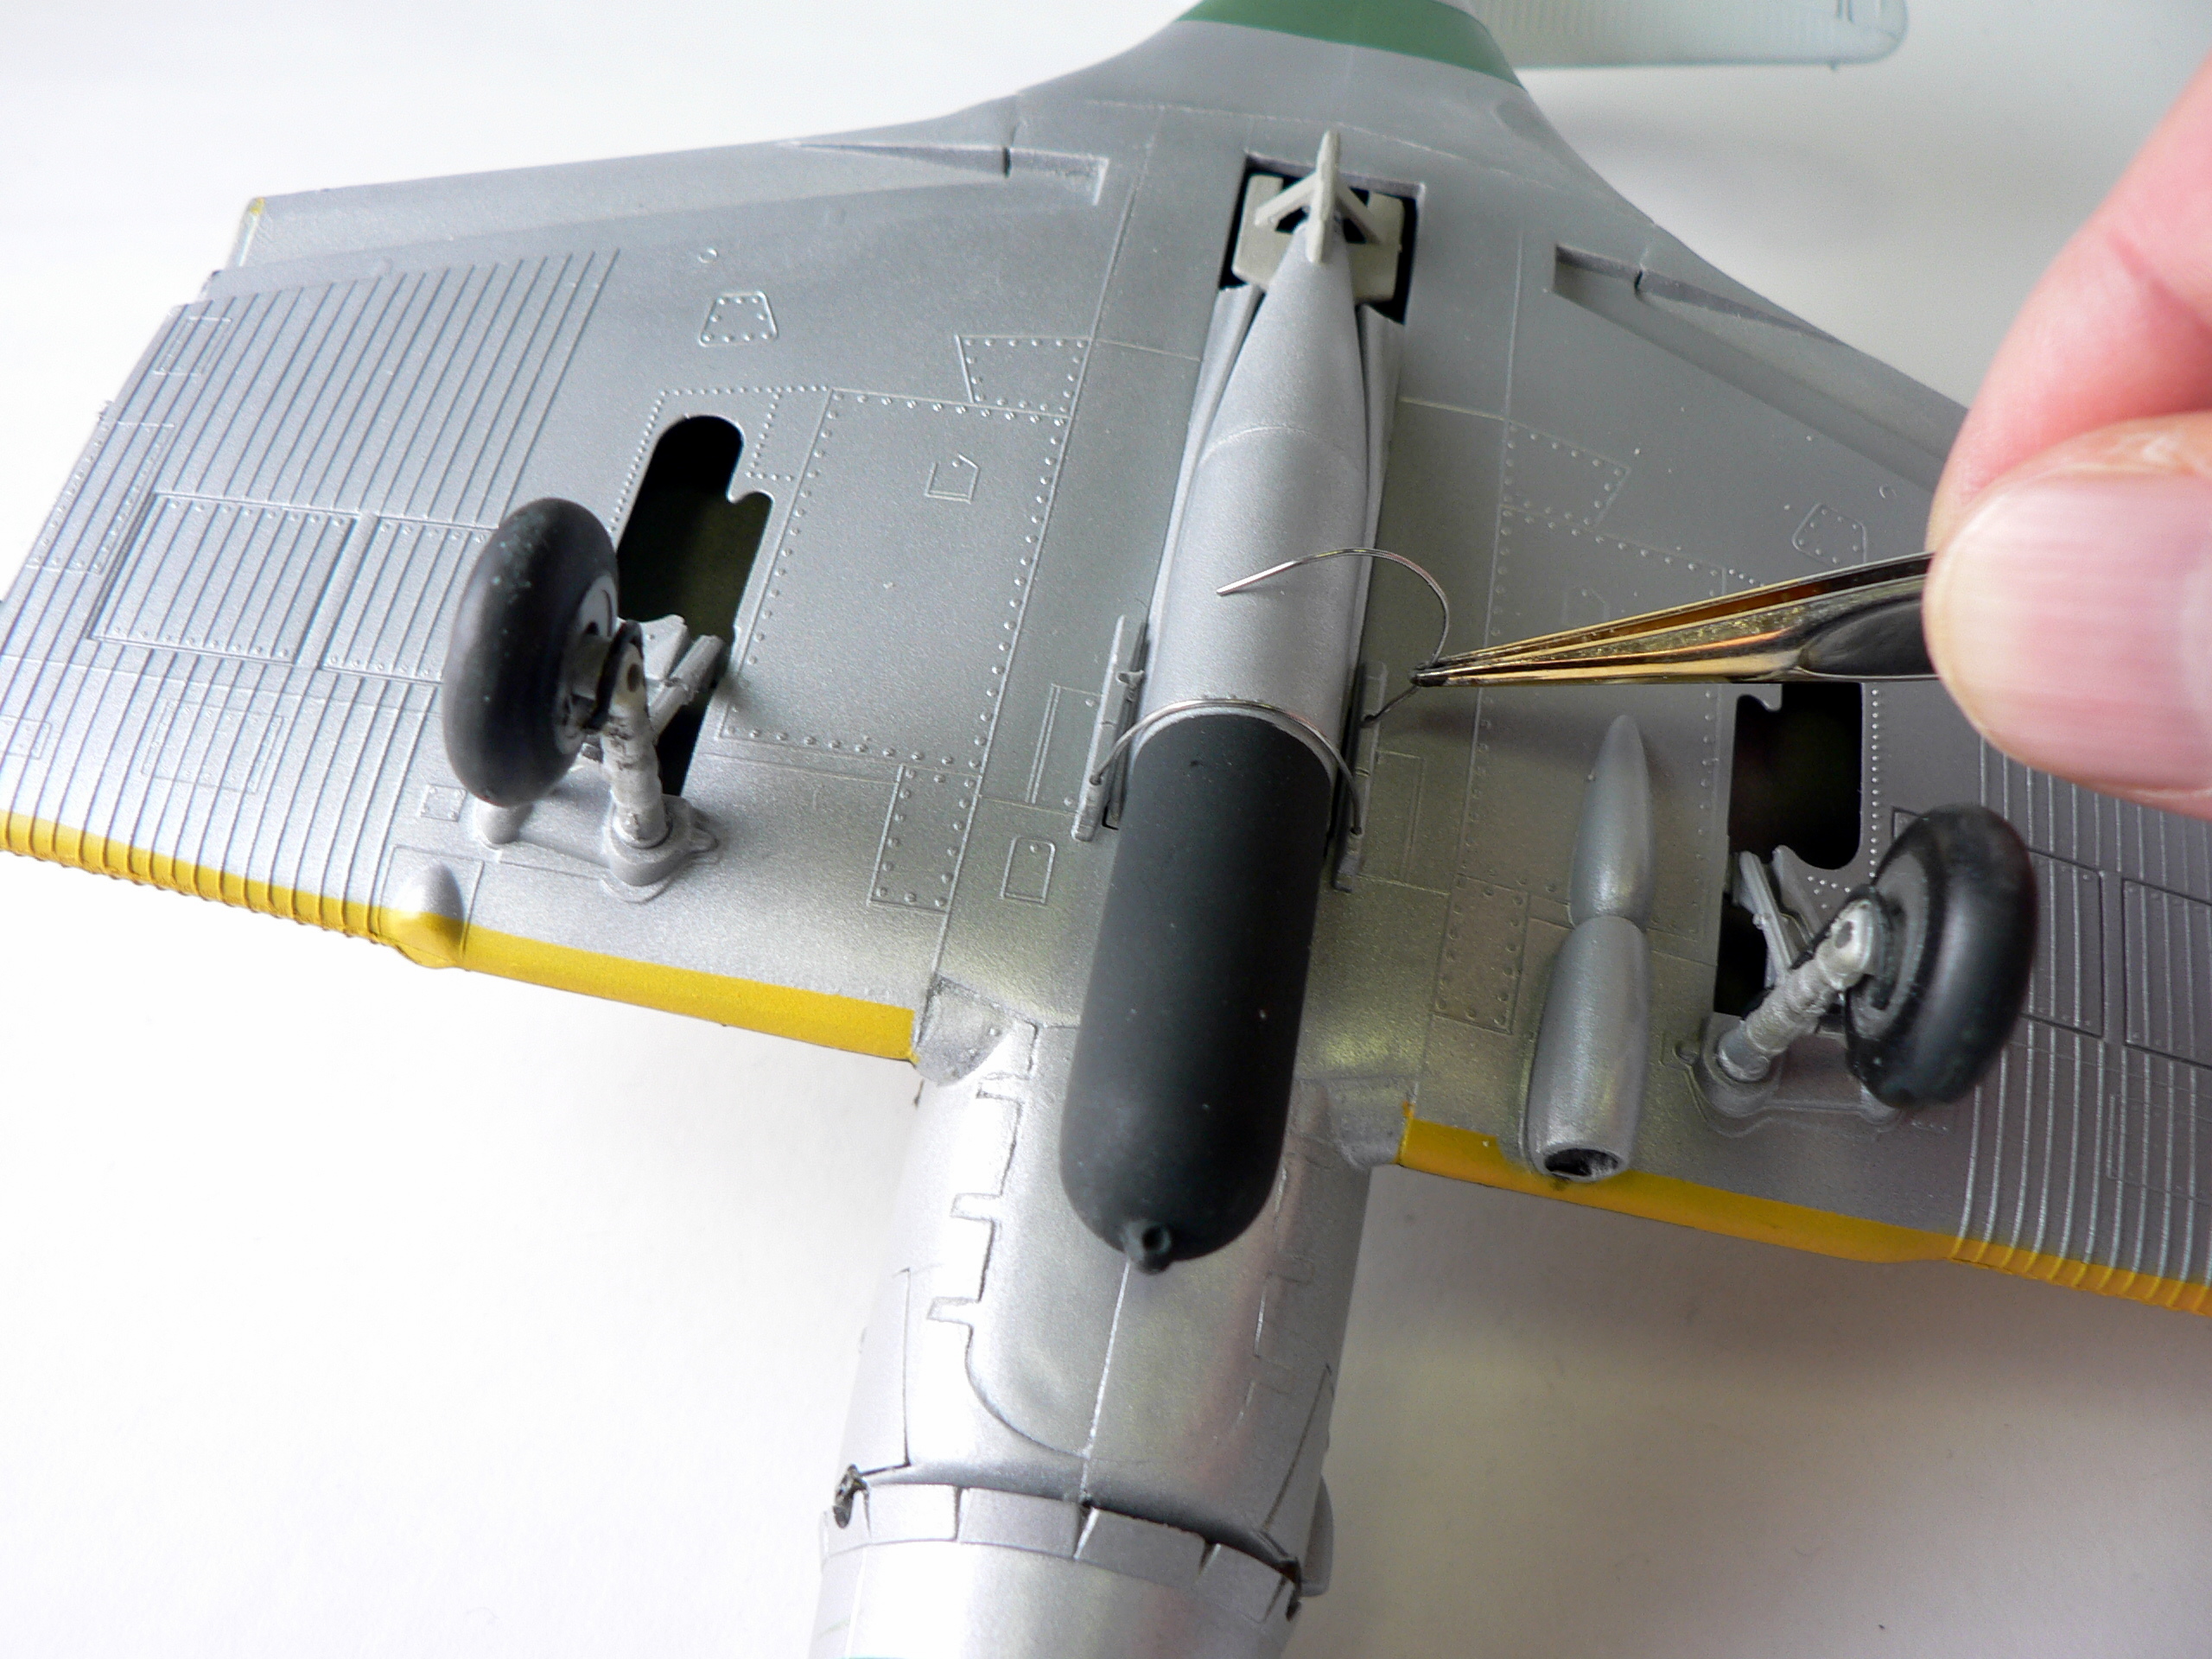
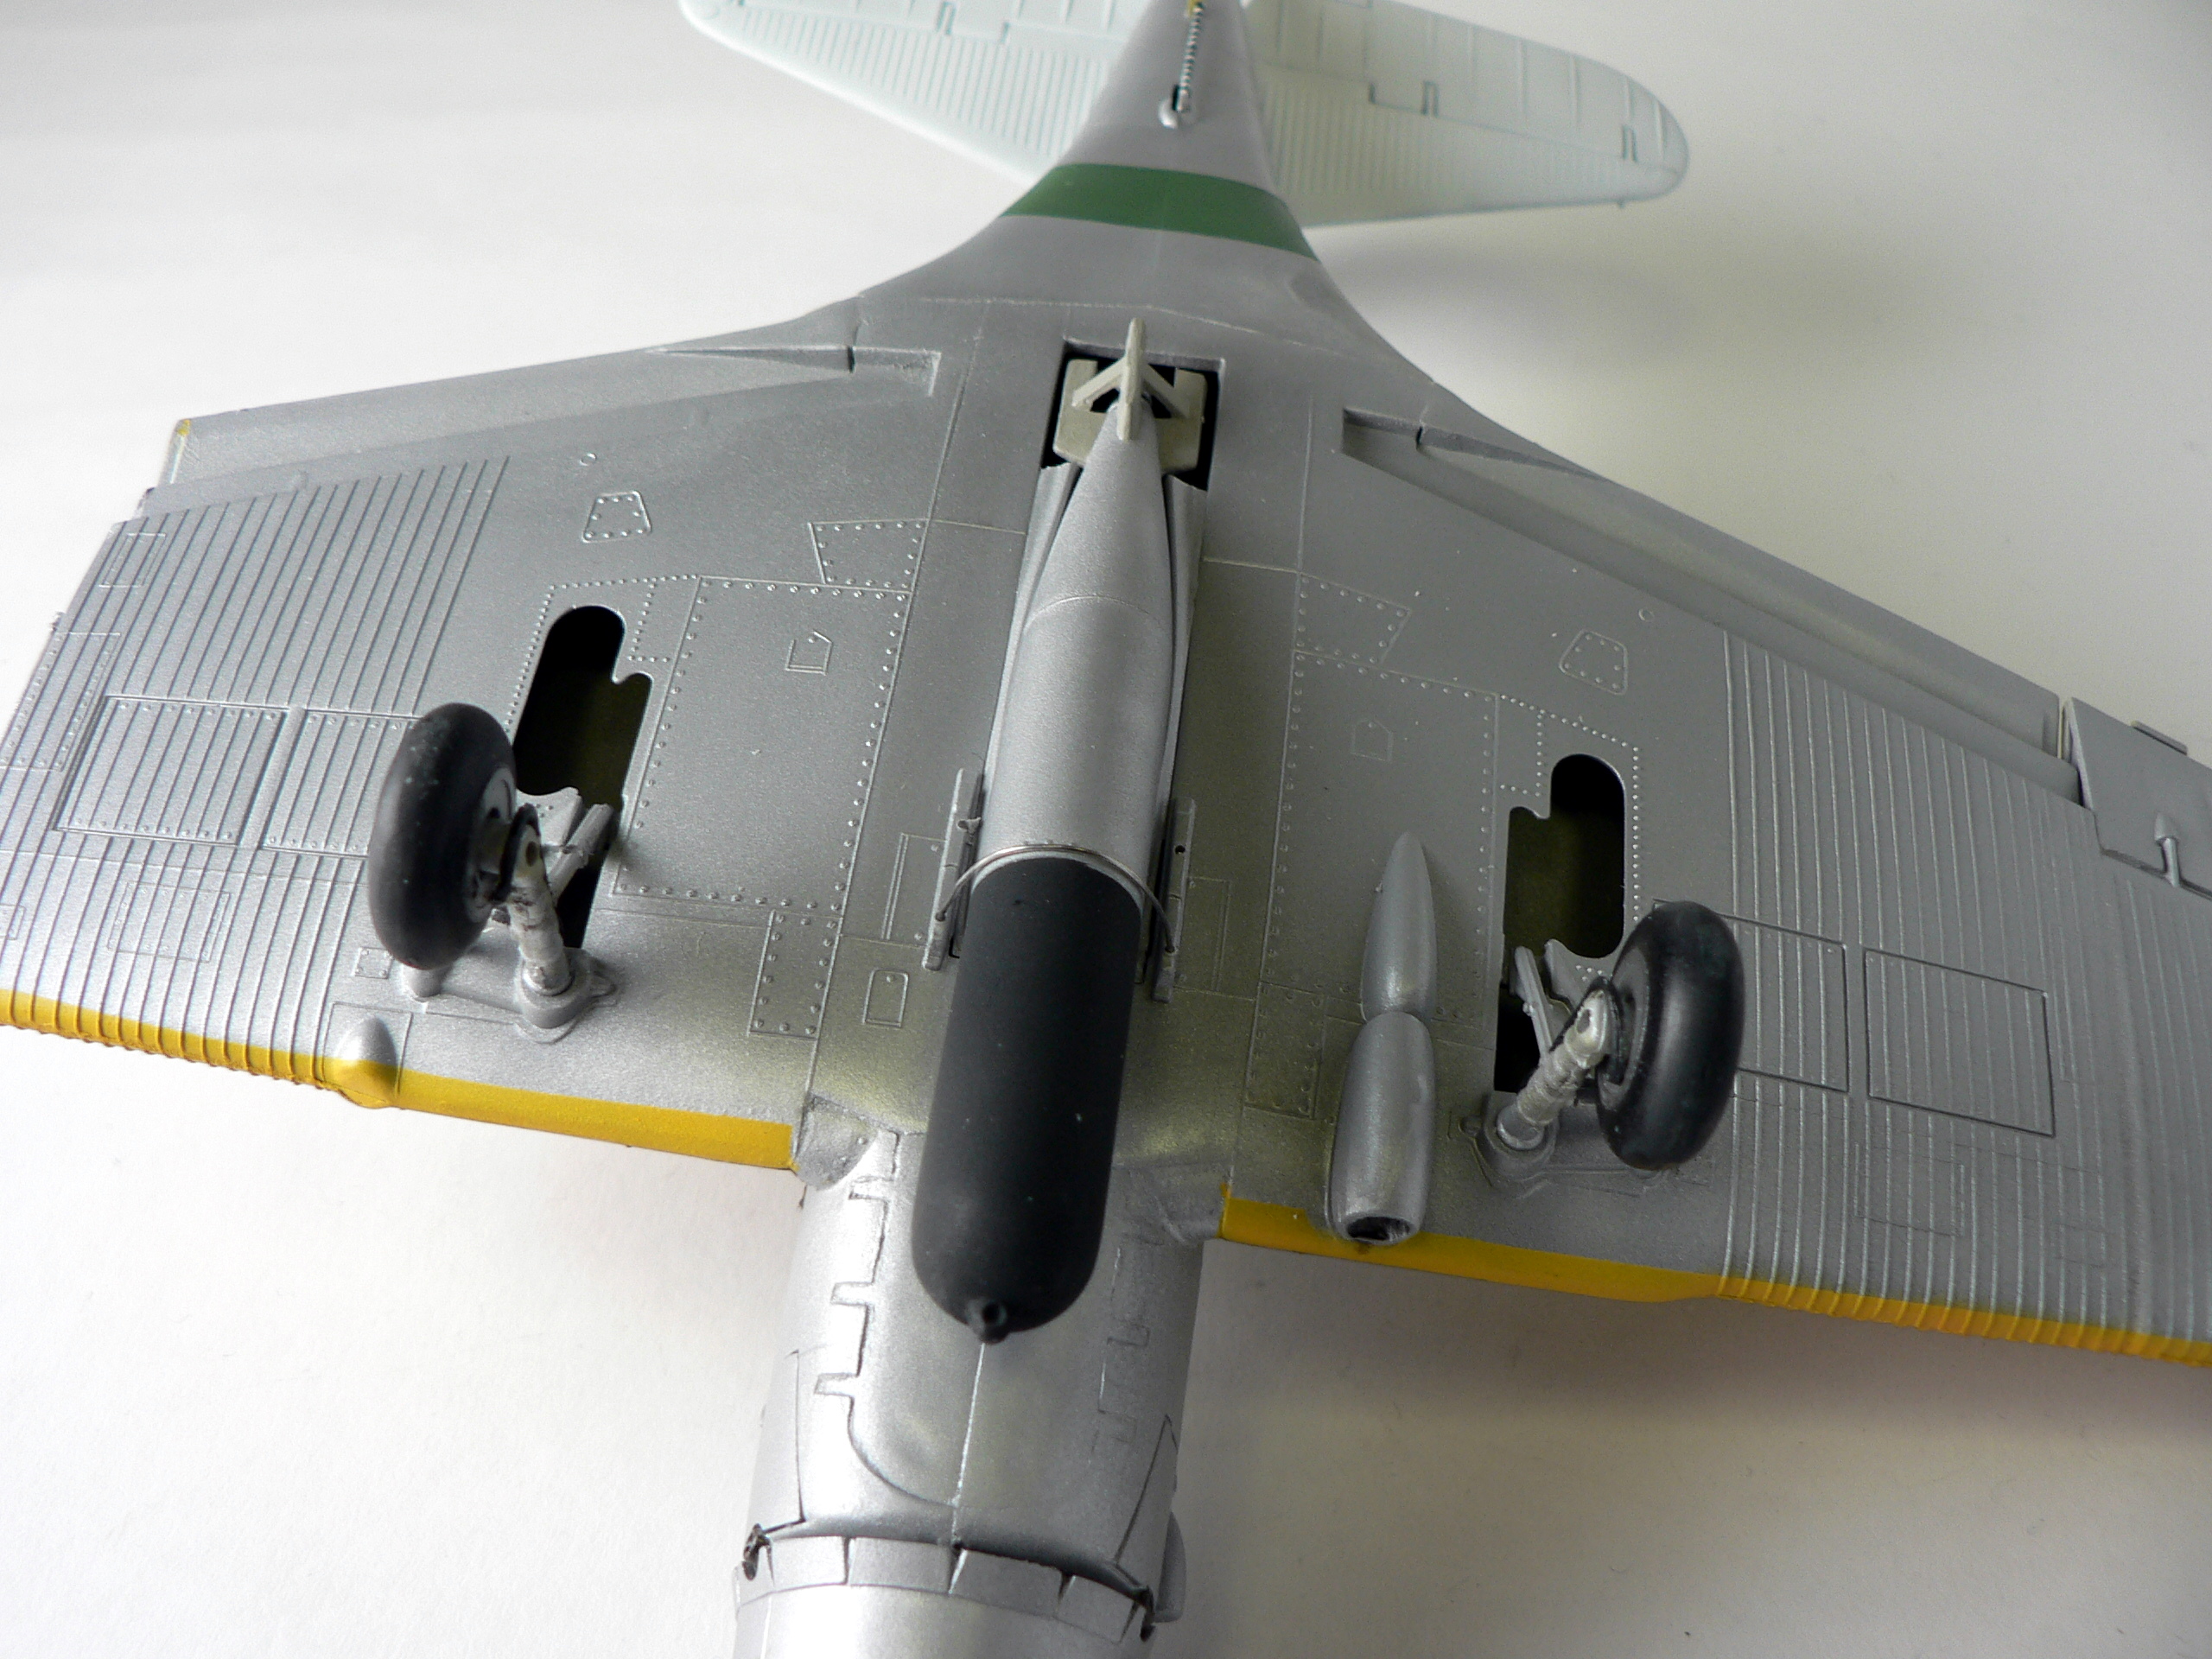
I then added details like the landing hook, which was painted white with black stripes. The Torpedo was assembled and painted silverish gray with a black head. After attaching it to the plane, retaining straps made from solder were glued to holes drilled onto the fuselage.
The clear parts were masked the old fashion way – with Tamiya tape and cut with a #11 blade. On dry fitting, it was clear that the rear clear parts are a bit thick to stack properly. So I filed down the innermost pieces’ bottom. After a coat of aluminum paint, these were attached. A scratched build pitot tube was added, as the one included in the kit is incorrect in shape – it should look like a trident. The propeller was painted and decaled – those tri-color tips decals in the Yellow Wings sheet really saved a whole bunch of work and time.
Finally, the folded wing was glued down permanently and the antenna was added with fishing line. Some very light wash was added to accentuate the movable surfaces and the engine exhaust area, but otherwise the plane was kept ‘pristine’ as it would have in peace time San Diego.