Mitsubushi A6m5 – Tamiya 2008 release
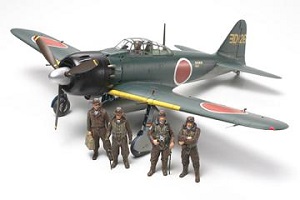
Tamiya’s Second iteration of the Famed A6M5 ‘Zero’ in 2008
This model was featured in Scaled Aircraft Modelling, Feb 2009 Issue.
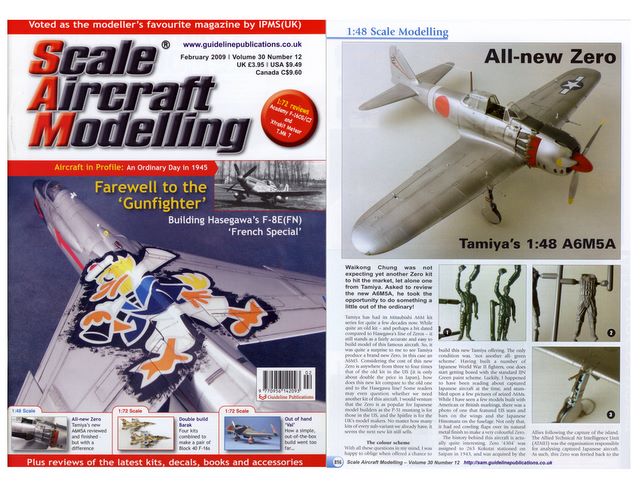
Tamiya has had its Mitsubishi A6M kit series for quite a few decades now. While quite an old kit and perhaps a bit dated as compared to Hasegawa’s own line of Zeros, it still stands as a fairly accurate and easy to build model of this famous aircraft. So it was quite a surprise to me to see Tamiya come out with a brand new zero, in this case an A6M5. Considering the cost is anywhere from 3 to 4 times that of the old kit in the US (it’s only about double the price in Japan), how does this new kit compare to the old kit and to the Hasegawa line? Some readers may even question whether we need another kit of this aircraft. I would venture that this aircraft is as popular for Japanese model builders as the P-51 mustang is for the US and the Spitfire is for in the UK. No matter how many kits of every sub-variant we already have, it seems the next new kit stills sells.
The color scheme
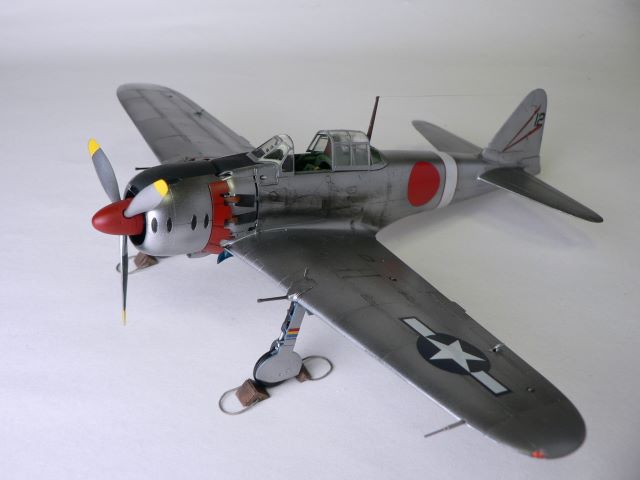
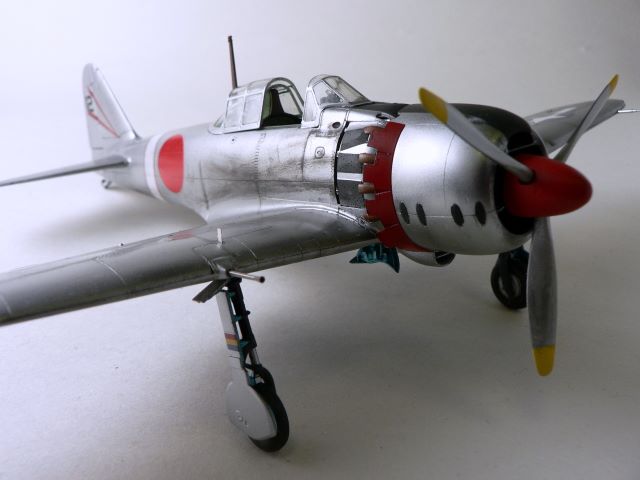
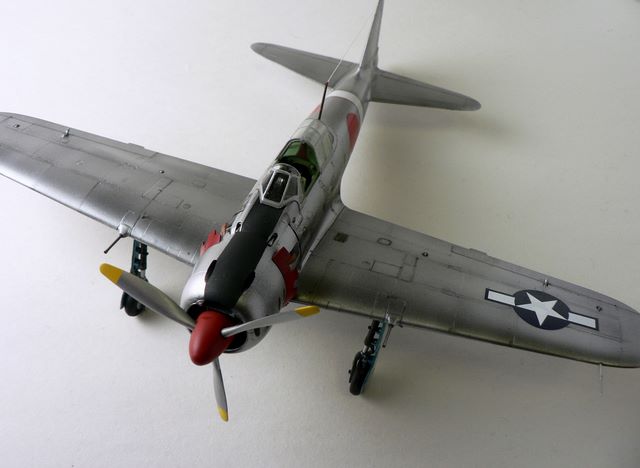
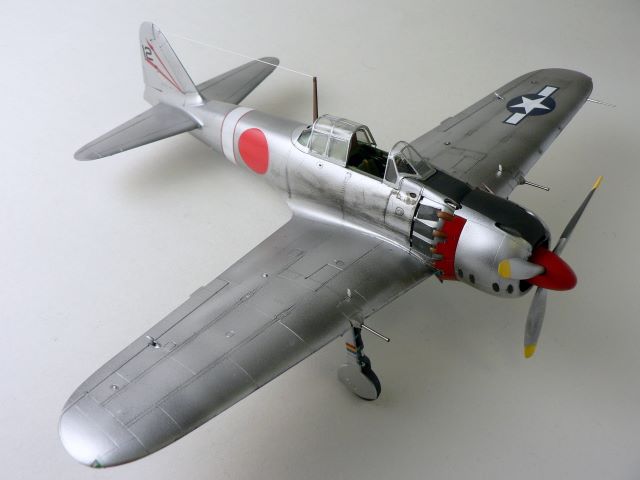
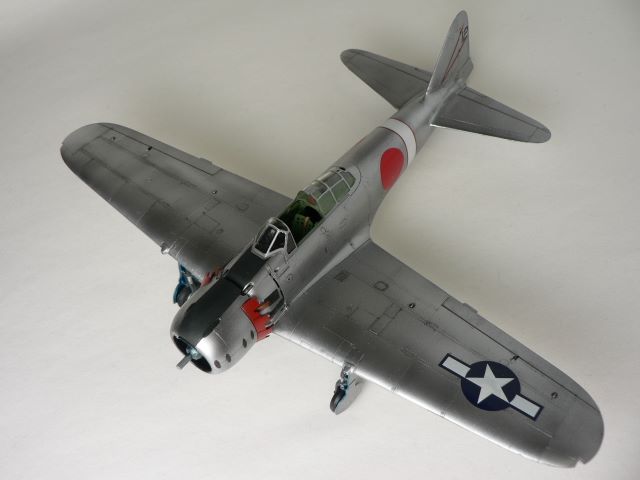
With all these questions in my mind, I was happy to oblige when offered a chance to build this new kit. The only condition was “Not another all Green scheme”. Having built a number of Japanese WWII fighters, one does start getting bored with the standard IJN Green overall planes. Luckily I happened to have been reading about captured Japanese aircrafts at the time, and stumbled upon a few pictures of captured A6Ms. While I’ve seen a few models built up with American or British markings, there was a photo of one that featured US stars and bars on the wings and the Japanese Hinomaru on the fuselage. Not only that, it had red cowling flaps over natural metal finish to make a very colorful zero.
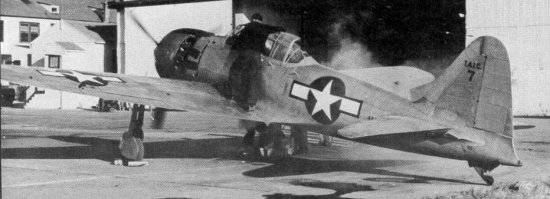
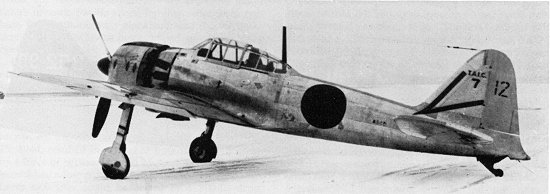
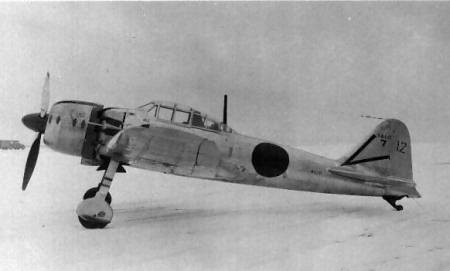
A bit of history behind this aircraft is actually quite interesting. This particular aircraft (SN 4304) was assigned to the 263 Kokutai stationed on Saipan in 1943 and was captured by the Allies after the capture of the island. The Allied Technical Air Intelligence Unit (ATAIU) was the organization responsible for analyzing captured Axis aircrafts. As such, this plane was ferried back to the US on the carrier USS Copahee in mid 1944. Eventually it was delivered to the Wright Field for US Air Force testing, painted with US markings and identified as TAIC 7 (photo above) . It was stripped of its green paint and kept in metal finish with US markings. It was repainted several time times with different color accents and at one point even had the name “Tokyo Rose” painted on the nose. It was during its time at Freeman Field, Indiana in 1946, that it sported both US stars and the Japanese Hinomaru with a white band in the fuselage. (photos below) The plane now hangs in the US National Air and Space Museum in overall green finish with the factitious tail number of 61-131.
Rising Decals produces a decals sheet that has this particular scheme in their “Dying Sun” Part 2 sheet. However, it’s in 1/72 only. For 1/48, I would have to use spare decals and some painting to get the scheme I wanted in that scale.
The Kit
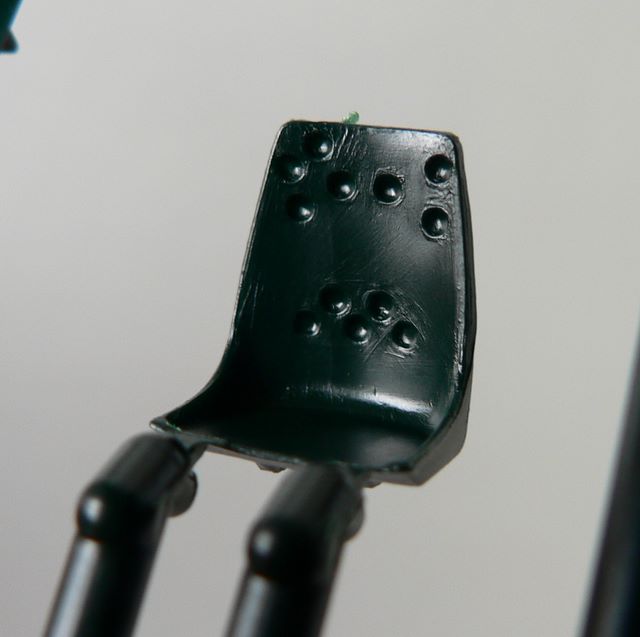
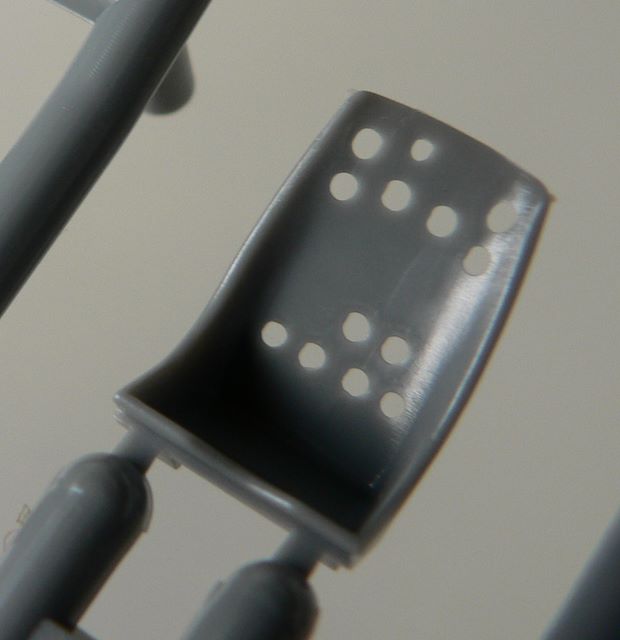
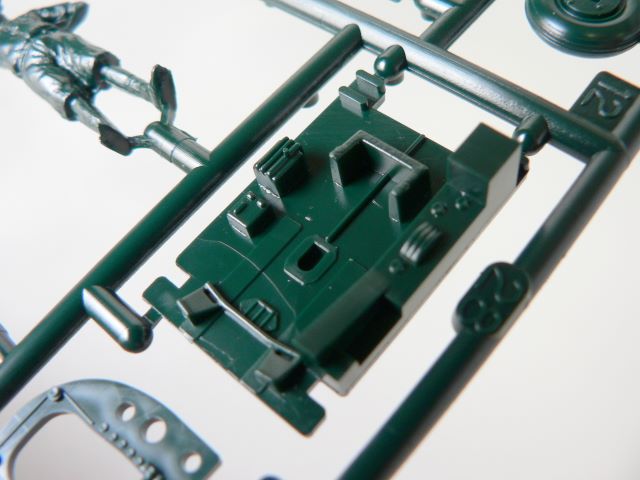
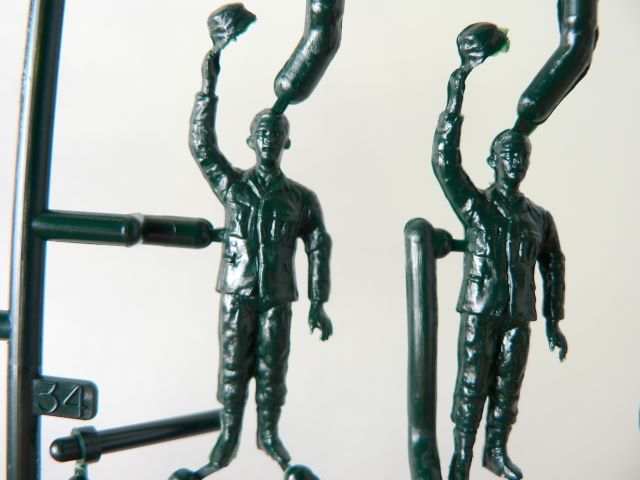
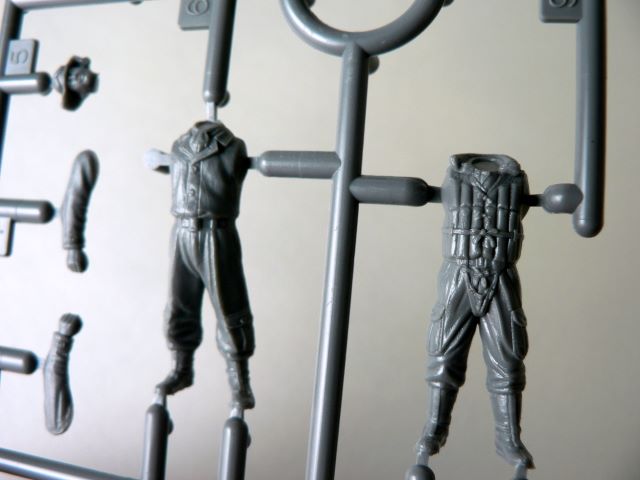
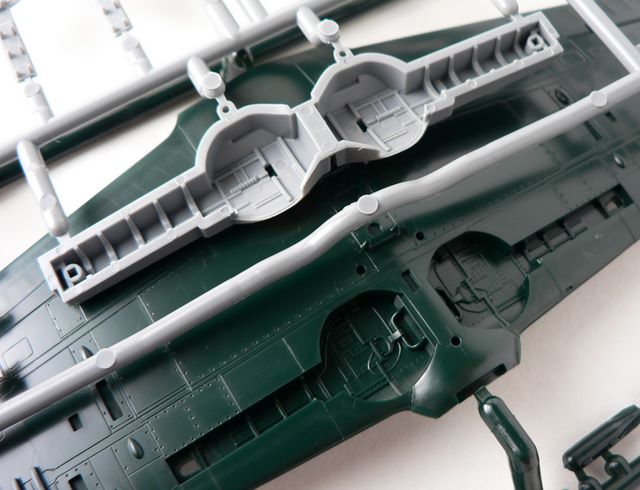
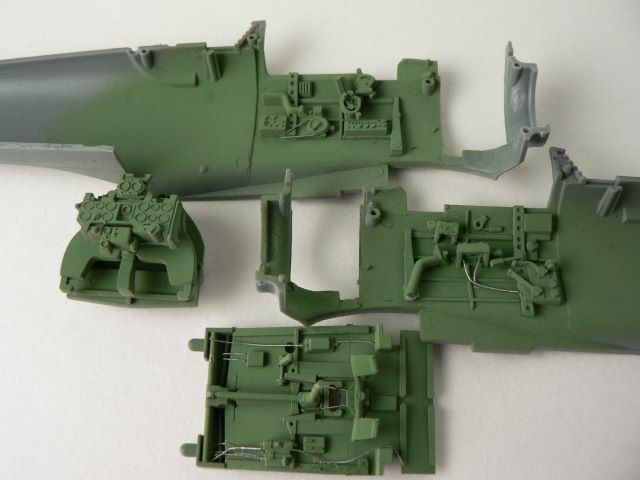
I’ve included several pictures comparing the new kit to the old one. As you can see, the cockpit floor is more detailed and there’s just no comparison between the seats. Not only are the lightening holes already drilled out, the new kit is much thinner and to scale. While the old kit had good details in the wheel well, it was too shallow. The new kit is much deeper and provides much crisper details. Both kits include figures, but the new kits’ are much more detailed and curiously a bit bigger. The new kit feature four pilot figures with interesting poses, and even include small decals for their uniform. (photos 3-9) The one with folded arms looks like a scaled down version of Tamiya’s 1/16 Japanese pilot.

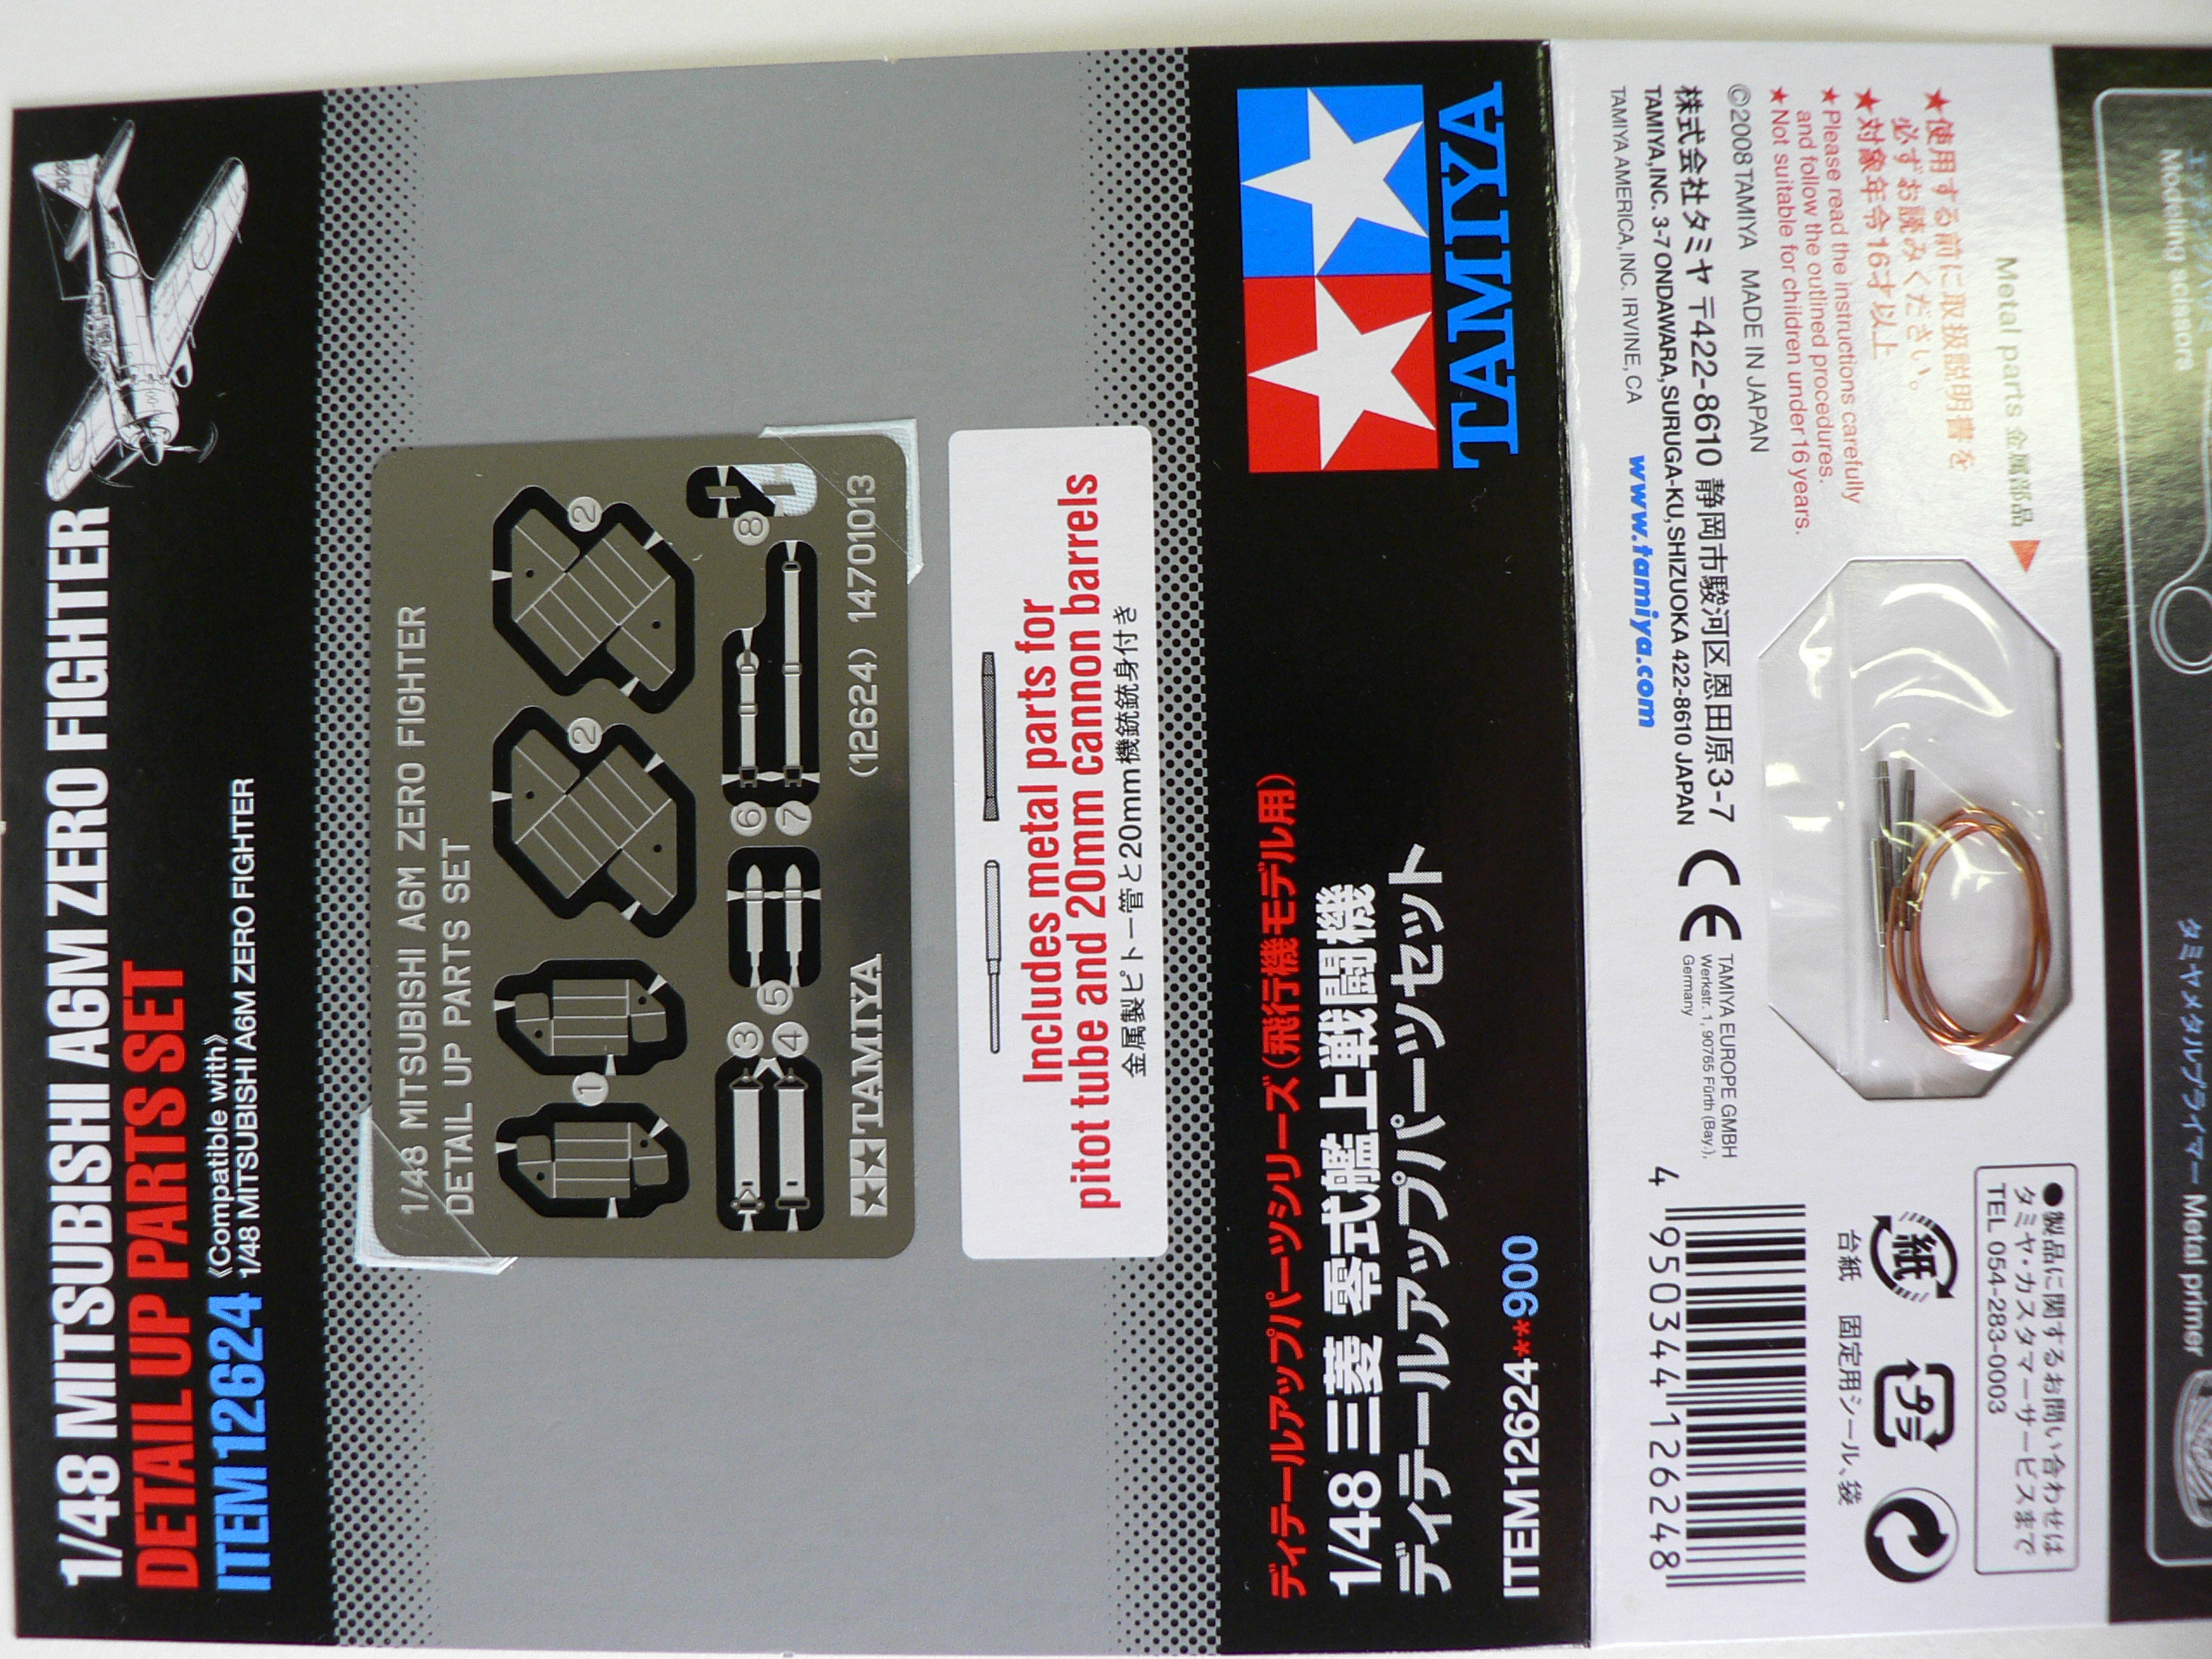
Tamiya has provided a small Etch kit (‘Detail’ up they call it). While definitely not a necessity, it does provide very nice metal cannons that are already hollowed – a God-send for someone like me who has not had success drilling out plastic ones. (photo 10) The replacement metal pitot tube is definitely sturdier than the plastic ones and the safety harness replaces the decals one in the kit. The wheel blocks are interesting if you are planning a diorama or just using them to pose with your finished Zero.
The Build
Most of the kit fits very, very well. I would venture to say that if a part didn’t fit well, you most likely did something wrong and should reexamine the step before committing to glue. The only exceptions were the gun covers on the wings that needed a bit of sanding and putting in order to fit flush.
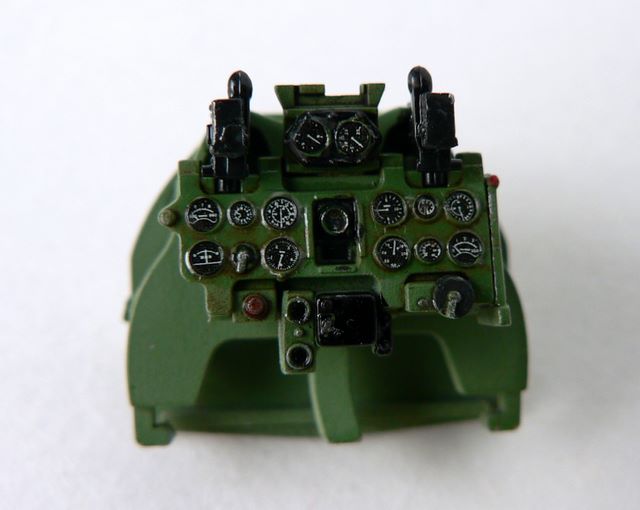
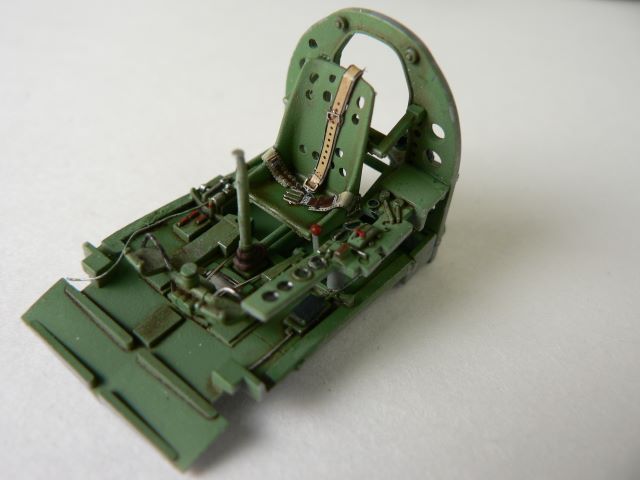
As usual, I started with the cockpit and what a cockpit! The use of several molded parts builds up one of the best stock cockpits I have ever built. The only thing required was some wiring to busy up the cockpit a bit. I then used thin soldering wire to add to the foot pedals. A layer of IJN interior green and some picking out of bits and pieces with yellow, reds, and silver was all that was needed to complete the painting. The instrument panel has nice raised details and individual decals are also provided. This is much nicer and easier to apply than a single attached decal sheet – as a single sheet requires either punching out the dials or using copious amounts of decals solution.
I used Eduard’s IJN PE seatbelts instead of Tamiya’s, as the Eduard had better detail. One exception was the shoulder belt, which was a bit short. For that, I cut out the decal belt with the backing paper still attached and glued on two small buckles to give it a more three dimensional feel. After an oil wash of burnt sienna to pop the details and weather the cockpit, a silver artist pencil was used to create scuff marks throughout.
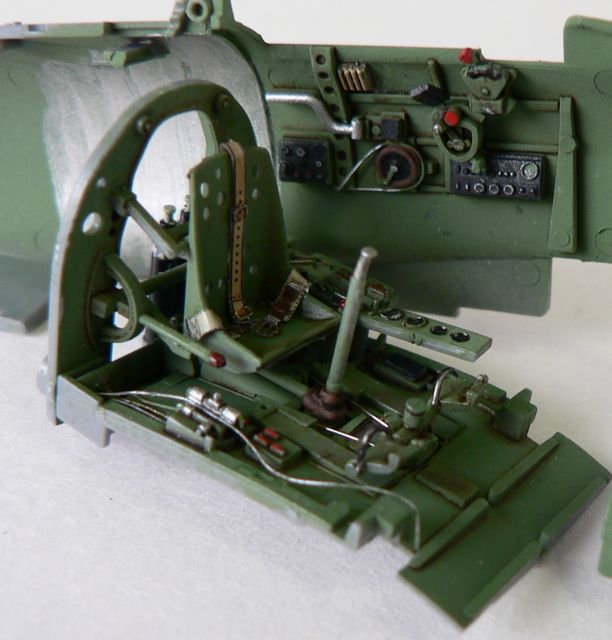
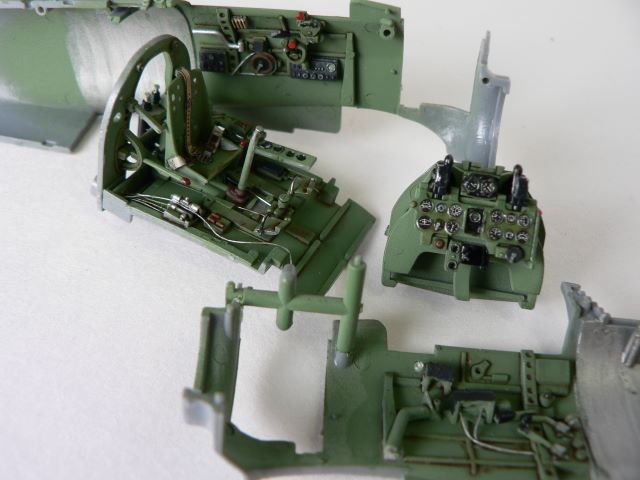
The cockpit was then sandwiched between the fuselage halves. Tamiya includes a bit of detail in the firewall. Instead of molding in depressions, they provided separate panels so that once installed, vents openings exist where they should. As with the cockpit, it’s thoughtful engineering details such as this that makes you appreciate the work that went into the kit’s design. The fuselage bottom has a slot with a rubber grommet so that you can later insert or detach the fuel tank without glue.
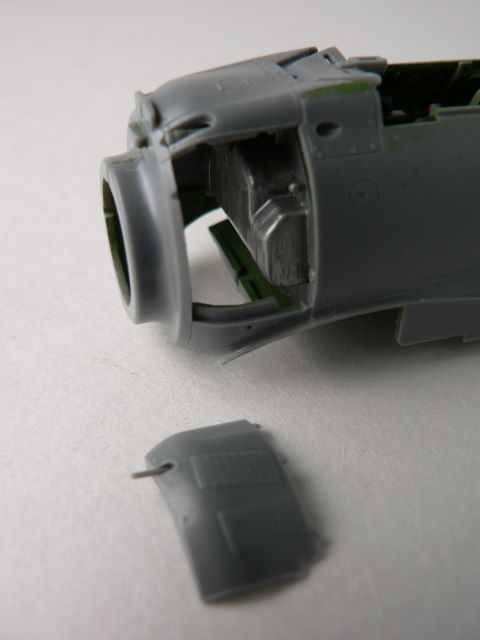
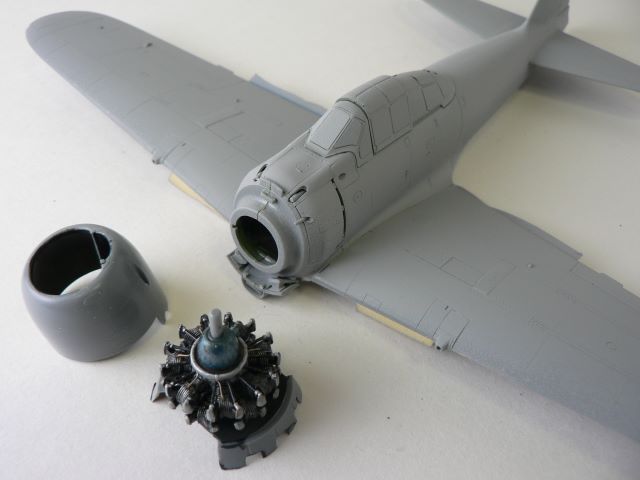
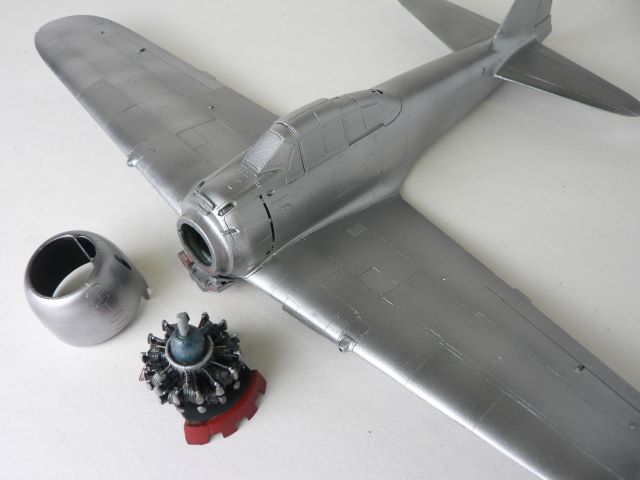
The engine was next and was easily put together. I added only ignition wires to the front row of cylinders keeping in mind that once closed, it’s nearly impossible to see details in the back row. Parts are keyed so that you can’t put them in improperly. You have a choice between closed or opened cowling flaps. I deviated a bit from the instructions here by not mounting the cowling and flaps first to make painting easier by eliminating the need to mask.
The kit provides masks for the clear parts, but unlike Eduard masks, they are only printed and not cut. The outlines provided are spot on, so if this extra step reduces the kit’s cost, I’m all for it since it’s much easier than masking from scratch.
Painting
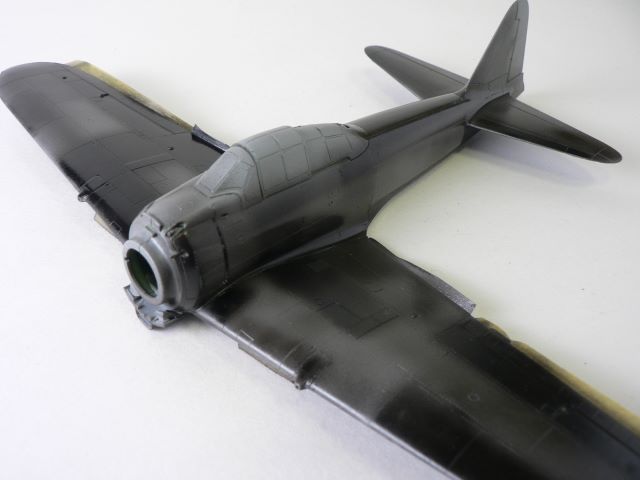
At this point, you suddenly realize the build was amazingly simple and it’s time to paint. As usual, I primed with Taimya white primer in aerosol form. In order to achieve a natural metal finish, I next sprayed a coat of gloss black. Being a somewhat lazy modeler, I tried to save myself a step by painting different shades of ‘black’ within different panel areas. The idea behind this variation of preshading was to eliminate later masking to get different shades of metal. After giving the paint a night to dry, I sprayed on light coats of Alclad 2 Duraluminum. The finished result did give a variation in tone, but I did eventually mask off 2 or 3 panels to add more contrast with Aluminum.
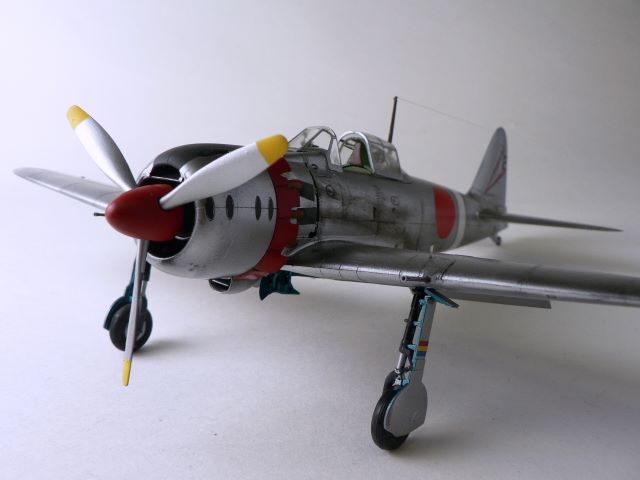
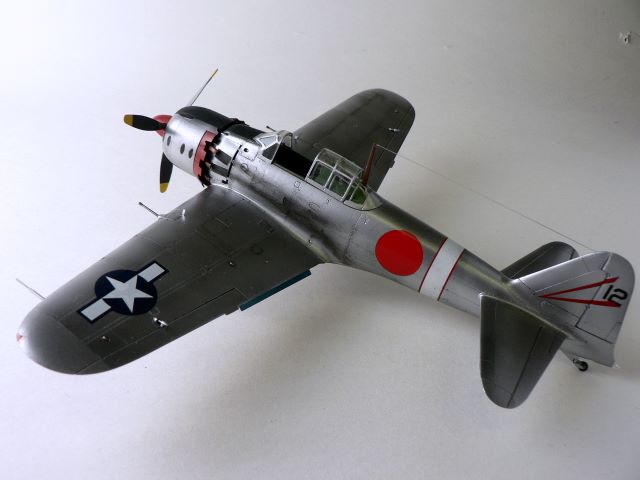
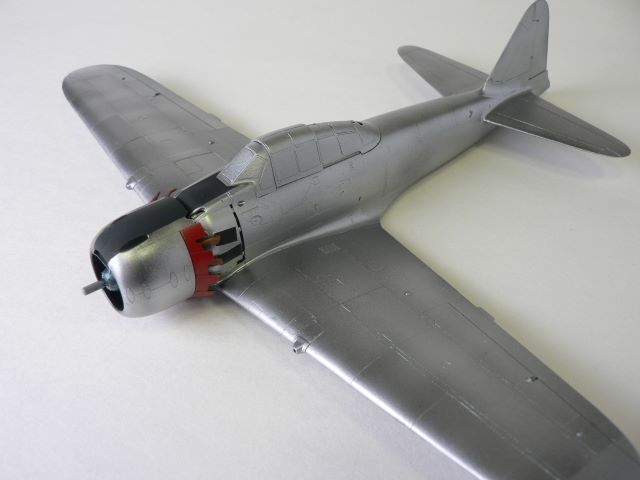
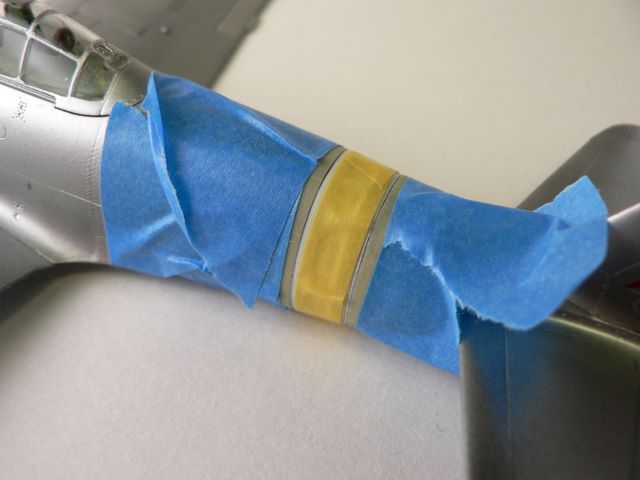
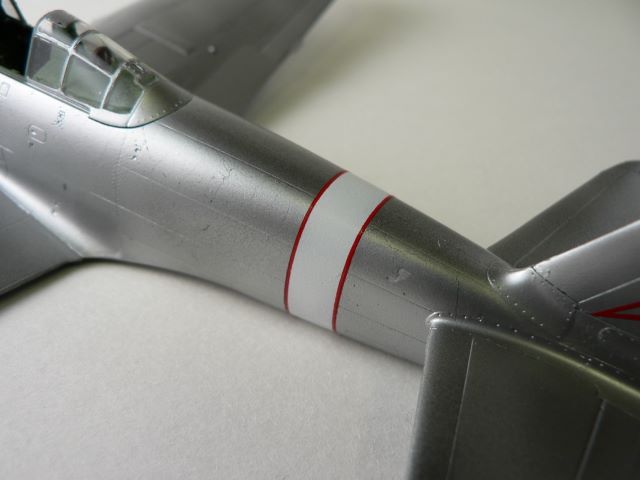
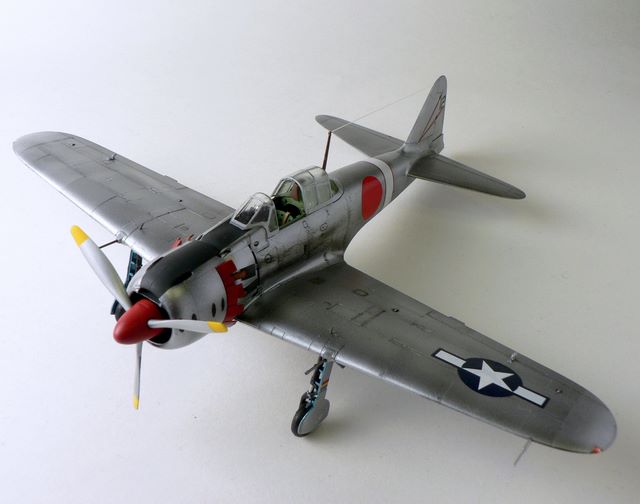
I painted the cowling flaps flat red and then attached the cowling/engine assembly to the fuselage. (photo 20) More masking was done to paint the anti-dazzle panel. Then I needed a white stripe with thin red borders. Lacking any suitable decals, I decided to paint this. First I masked for the white strip and after laying down white paint, I masked the center section, leaving just the thinnest of outlines. After red paint was laid down, the masking came off for the finished band. (photos 21, 22)
Final assembly and Decals
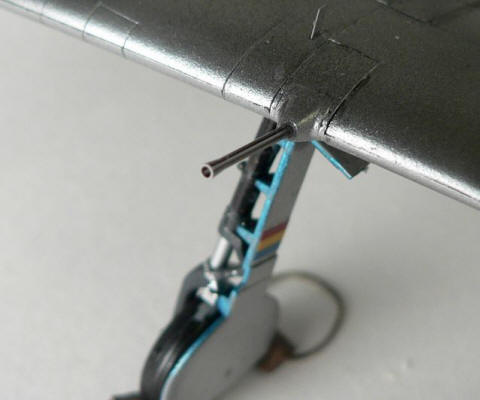
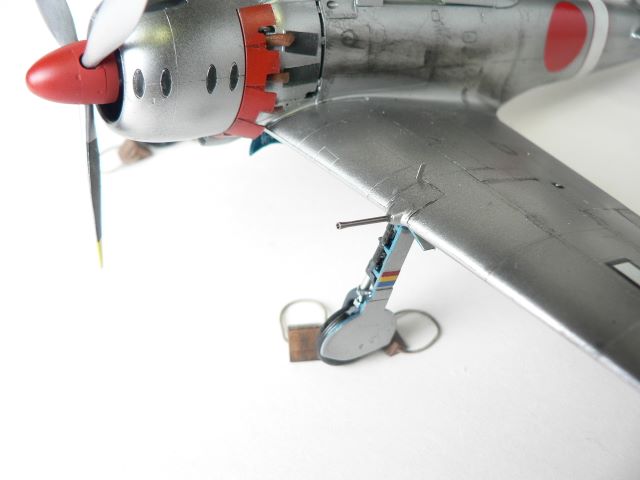
At this point, I added the landing gears. A bit of warning here in regards to following directions. I am accustomed to fitting the gears first and then the gear doors in aircraft, and that’s precisely what I did here. However, the instructions require you to put the door in first, as they are molded with part of the inner wheel well to provide a large gluing area for a strong bond. Failing to do that, I had to cut off part of the gear door to make everything fit without having to break off the attached landing gear. The wheel well and landing gear were painted with a mix of Tamiya ‘Metallic Blue’ and ‘Clear Green’. This actually recreates the controversial Aotake very well. Samples of the actual paint I’ve seen show a very bluish shade when the color is new and a much greenish shade when it has been exposed to the elements. The kit also offers a choice between dropped or retracted flaps. I chose the dropped flaps and they were a snap to install as they have molded attachment point that guarantees the correct angle. The same Atoake mix was used for the inside flaps.
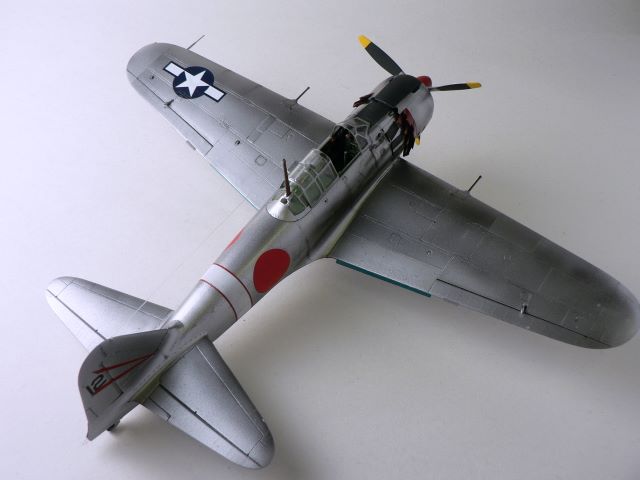
The decals were next – raiding my spare box, I was able to find all the correct markings, including the red “V” and number “12” in the tail. No clear coat was added before applying the decals, as the underlying metal paint was smooth enough not to cause silvering. Nor was any clear coat added afterwards. Microsol decal solution was then added to melt the decals down into the paint. The spinner was then painted red with yellow tipped propellers. The metal plates underneath the exhausts were masked off and painted black as per the reference photos. (photos 23, 24)
Light weathering was accomplished with a black oil pin wash. One of the reference pictures clearly shows heavy exhaust stains, which looked great to me so I duplicated that with Tamiya weathering pastels. They were applied with the included sponge applicator and were much easier to control than my usual method of airbrushing Tamiya smoke. (photo 25)

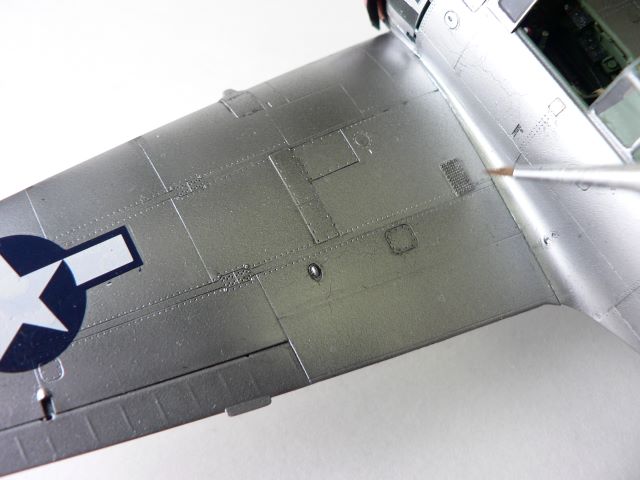
At this point, I attached the remaining details – the antenna, wiring, pitot tube, and cannons. Finally, I painted the insides of the clear landing lights with clear red and green before attaching them to the wing. (photo 26) Not quite finished yet, I assembled the wheel blocks (photo 27), painted and then weathered them.
I was also able to assemble 3 of the figures – unfortunately I lost the head of the last one – and tried my hand at figure painting. After referencing a few books, especially Shep Paine’s chapter on figure painting in his diorama book, I delve into this new area. I probably spent more time trying to paint these little guys than I did on the actual plane. After much agonizing hours under a magnifying glass, I hopefully did a presentable job. One thing I definitely learned was admiration for figure painters!

Final thoughts
So did the world really need a new Zero kit? Well, Tamiya definitely has created a state of the art kit in terms of fit and finish. I’m not a rivet counter, but the kit seems accurate enough to me. I will leave the question of whether the kit is worth its premium to the reader. As value of your modeling dollar depends on your personal outlook. However, this new kit definitely out-class the old Tamiya one by a long shot and has more details than the Hasegawa line, making this the best 1/48th scale A6m5 kit available today. I will be looking forward to other variant of this plane from Tamiya in the future – perhaps a A6m3 Rufe?
My Thanks to HobbyLink Japan for the Kit along with the Etch set.