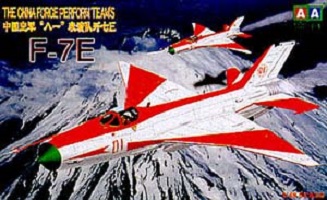
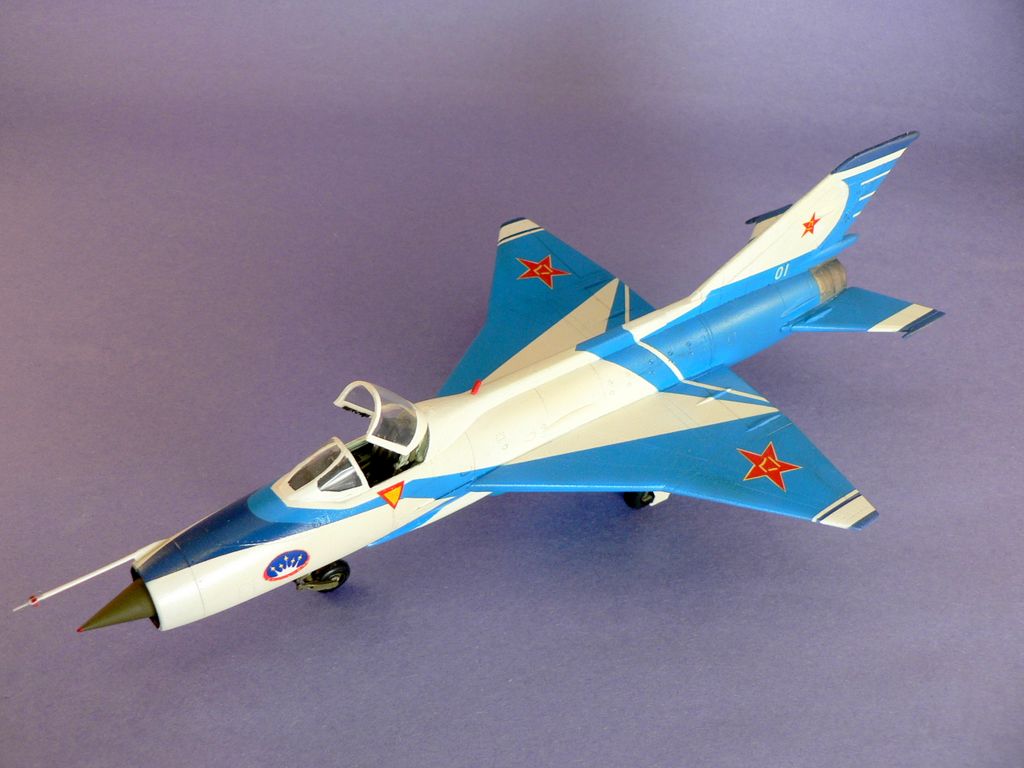
J-7E AA Models 1:48
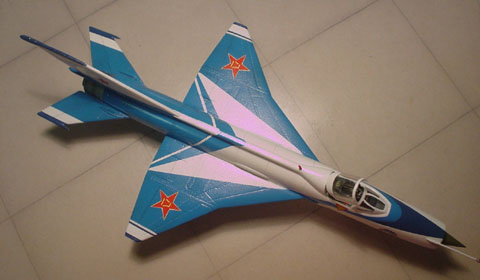
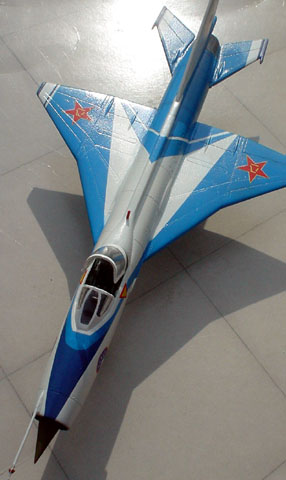
Here’s an unusual one, J-7EB, a Mig-21 derived fighter used by the Chinese airforce (PLAAF). This version is equavalent to the J-7MG version for export, but is specialized for their “August 1st” flying demonstration team. Since this model came out, the team have updated to a much more attractive White/Blue scheme.
The Kit is from AA models in China, I’m not even sure this company is still in business. I won this model as a door prize at a local model show and I do
still see it availabe at some online retailers.
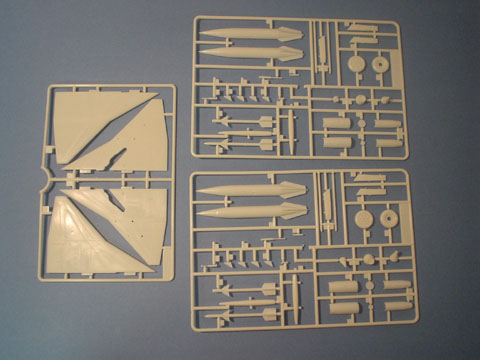
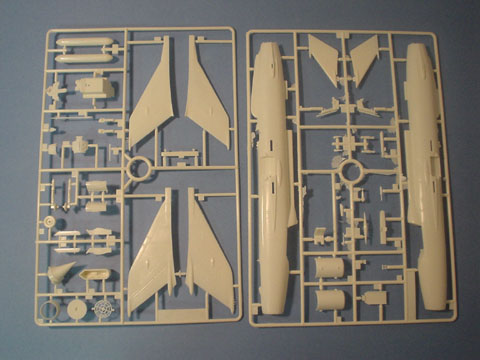
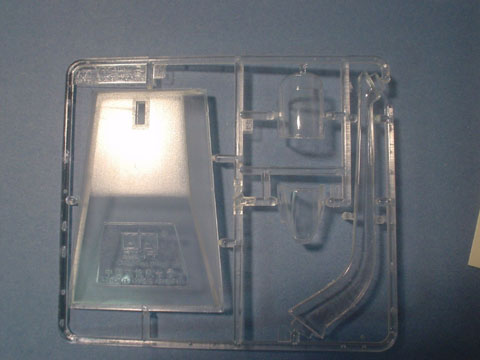
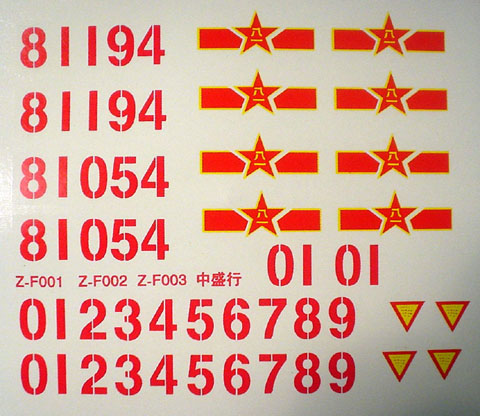
The Kit comes in 4 sprues of white somewhat thick plastic with engraved panel lines. There is some flash, but not an excessive amount. The decals has the PLAAF markings, along with the danger signs and numbers to do any of the flying team planes. There are no stencial otherwise, but then base on reference sources, the actual planes seems to be very clean and devoid of much markings. The clear parts are a bit too think and includes a stand.
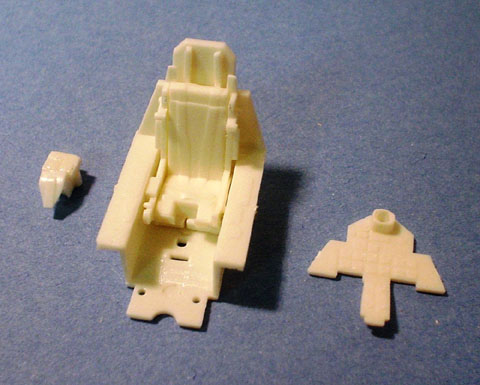
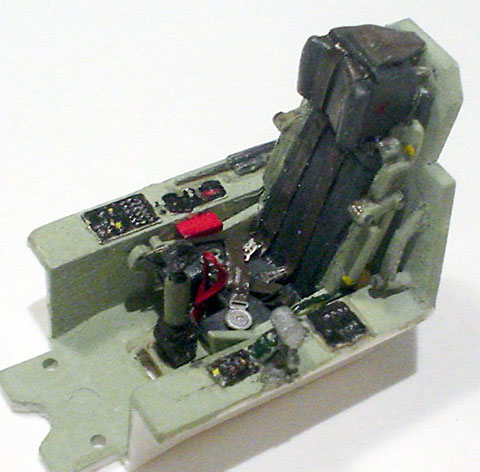
The cockpit has a couple of strikes against it. The tub is devoid of any details besides some bumps on the side panel, the molded-in seat belts are much too shallow. The instrument panel has some generic circles and squares as dials. Finally the cockpit supplied is of the wrong type being a Mig-21PF, hence the big 1960’s era radar scope on top. The F7Eb has a very different layout. While I don’t consider myself a rivet counter, the errors and lack of detail was just a bit too much to leave alone. Besides, I have been reading one of Mike Ashley modelling books (Kalmbach publishing, the folks that publishes Finescale Modeler) and have been quite eager try some scratchbuilt cockpit techniques.
 So I sanded down the instrument panel and added Reheat dials decals and brass bezels. I made sure to add the most prominent characteristic of the real panel – the MFD panel on the right, the large artificial horizon in front, and the set of black boxes with white dials on top (I have NO idea what those boxes are). The dials are 24guage jewelry wire that was inserted into holes drilled into the plastic. I even added 2 toggle switches made with 30 guage wire in the same manner. However, with hindsight, the wiring details was wasted in 1/48 scale. I had originally seen this in 1/32nd, and the results were impressive. But in this smaller scale, some drops of paint probally would have sufficed. In any case, the panel was finished with some dark gray paint and silver, white, and red paint for some details. The MFD was Tamiya clear green over white followed by Future.Finally a silver pencil was used to highlight the bezels and edges.
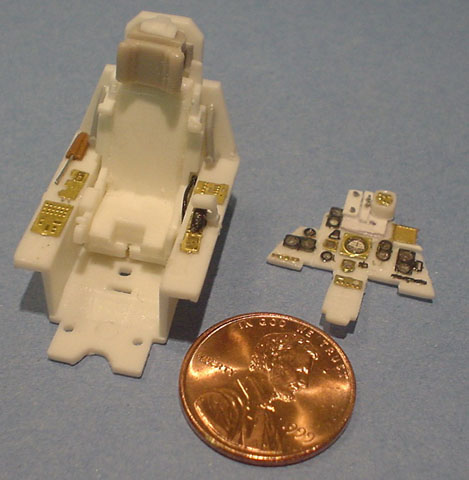
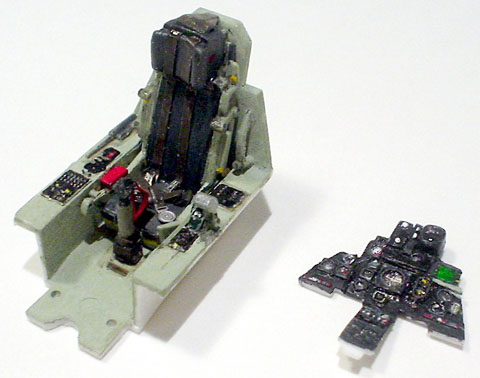
The seat headrest was cutoff and replaced with one from an parts box. The seat belts were made with thin foil (from disposable contact lense containers) and finished with reheat buckles. This was the first time I used foil as seat belts, and they came out better than my previous attempts using paper/cloth/tape, as the foil can be easily folded onto itself to create a more natural belt placement. I then added a red ejection seat handle made with thin wires from some old electronic wiring. A throttle quadrant was built with some sprue and 1/3 of a wheel from a 1/72nd Bf-109. Some rehead brass ‘consoles’ were added to the side panels, after which the assembly was painted and details picked out.
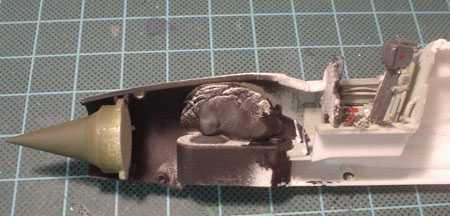
The finsihed cockpit tub was glued to the fuselage and weight was added by wrapping some fly fishing in modelling clay. This was stuffed behind the nose cone to make sure the finsihed plane will not be a tail sitter. Once the two halves were closed up, you can see an immediate problem behind the cockpit, There’s a huge slot and two bumps meant for the clear part to be sandwiched so that it can open & close once installed. Obviously, the real plane did not offer such a mechanism, so it had to be filled and sanded out. The first of much filling and sanding, as the wing root, landing gear bay, and numerous other places had noticable gaps.
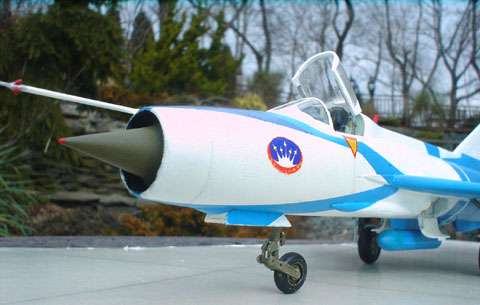
I then scratched built the armor glass plating and glued to canopy on with Testors clear glue. After masking the canopy with Tamiya tape, the plane got a coat of Taimya spray gray primer. After fixing up some areas, a coat of Tamiya white was airbrushed on. At this point, the compilicated masking was done based on referenced photos and more tamiya tape cut into strips. The large areas were then covered up with Blue painters tape.
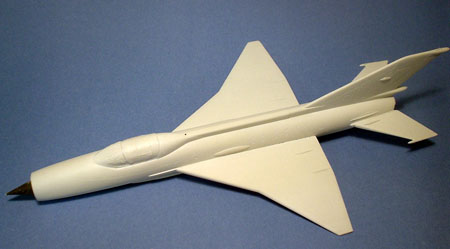
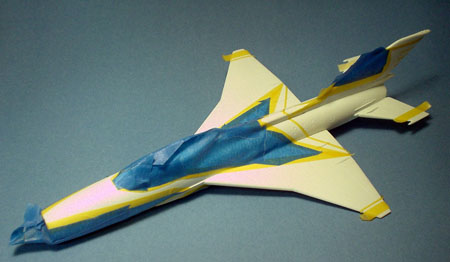
The blue paint consists of mainly a bright blue with areas of a darker blue. Unfortunately, I had mixed a blue that was too dark for all the unmasked area. So I had to remask and laying down a lighter coat of blue on top. This mistake did give me a chance to try some preshading techniques, but mainly on the bottom area as these planes are very well maintained.. So here’s the plane with its initial painting done. The next job will be a wash & decals.
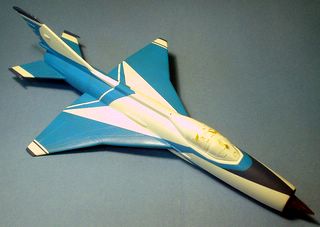
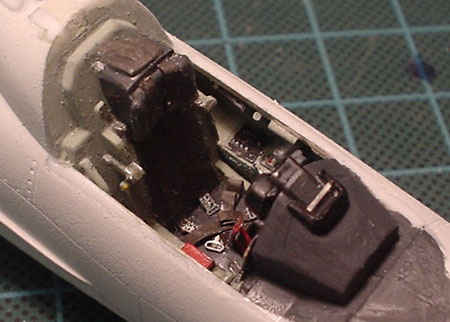
I sprayed a layer of PollyS gloss and then used thinned Tamiya smoke for a wash. Only the main control surfaces got a full treatment of wash, the rest of the plane, espcially the white area, were minimally emphasized. These demonstration team planes were very, very clean based on all reference photos. The next area that needed work was reattaching the canopy back into an opened position. Since I had filled the orginal incorrect hinge mechanism, I had to scratchbuild a new system. I did this by using CA glue to attach a brass rod onto the inside canopy, covered this with plastic card, filled the gap with white glue and after everything was dry, painted it white. You can see the result below with some left over photoetched frets I used as the canopy locking mechanism. I then drilled a hole at an angle the rear cockpit, and added a piston mechanism next the seat which the real planes use to open and close the canopy.
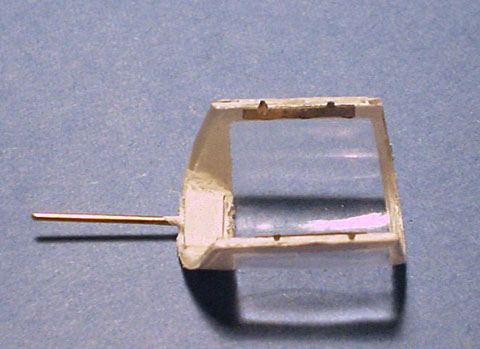
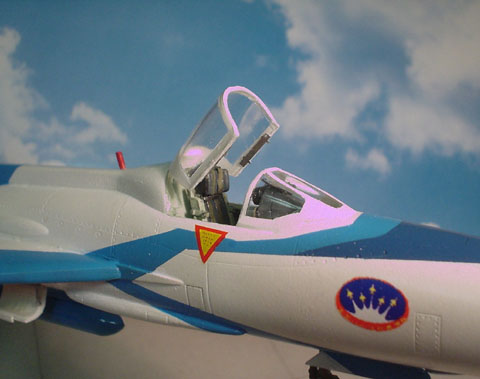
You can see how the canopy now stays open in the correct position.
This was also the first time I had tried to print my own decals on an inkjet printer. The kit had come with decals for the old red/white scheme. This new blue/white scheme have bigger stars on the wing and a new team badge on both sides of the nose. I downloaded the badge from the internet and printed it on Micromark white decal paper. After spraying it withe the supplied fixative and waiting a day, the were applied with no problems. At first them seemed a bit think, but some Microsol set solved that problem. I couldn’t get a good picture of the star, so I drew my own using Microsoft Visio. After the decals, another coat of PollyS gloss were used to seal everyhting. At this point, the landing gear and various attennas and pitot tubes were added, and the model is complete.