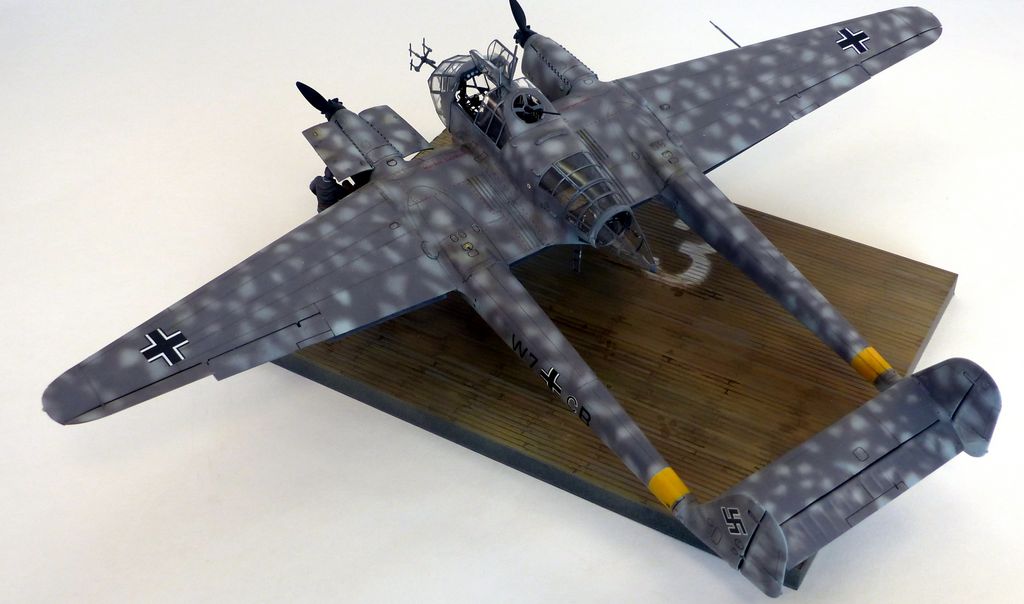
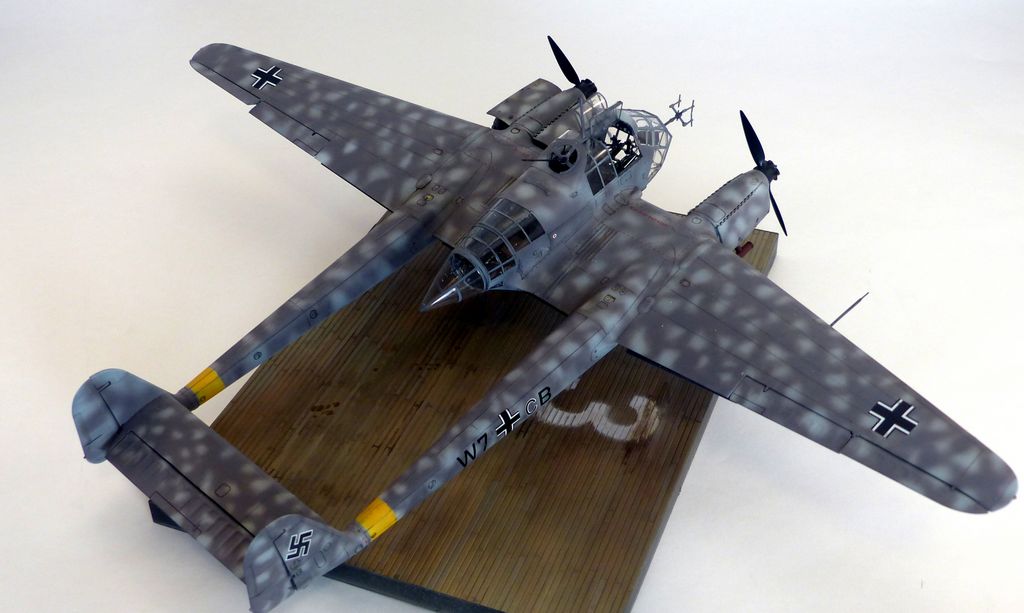
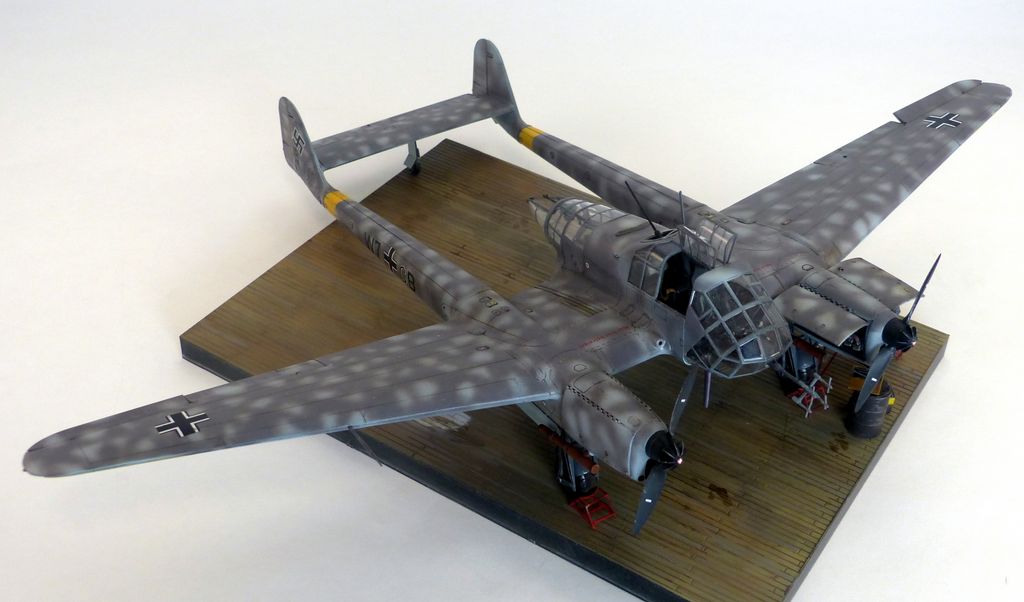
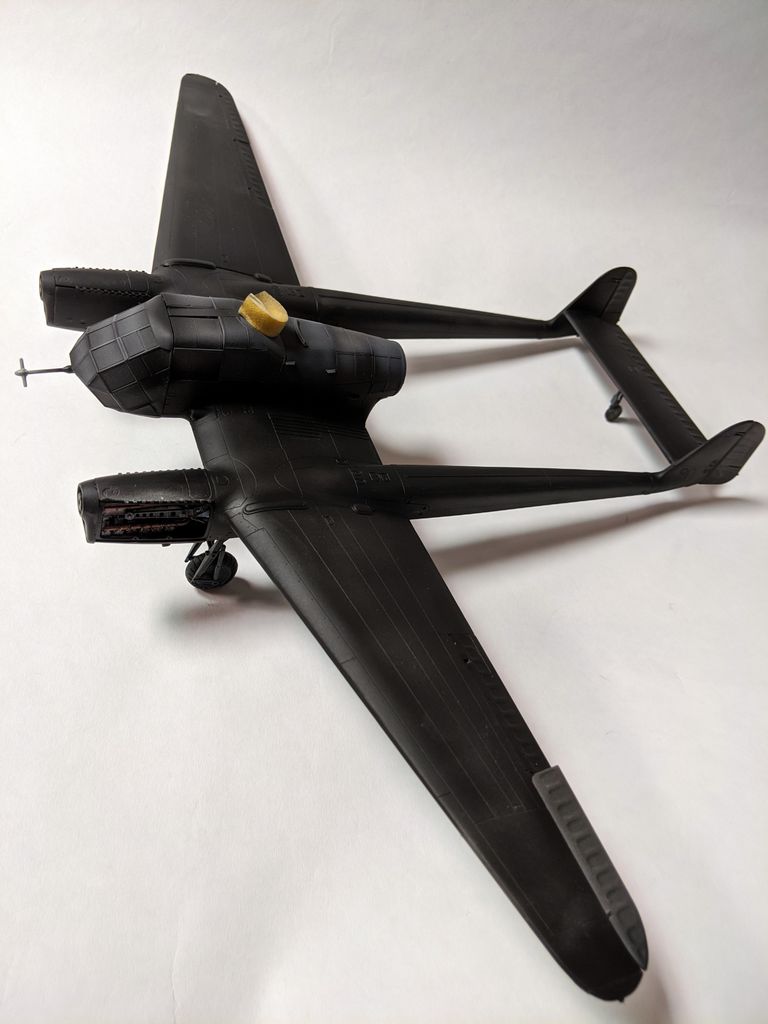
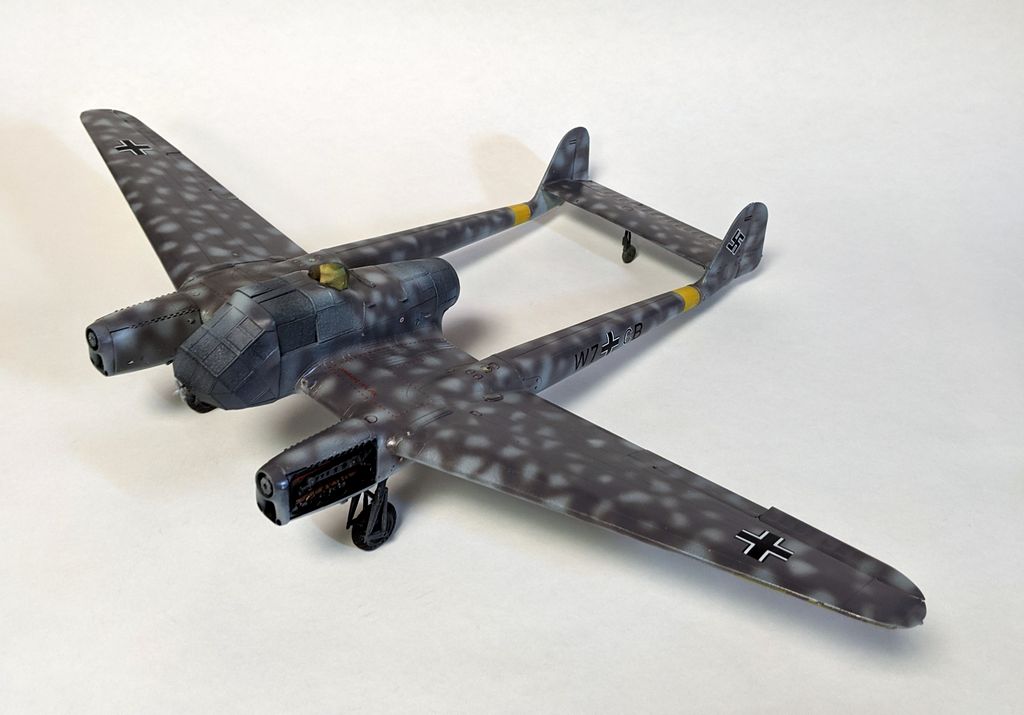
Focke-Wulf 189A-1 ‘Nacht Jager’
GWH Focke-Wulf 189A1 Night Fighter version
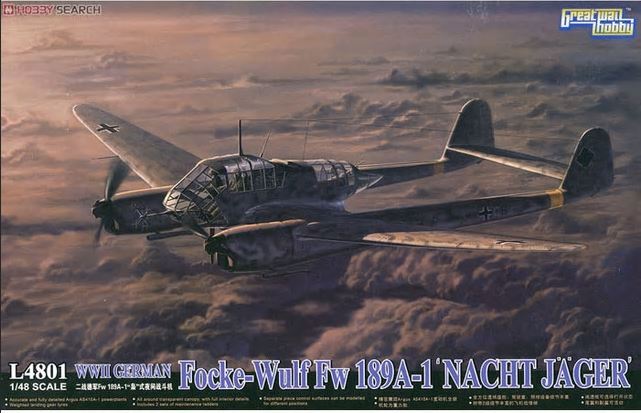
Great Wall Hobby is a fairly ‘new’ model company, maybe 12 years old as of this writing. Heard good things and wanted to give them a try. This FW 189 and the BV141 are two rather unsual ww2 luftwaffe planes that I’ve been meaning to add to my collection. GWH put out the original fw189 kit about 10 years back and have since put out 2 other versions, this night fighter version, and a version on skis I believe.
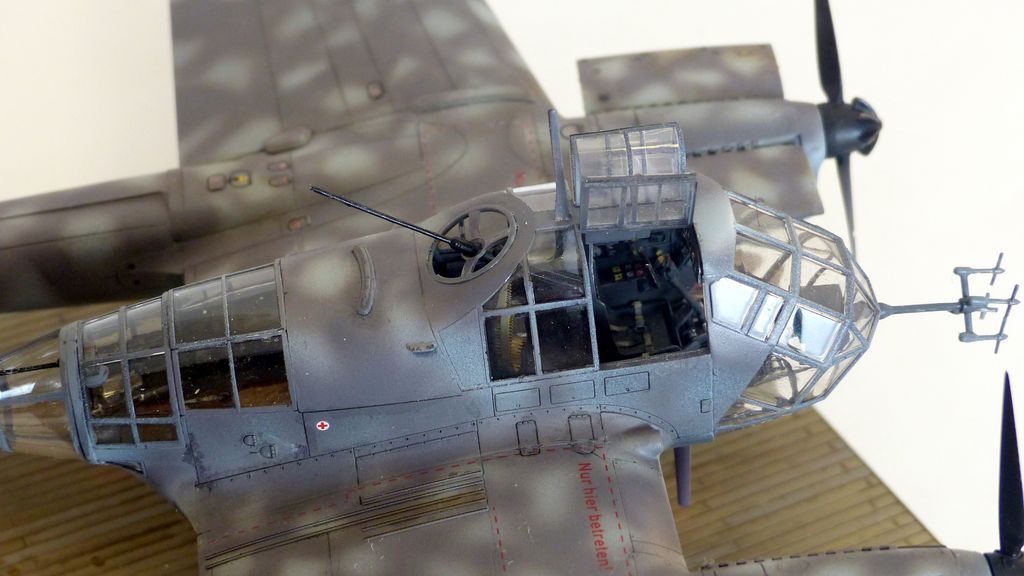
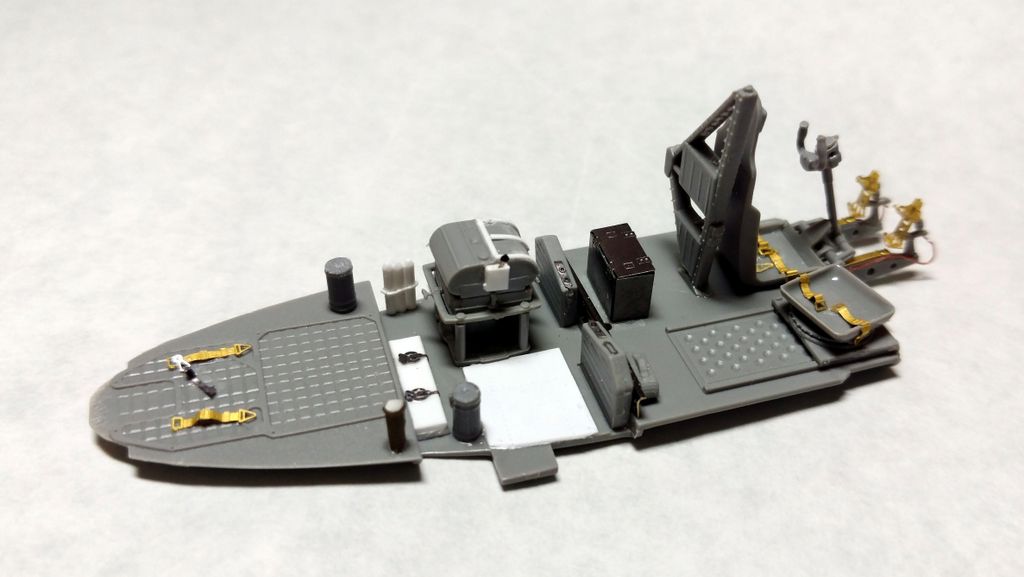
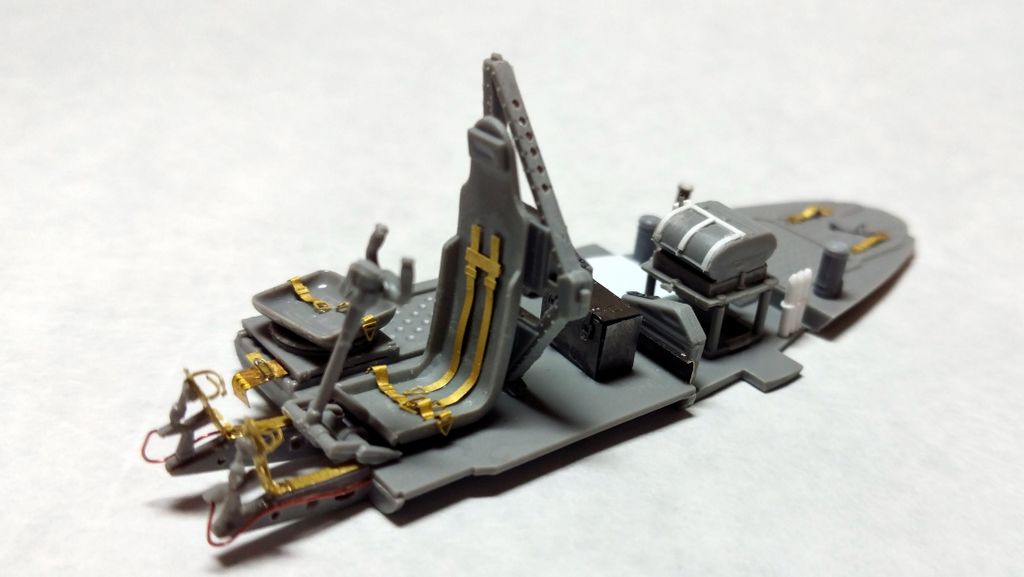
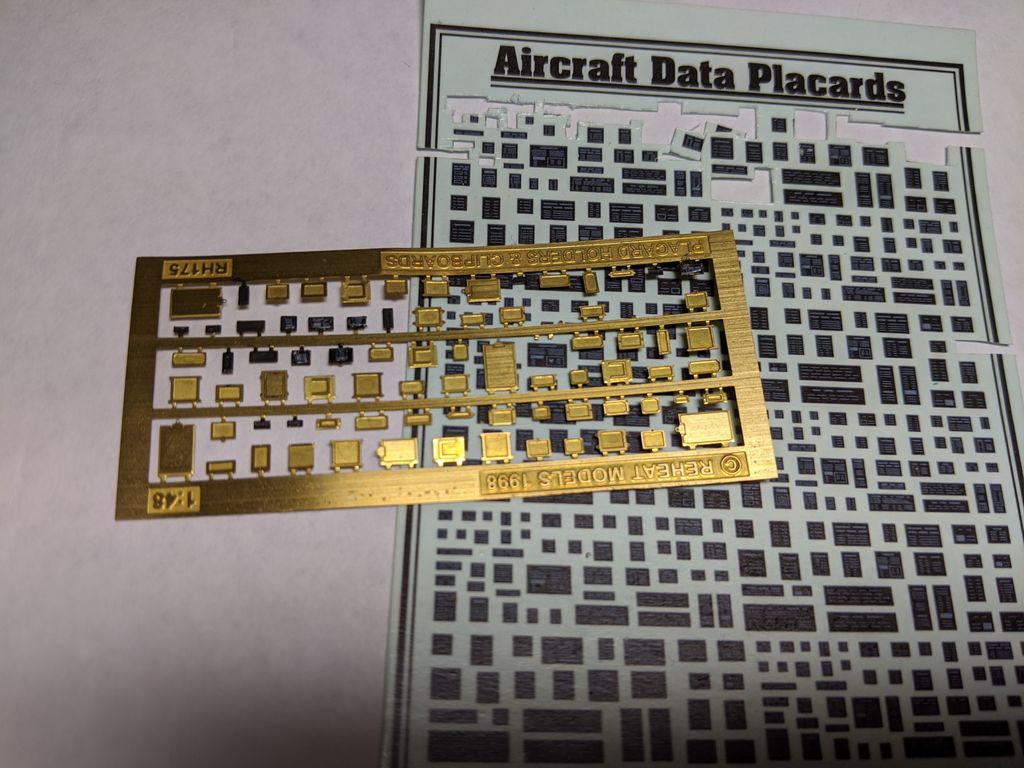
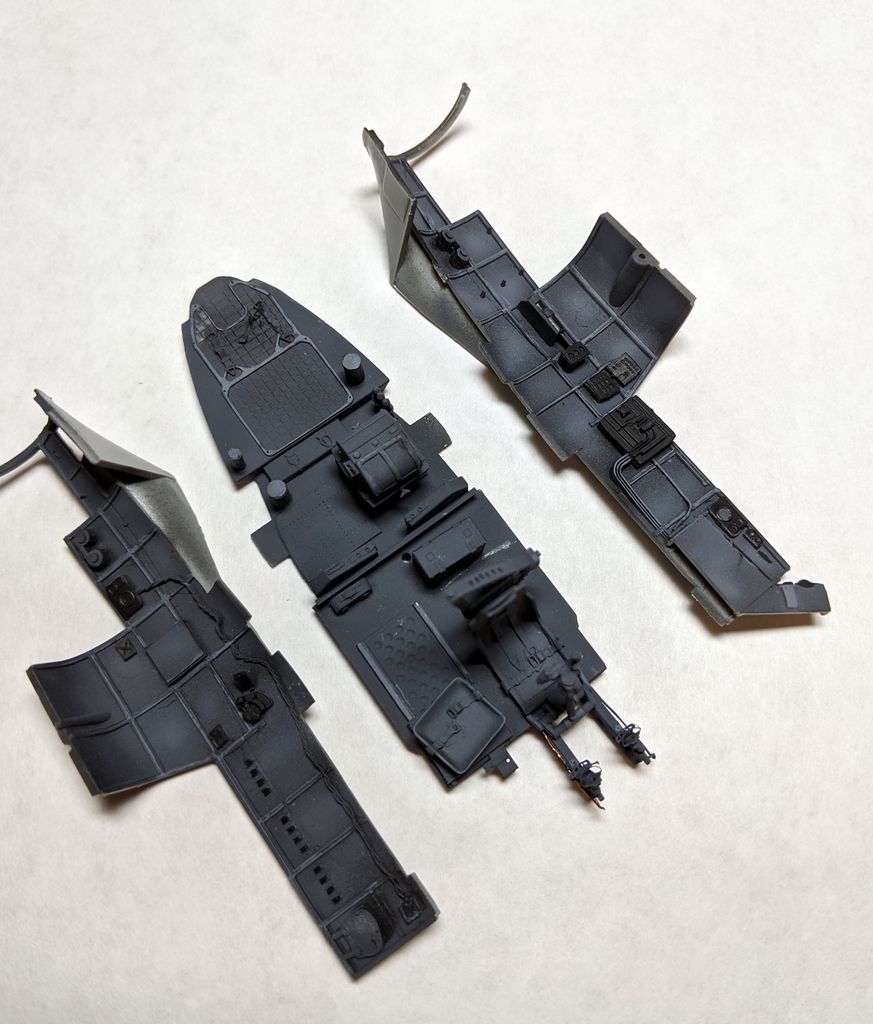
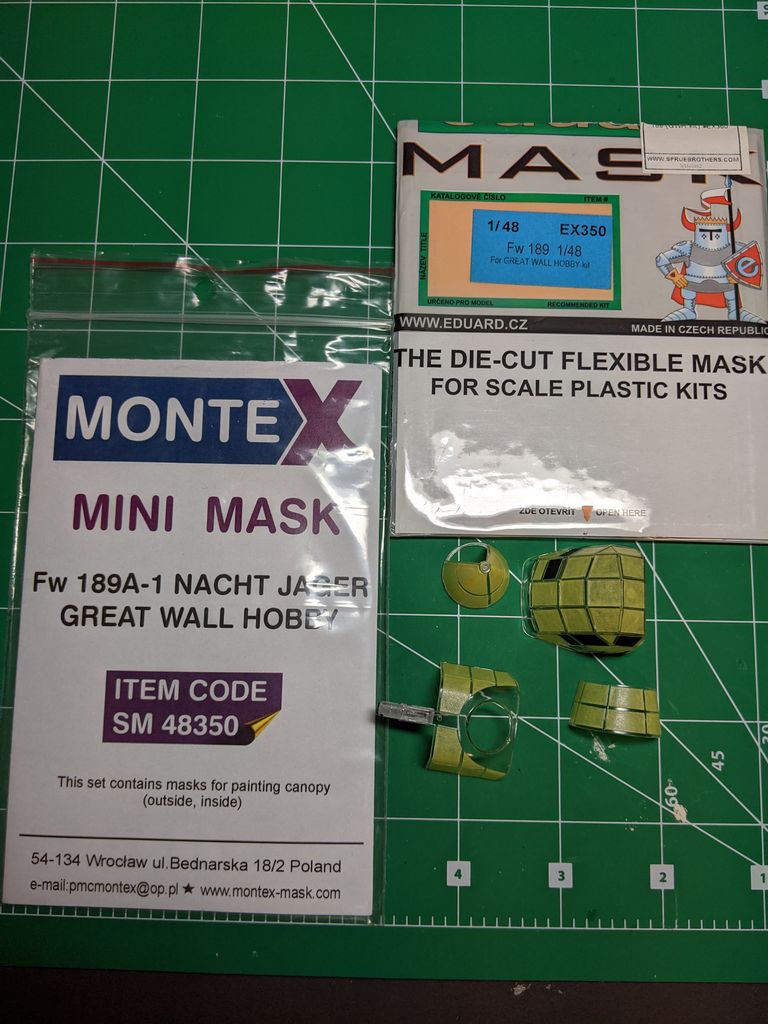
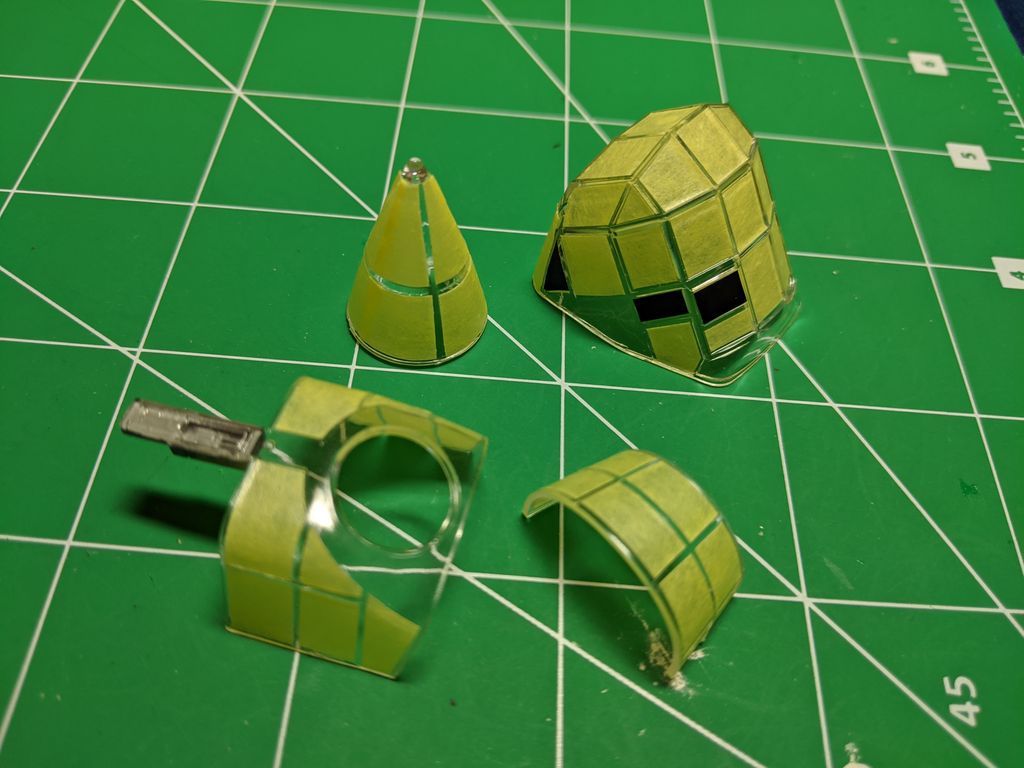
The kit does come with some PE and a masking set, depending on who you listen to, the masking set do not stick well and is ill formed for some panels. So since this plane is almost all greenhouse, I played it safe and got the Eduard mask after tyring out a few of the kit’s mask. There is also a PE kit for the interior, but frankly, what is provided in the kit is pretty comprehensive and whatever is missing, I feel can be scratched built fairly easily. The brass are the included PE, and I scratched built the different details with plasticard or old PE items. The cansister are actually 1/48 modified Tamiya German infrantry canisters.
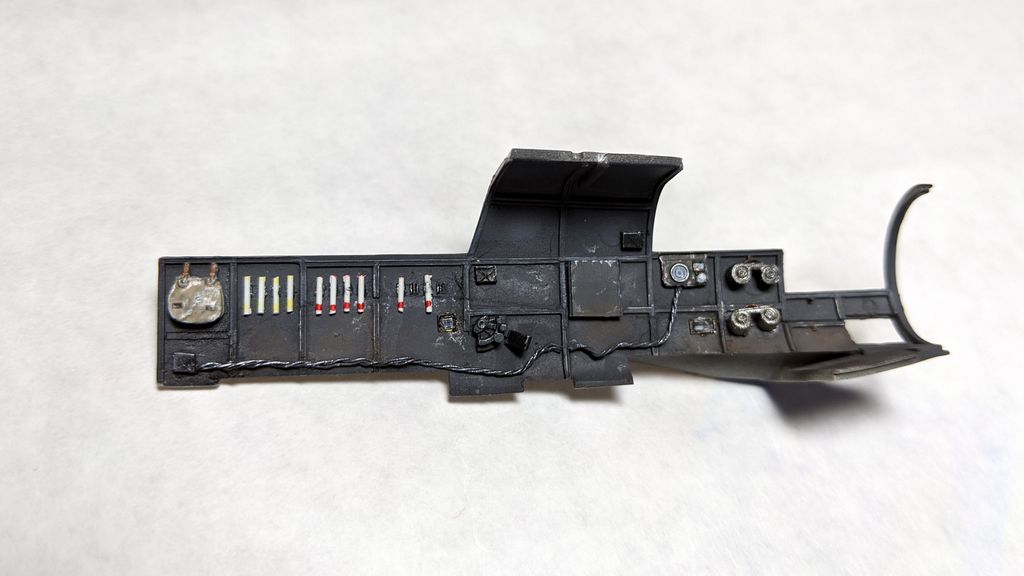
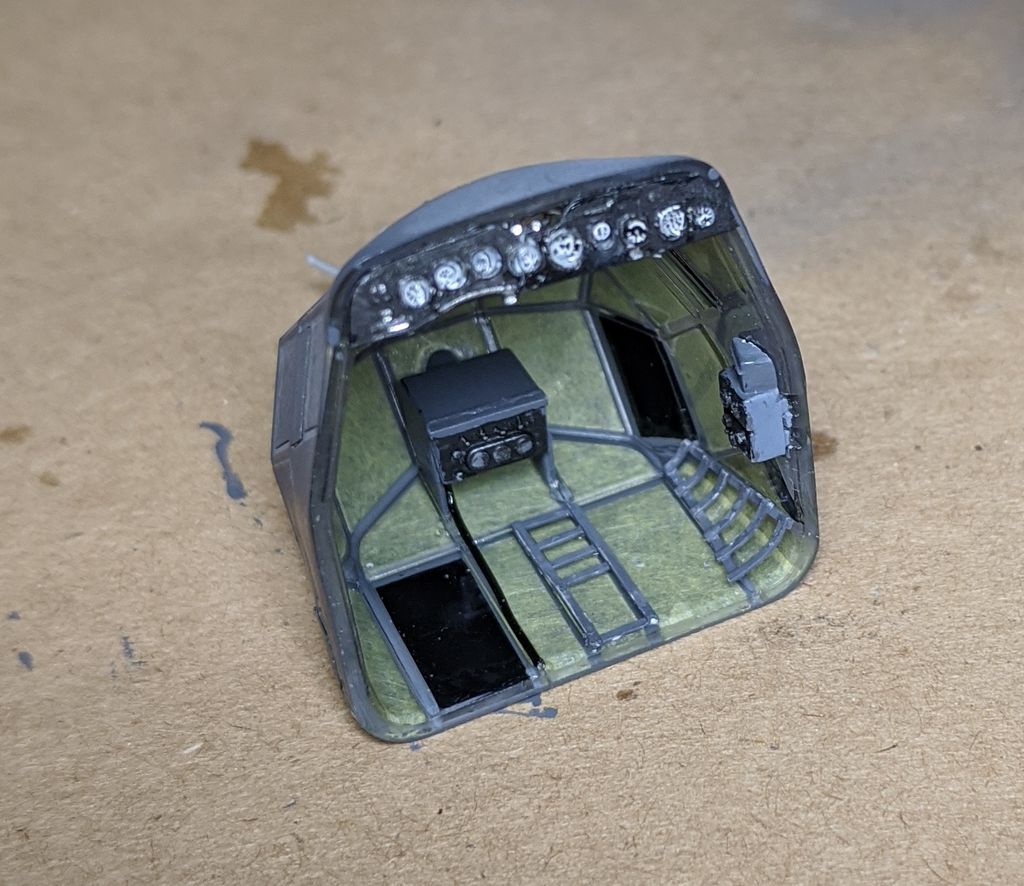
Of course, couldn’t build OOB, so decided that we need to add some wiring behind the instrument panel, as that will definitely be easily seen (well, maybe). Since this uses a tricycle landing gear, it needs weight up front to prevent tail sitting. I got some liquid gravity that I’ve been wanting to try out – definitely good stuff, pours out almost like a liquid with its small metail balls, some thin CA glue and you are set.
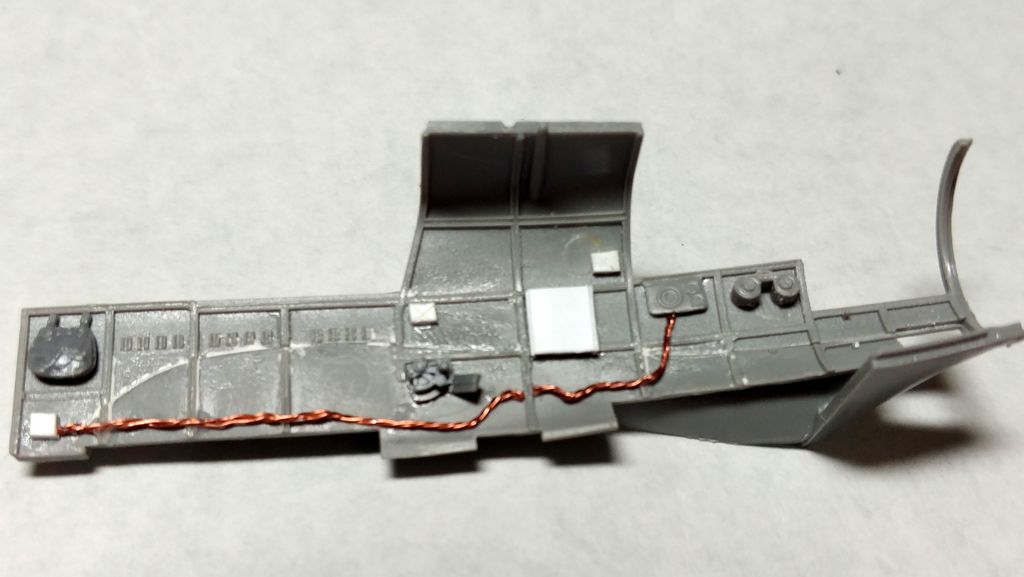

Side wall details were added with rehead swtich panels and copper wiring. Everything was given a coat of Vallejo black primer to get a uniform base and to provide shadows.
RLM Gray was then sprayed and a lighter version of the same gray was use highlight panels and framing. The smaller parts were then picked out with black and different grays to add interest. The gunner rear position was painted with brown and all the belts were coated with an off white. light scratches and wear was added with a silver artist pencil.
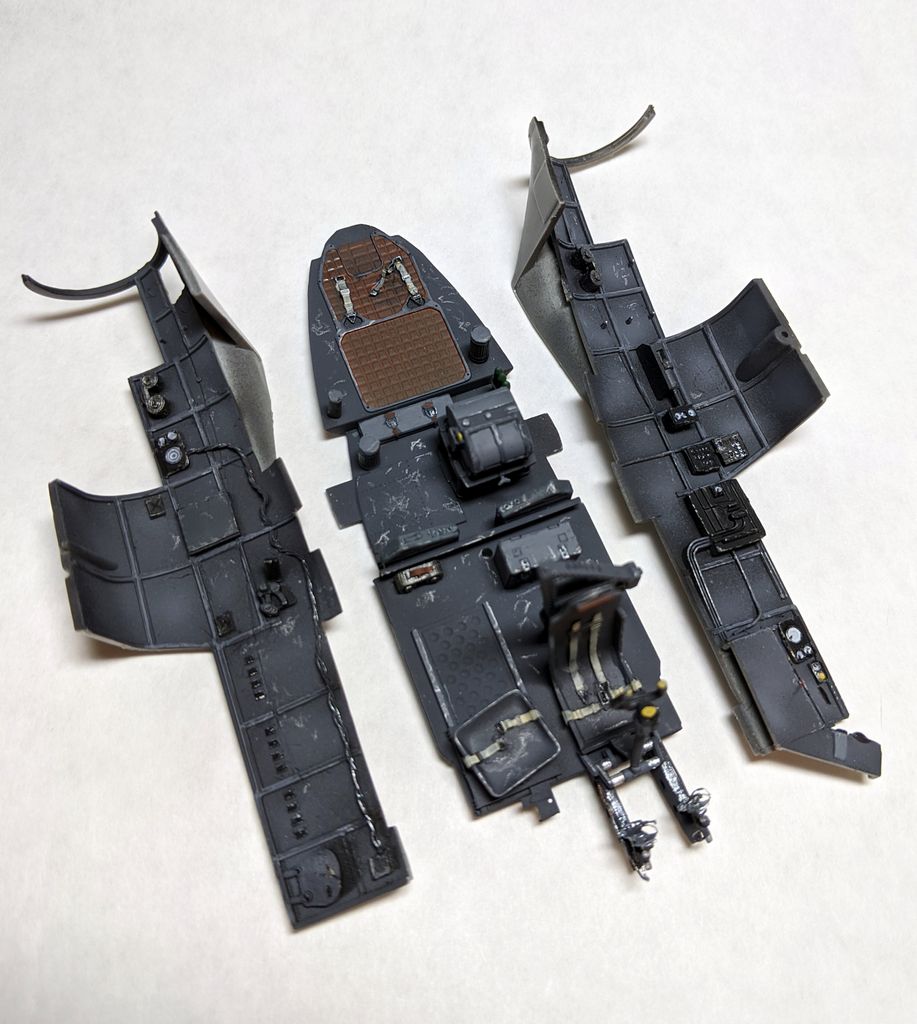
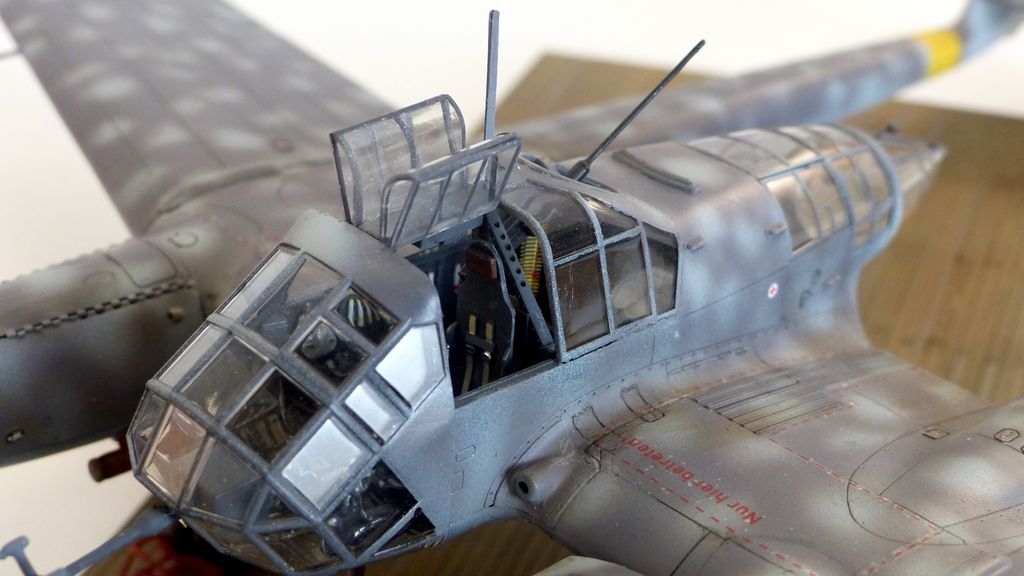
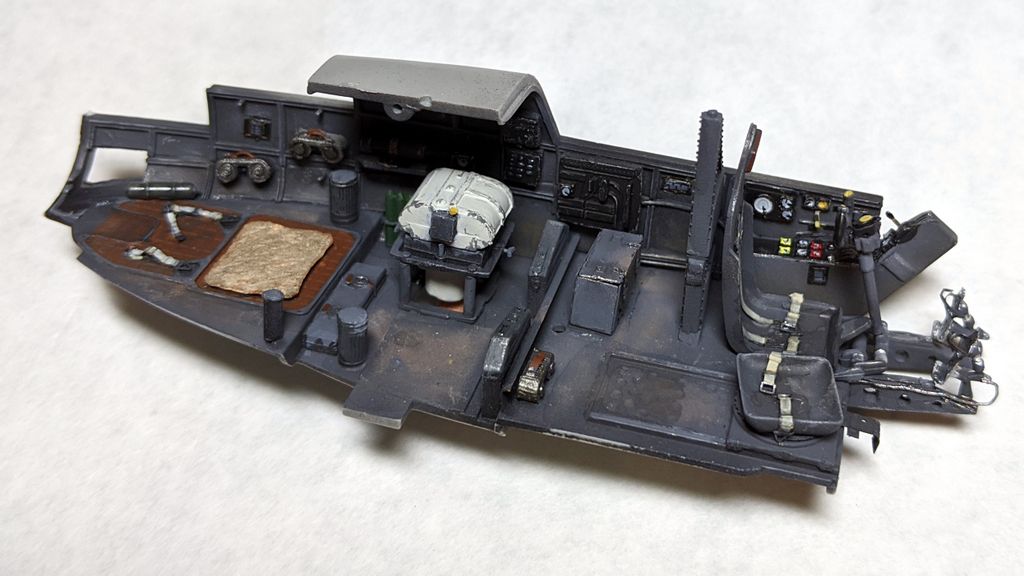
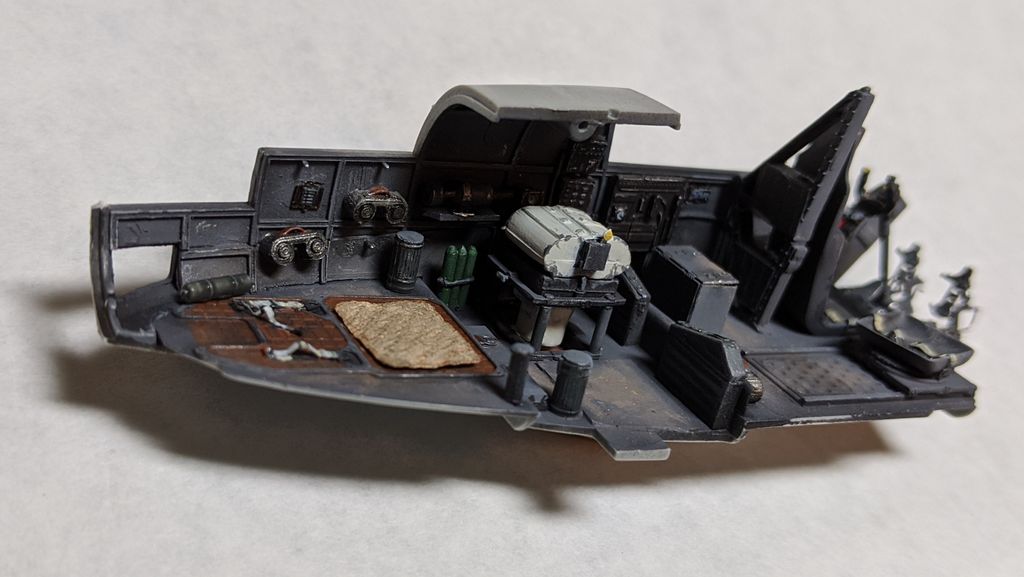
Better pictures of the sides and the added details based on reference photos.
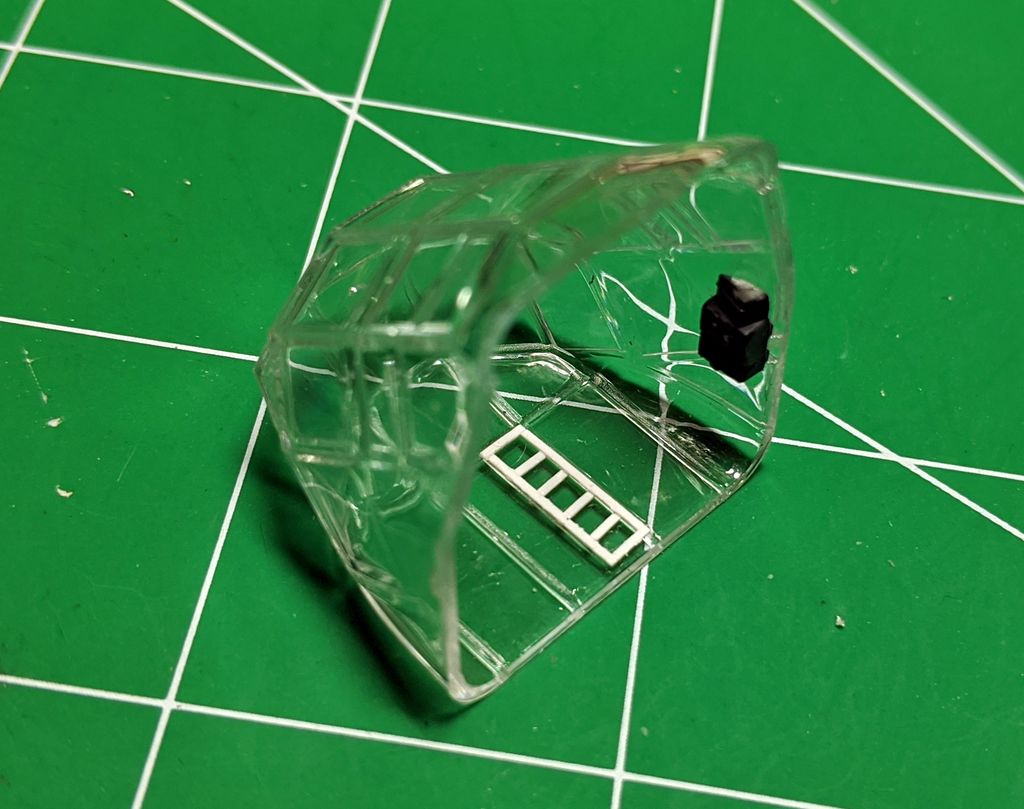
The other side of the cockpit with flares from plastic rod added and a bag hanging on next to the gunner. A cushion was common based on reference pictures, so one made with milliput was added.
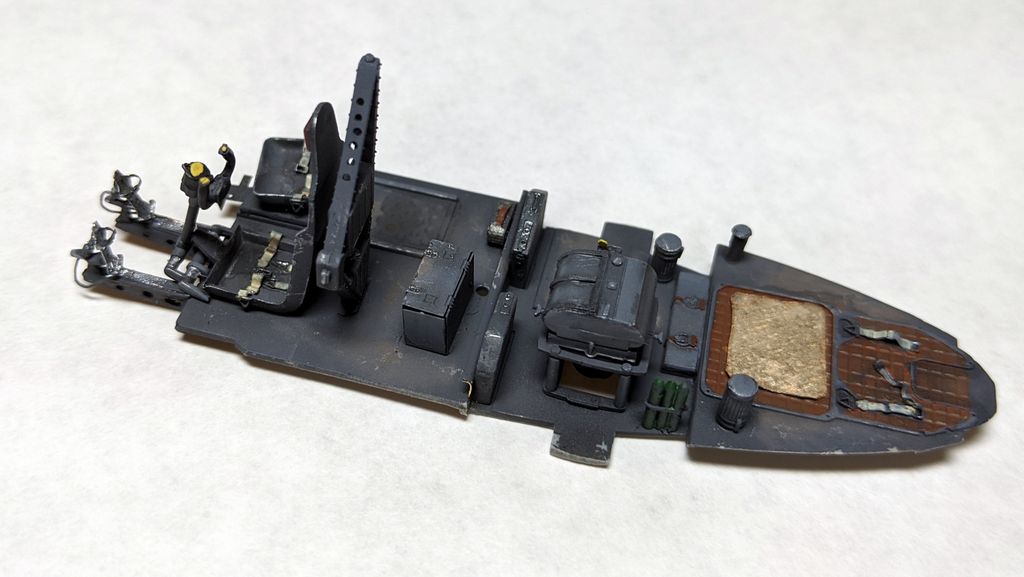
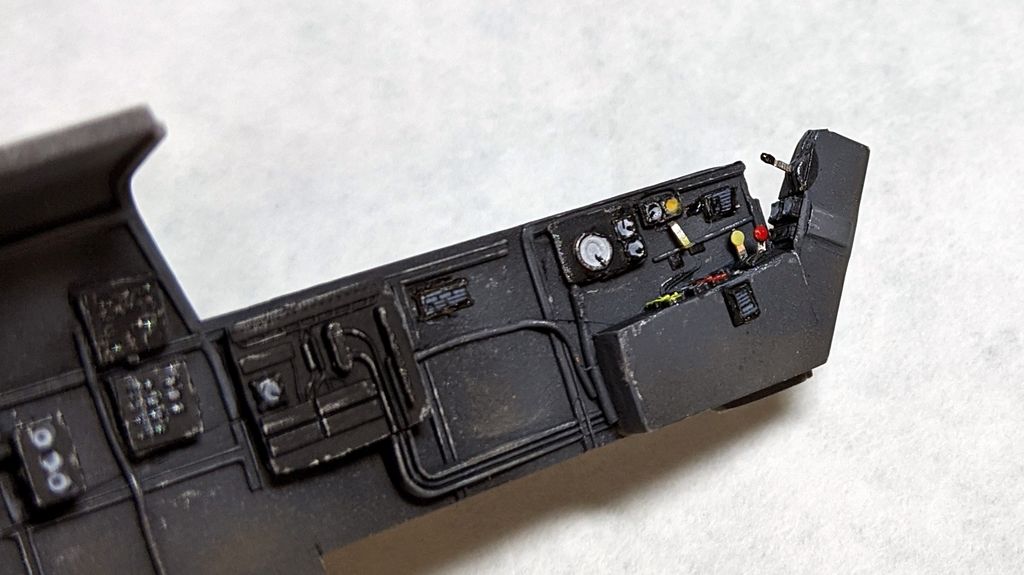
The cameras was now repainted white and distressed, as I’ve seen them in this other besides black, and the lighter color makes for more visible details. At this point, I’m pretty happy with the details and it’s time to move on.
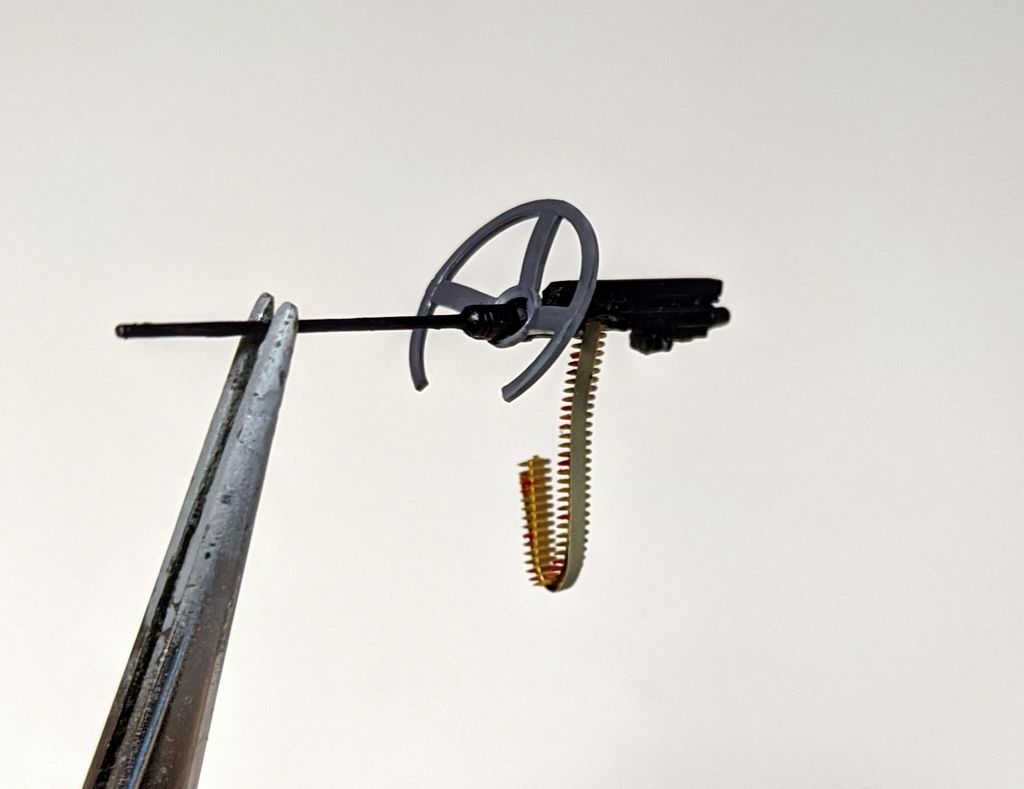
The instructment panel is mounted at the top of the green house, and thus the back is completely exposed. I used my trusty punch and die set to create the back fo the panels. It will then be painted and plumbed with soldering wire.

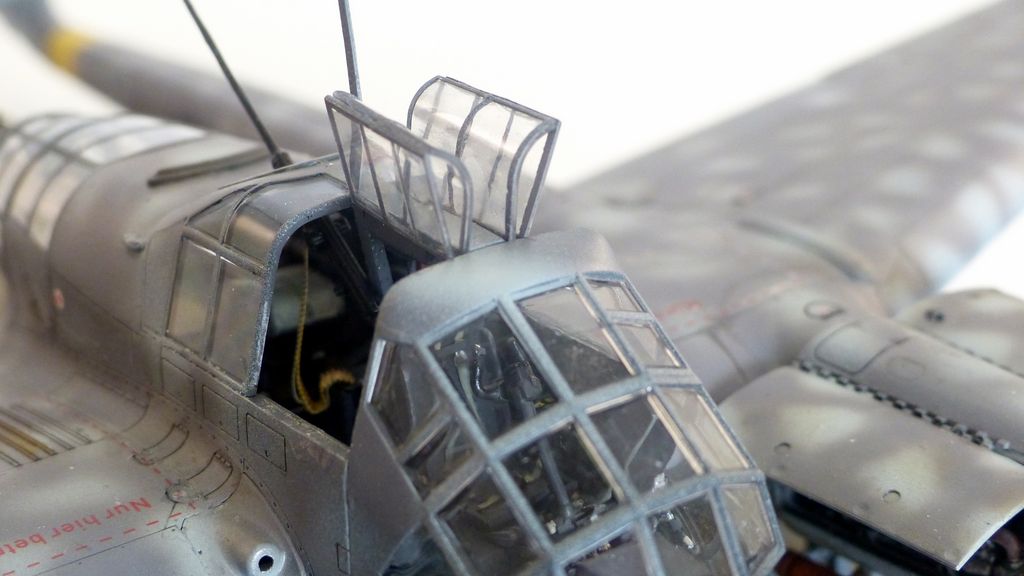
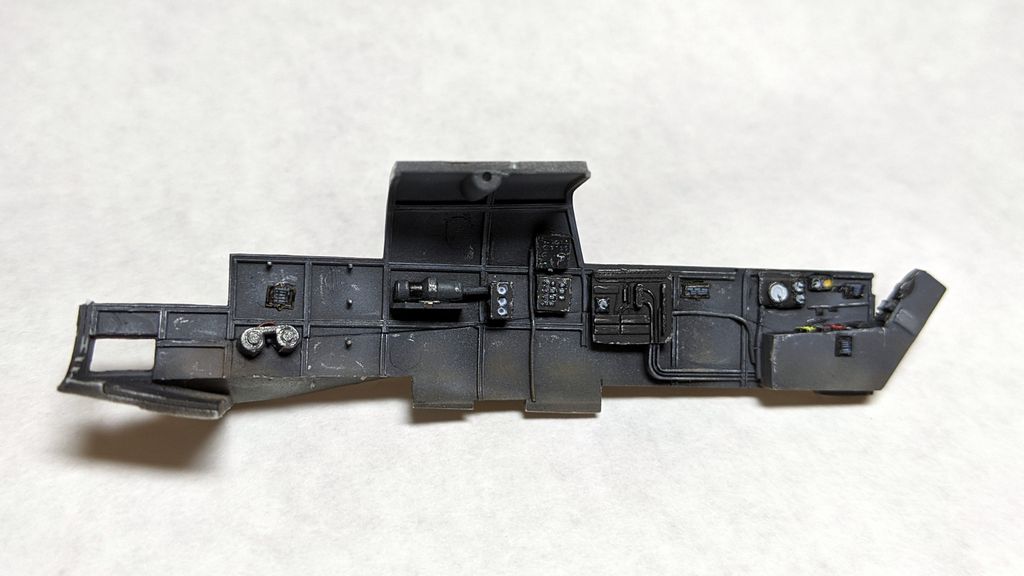
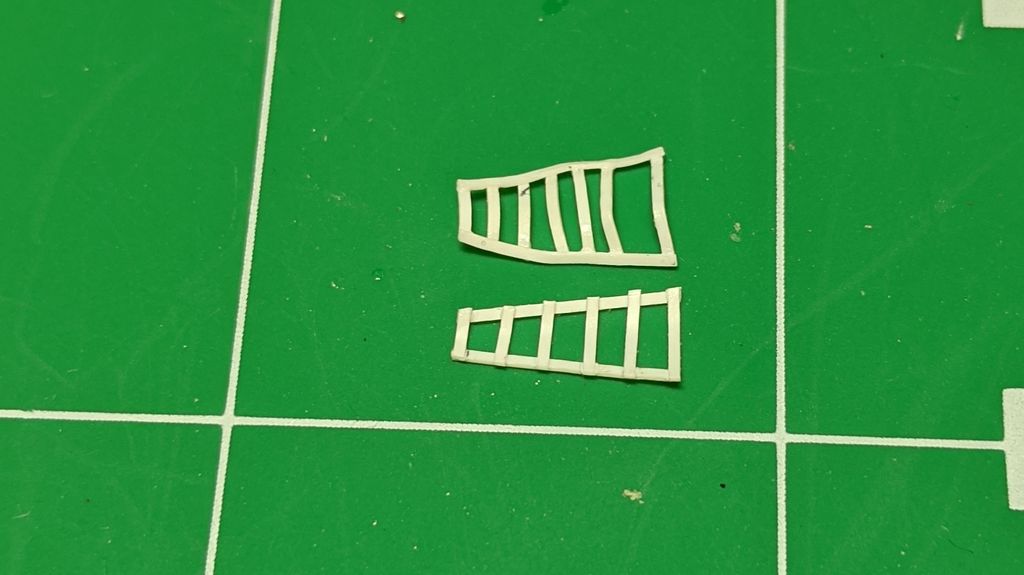
There are two metal ‘grates’ in the front cockput, they are vaguely outlined in the framing, but there were really interior structures. So I recreated them using plastistruct. The picture to the left was my first attempt in rounding out the framing with a heat gun. It went from solid to Salvidor Dali in a sec, so back to the drawing board with a 2nd try. Just going to glue it down this time around.
This kit framing is very intricate and shows off the interior detail very well, but that’s both a blessing and curse – as the masking will be nightmare. So for these types of jobs, Eduard masks come to the rescue, for the cost involved I think it’s money well spent. Note that I already had a set of Montex mask which was vinyl, they really didnt’ fit too well and tend to lift overnight. The Eduard ones haven’t failed me yet.
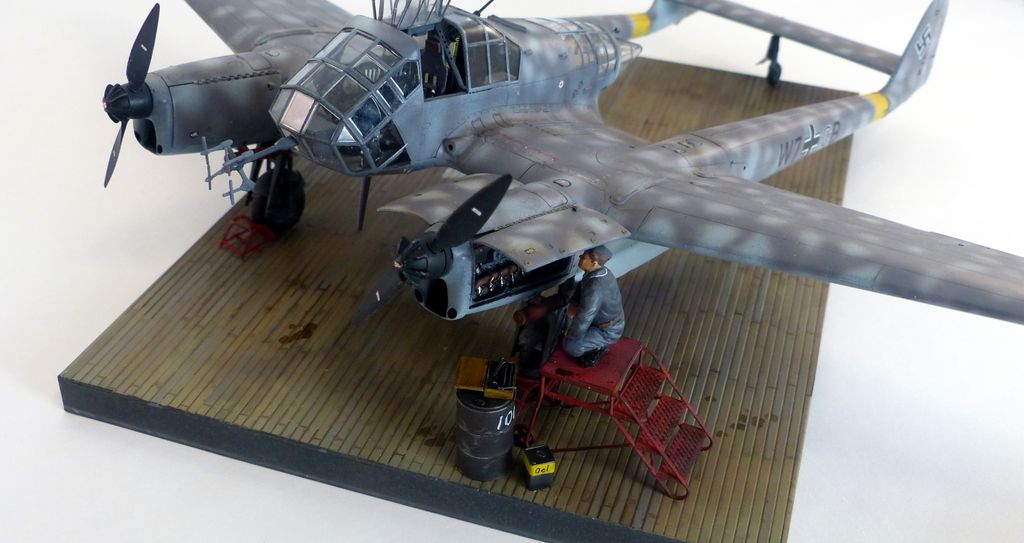
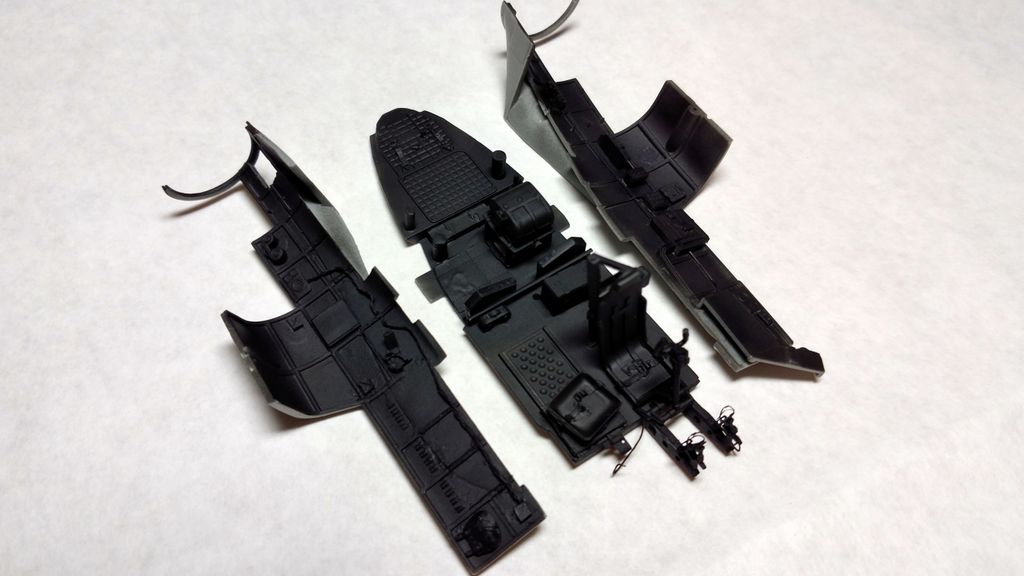
At this point the front green house was complete after painting and attaching everything
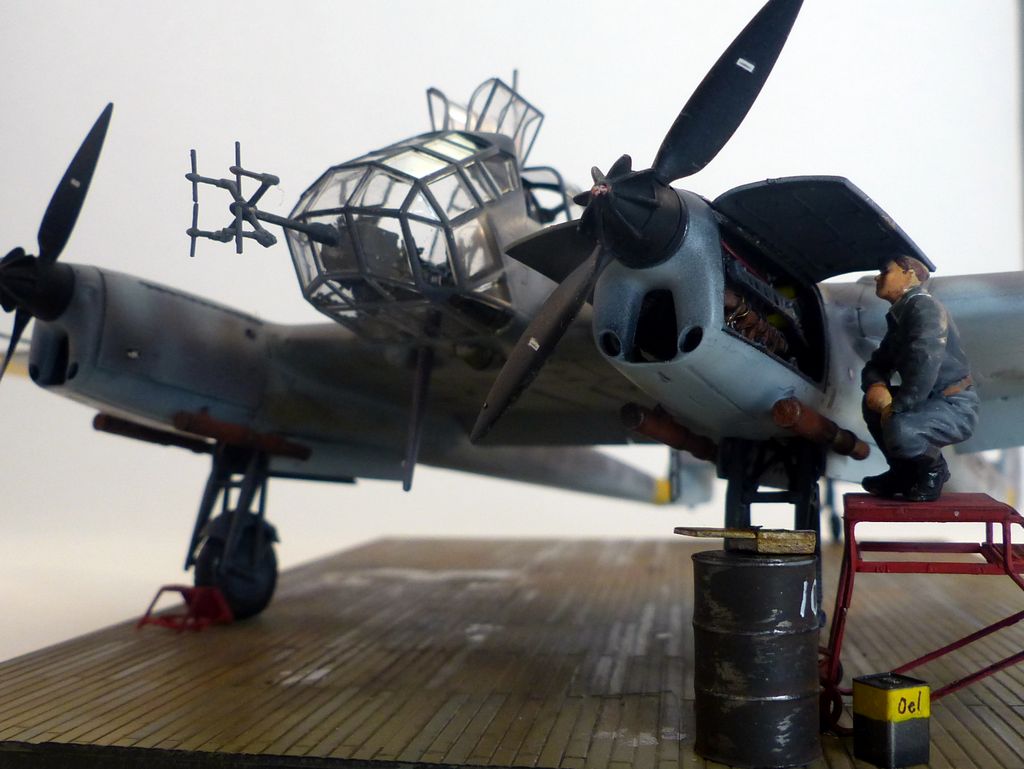
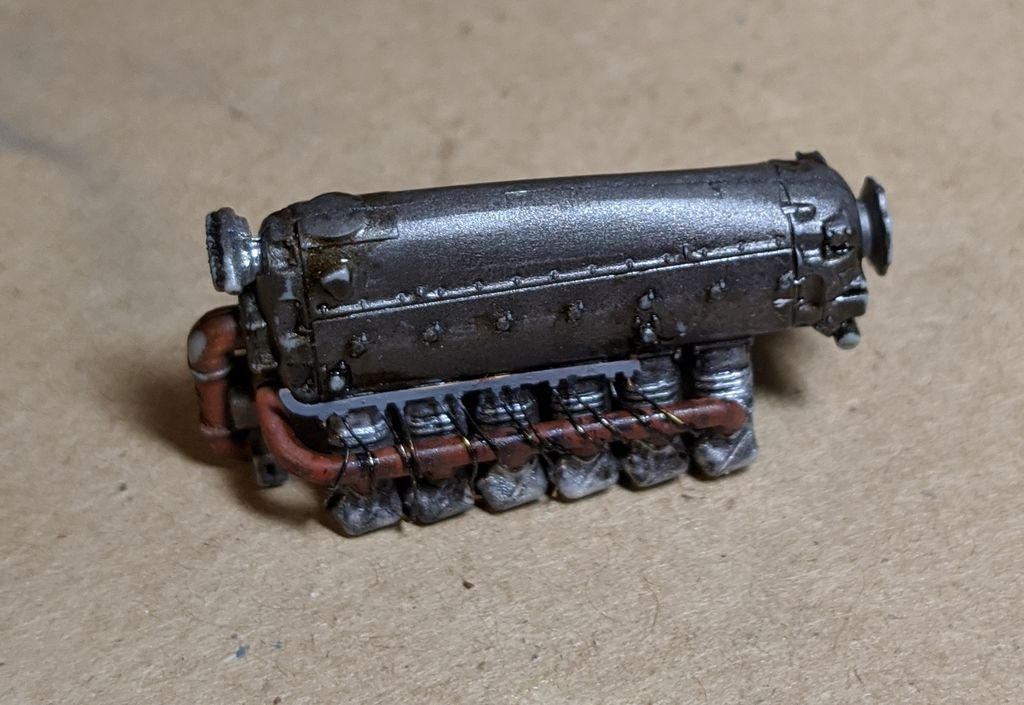
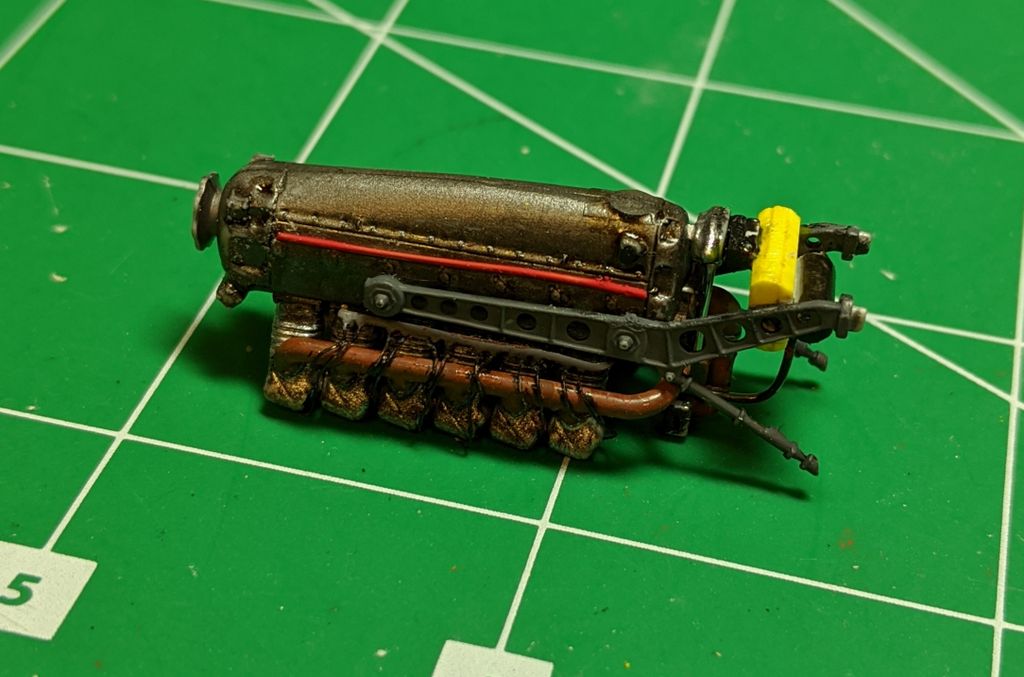
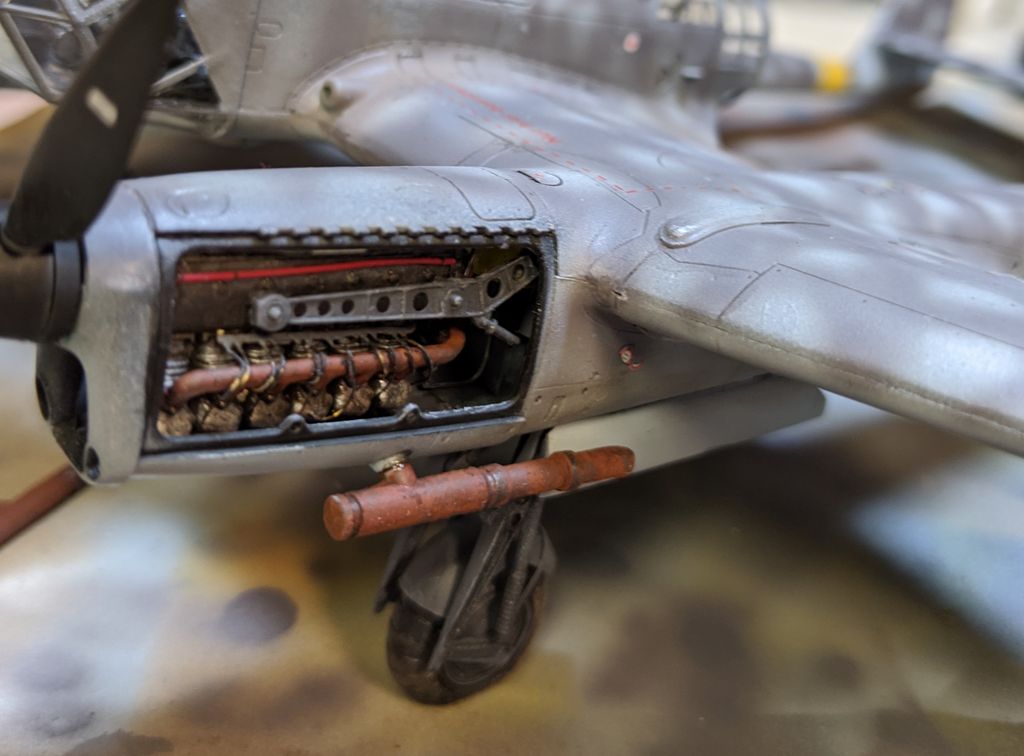
The kit comes with the ability to show both engines covers off and comes with two nice engines. As given in the kit, it does include the engine mount and wiring as PE. Based on reference photos I added more hoses and the oil container in the back painted white. You can add more details if you wish, but its really not visible once you close up the engine compartment, so I left it alone.
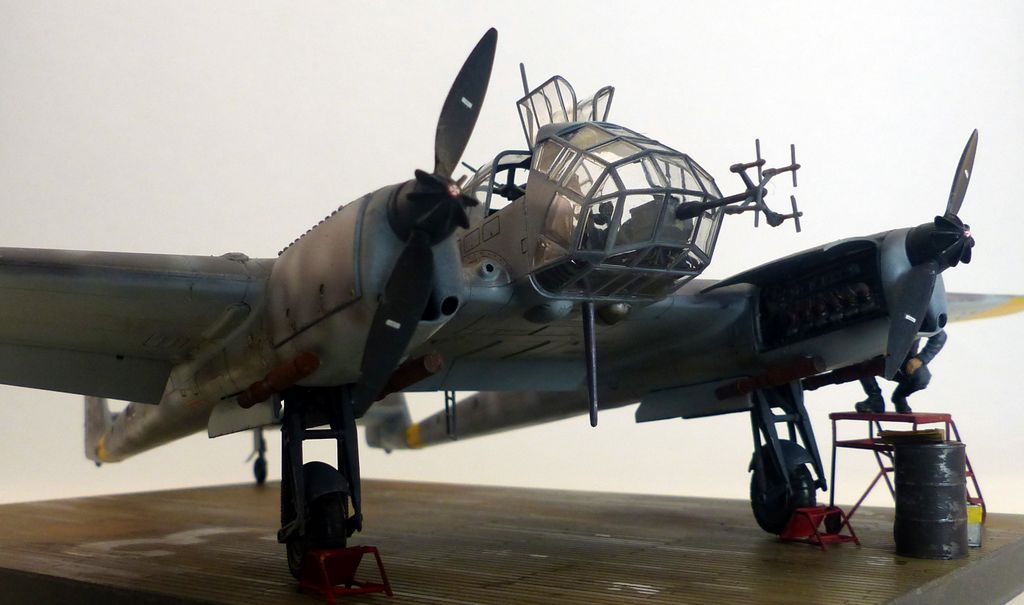
At this point everything was closed up, masked and primed with Vallejo black primer, my current go-to primer. I chosed a dark gray finish with light gray ‘spots’ scheme. This was accomplished by first laying down the light gray and then painting the dark gray until I created the spots.
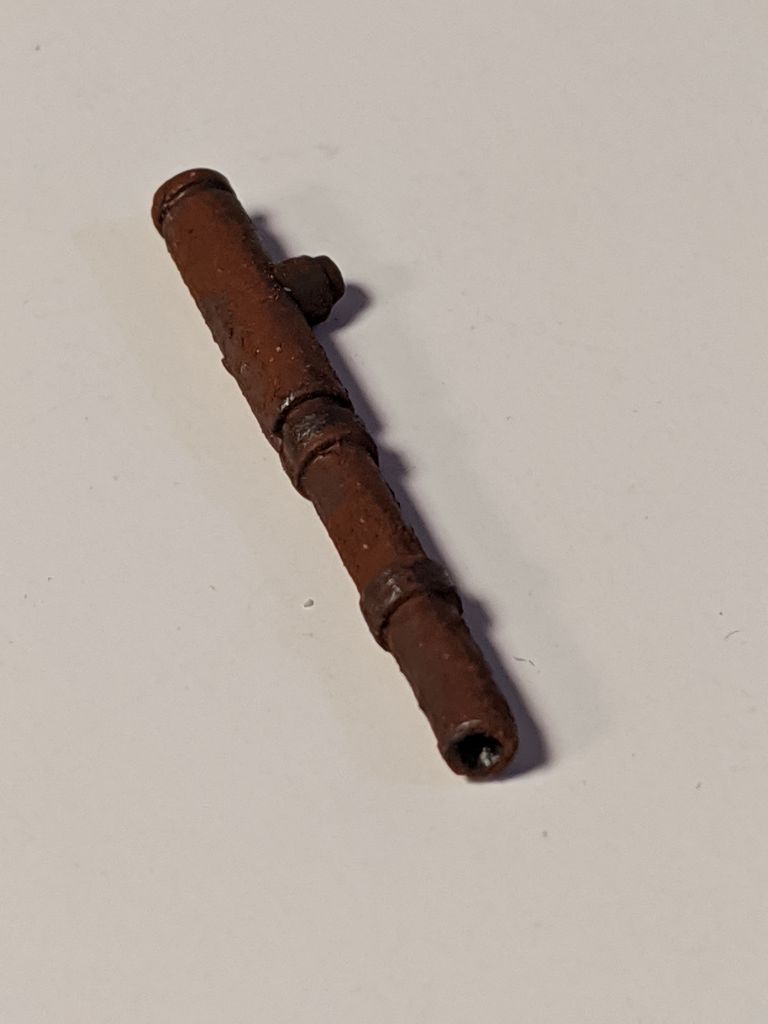
I was then able to add the external flame suppressors, which I finsihed with Tamiya red brown, Vallejo rust, and Ammo rush powder. Looks good after everything was put together.
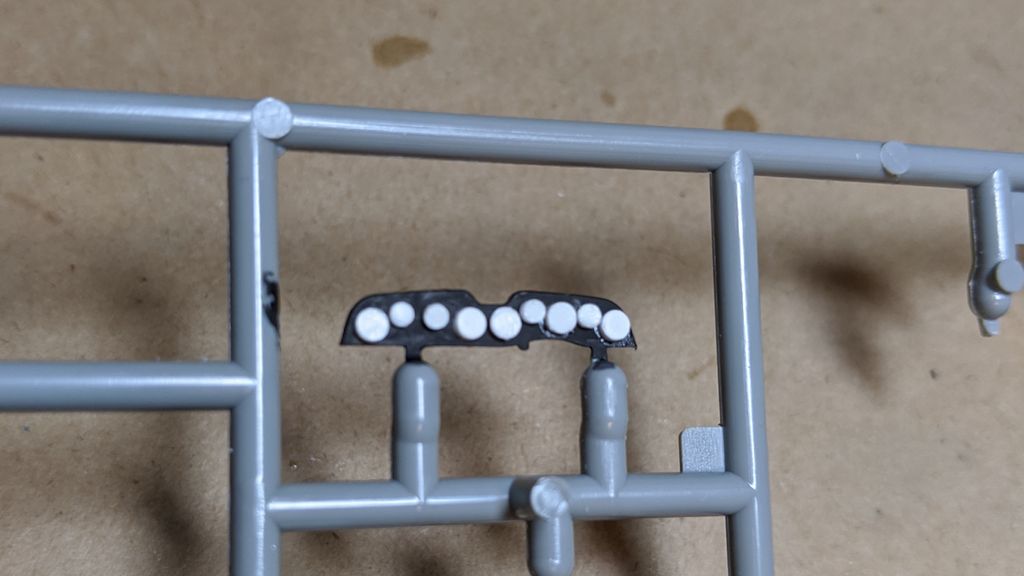
One final interior finishing touch was adding some PE ammo belts, these are really nice.
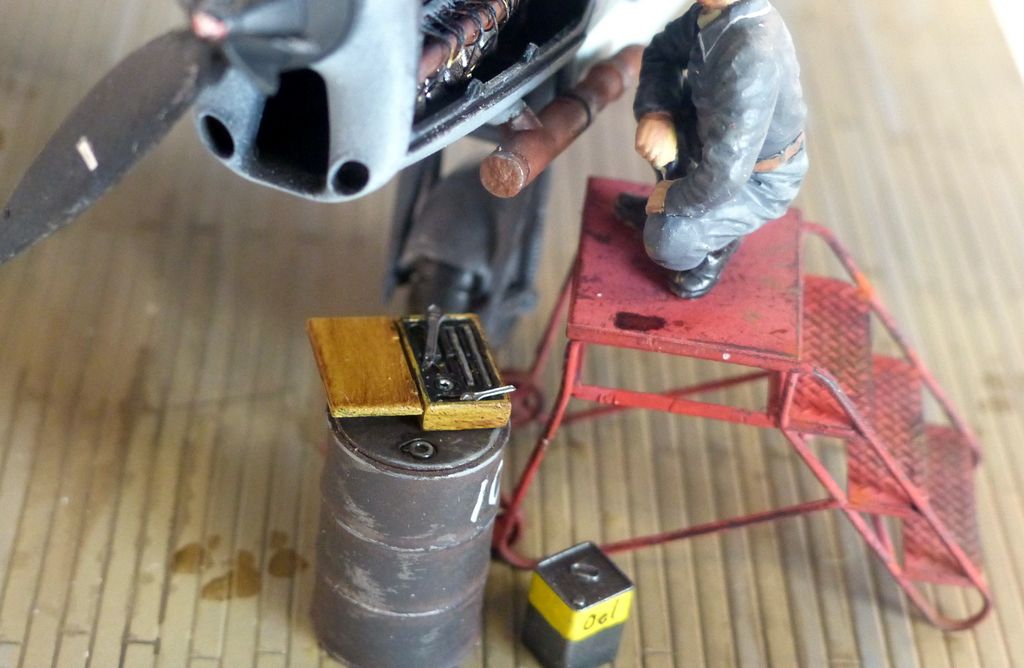
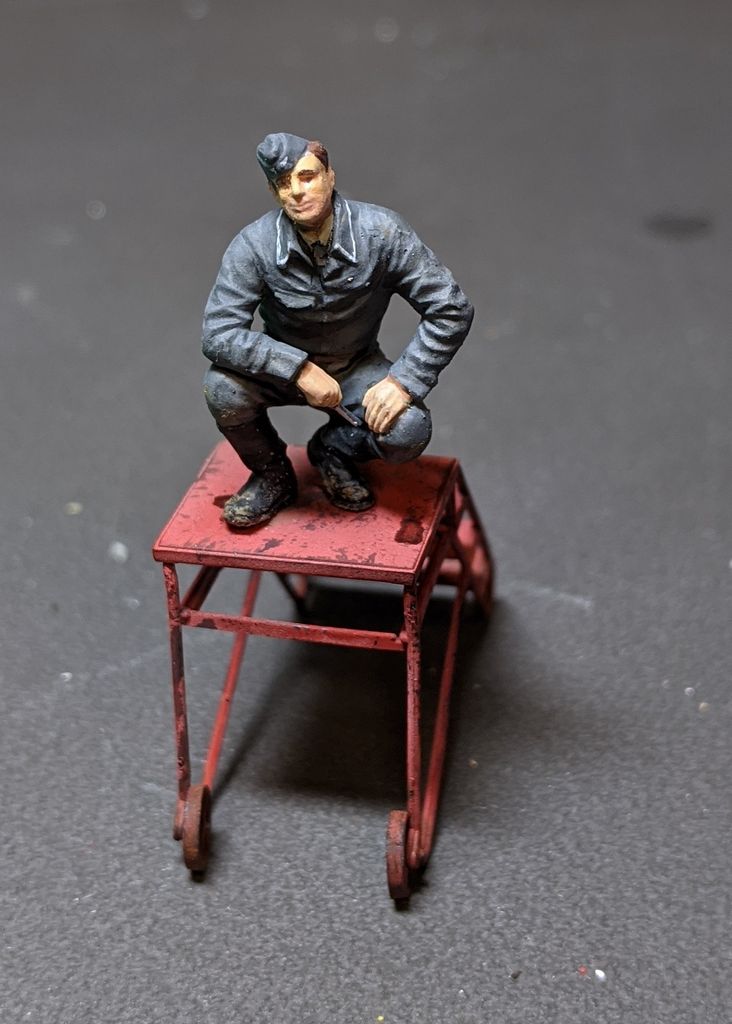
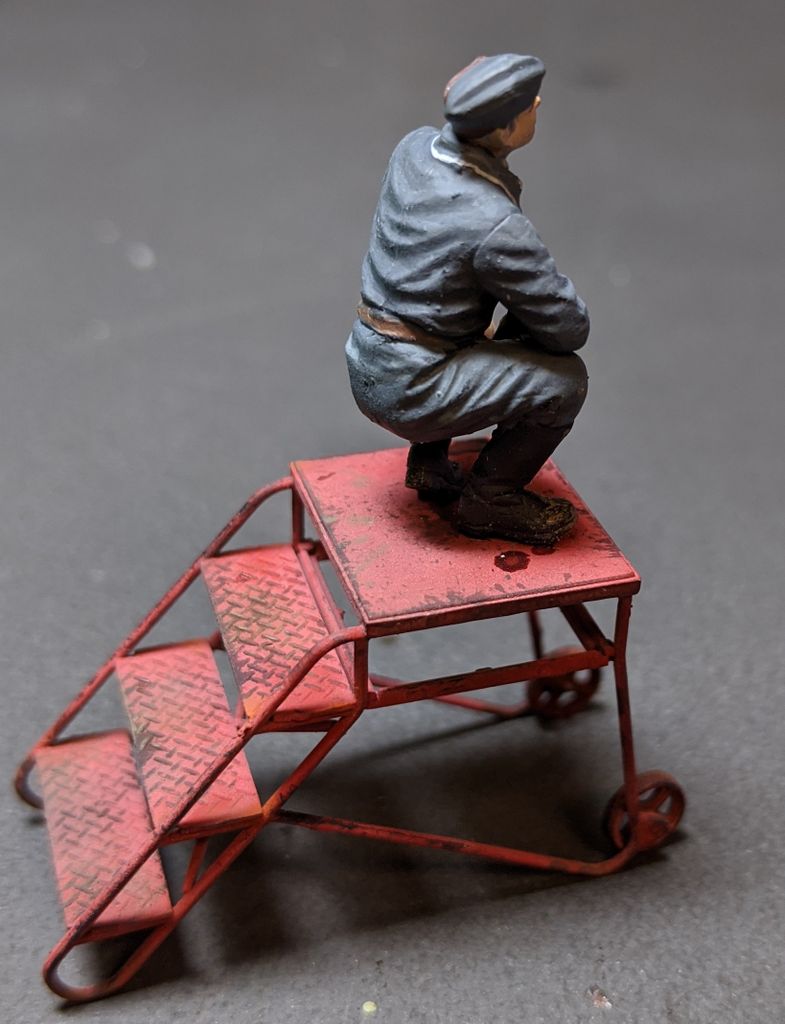
Since I was going to use a simple Eduard base with the included maintenance ladder (VERY delicate to put together), I decided to add a mechanic looking at the engine. This was from an ICM luftwaffe figures kit. The tool chest and tools came from Tamiya’s panzer figure set. Everything was painted with Vallejo acrylic, still learning the art of figure painting.
Everything was mounted on an Eduard base, with the number 3 painted on and weathered. Additional oil drums and cans were added, and I have a FW 189 in my collection.