Martin B-57 Canberra – Vietnam
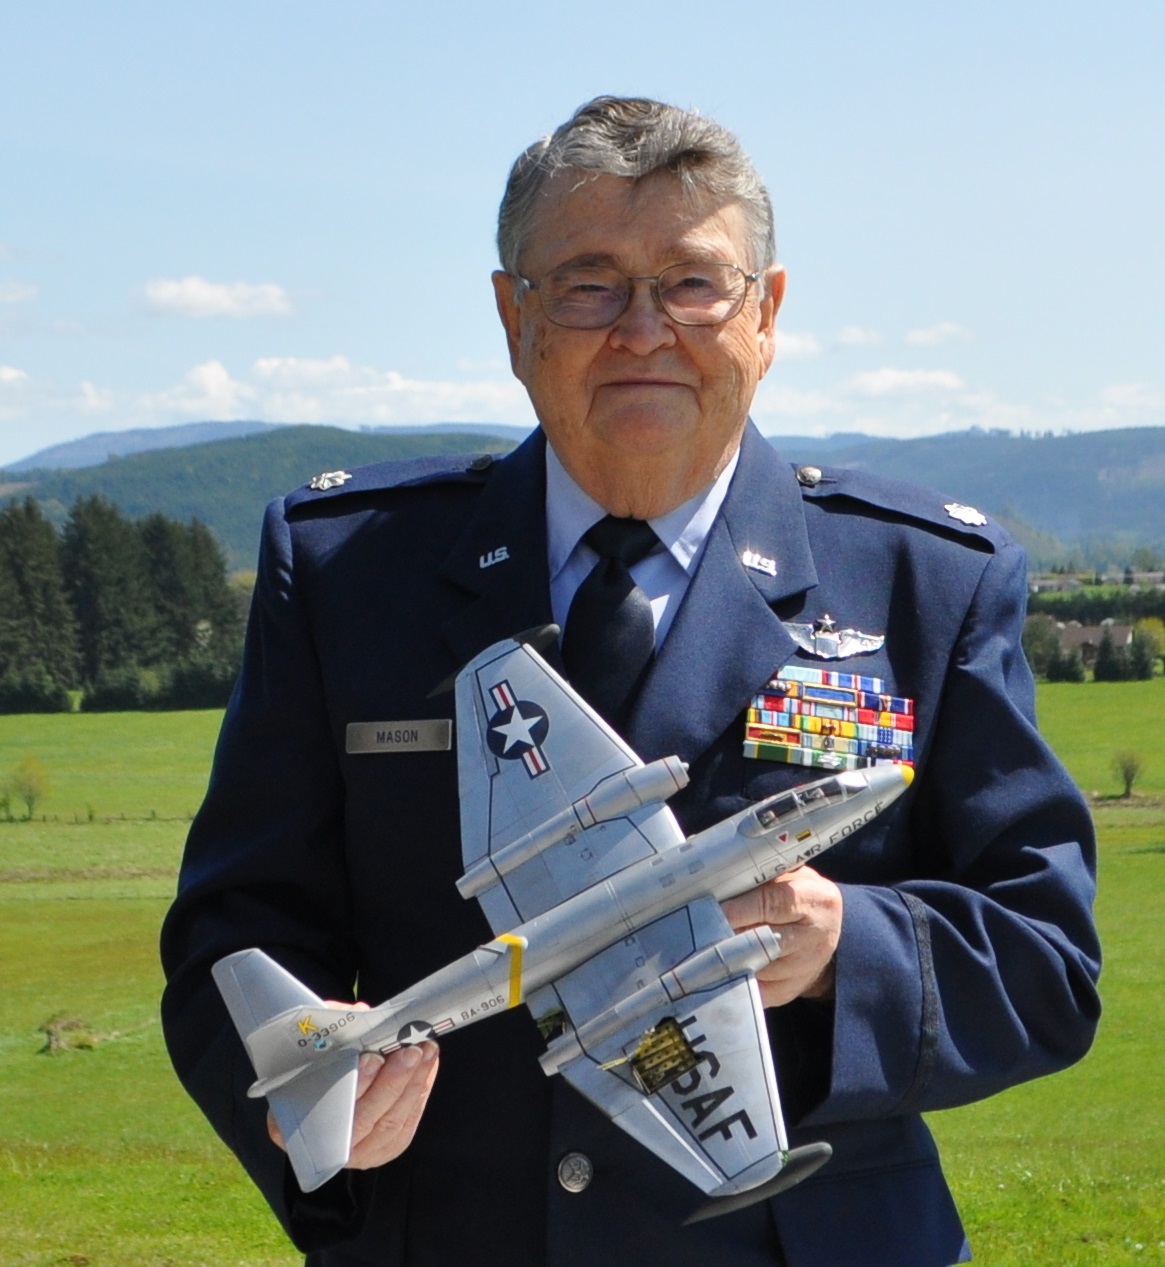
Col. Mason in his dress blues holding the model of his B57
As modelers, we all have our reasons for being in the hobby. For myself and I suspect for many others, the chance to model and relive history is a major factor. So I when I had the opportunity to build an aircraft for a veteran, I was honored to do so. T.E. Bell, the author of “B-57 Canberra Units of the Vietnam War”, who happens to be a fellow modeler and friend had made many contacts in the B-57 community and asked whether I wanted to build the B-57 flown by Col (retired) Larry B. Mason.
At the time of the Vietnam War, he was Captain serving in with the 8th Tactical Bomber Squadron and received the Air Force Cross and the Distinguished Flying Cross. Mr. Bell wanted to me to build Capt Mason’s B-57 on the mission for he received his Air Force Cross. I’ll simply repeat the Air Force citation in describing his action that day.
The President of the United States of America, authorized by Title 10, Section 8742, United States Code, takes pleasure in presenting the Air Force Cross to Captain Larry B. Mason (AFSN: 0-3102518), United States Air Force, for extraordinary heroism in connection with military operations against an opposing armed force as an Aircraft Commander of a B-57 tactical jet bomber of the 8th Tactical Bomber Squadron, Clark Air Base, Philippine Islands, in action on 15 March 1966.
On that date, while attacking a heavily defended target, Captain Mason’s aircraft was hit repeatedly by 57-mm. and 37-mm. shells which set fire to the right engine and created extreme vibration in the left engine. One shell exploded in the rear cockpit, wounding the navigator and severing a section of wiring which deprived the crew of most electrical power. Wind, blasting through a large hole in the fuselage, scattered dirt and debris around the cockpit temporarily blinding Captain Mason. As he regained his sight, he realized that a safe bailout could not be affected because of the wounded navigator’s condition. With one engine shut down and the other on fire, and with approximately 30 square feet of surface missing from the right wing, Captain Mason, with complete disregard for his own personal safety, attempted the return flight to his home base.
Flight conditions were further hampered by inoperative radios, no hydraulic pressure or oxygen, severe airframe vibration, and no indication of gear position or fuel level. Through outstanding airmanship, he piloted his crippled aircraft to a safe landing in friendly territory. By his extraordinary heroism, superb airmanship, and aggressiveness in the face of the enemy, Captain Mason reflected the highest credit upon himself and the United States Air Force.
If you are interested, there is a short video on youtube featuring then Captain Mason. https://www.youtube.com/watch?v=LcirLPZR1Jw
Along with the description, I was able to speak to Col. Mason and received a series of photo of the B-57 after the mission. The major challenge will be replicating the damage received in the wing area and forward fuselage. Also, if possible I was to build it within a few months so Col. Mason can bring the model along to a speech he was giving. Time to get cracking!
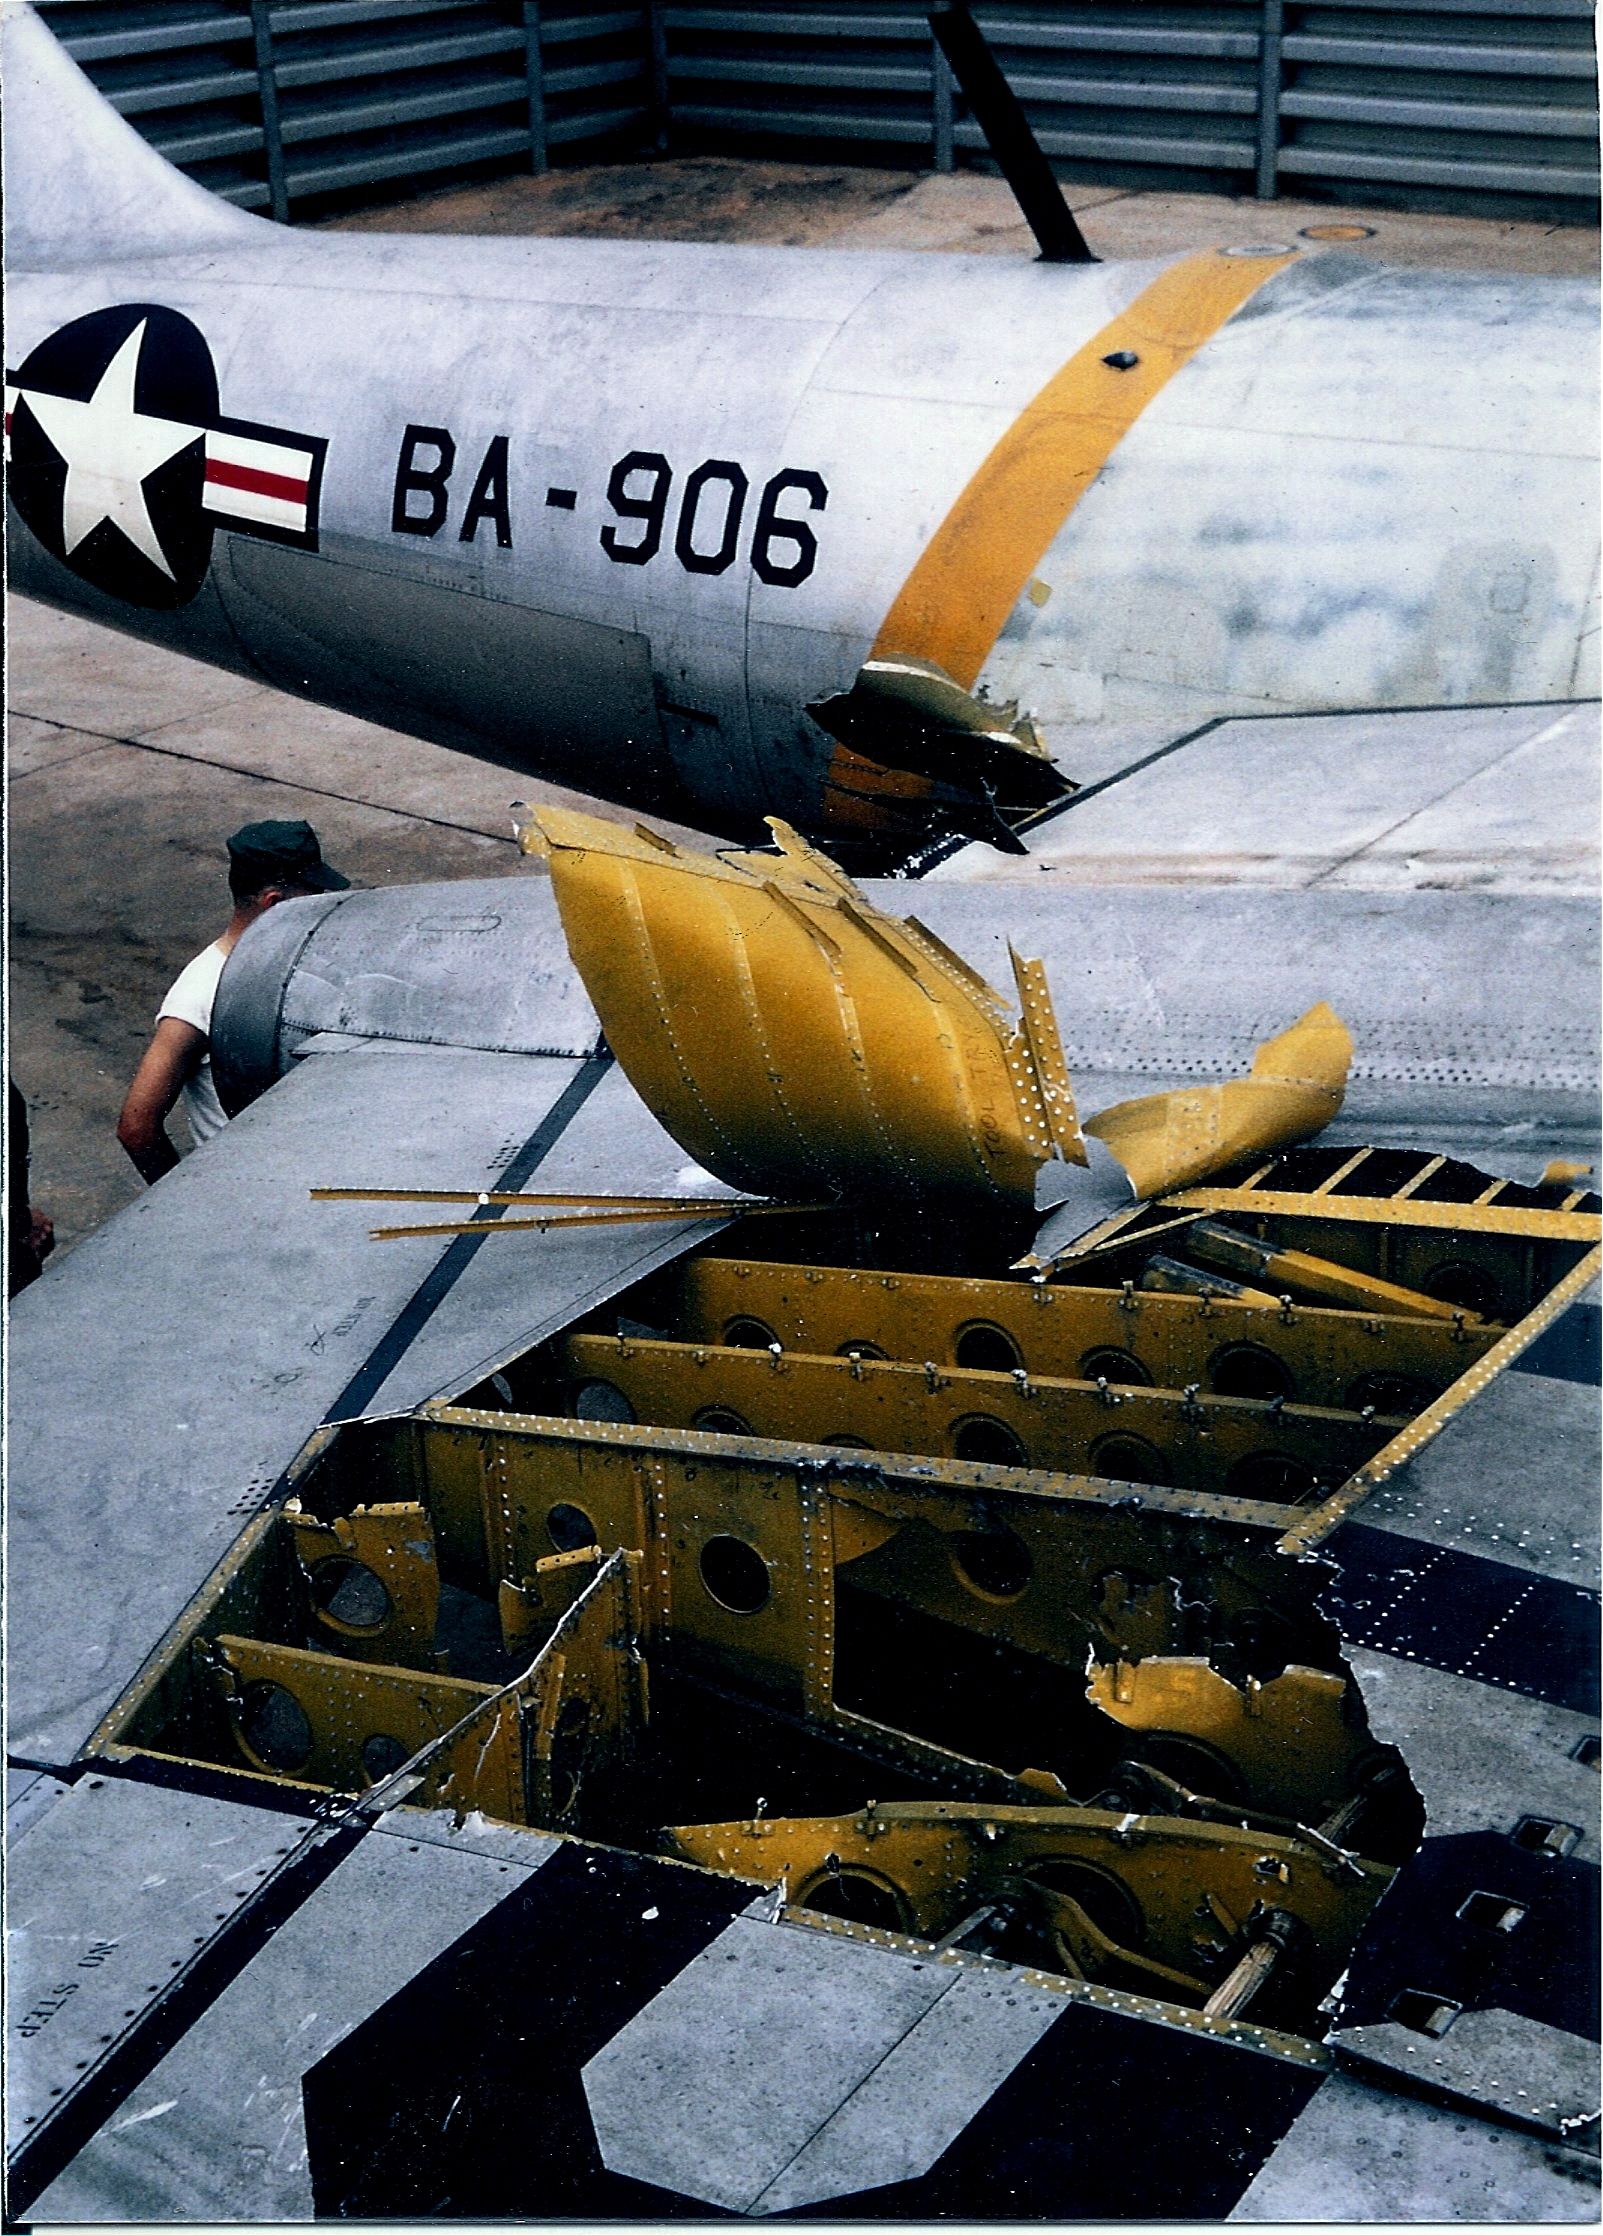
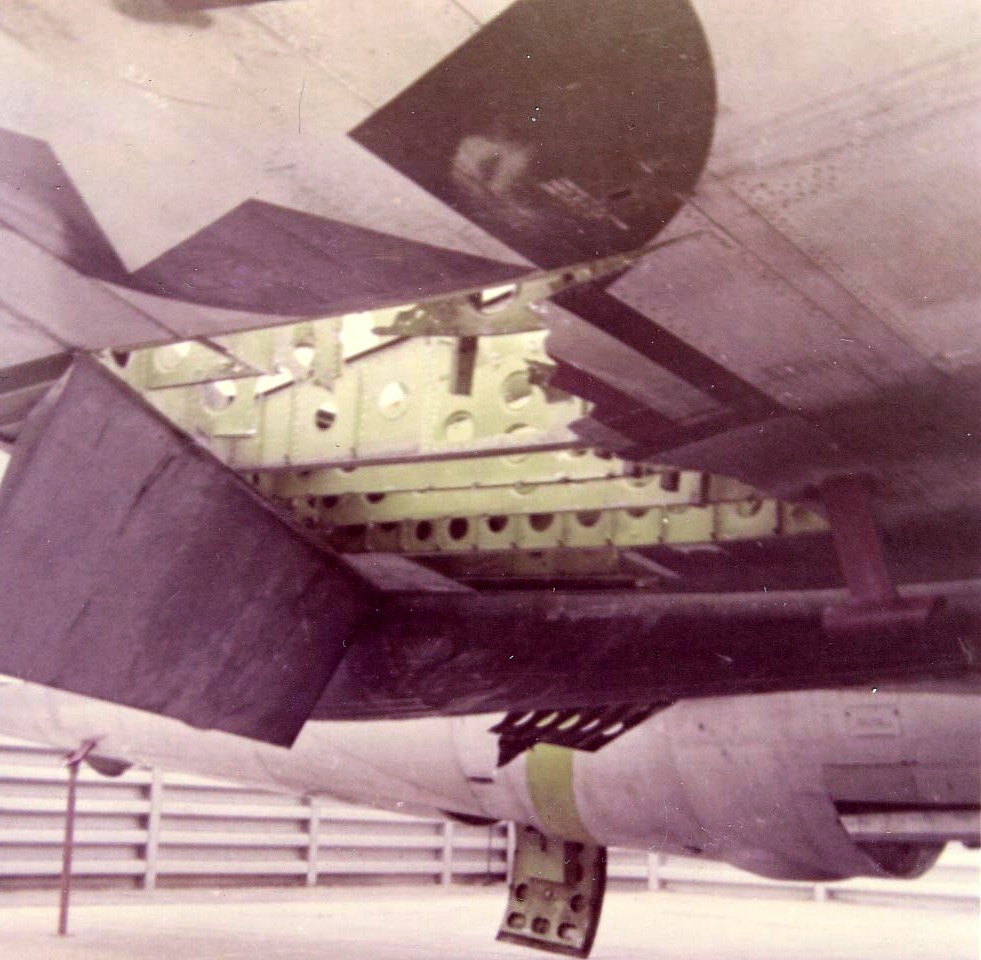
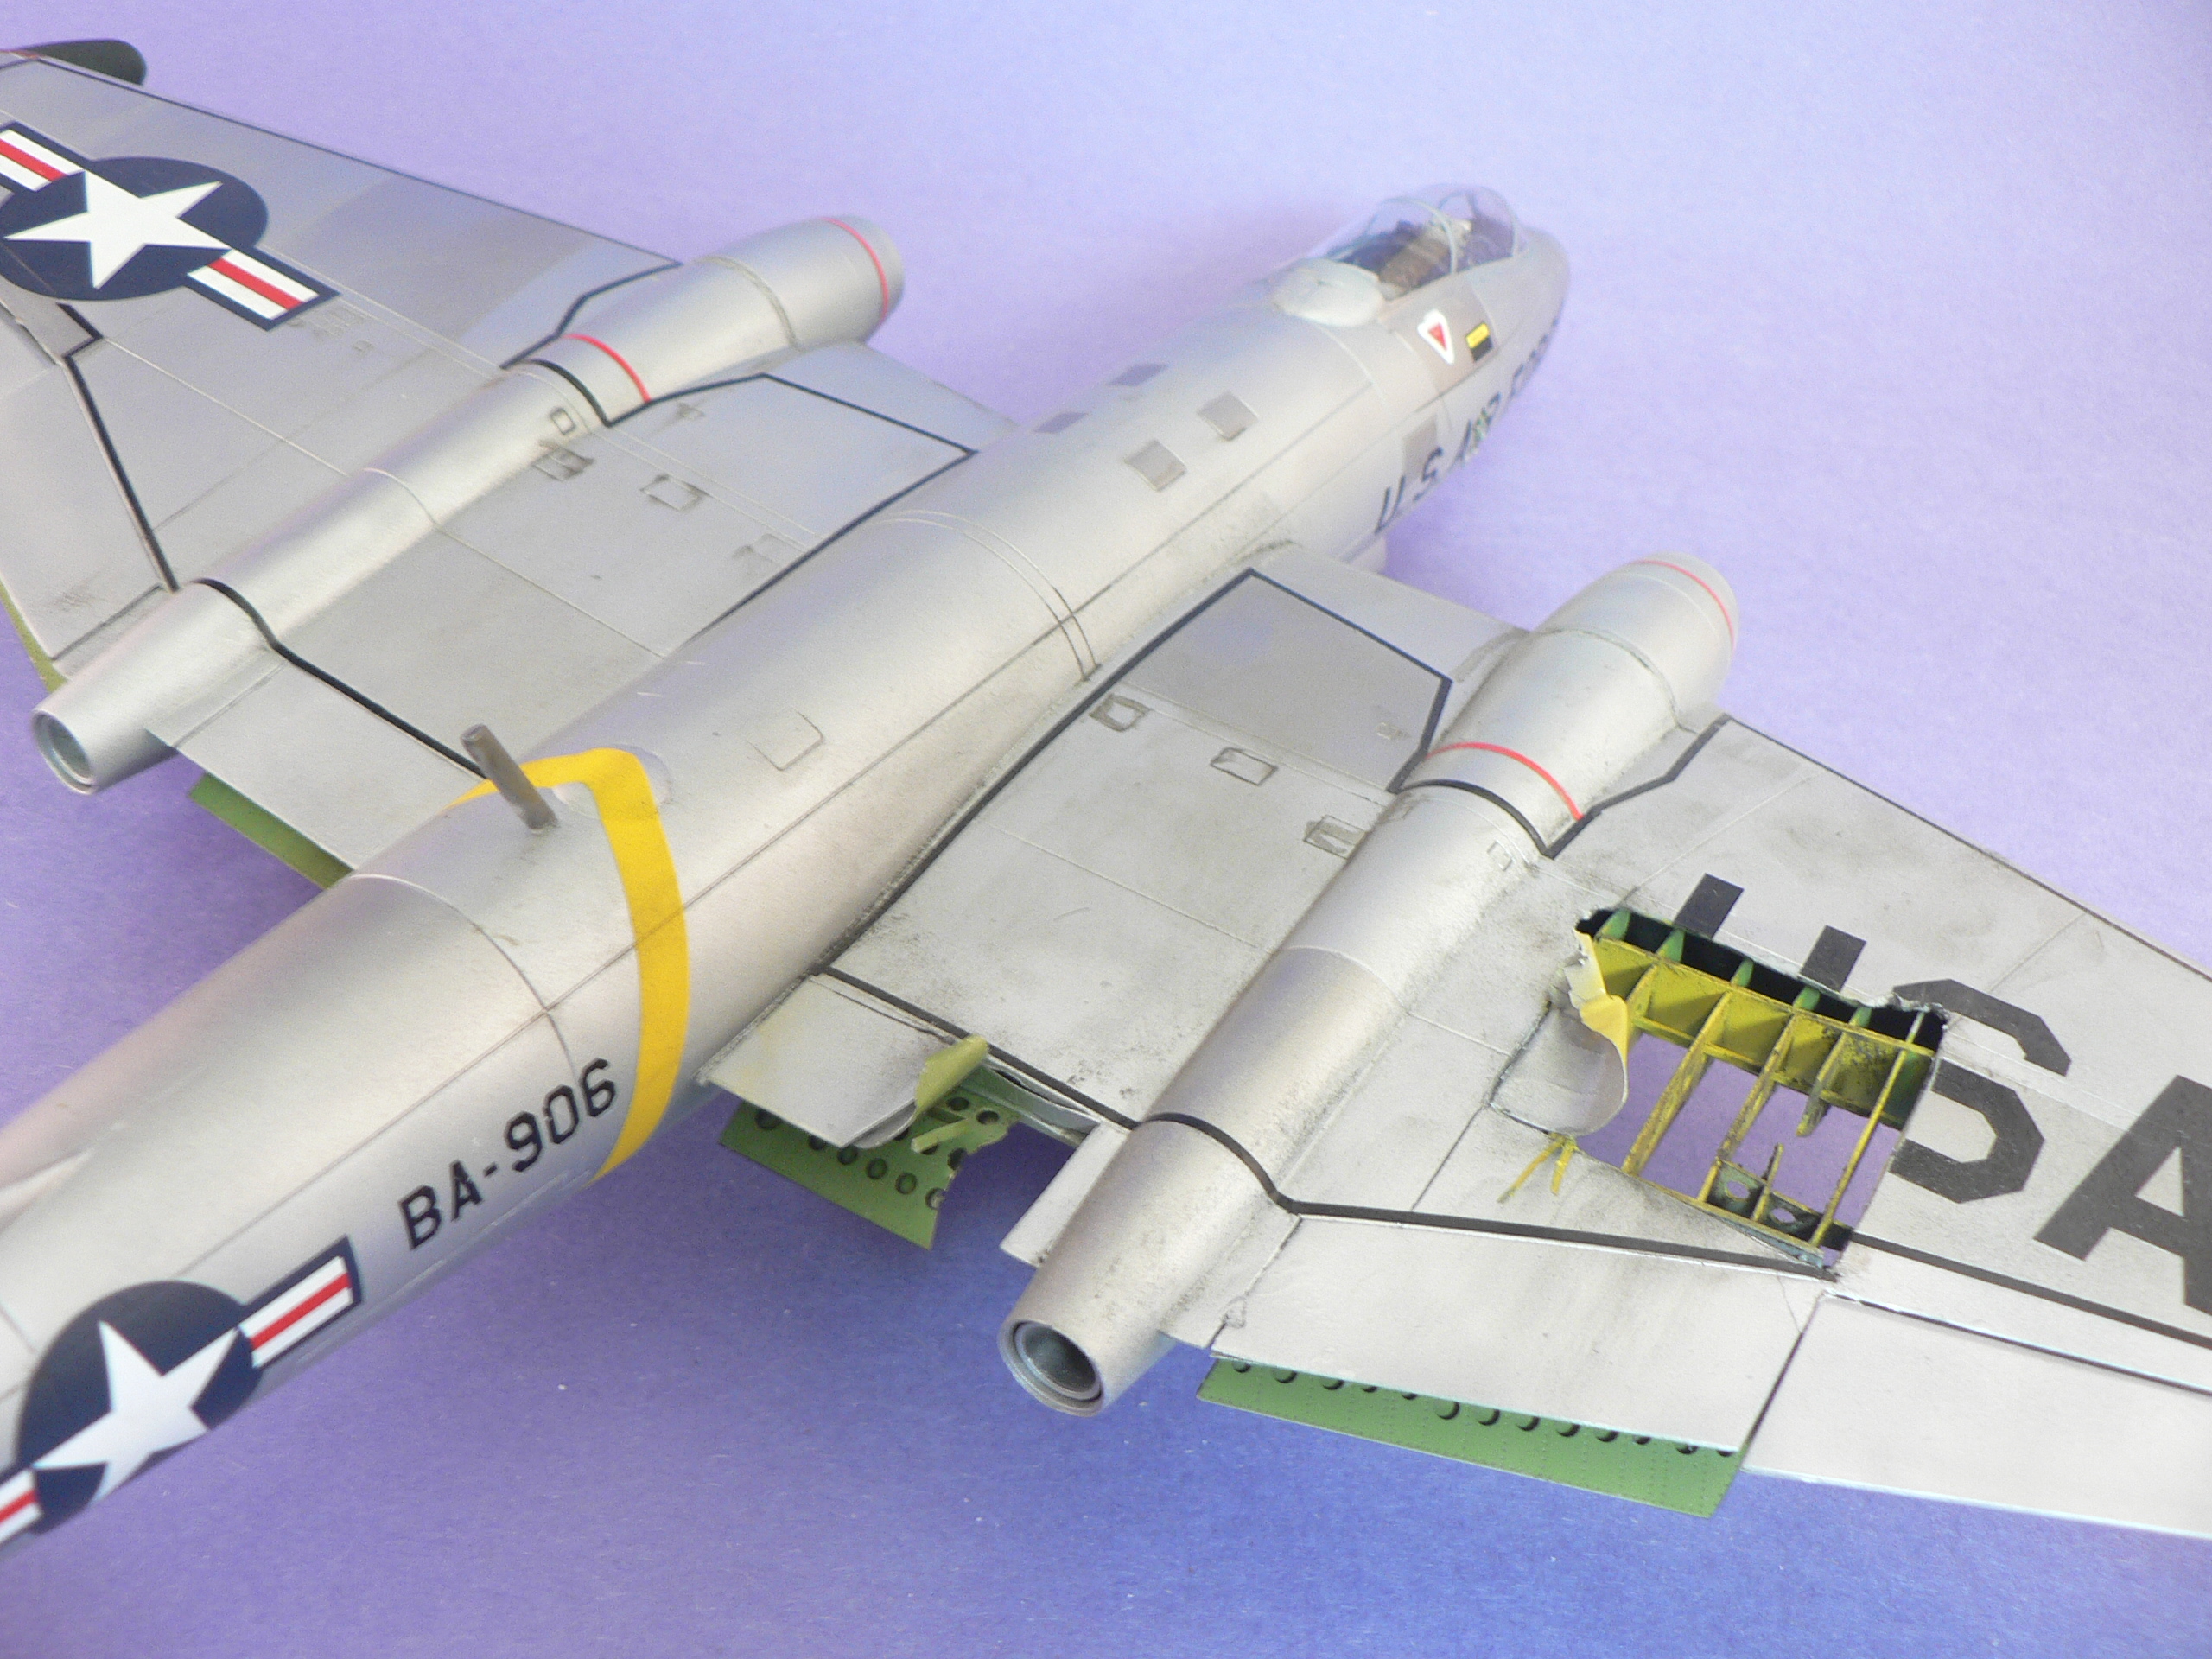
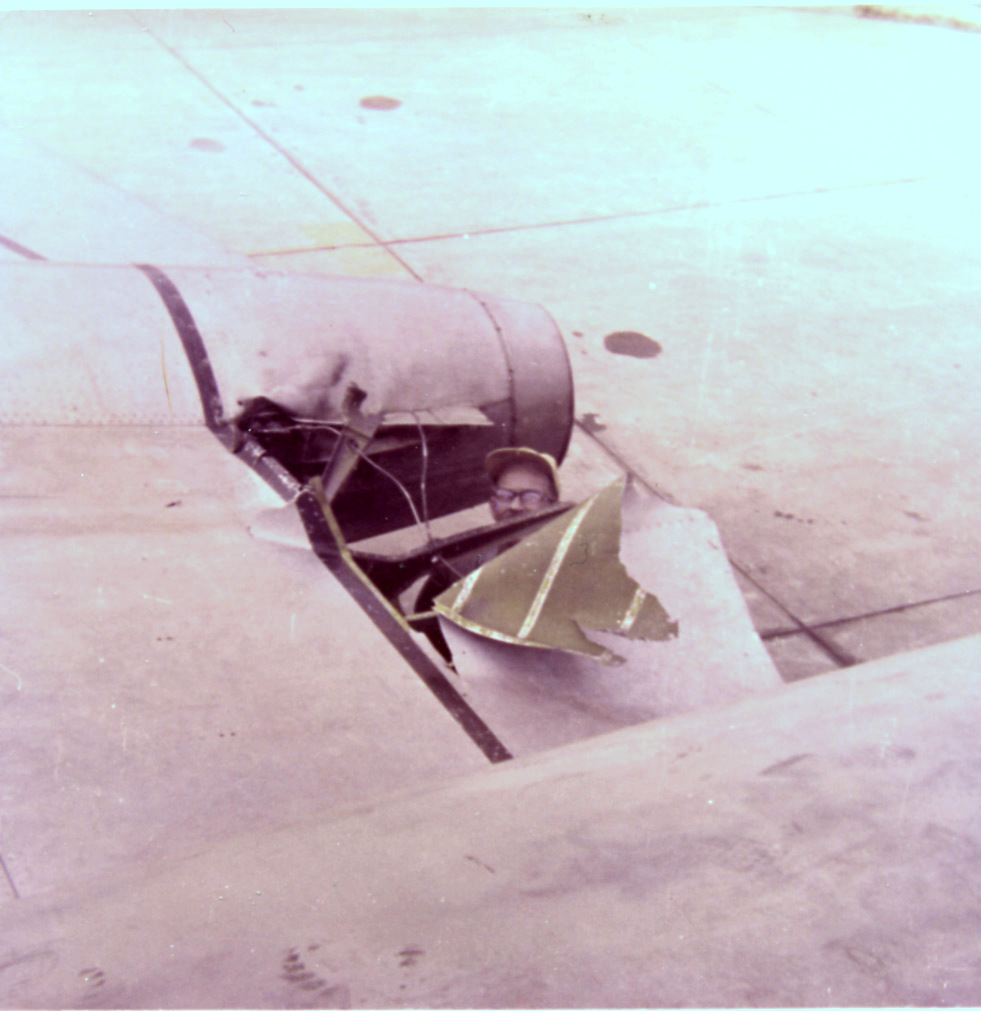
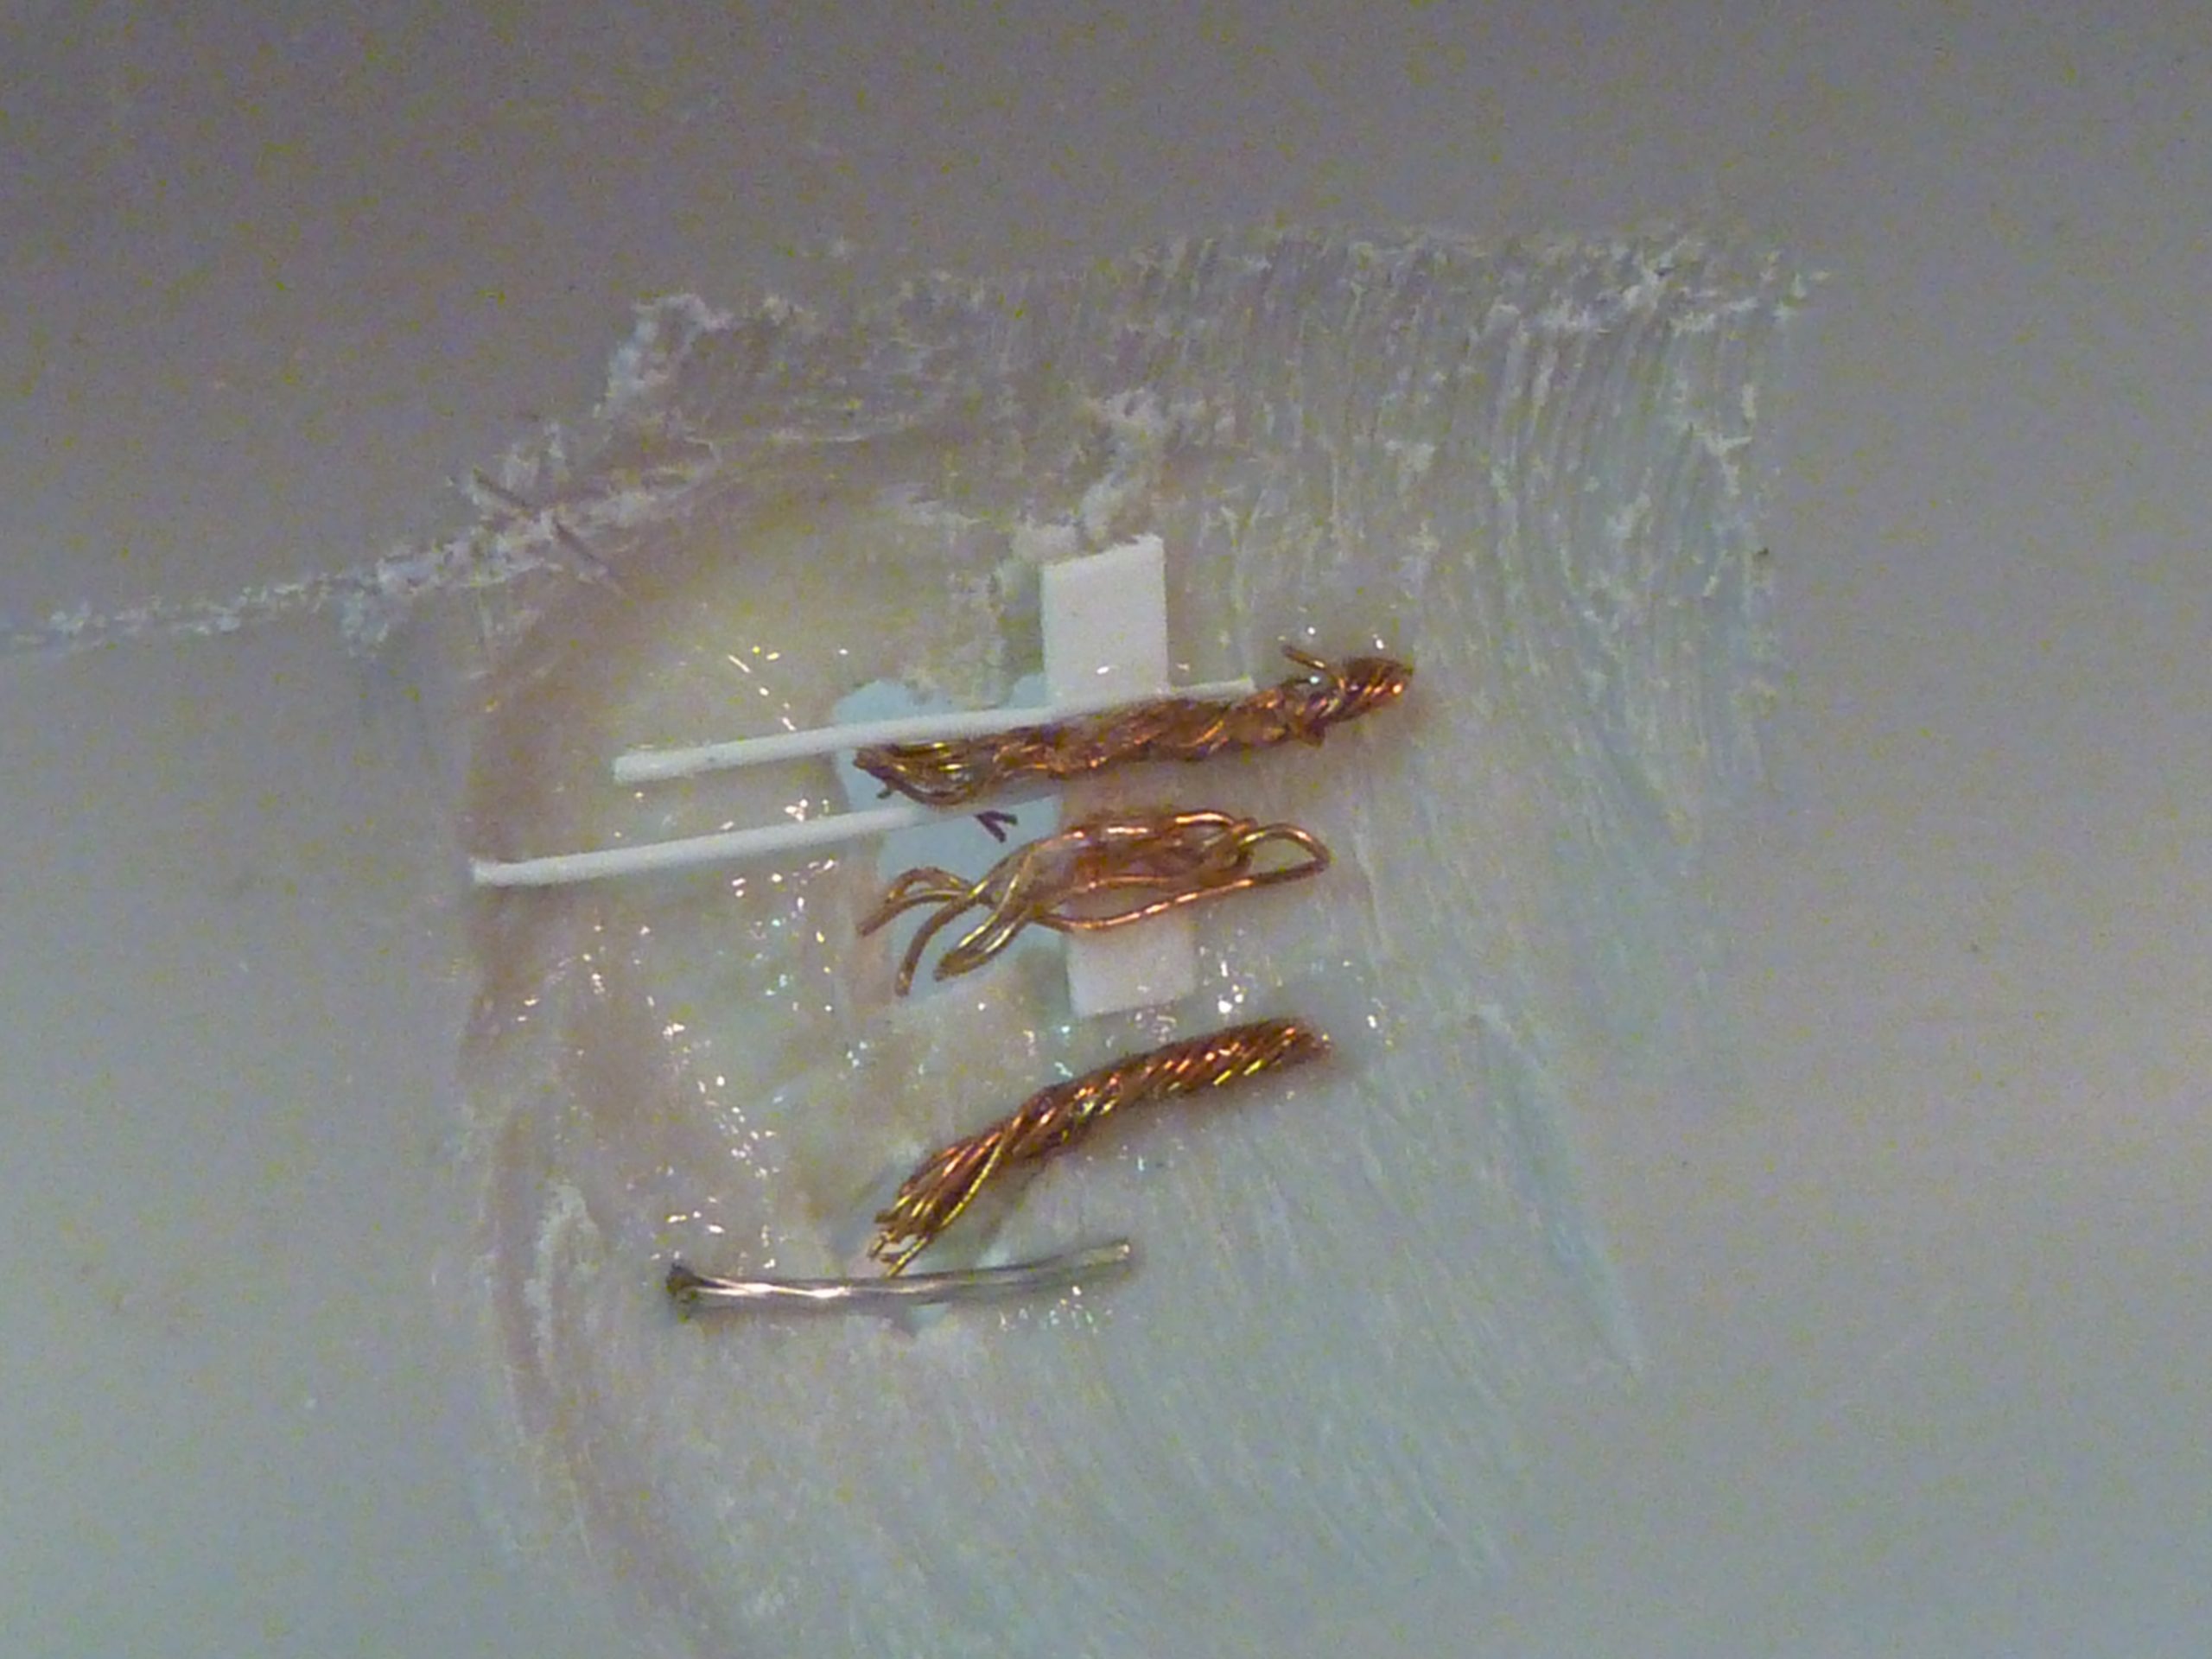
These were pictures provided by Col Mason of his B-57 immediately after the mission. The damaged wing area, you can clearly see that the both the upper and lower coverings were destroyed
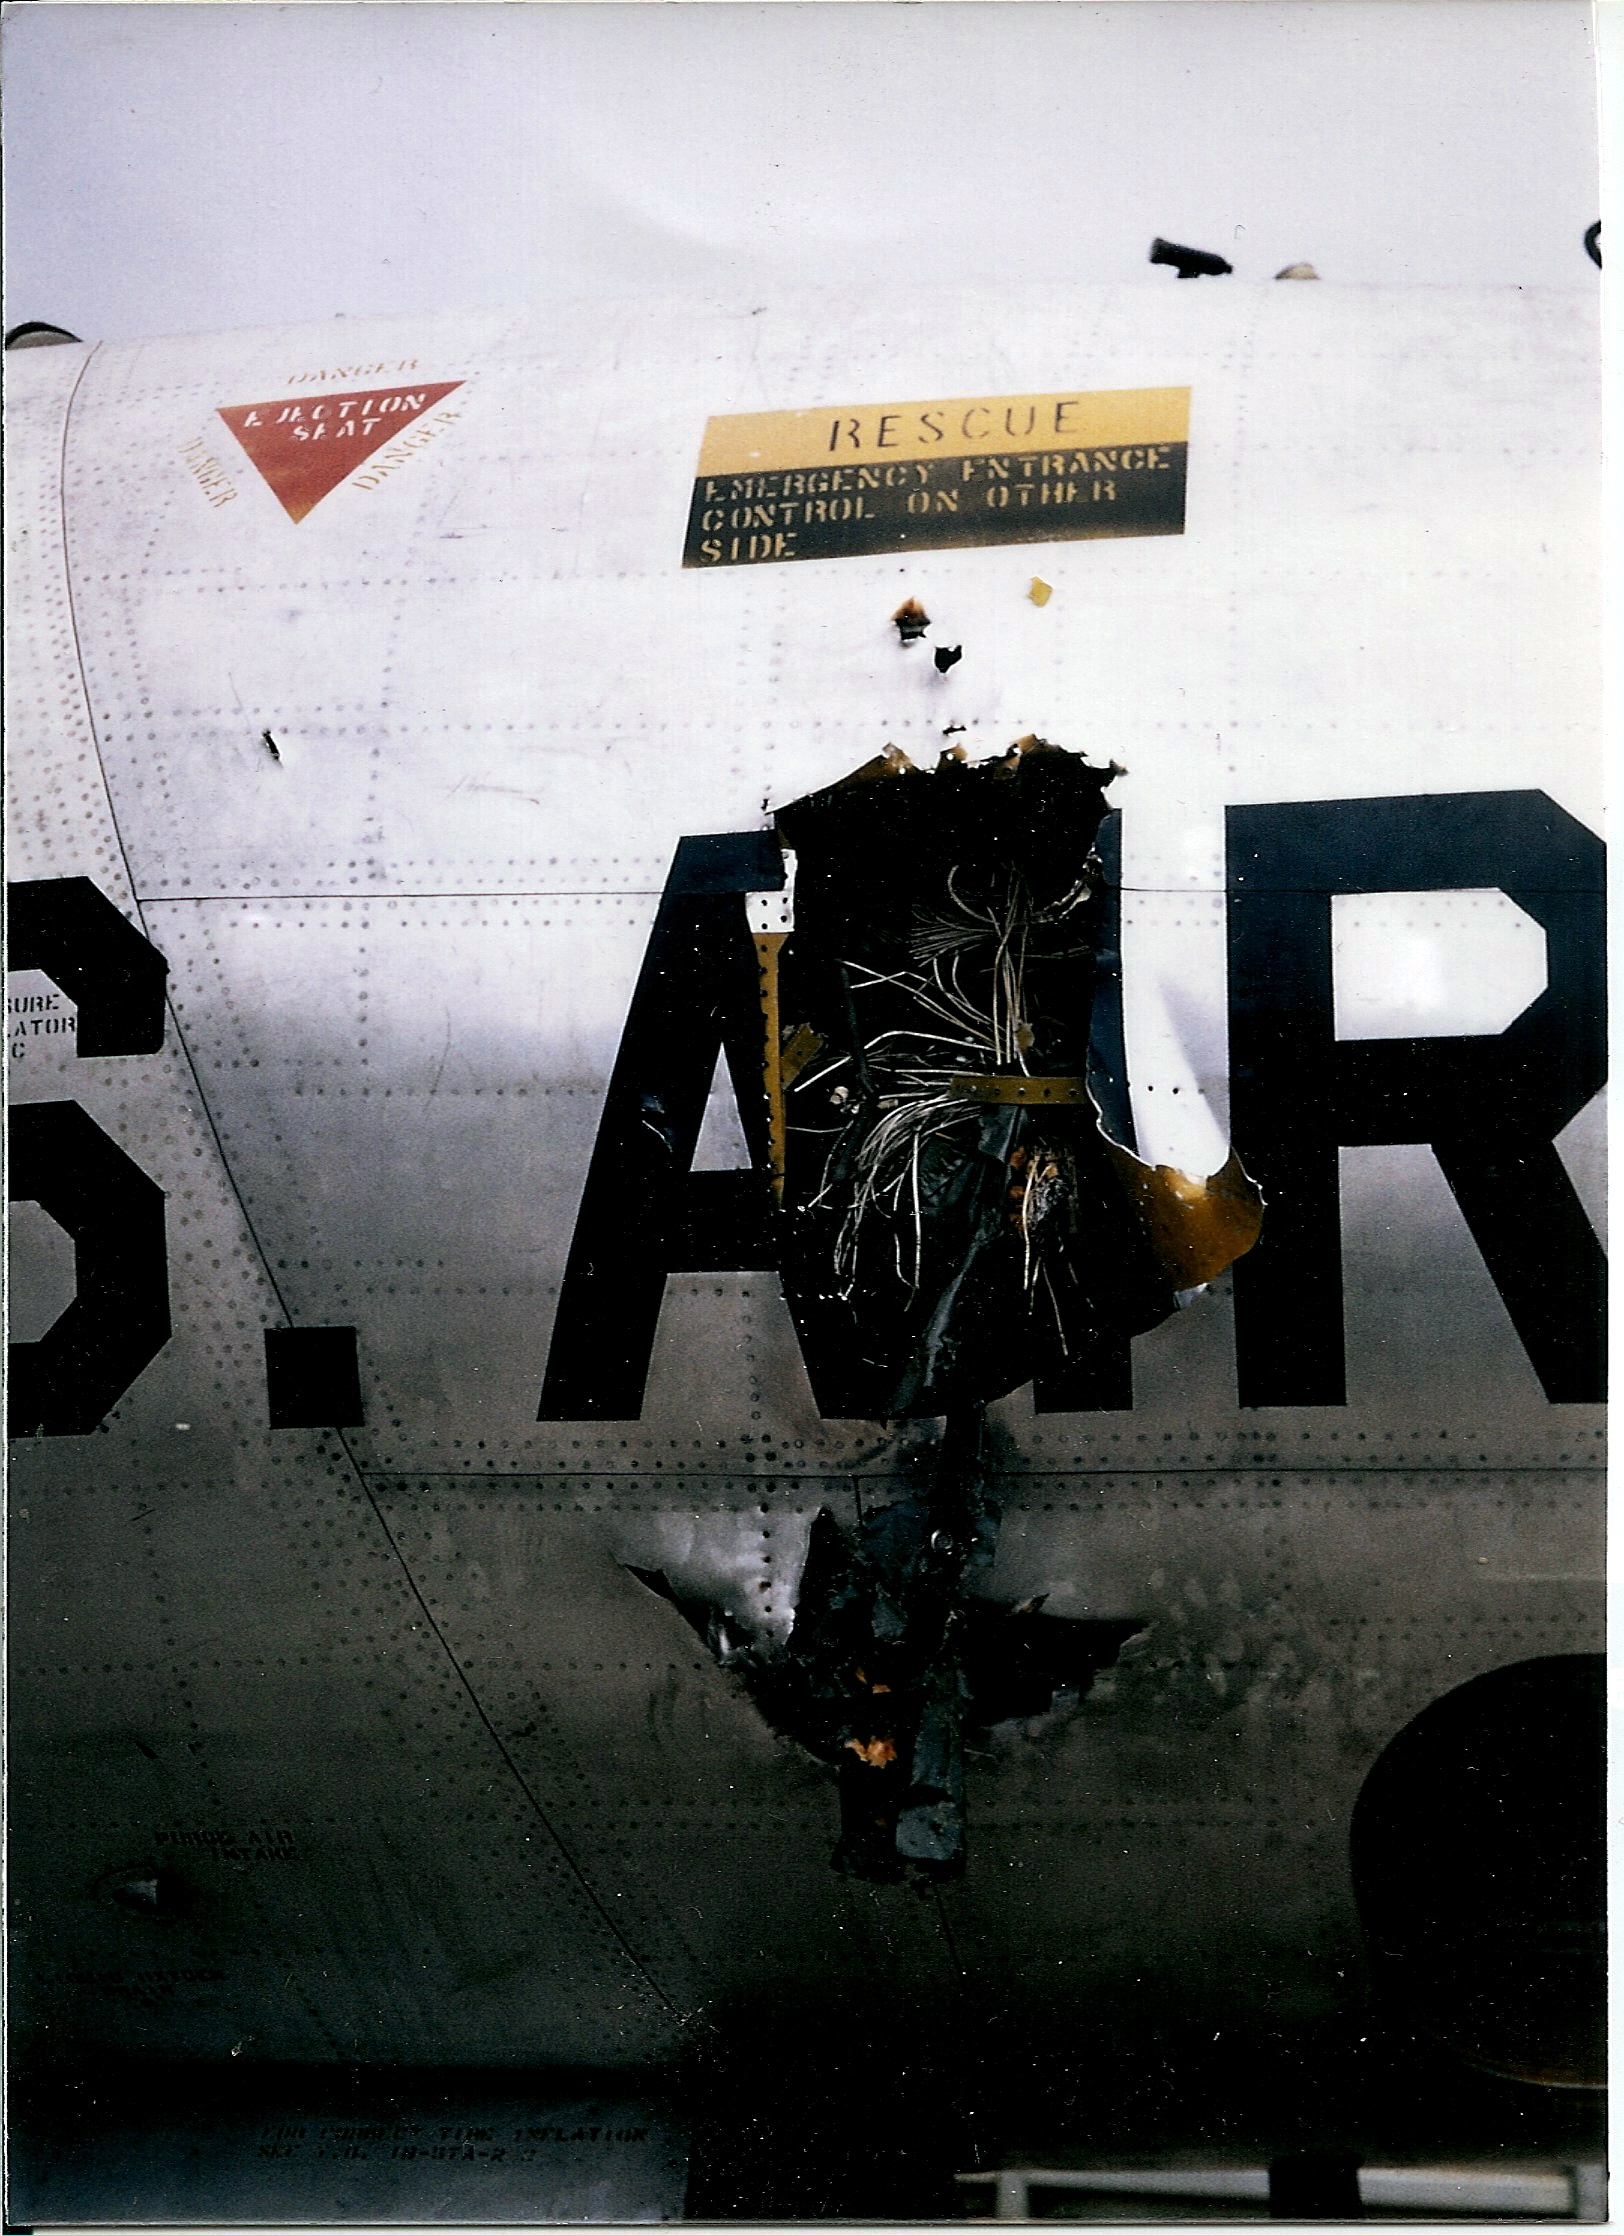
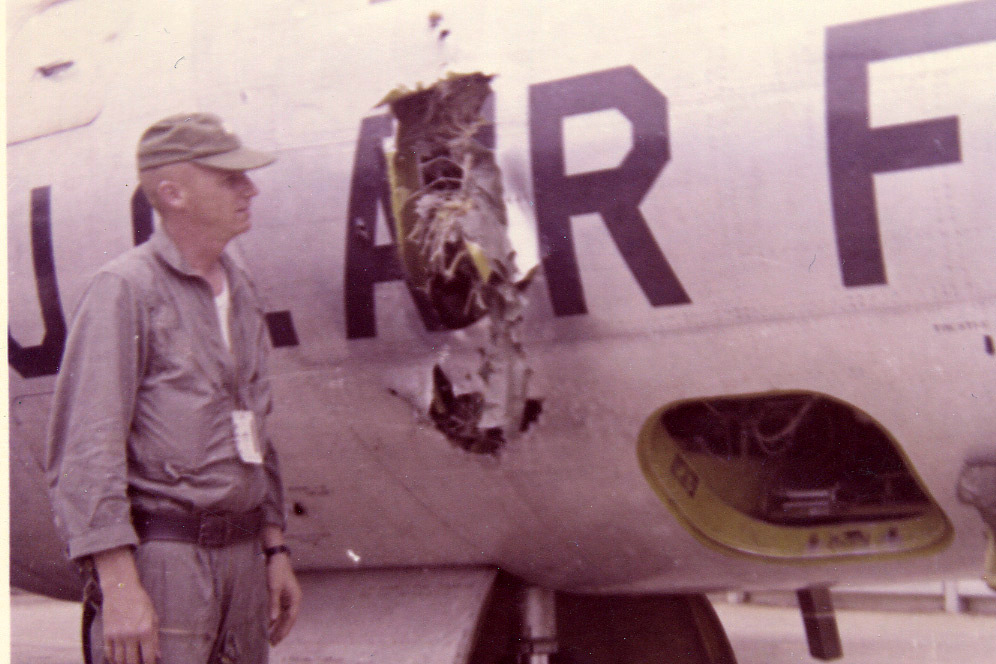
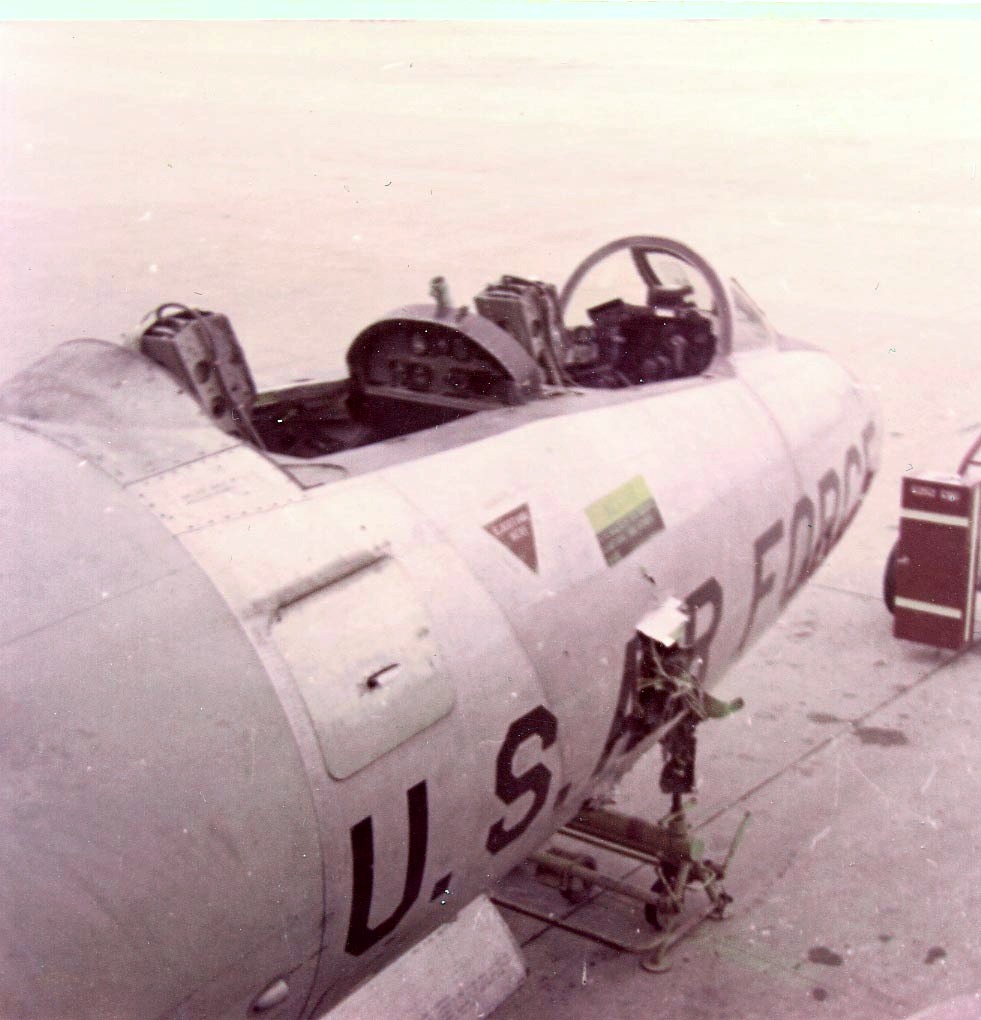
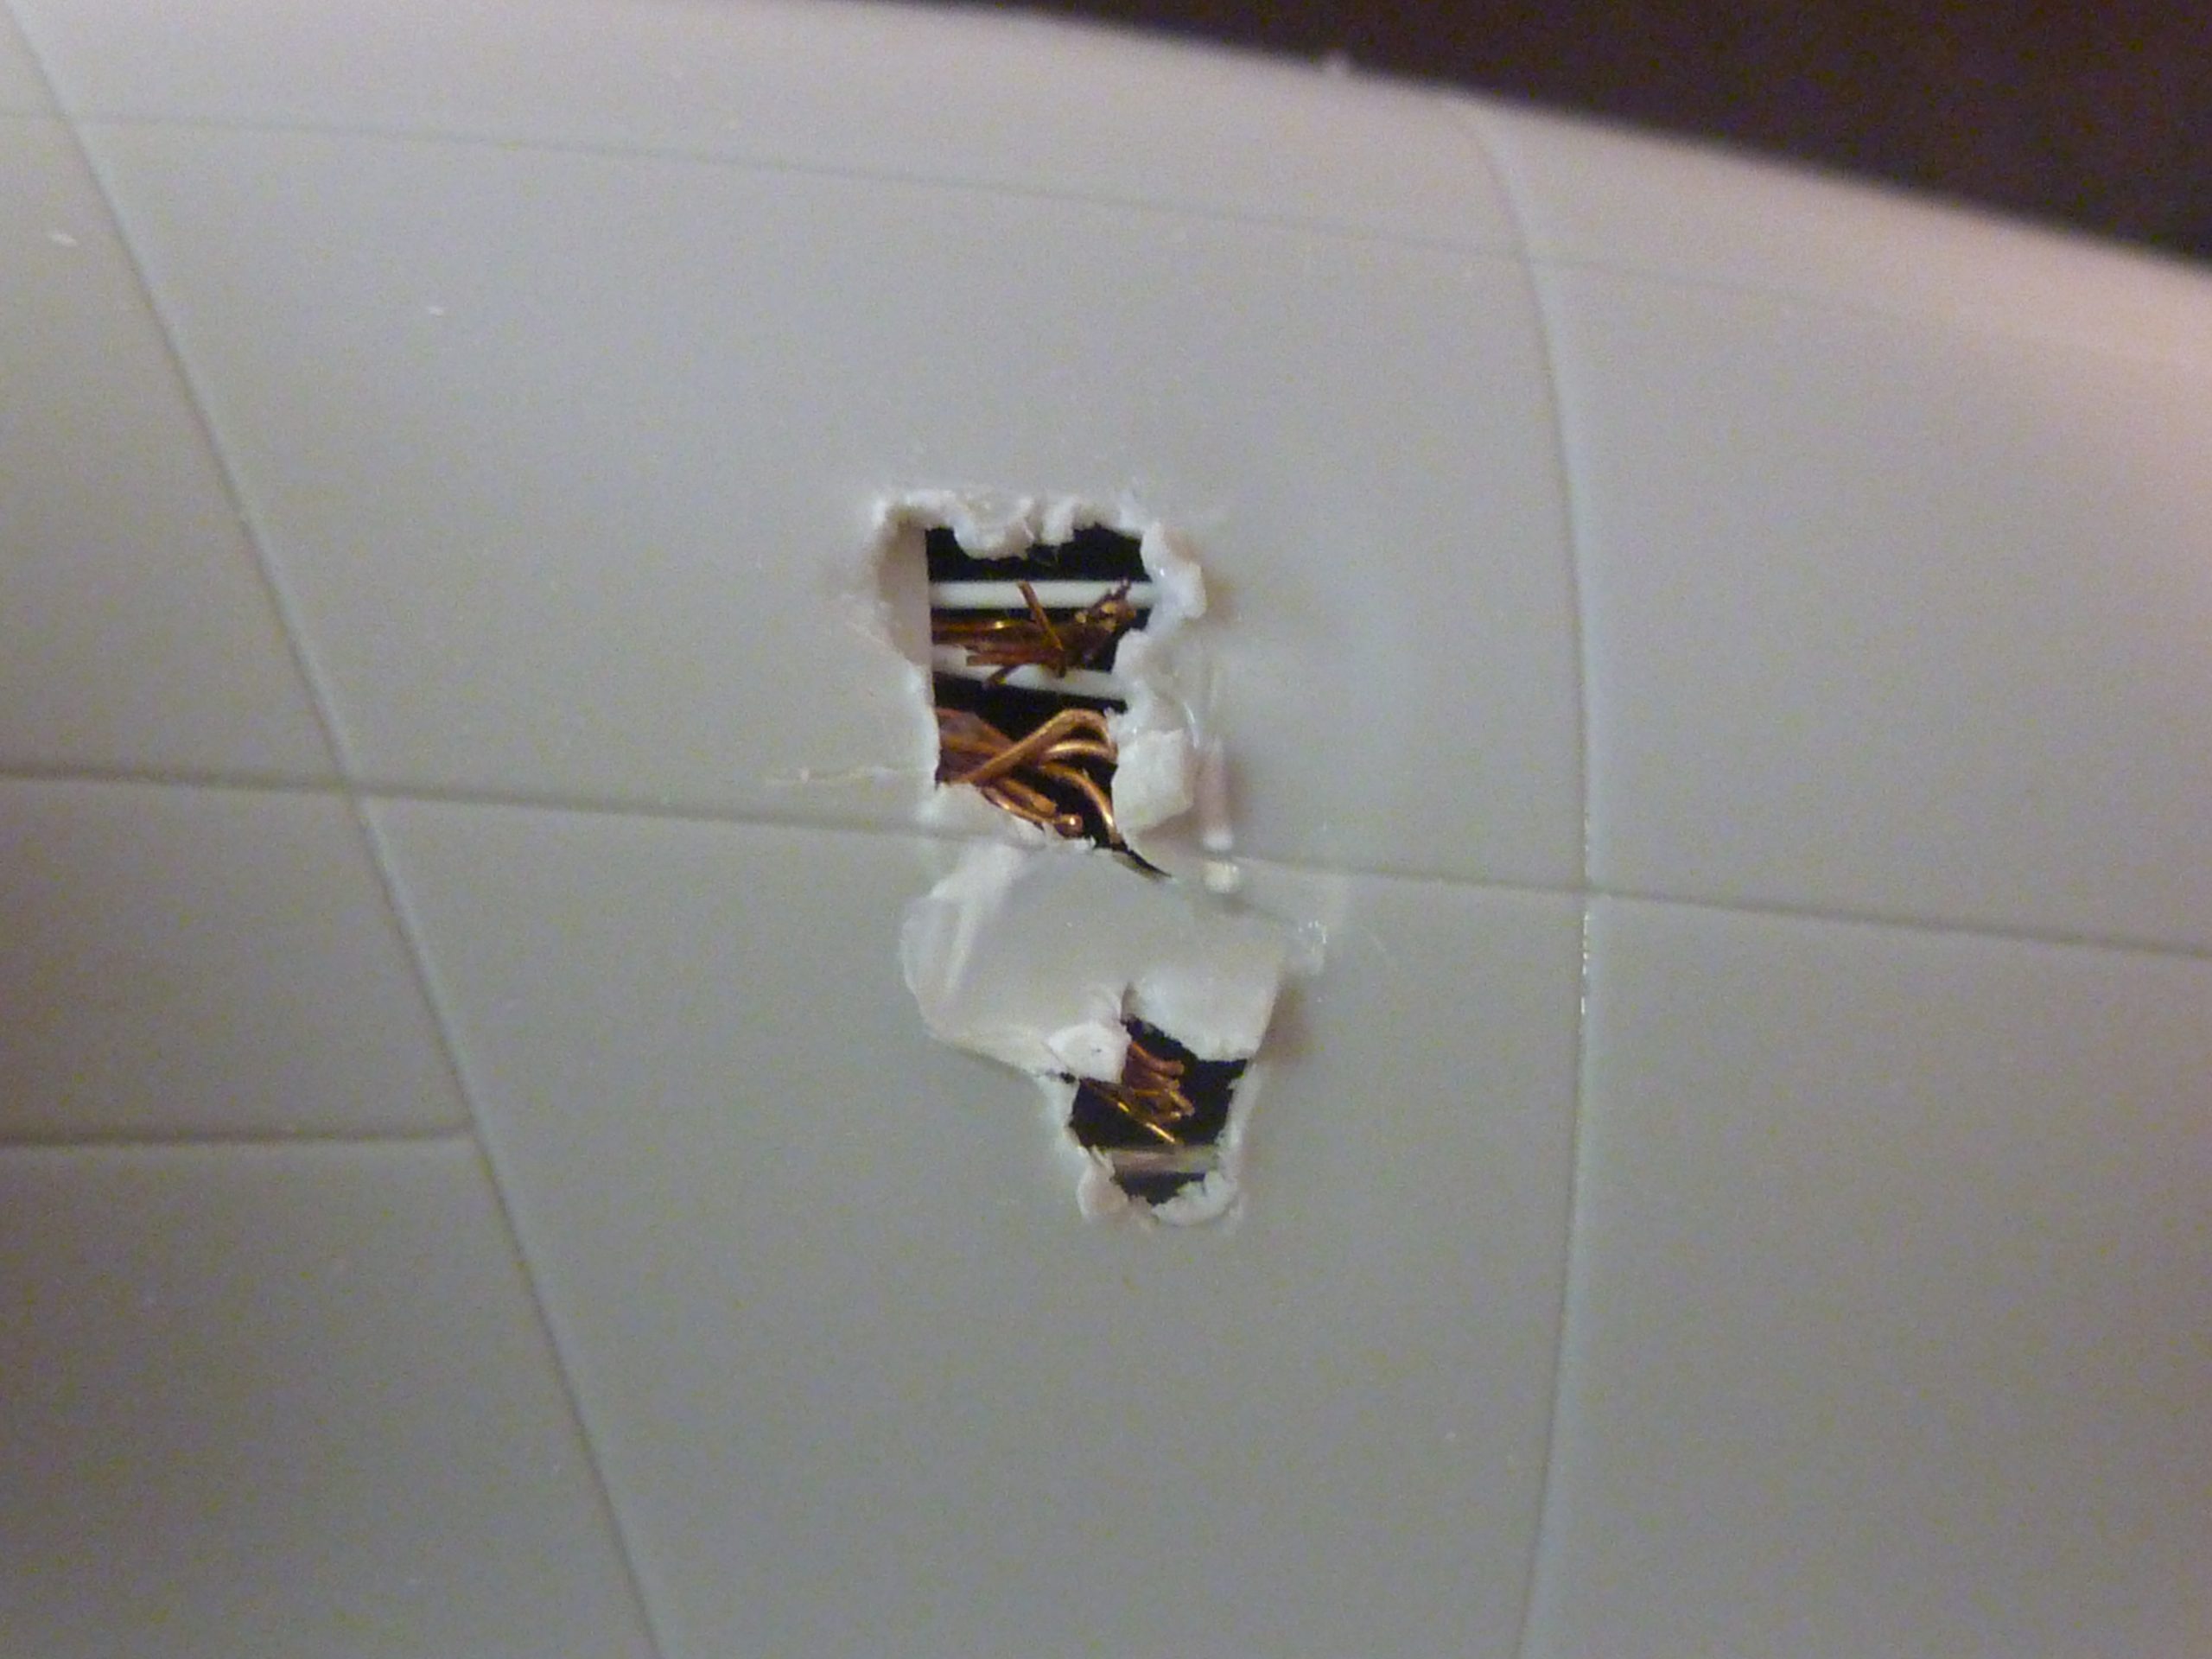
The damaged forward fuselage, where rear seat navigator – Capt. Jere Joyner – was injured.
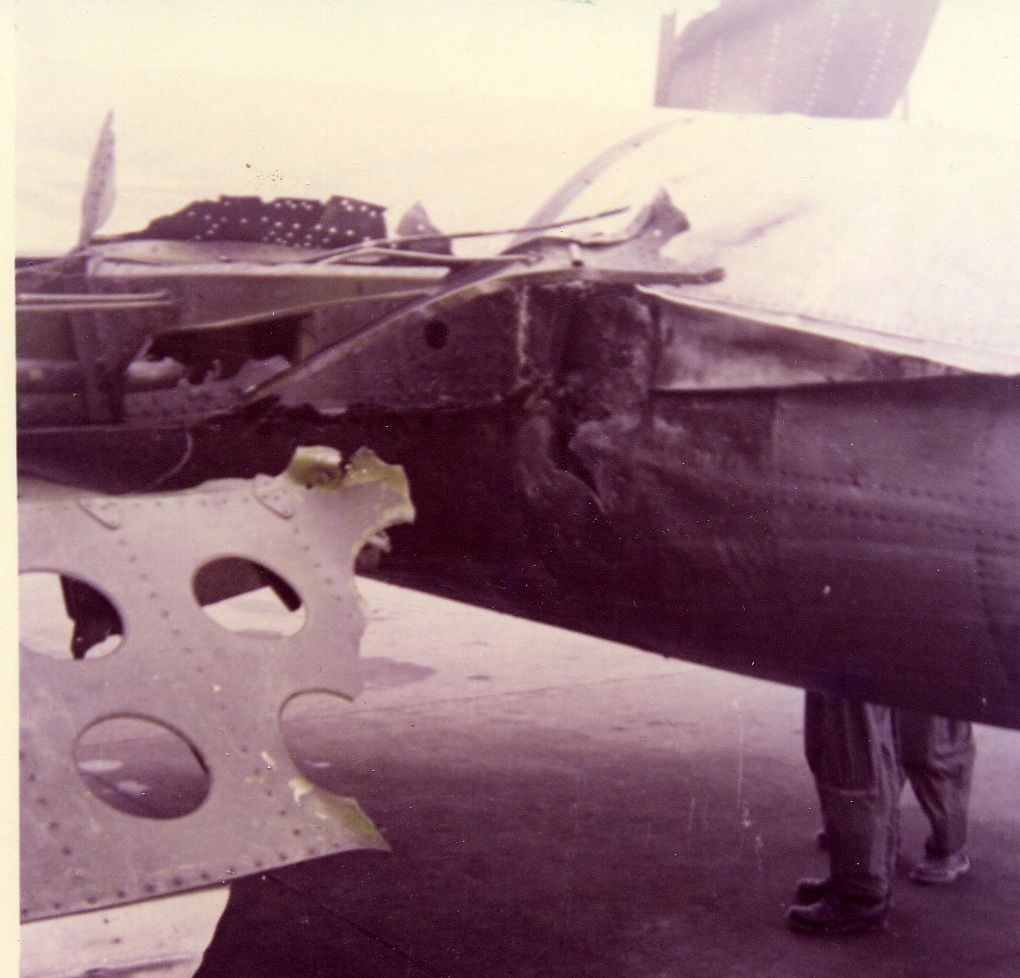
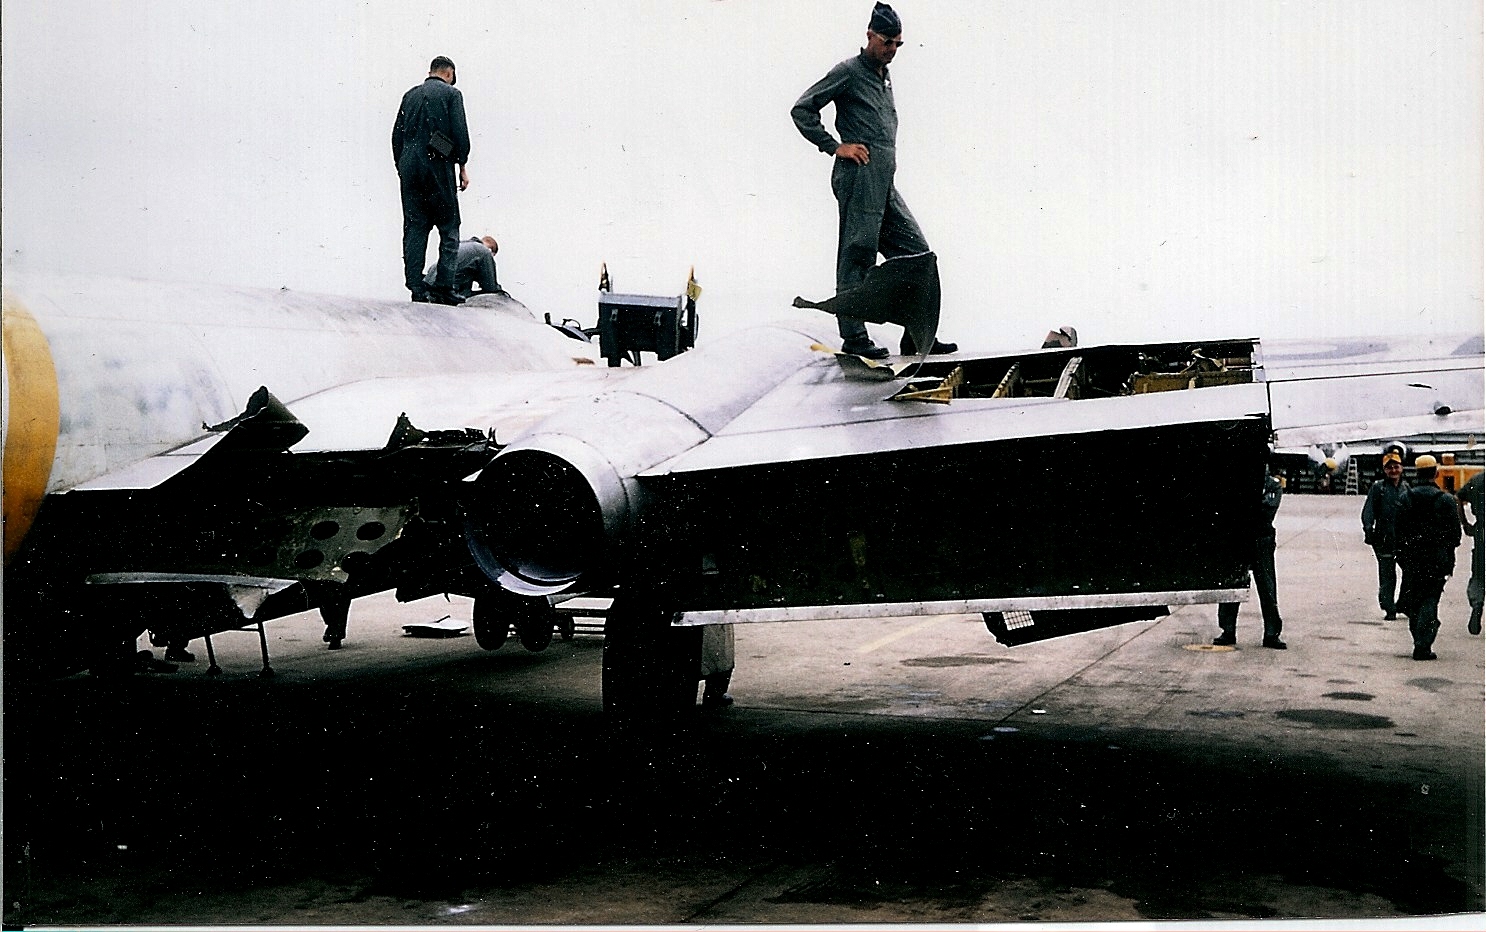
More damage to the flap area in the right wing.
Building the damaged fuselage area
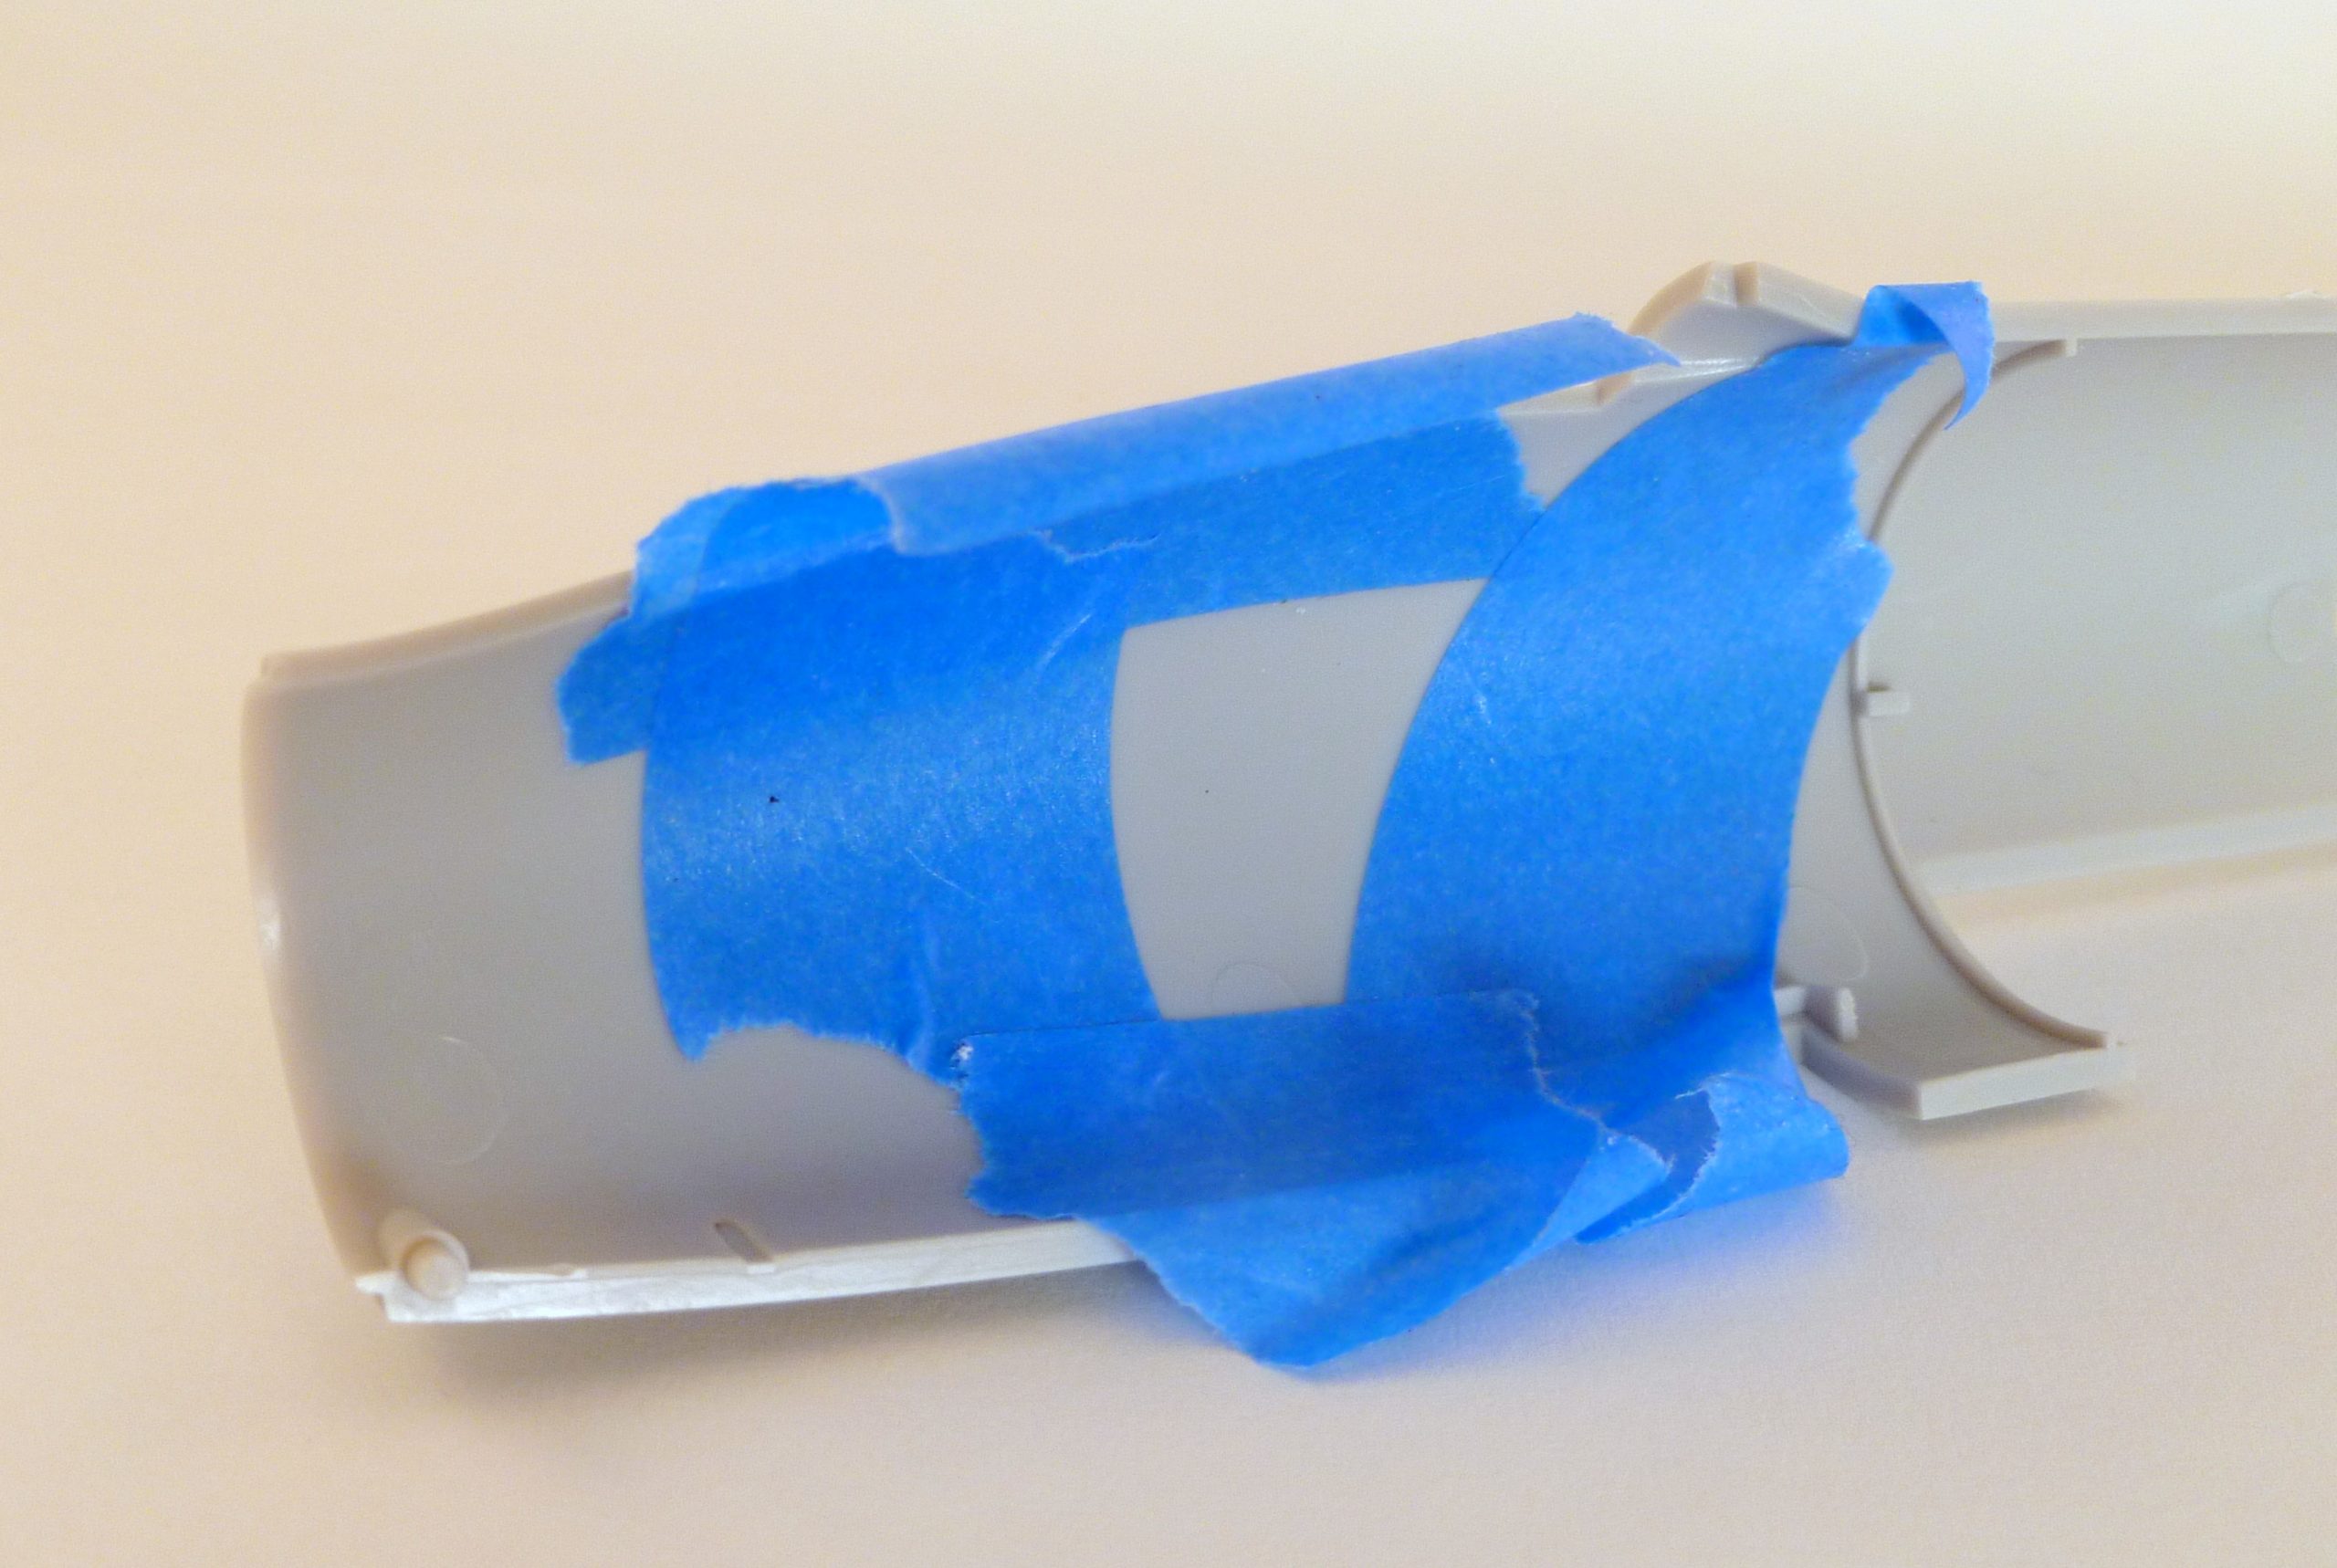
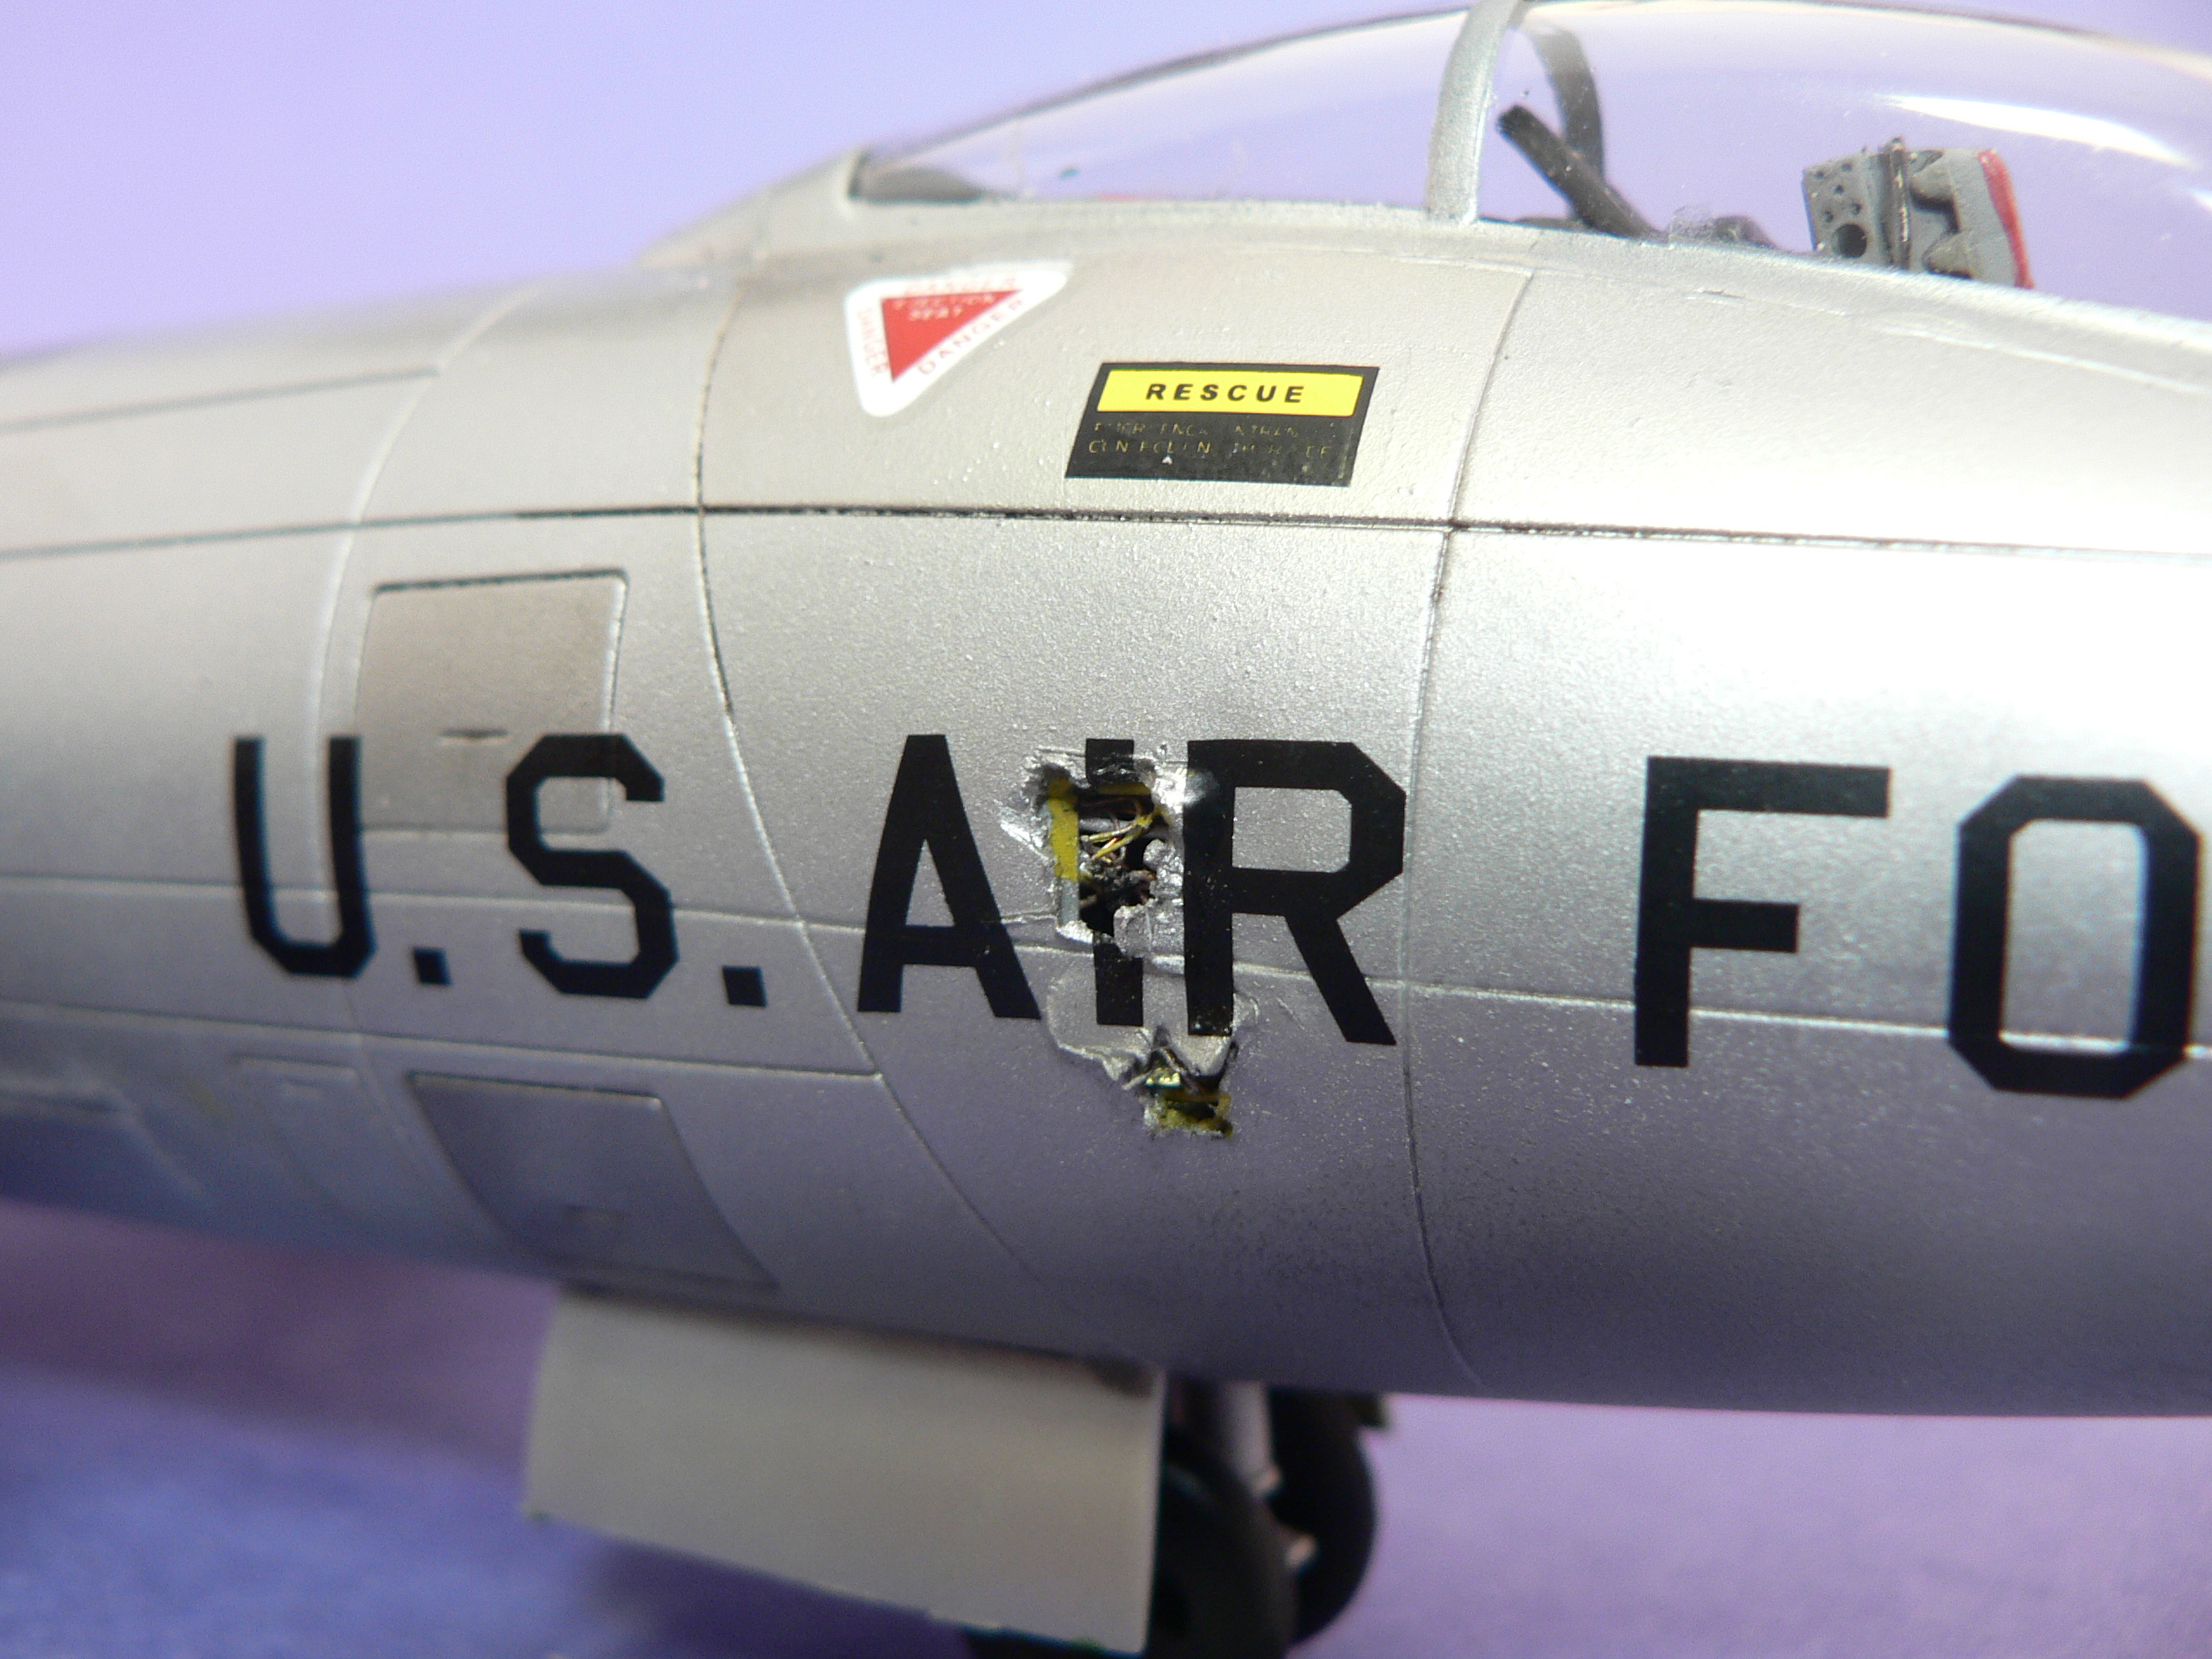
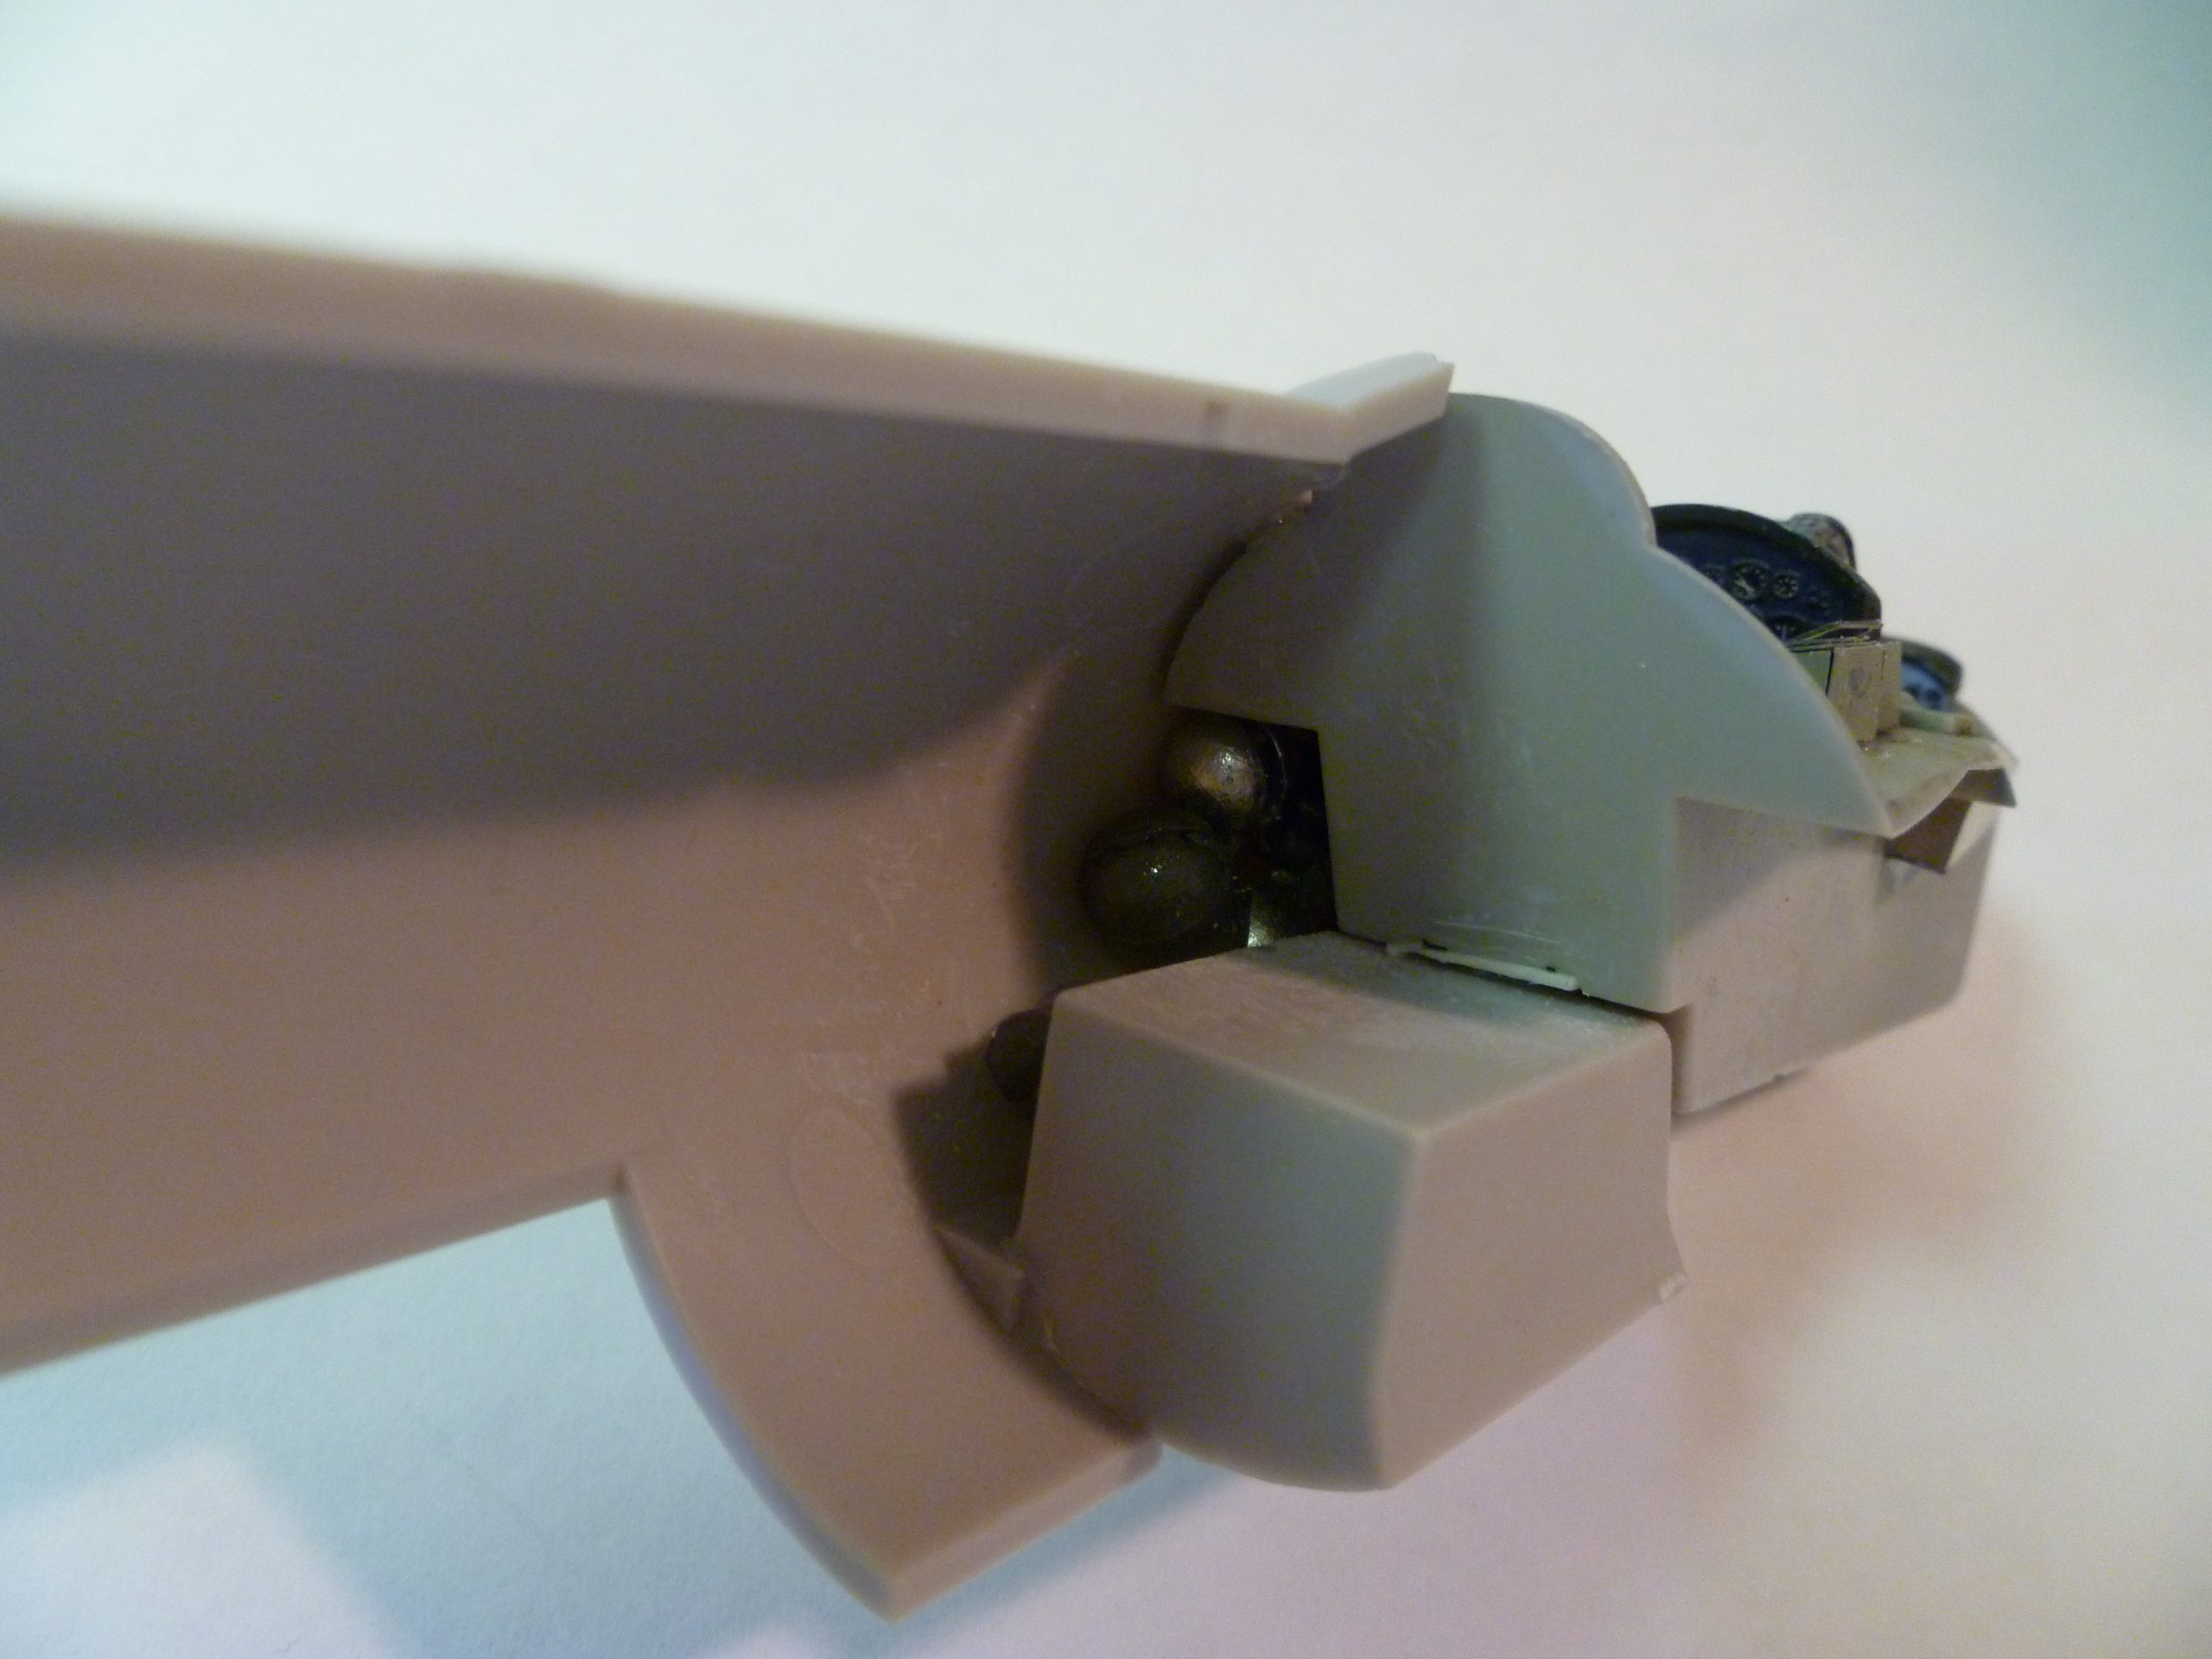
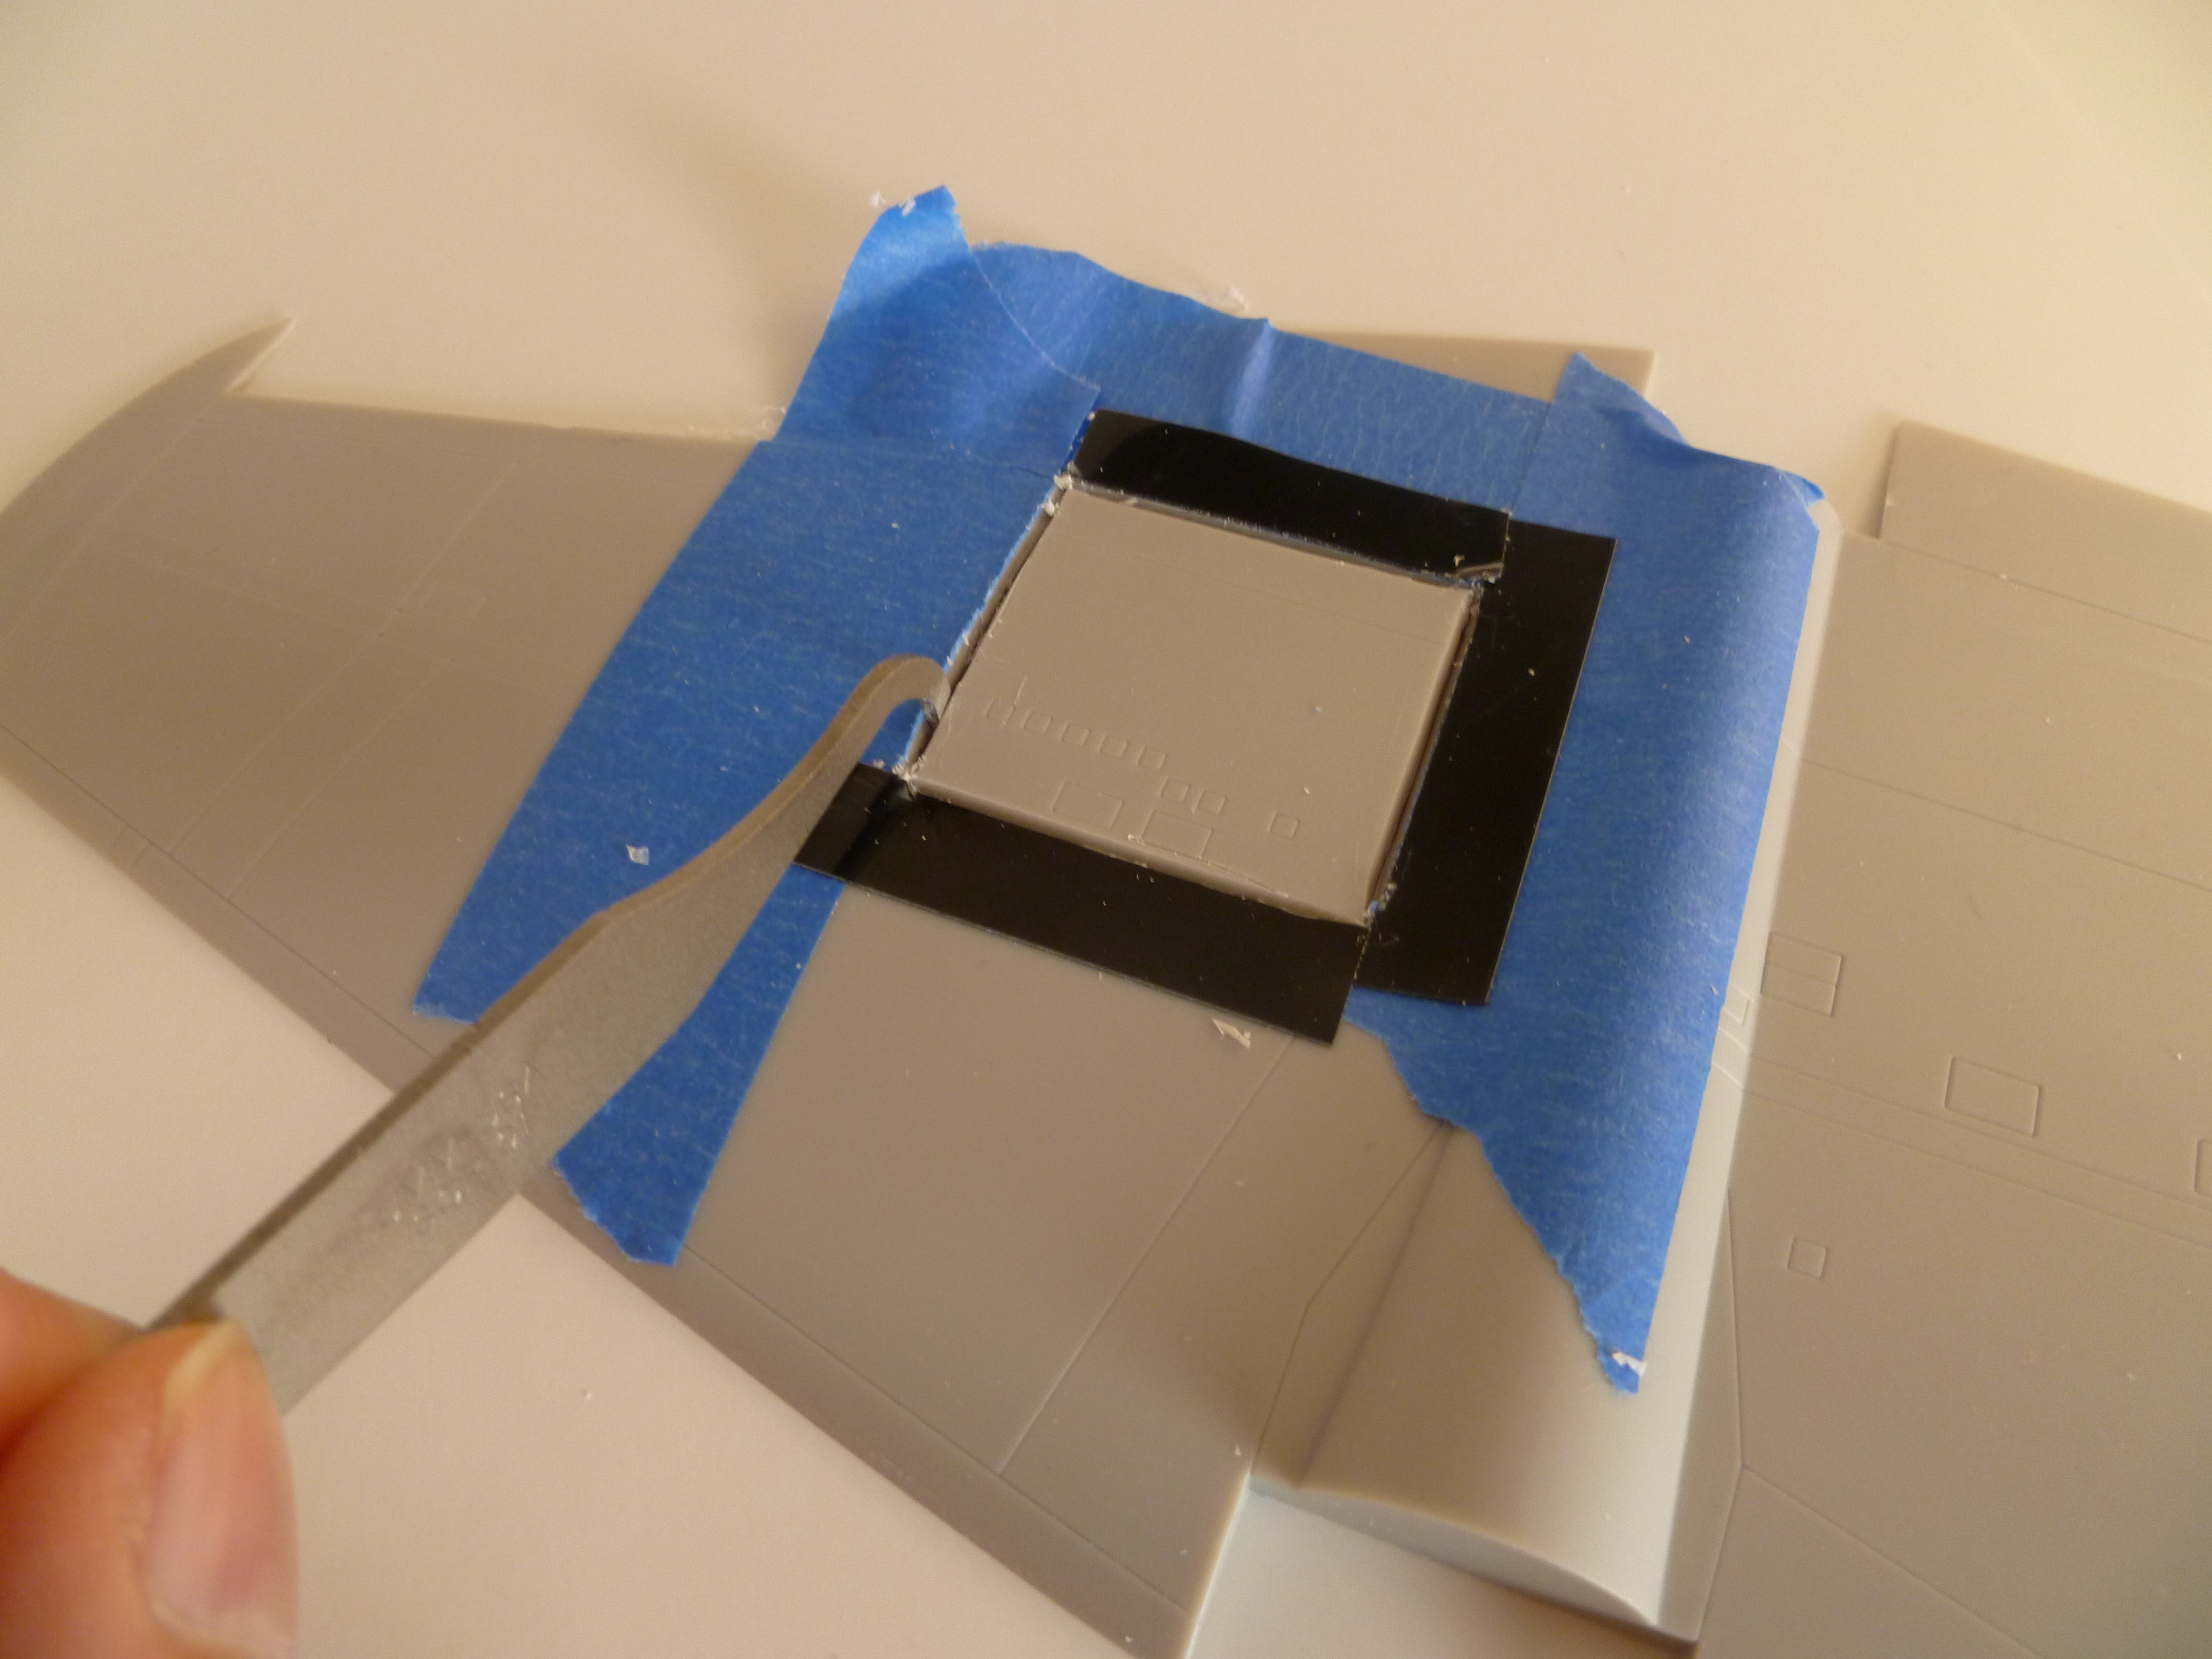
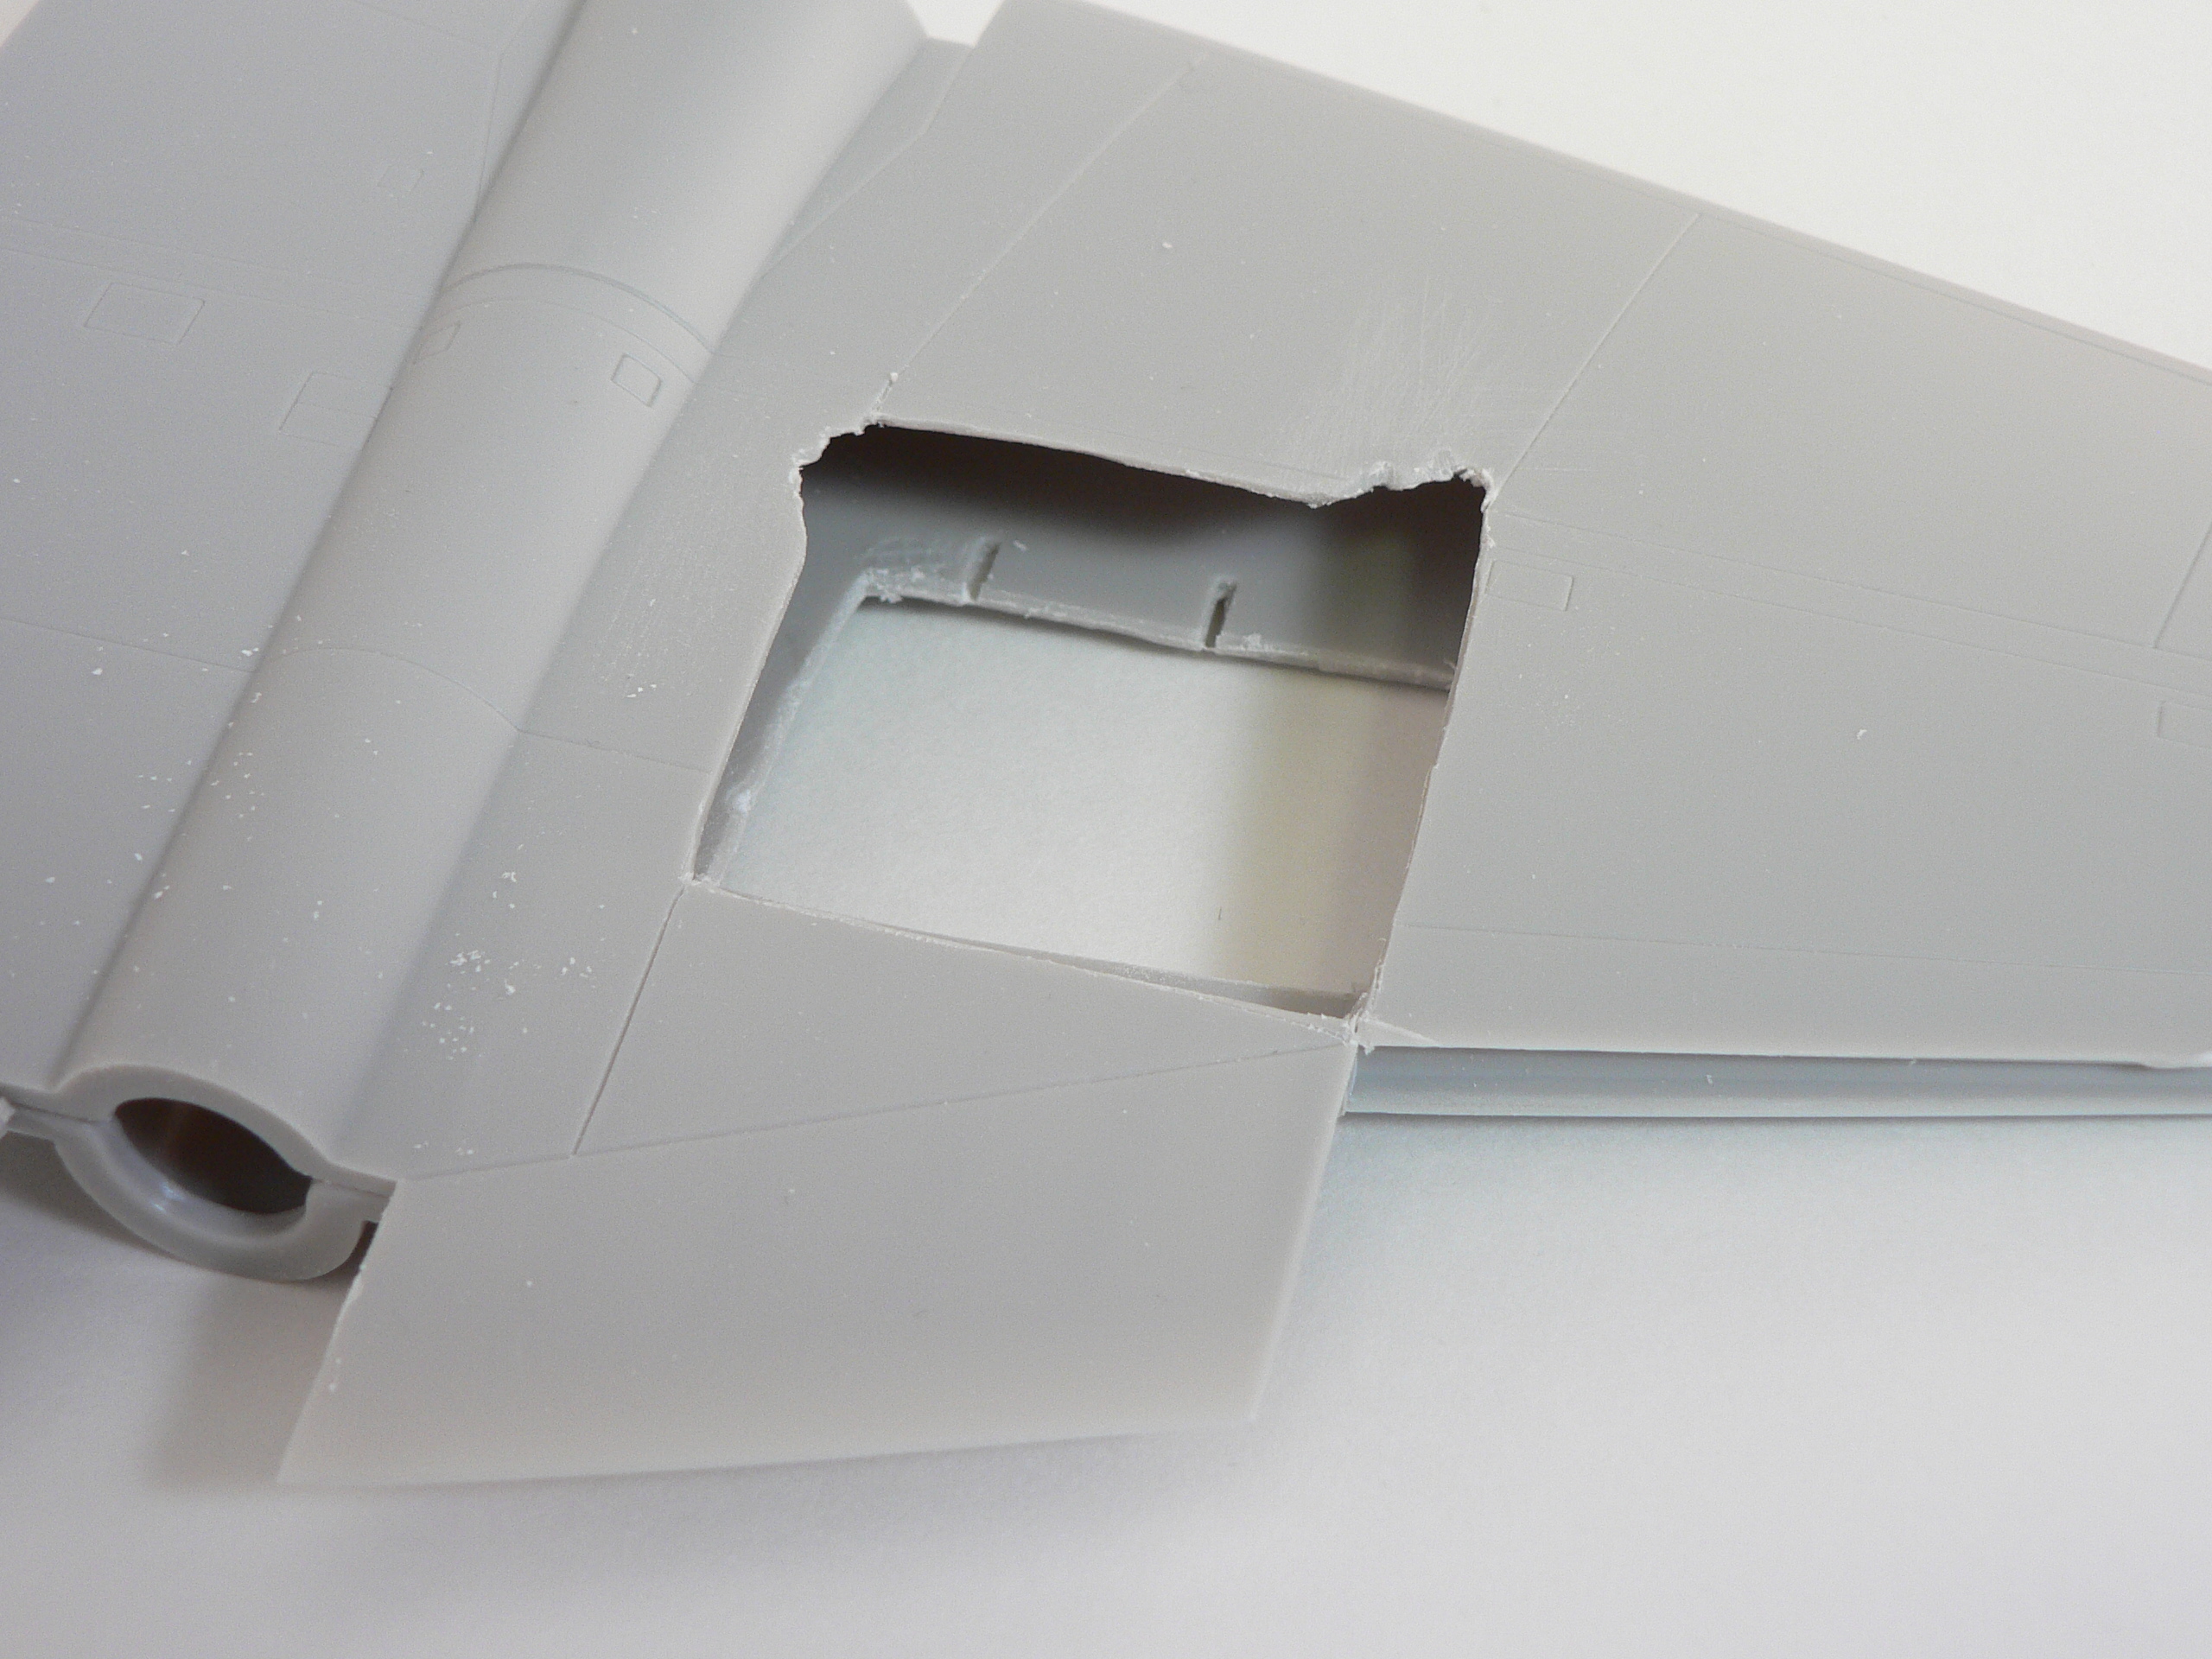
First up, I had to create the forward fuselage damage before I can put the cockpit in. To thin the plastic wall, I protected the outside area with tape. Then using a dremel tool with a grinder, I removed the plastic, thin layer at a time until the plastic was translucent. I used a No 11 blade to punch through and carve up the plastic from the outside. Using plastic scraps and thing wiring, I created the bracing and severed wiring to the damaged area. From the inside, it just looks like a mess. From the outside though, it looks convincing that a busy interior exists.
Building the Cockpit:

The kits cockpit was very basic and also incorrect in the details. I used the Eduard Interior detail set to make more convincing one. You can clearly see the much better detailed ejection seat with the photo-etch added.
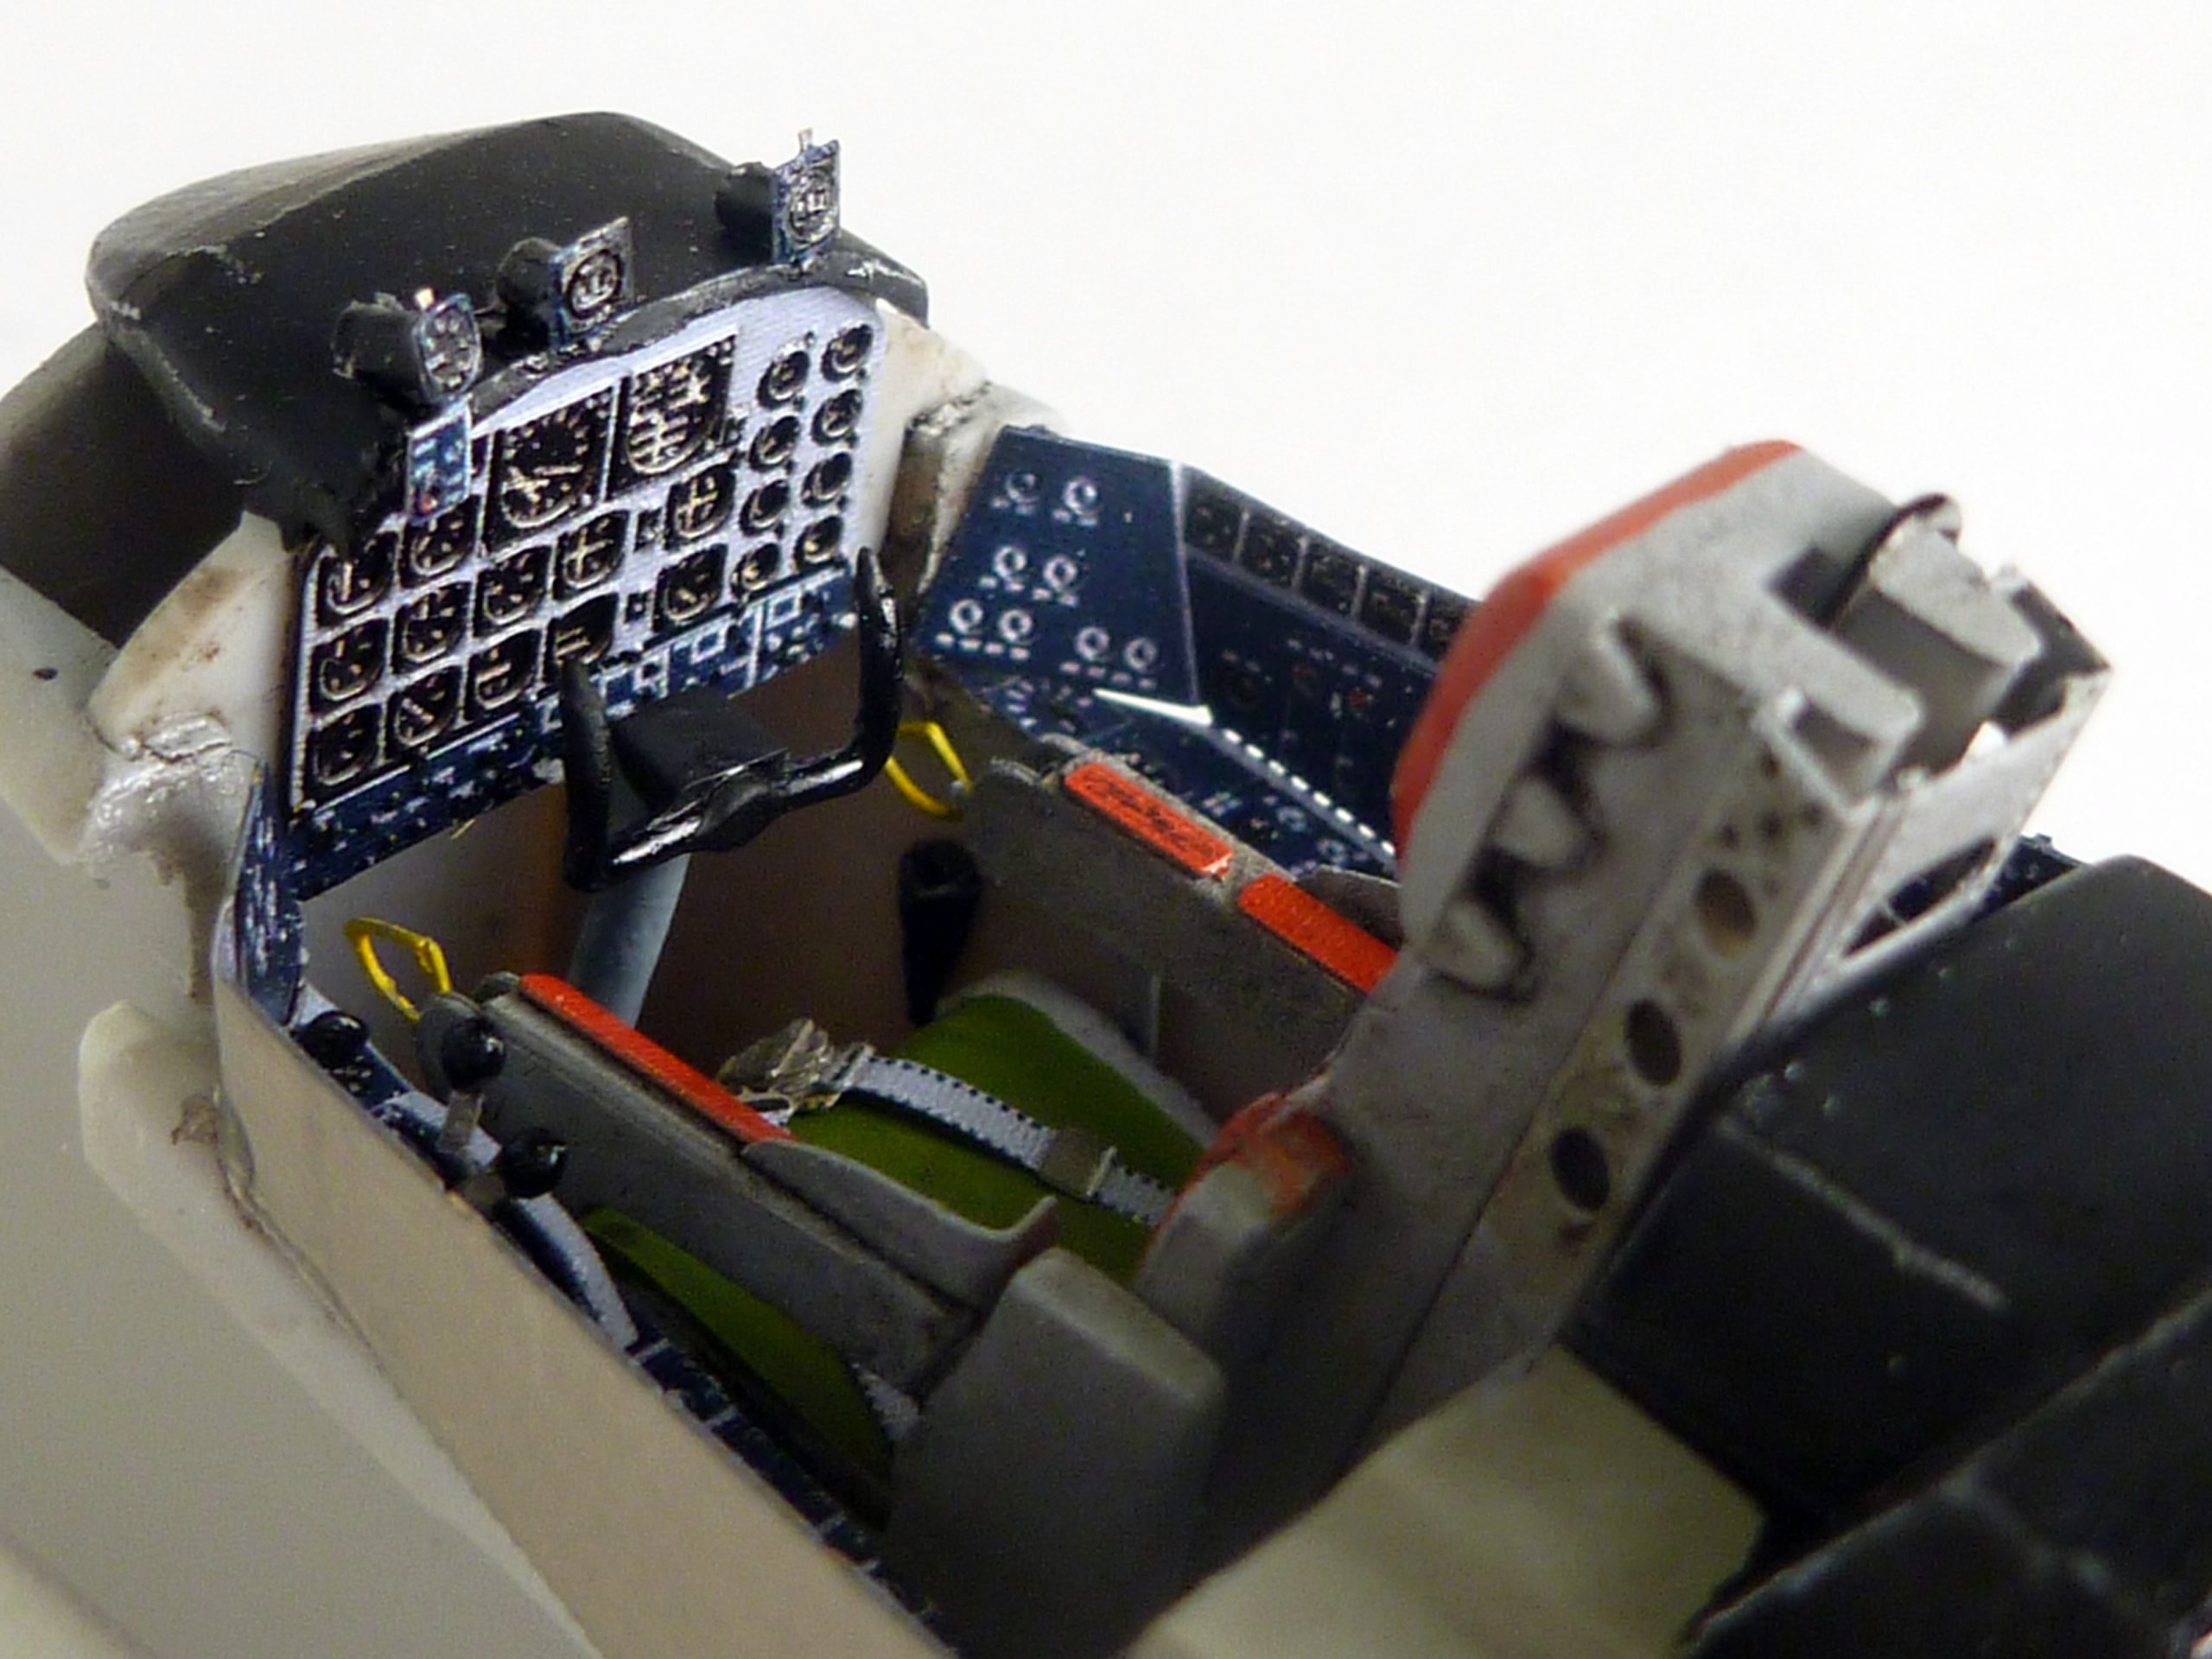
The front office finished, it’s a tight fit, but I was even able to add a relief tube made up for stretched sprue for those long missions! I gave everything a thick brown oil wash to give everything a dirty and used look.
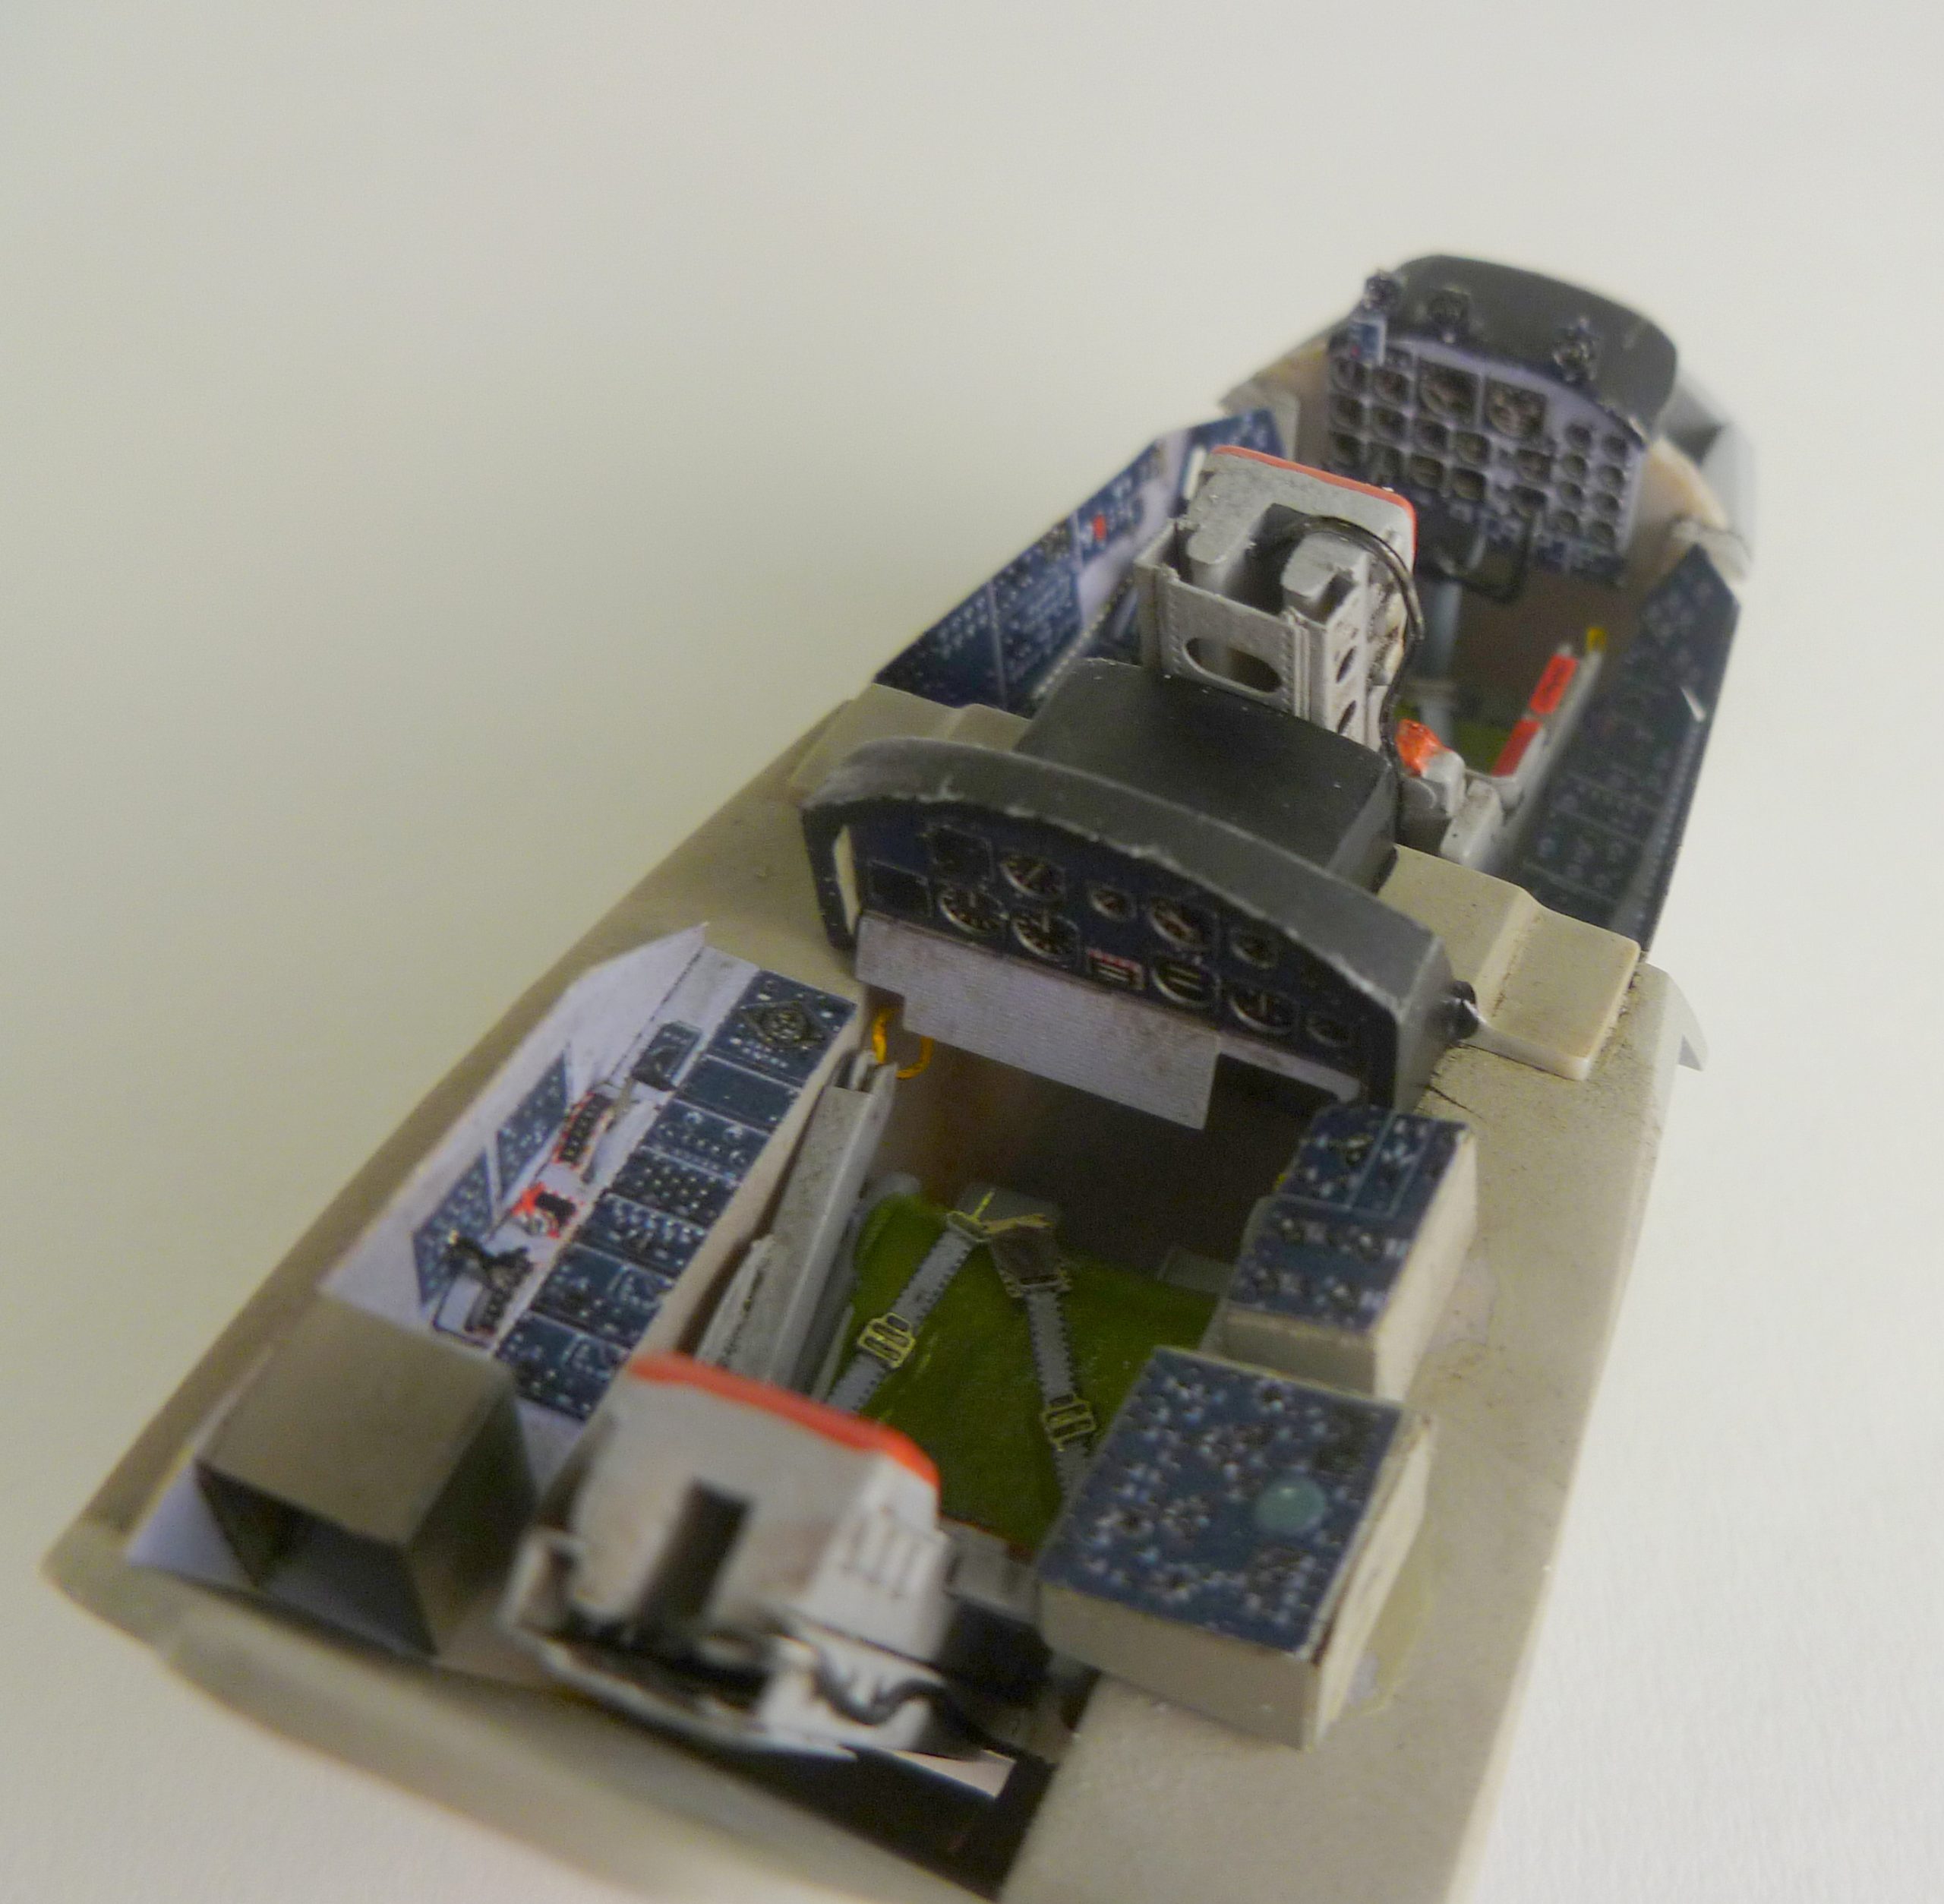
The navigator station was similarly detailed with PE. I used a silver pencil and a dark wash to dirty up area. The PE instrument panel shroud were ‘banged up’ a bit with some pliers. In the referenced photos, this area was actually splattered in blood by the wounded Capt Joyner.
The cockpit installed, and fishing weights being installed with super glue into every open area. The kit instruction calls for a large amount of weight and I had trouble stuffing enough weight to keep the plane from being a tail seater. At the end, even with dozens of weights, I had to install a service jack to prop the plane up.
Fixing problem areas in the kit:
The kit comes with several problem areas, however, they are quite easy to fix. The airbrake can be displayed open or closed. Unfortunately, the fit closed is very poor and filler was needed to fill the gaps. Just make sure not to use too much as you still want to see the panel lines.
The tail has deep grooves inscribed into it, which did not exist in the actual plane. Again, a generous coat of putty followed by sanding solves this problem.
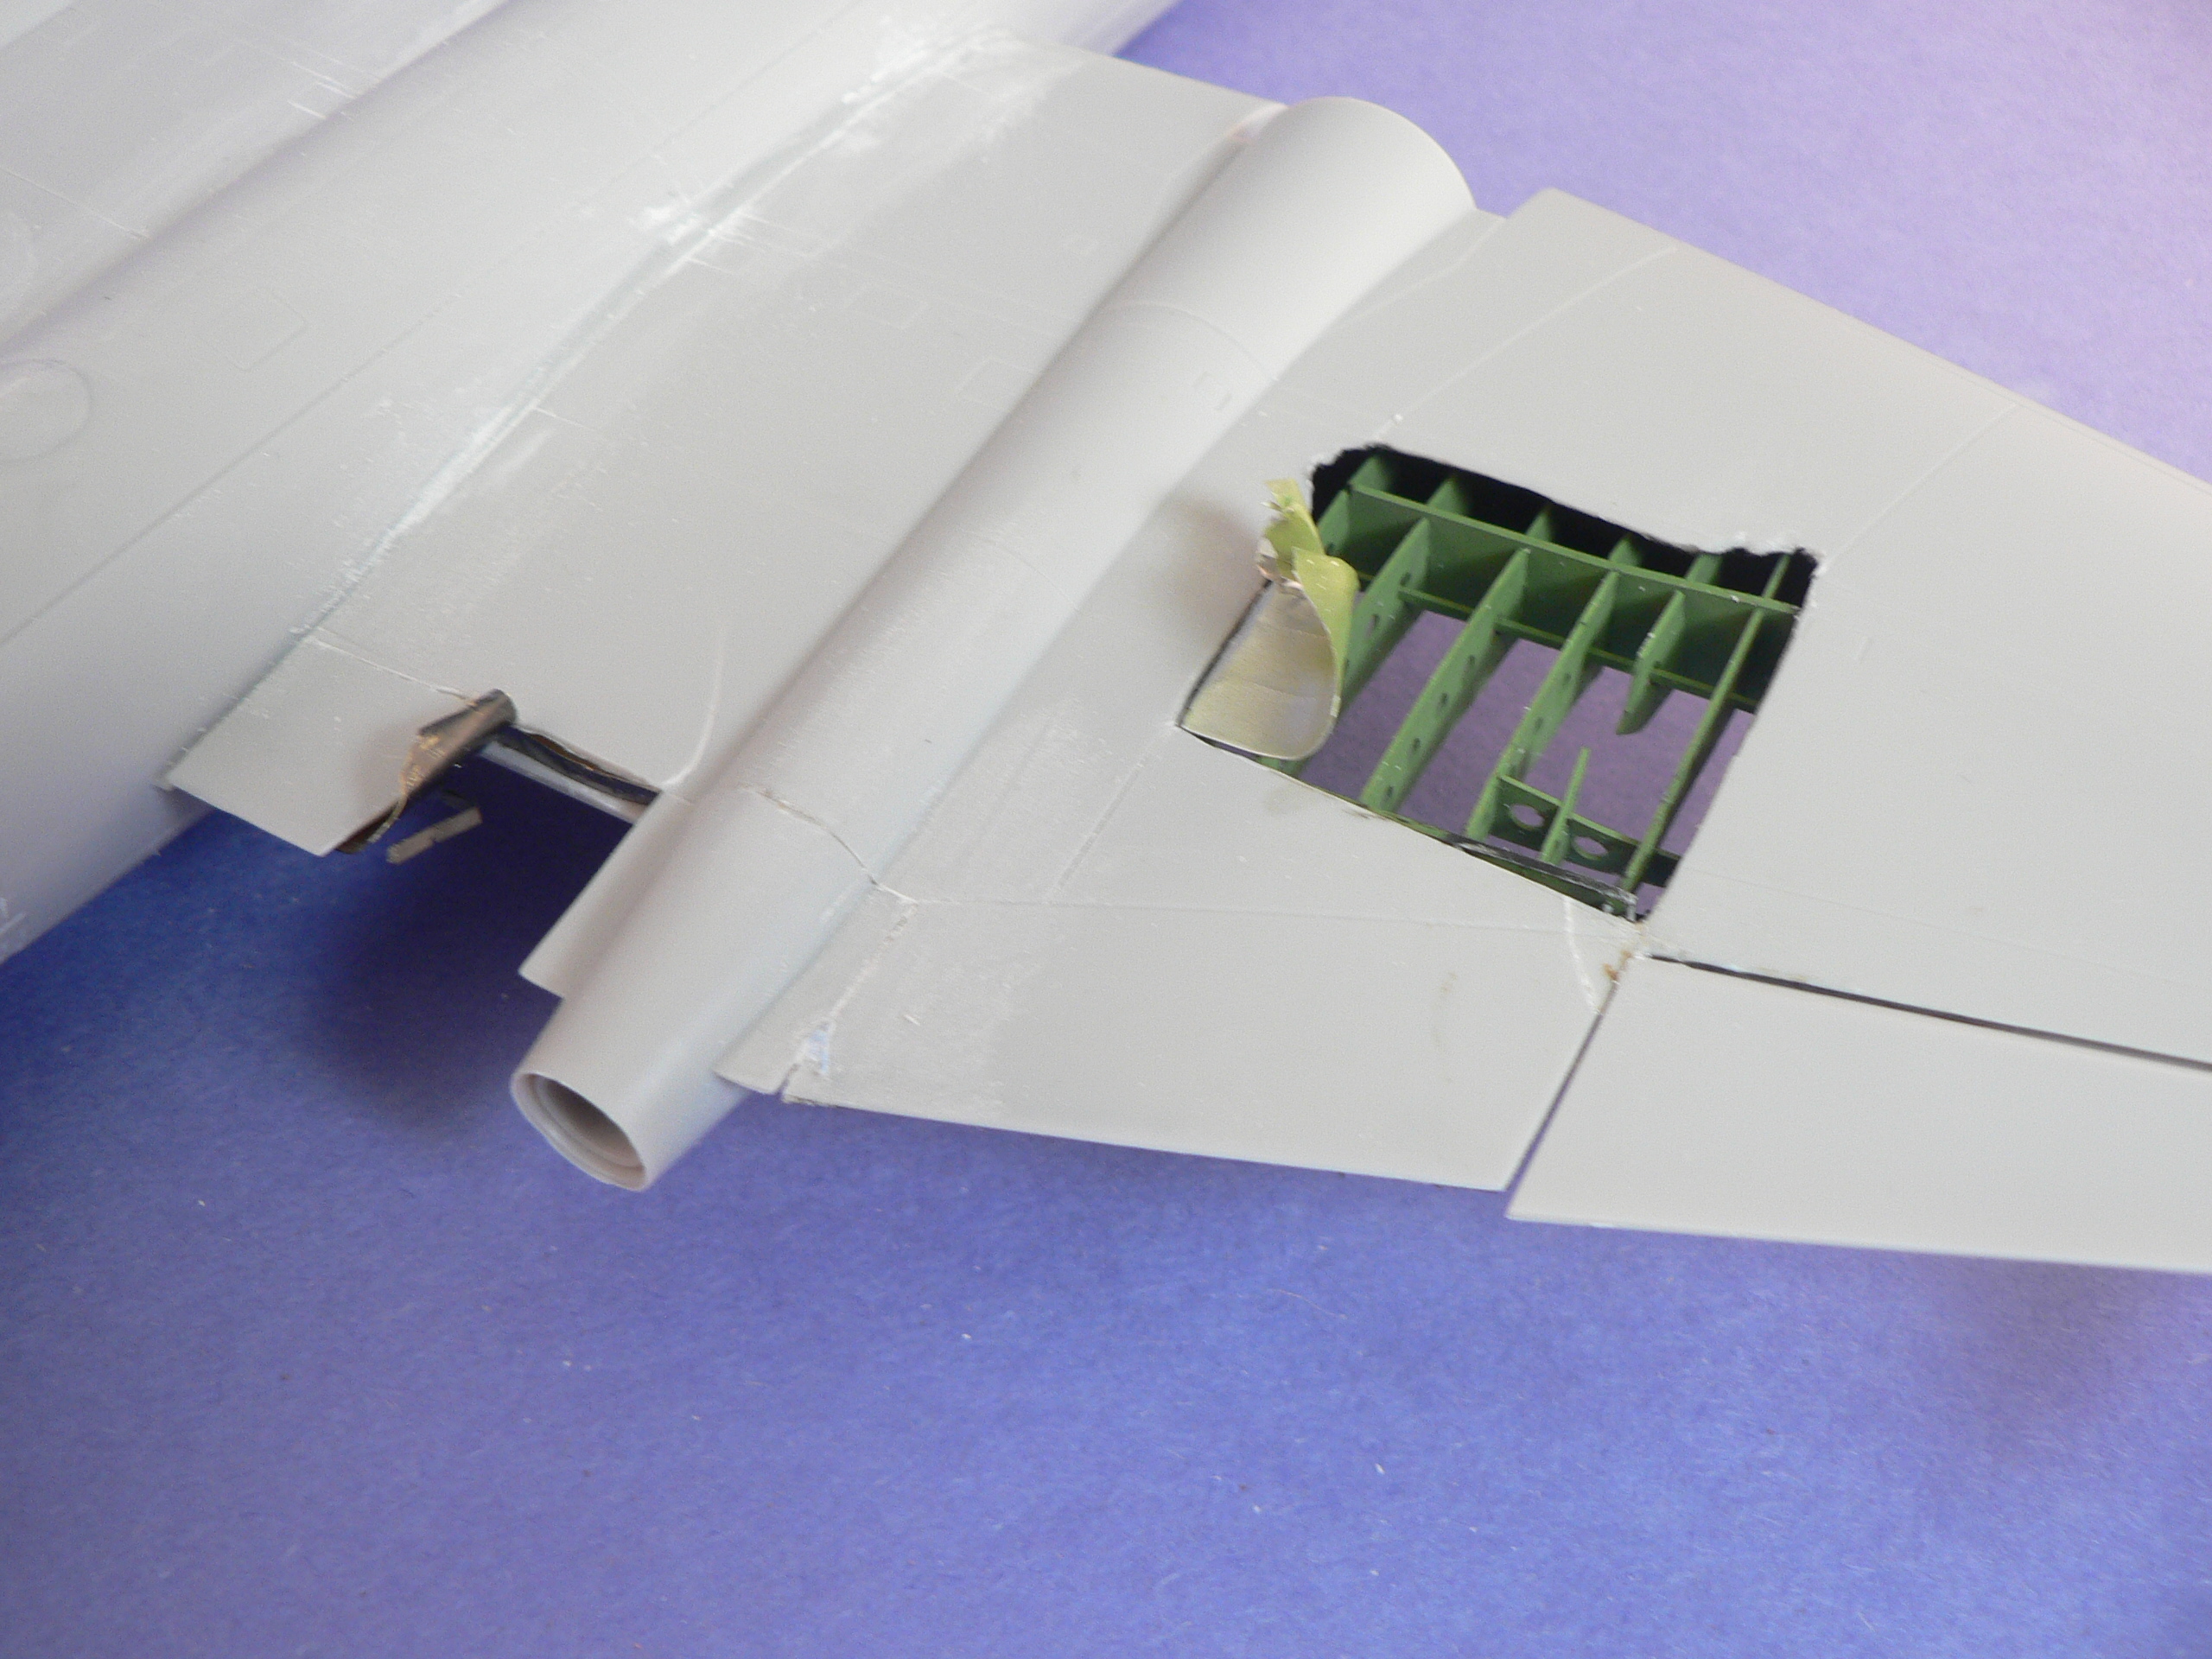
Building the damaged flaps and wing
Onto the main damaged area – the wing and flaps. I used Eduards PE flap set, besides adding more details, the PE allows me to create damage much more easily. Here you see one of the flaps installed by grinding out the existing crude plastic details.
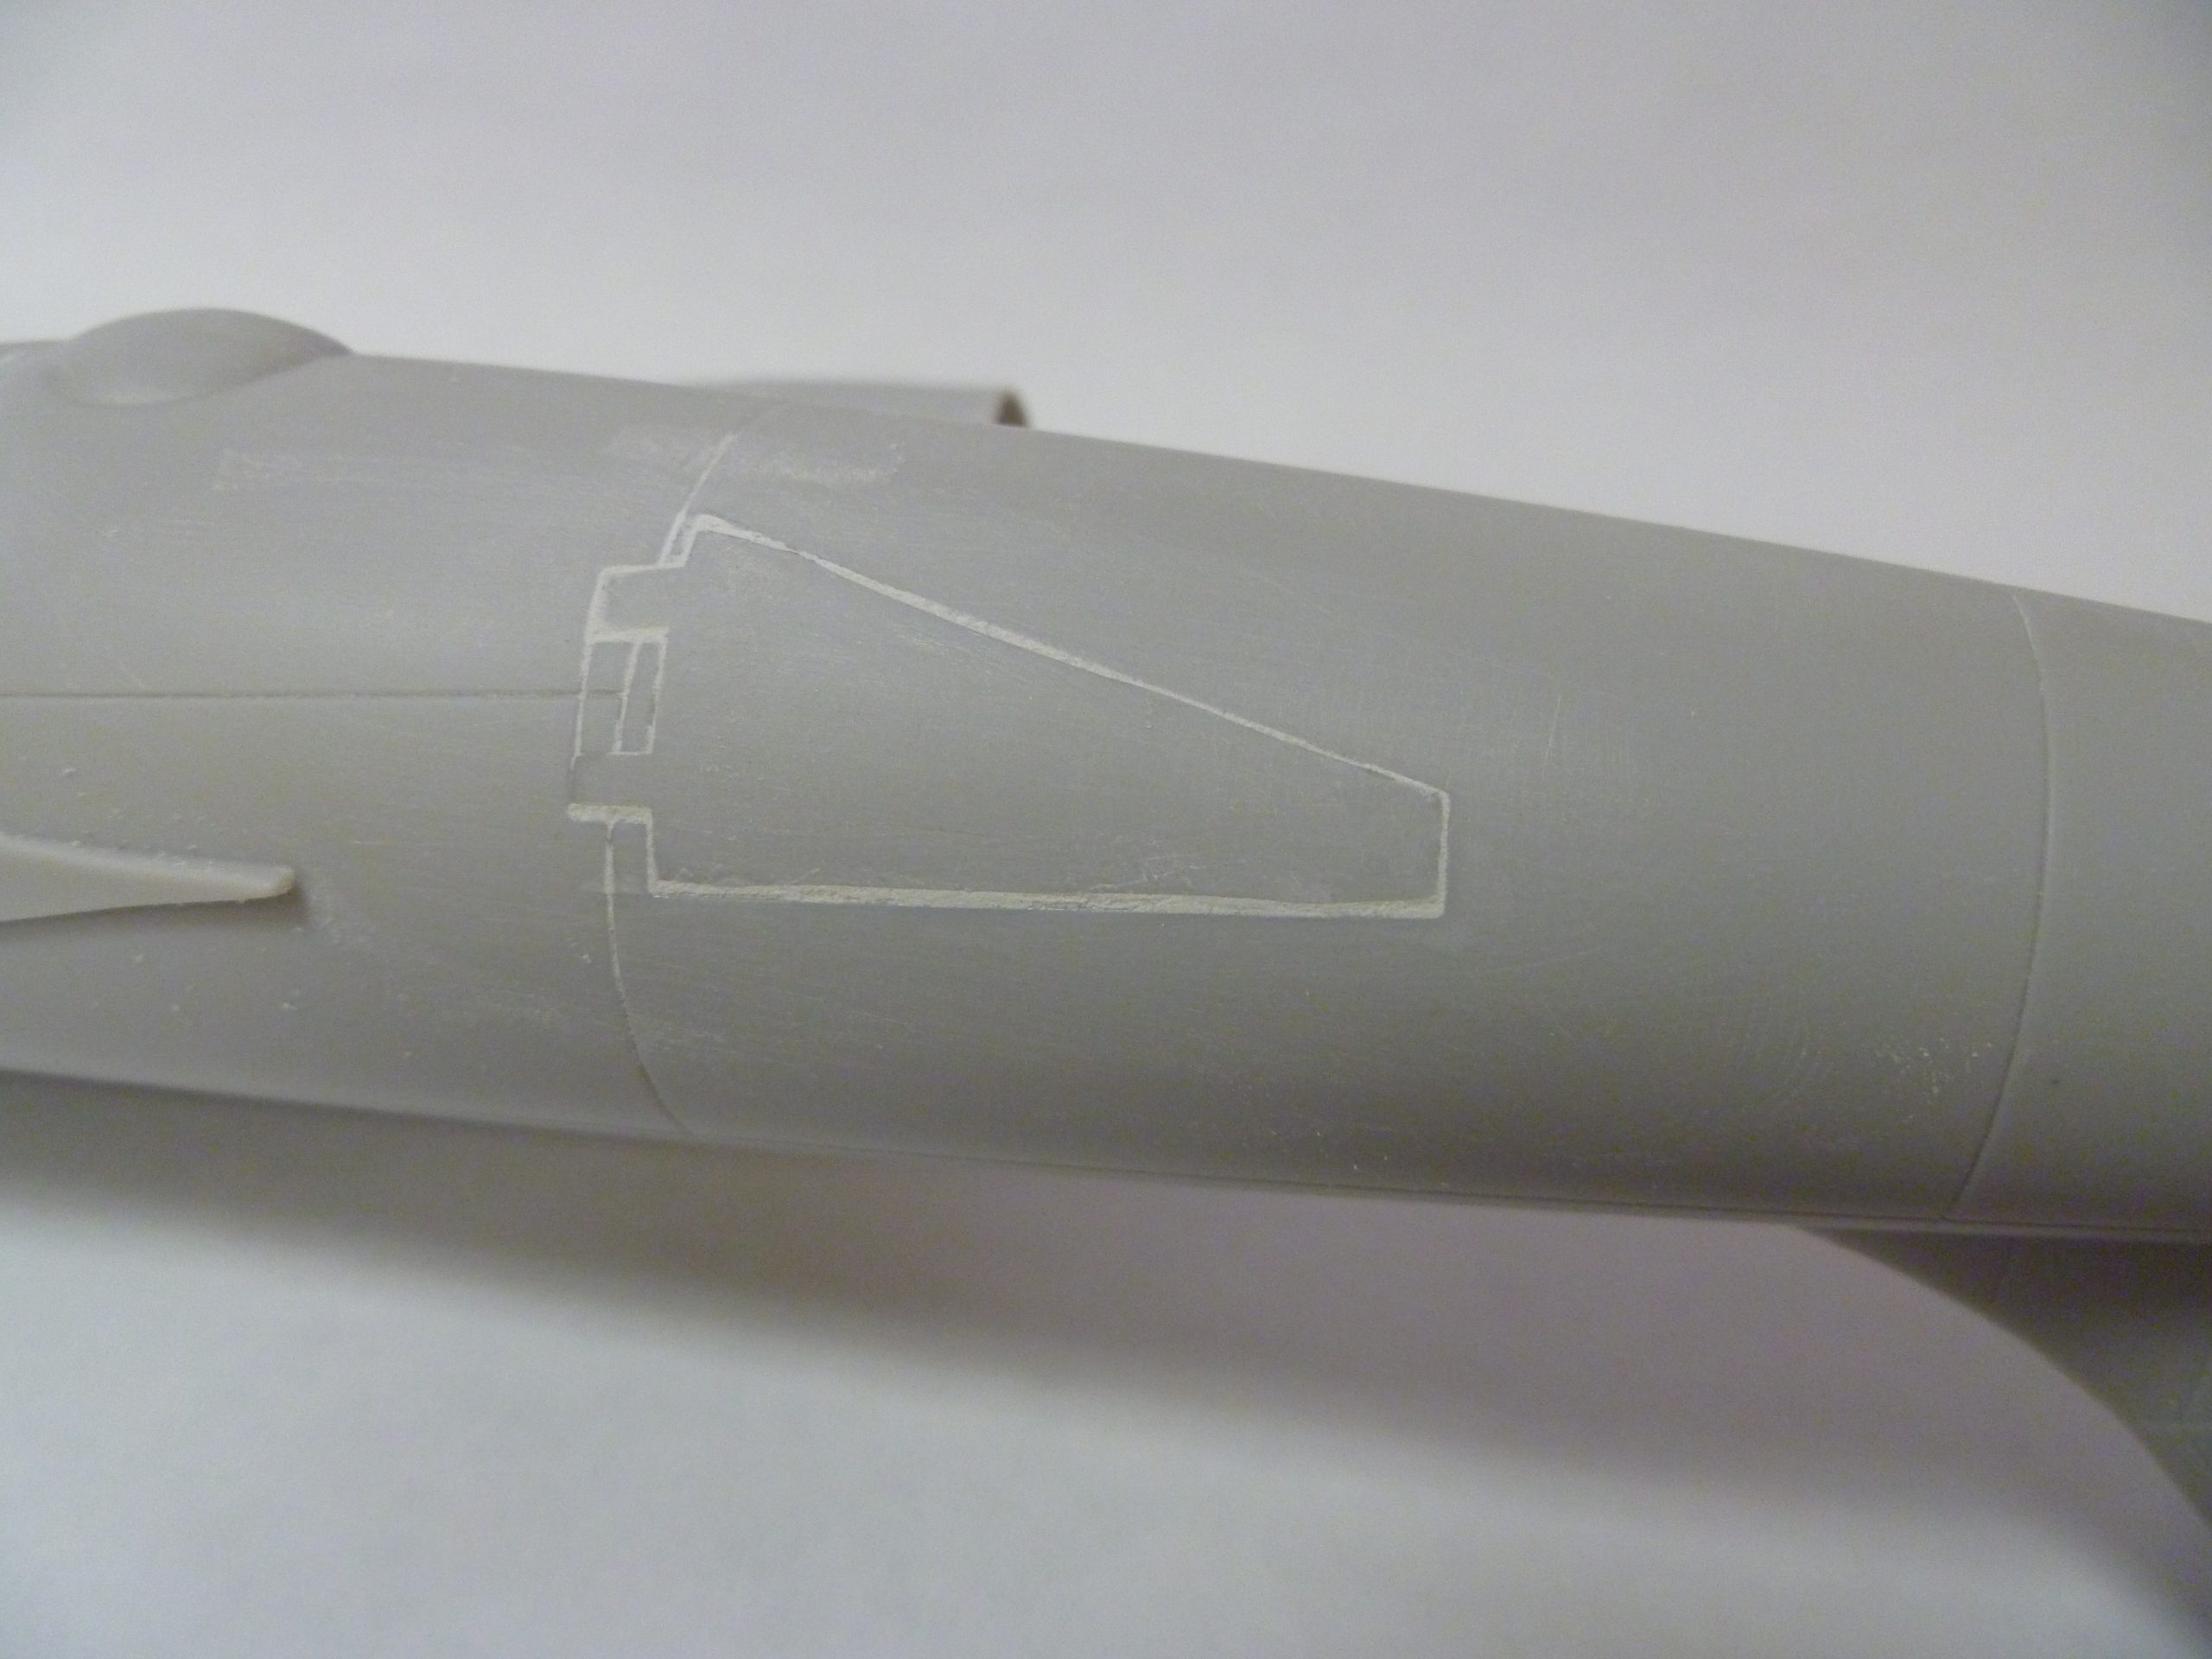
To create the panel that was punched through, I surrounded the area with thick ‘dymo’ tape. The type used for punching out those out thick plastic labels. Then using my scriber, I made repeated passes until the plastic cut through.
Repeating the process for both the upper and lower wing, I then thinned the opening edges with a sanding stick. This was followed by a No 11 knife to create irregular edges.
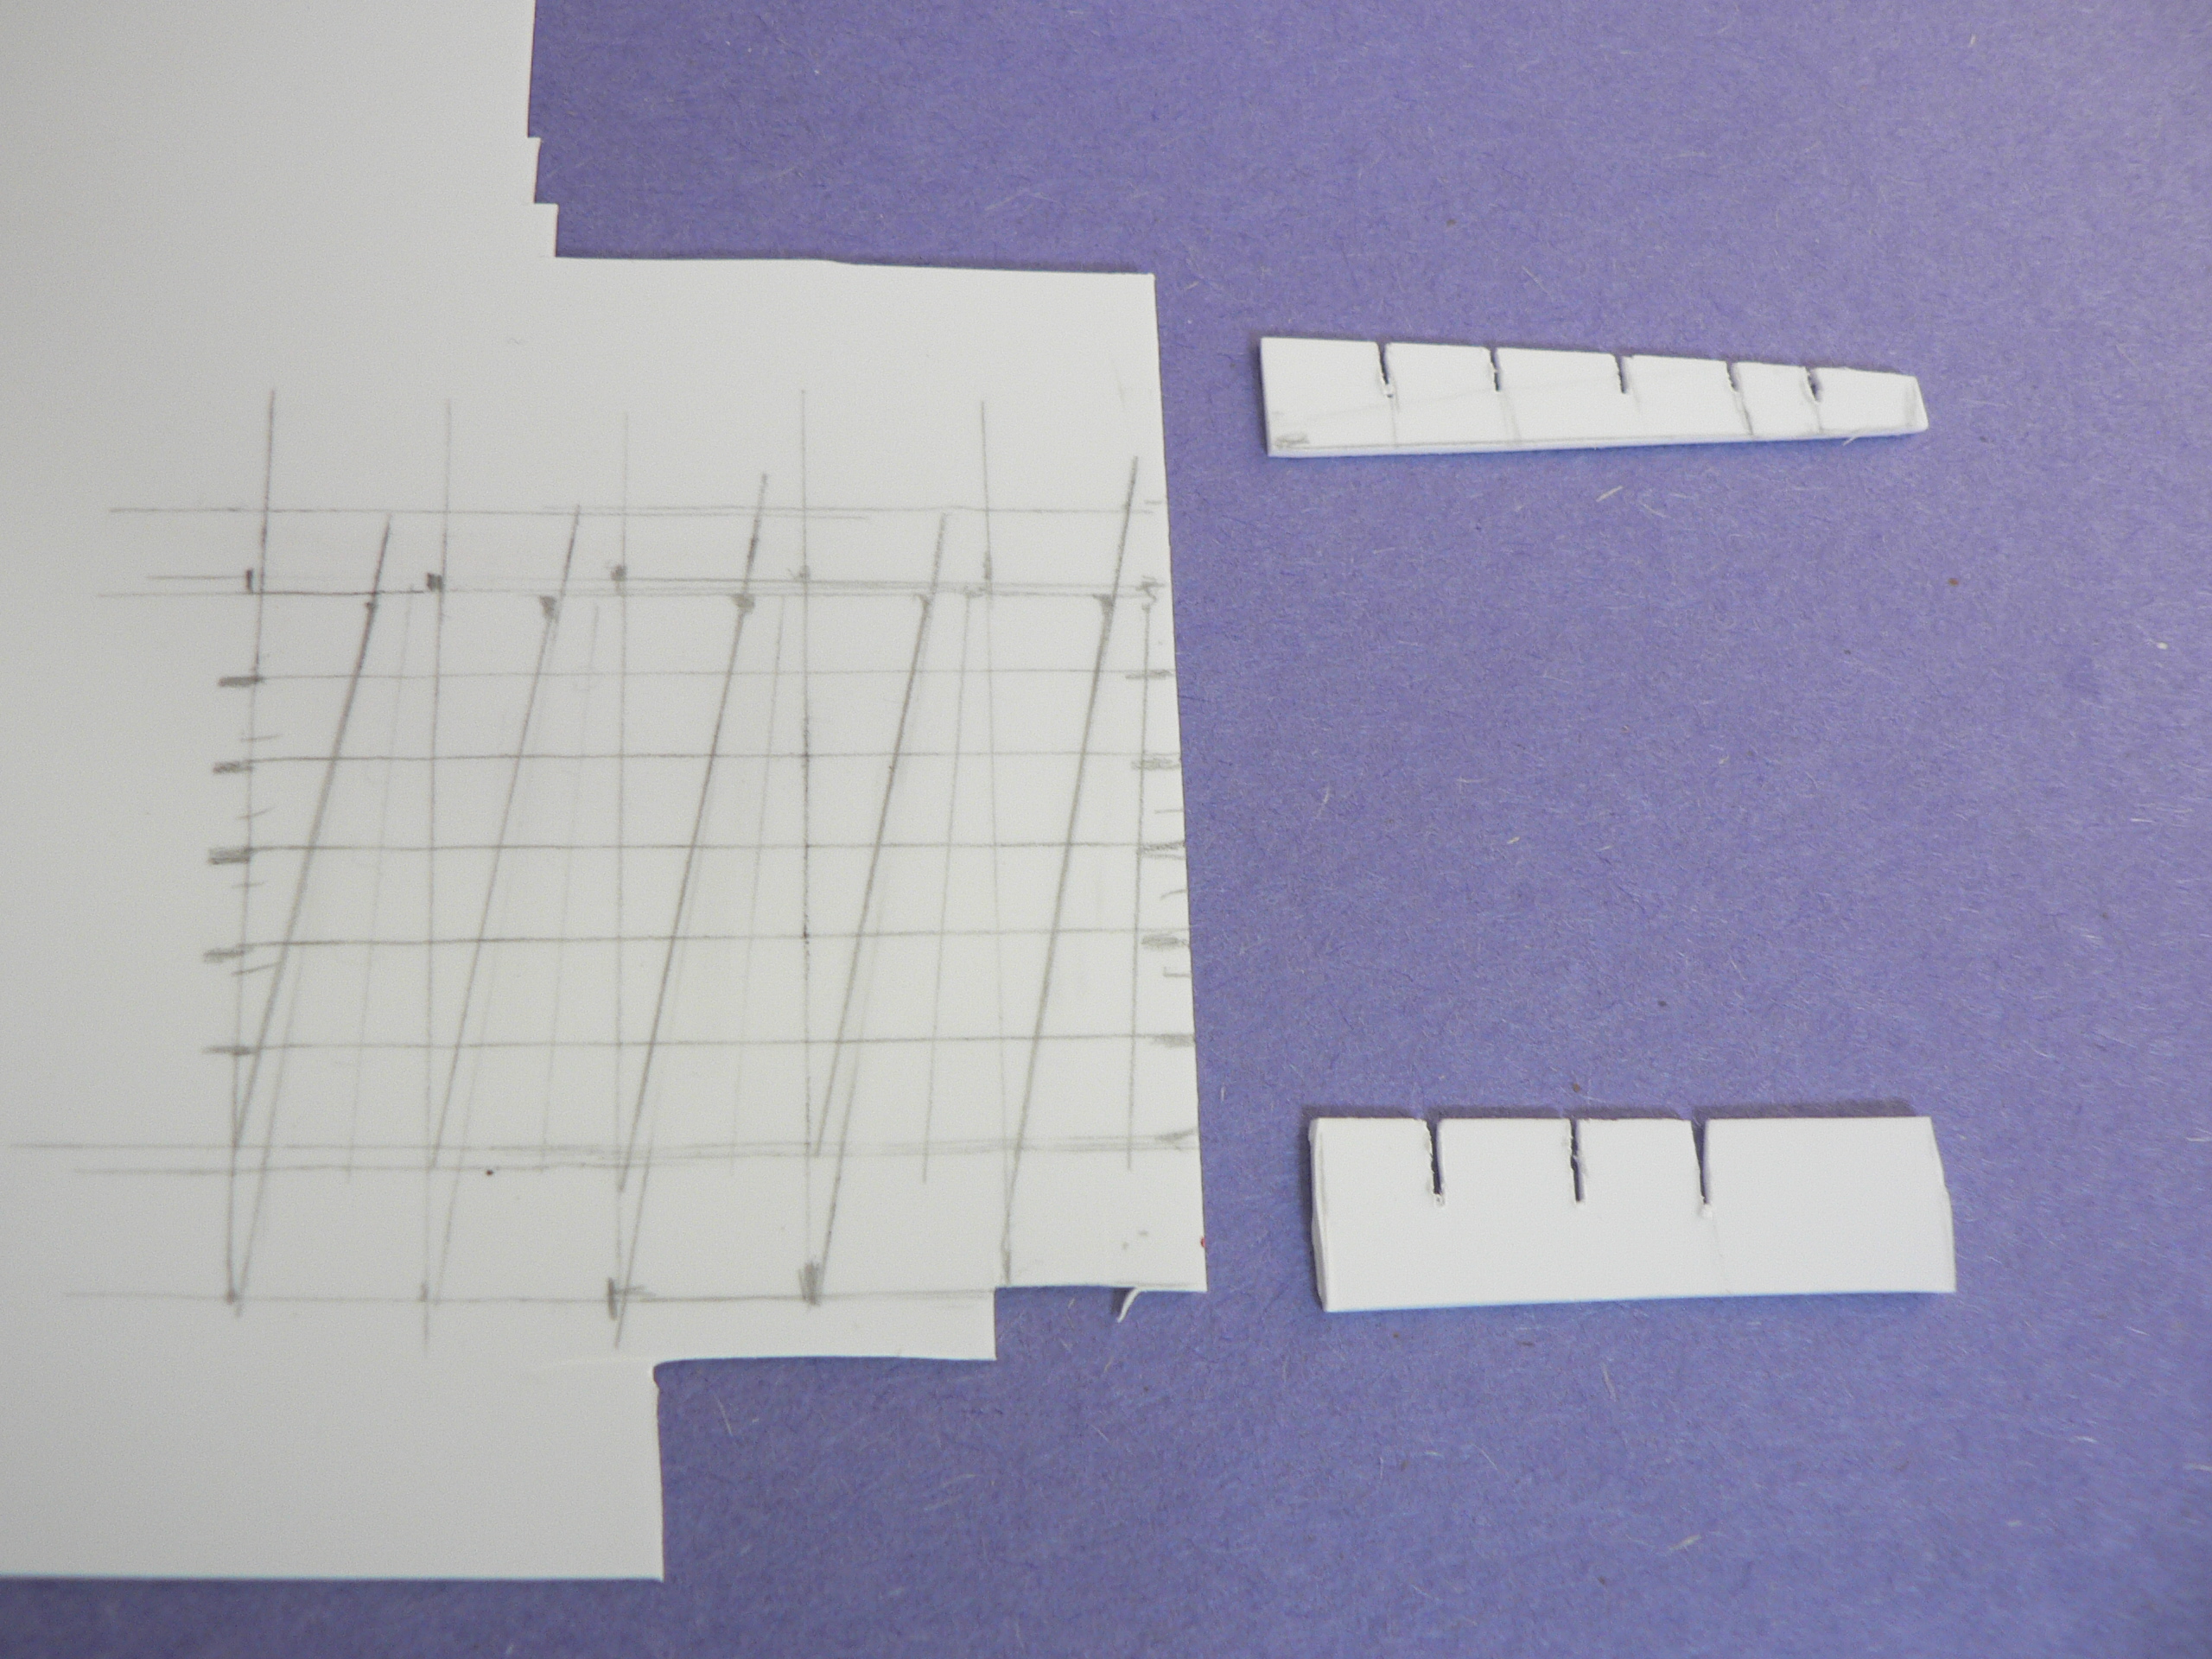
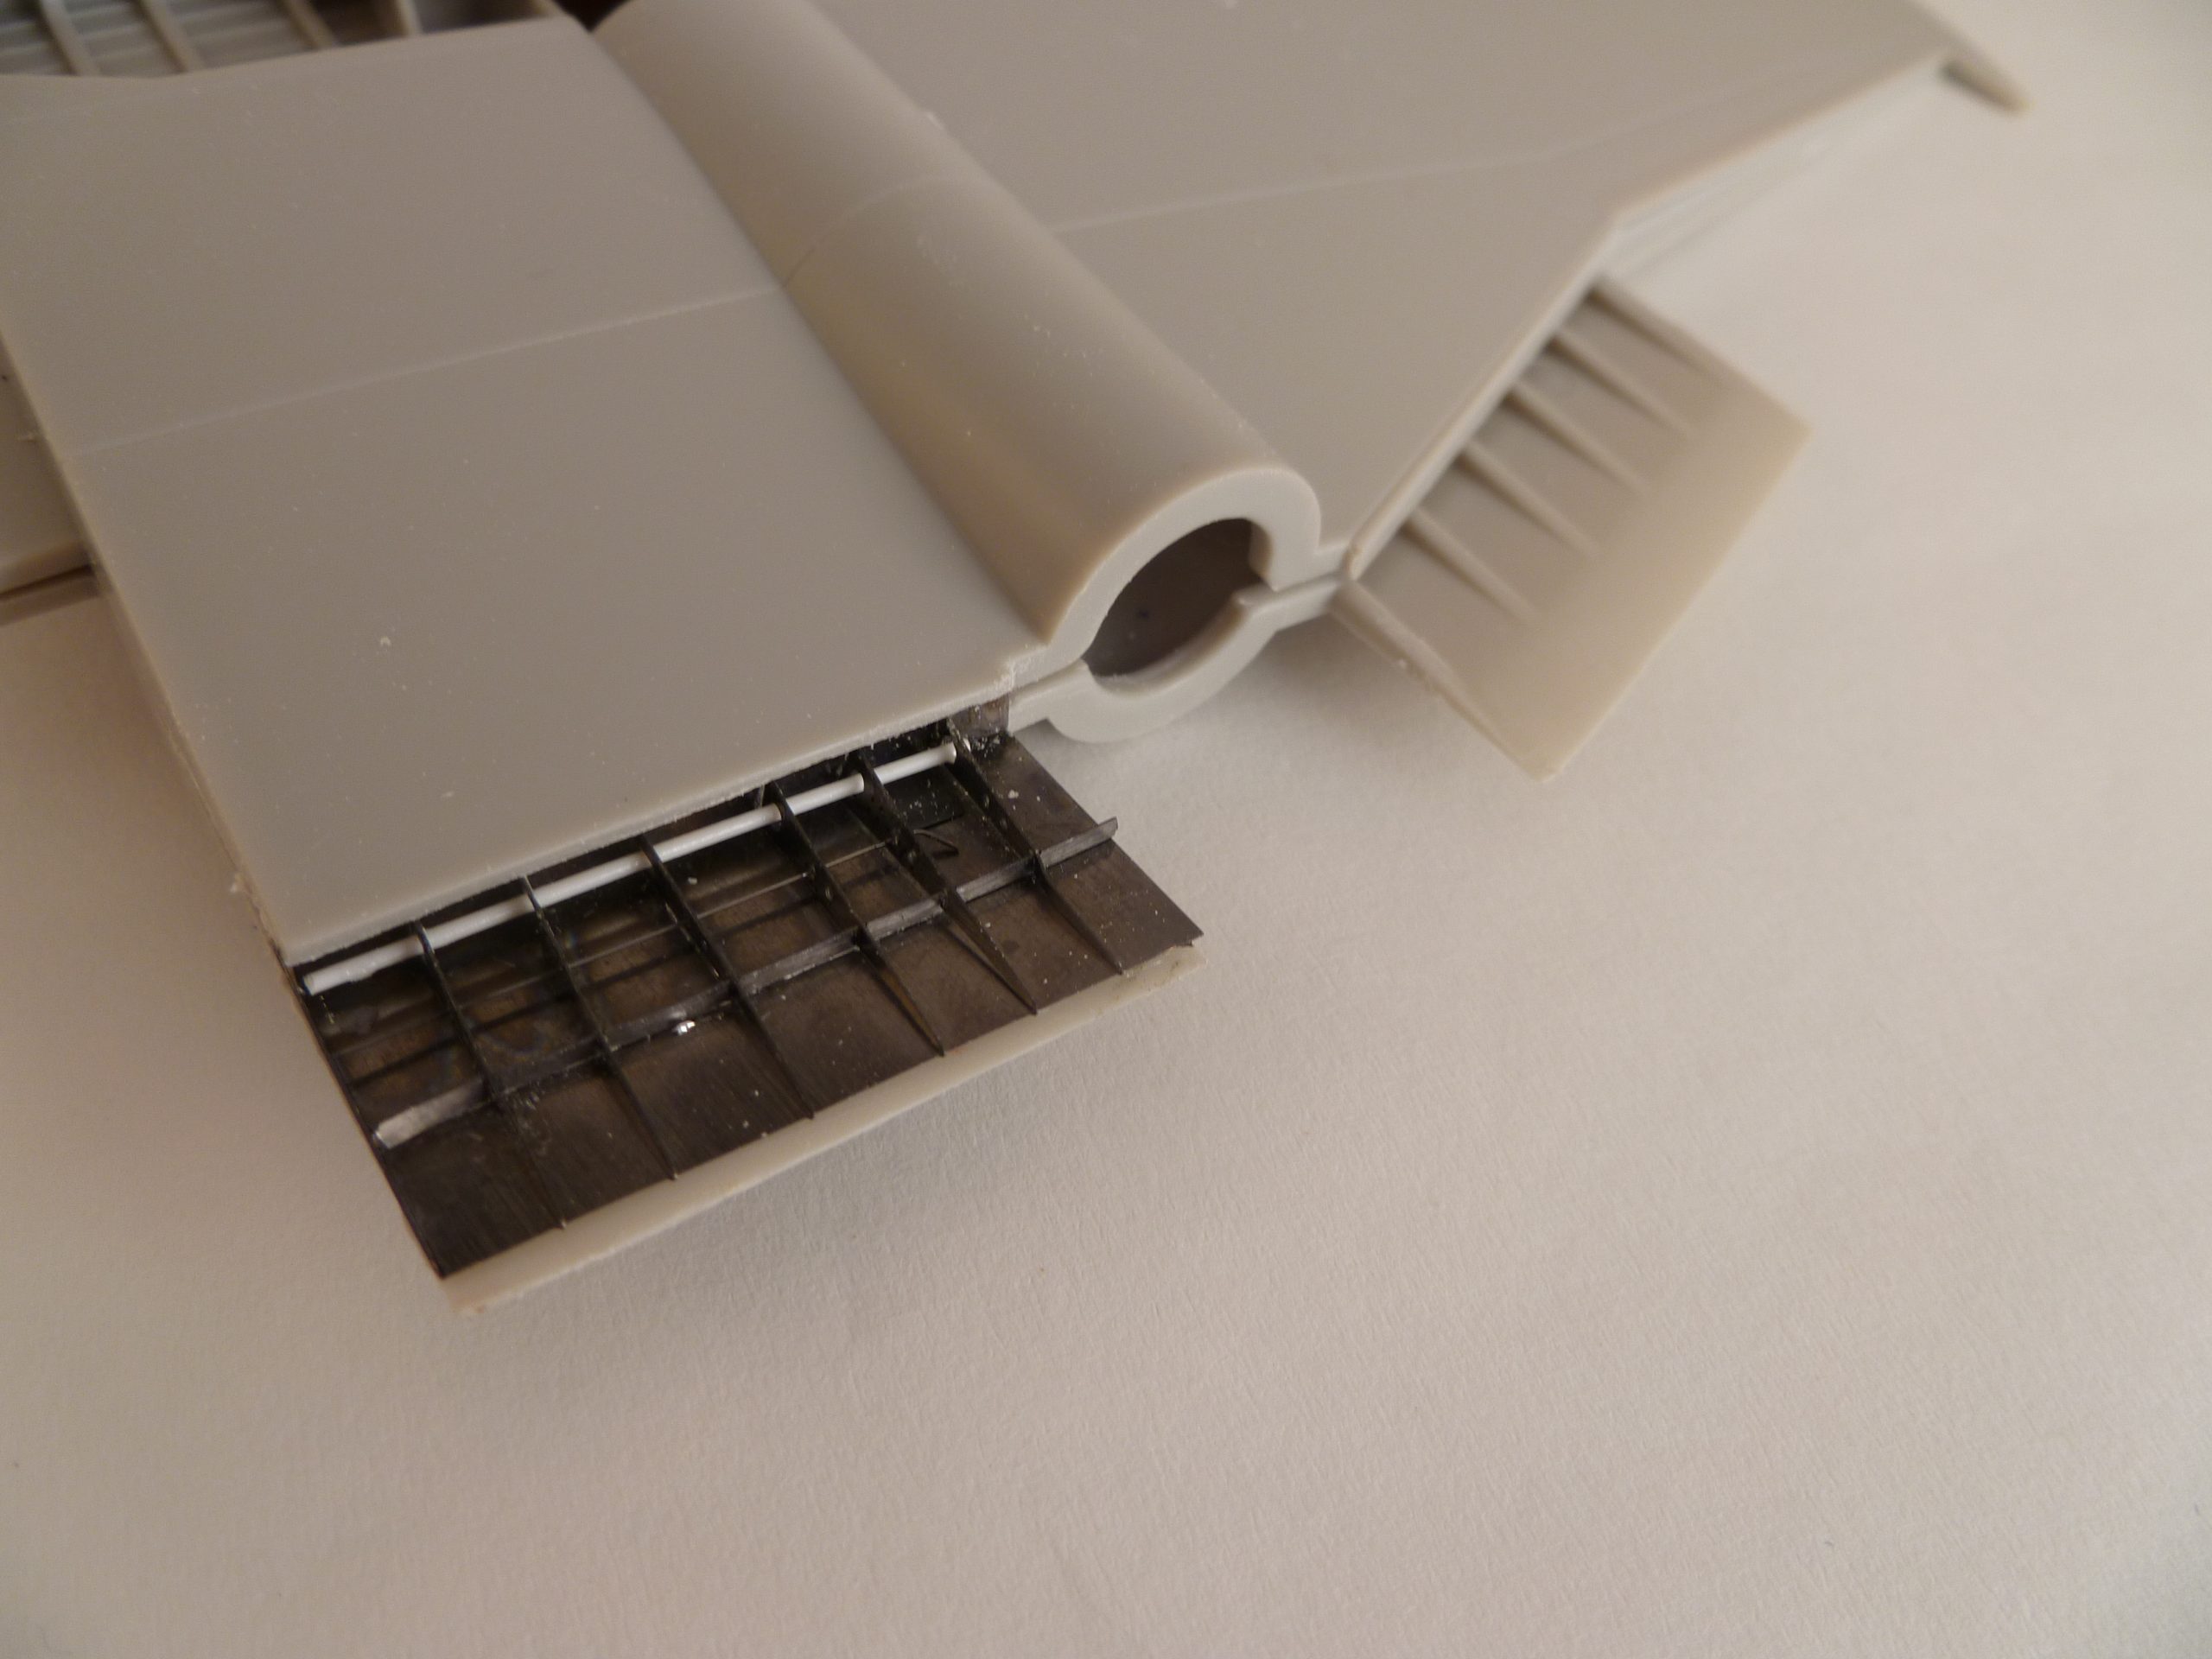
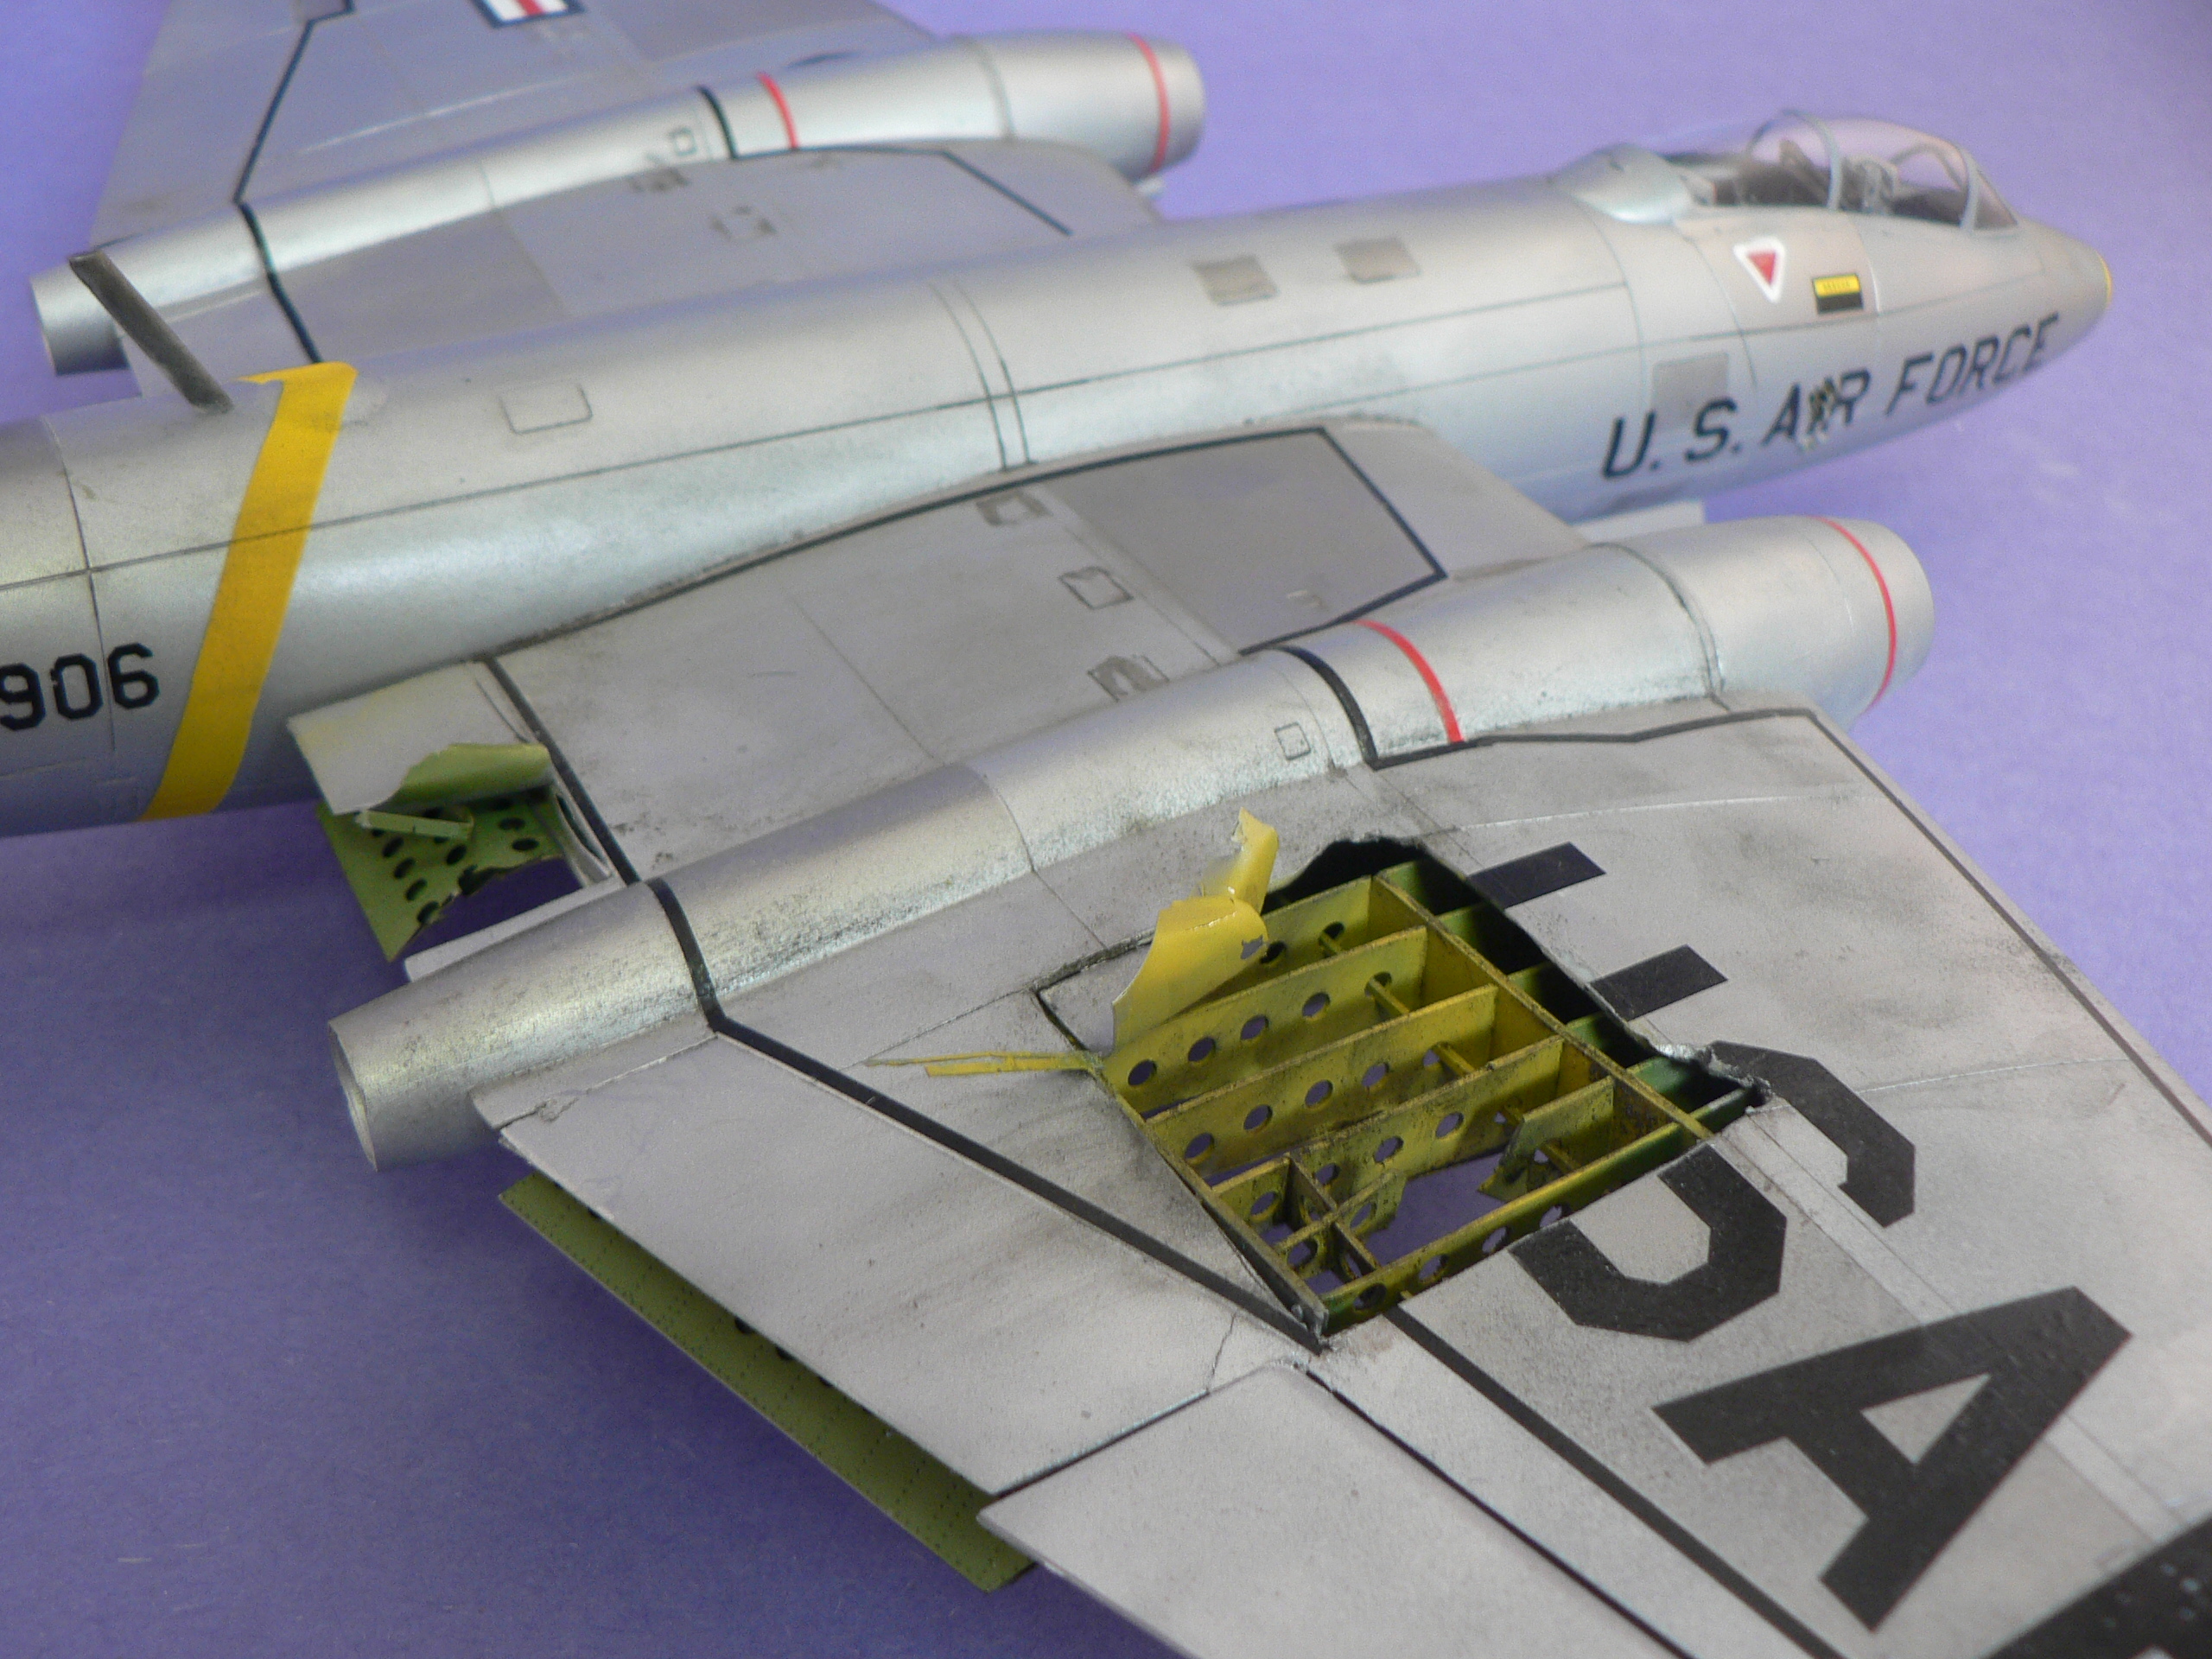
To create the interior framing, I used calipers to measure the opening width, length, and height. I then transferred the dimensions onto sheet styrene. Dividing the width into five equal parts gives me the stringers and also allows me to locate notches in the proper place in the front and rear horizontal support.
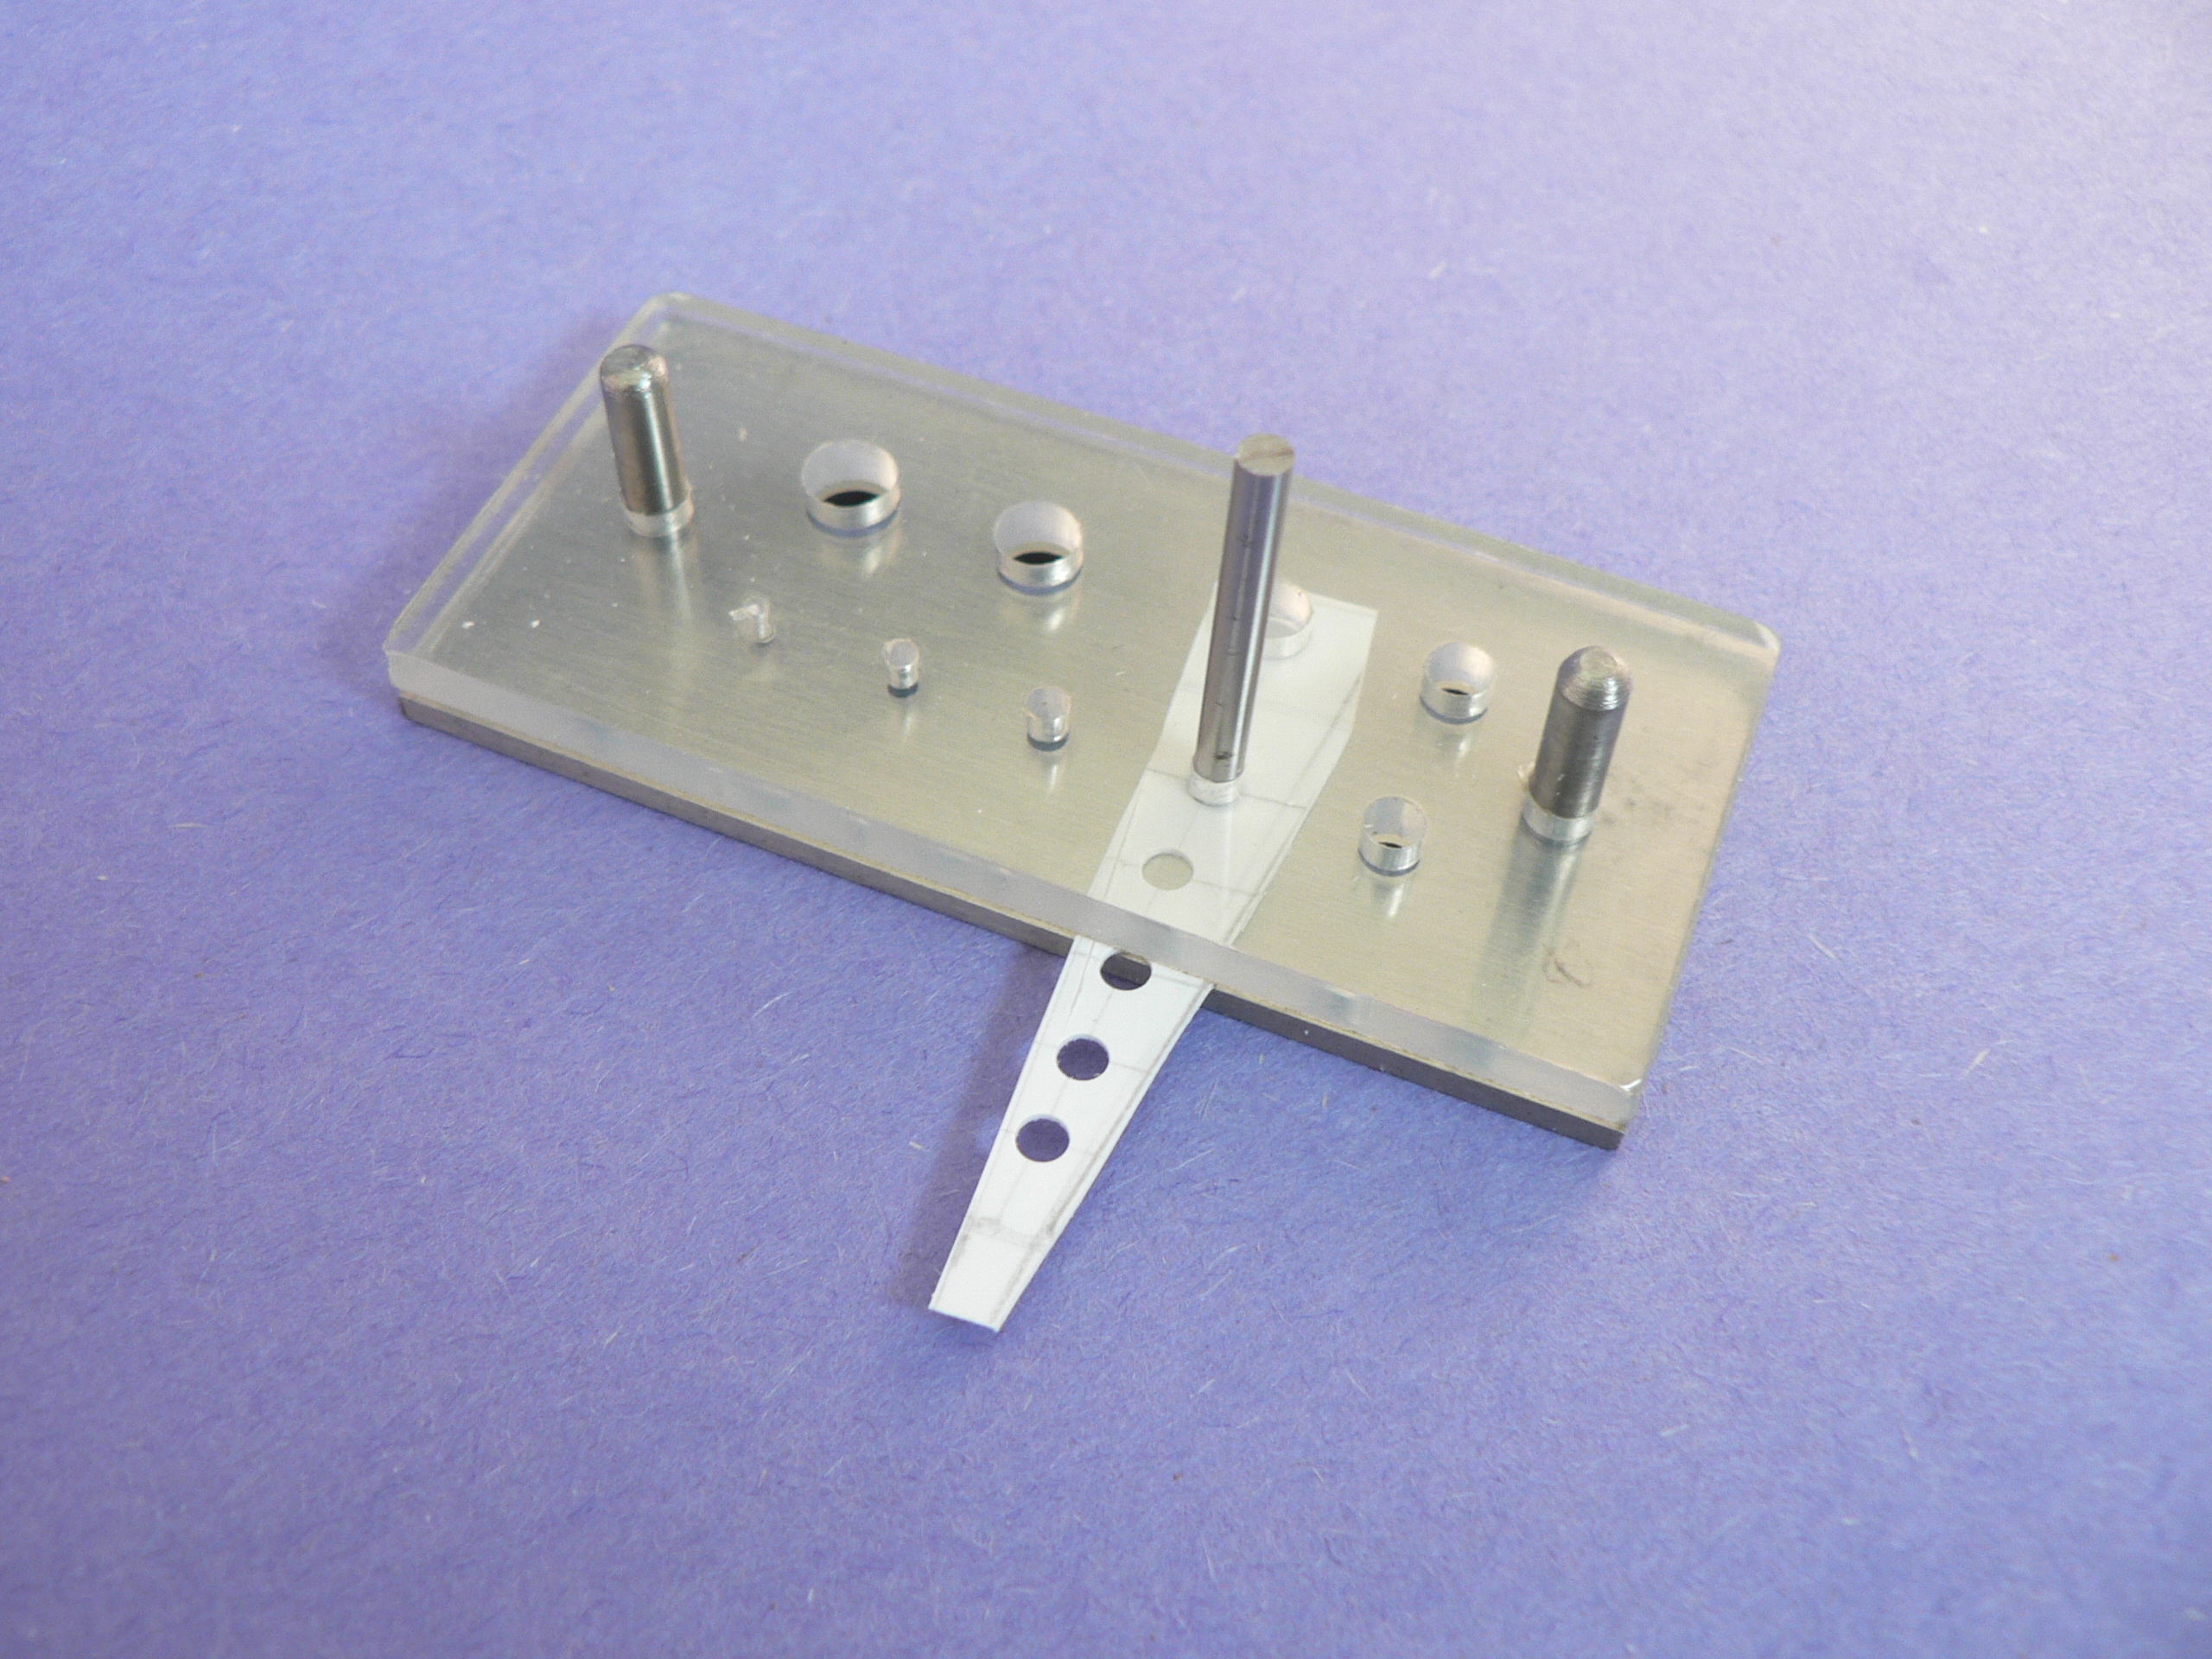
The stringers were cut out and then lightening holes were punched out using my punch and die set.
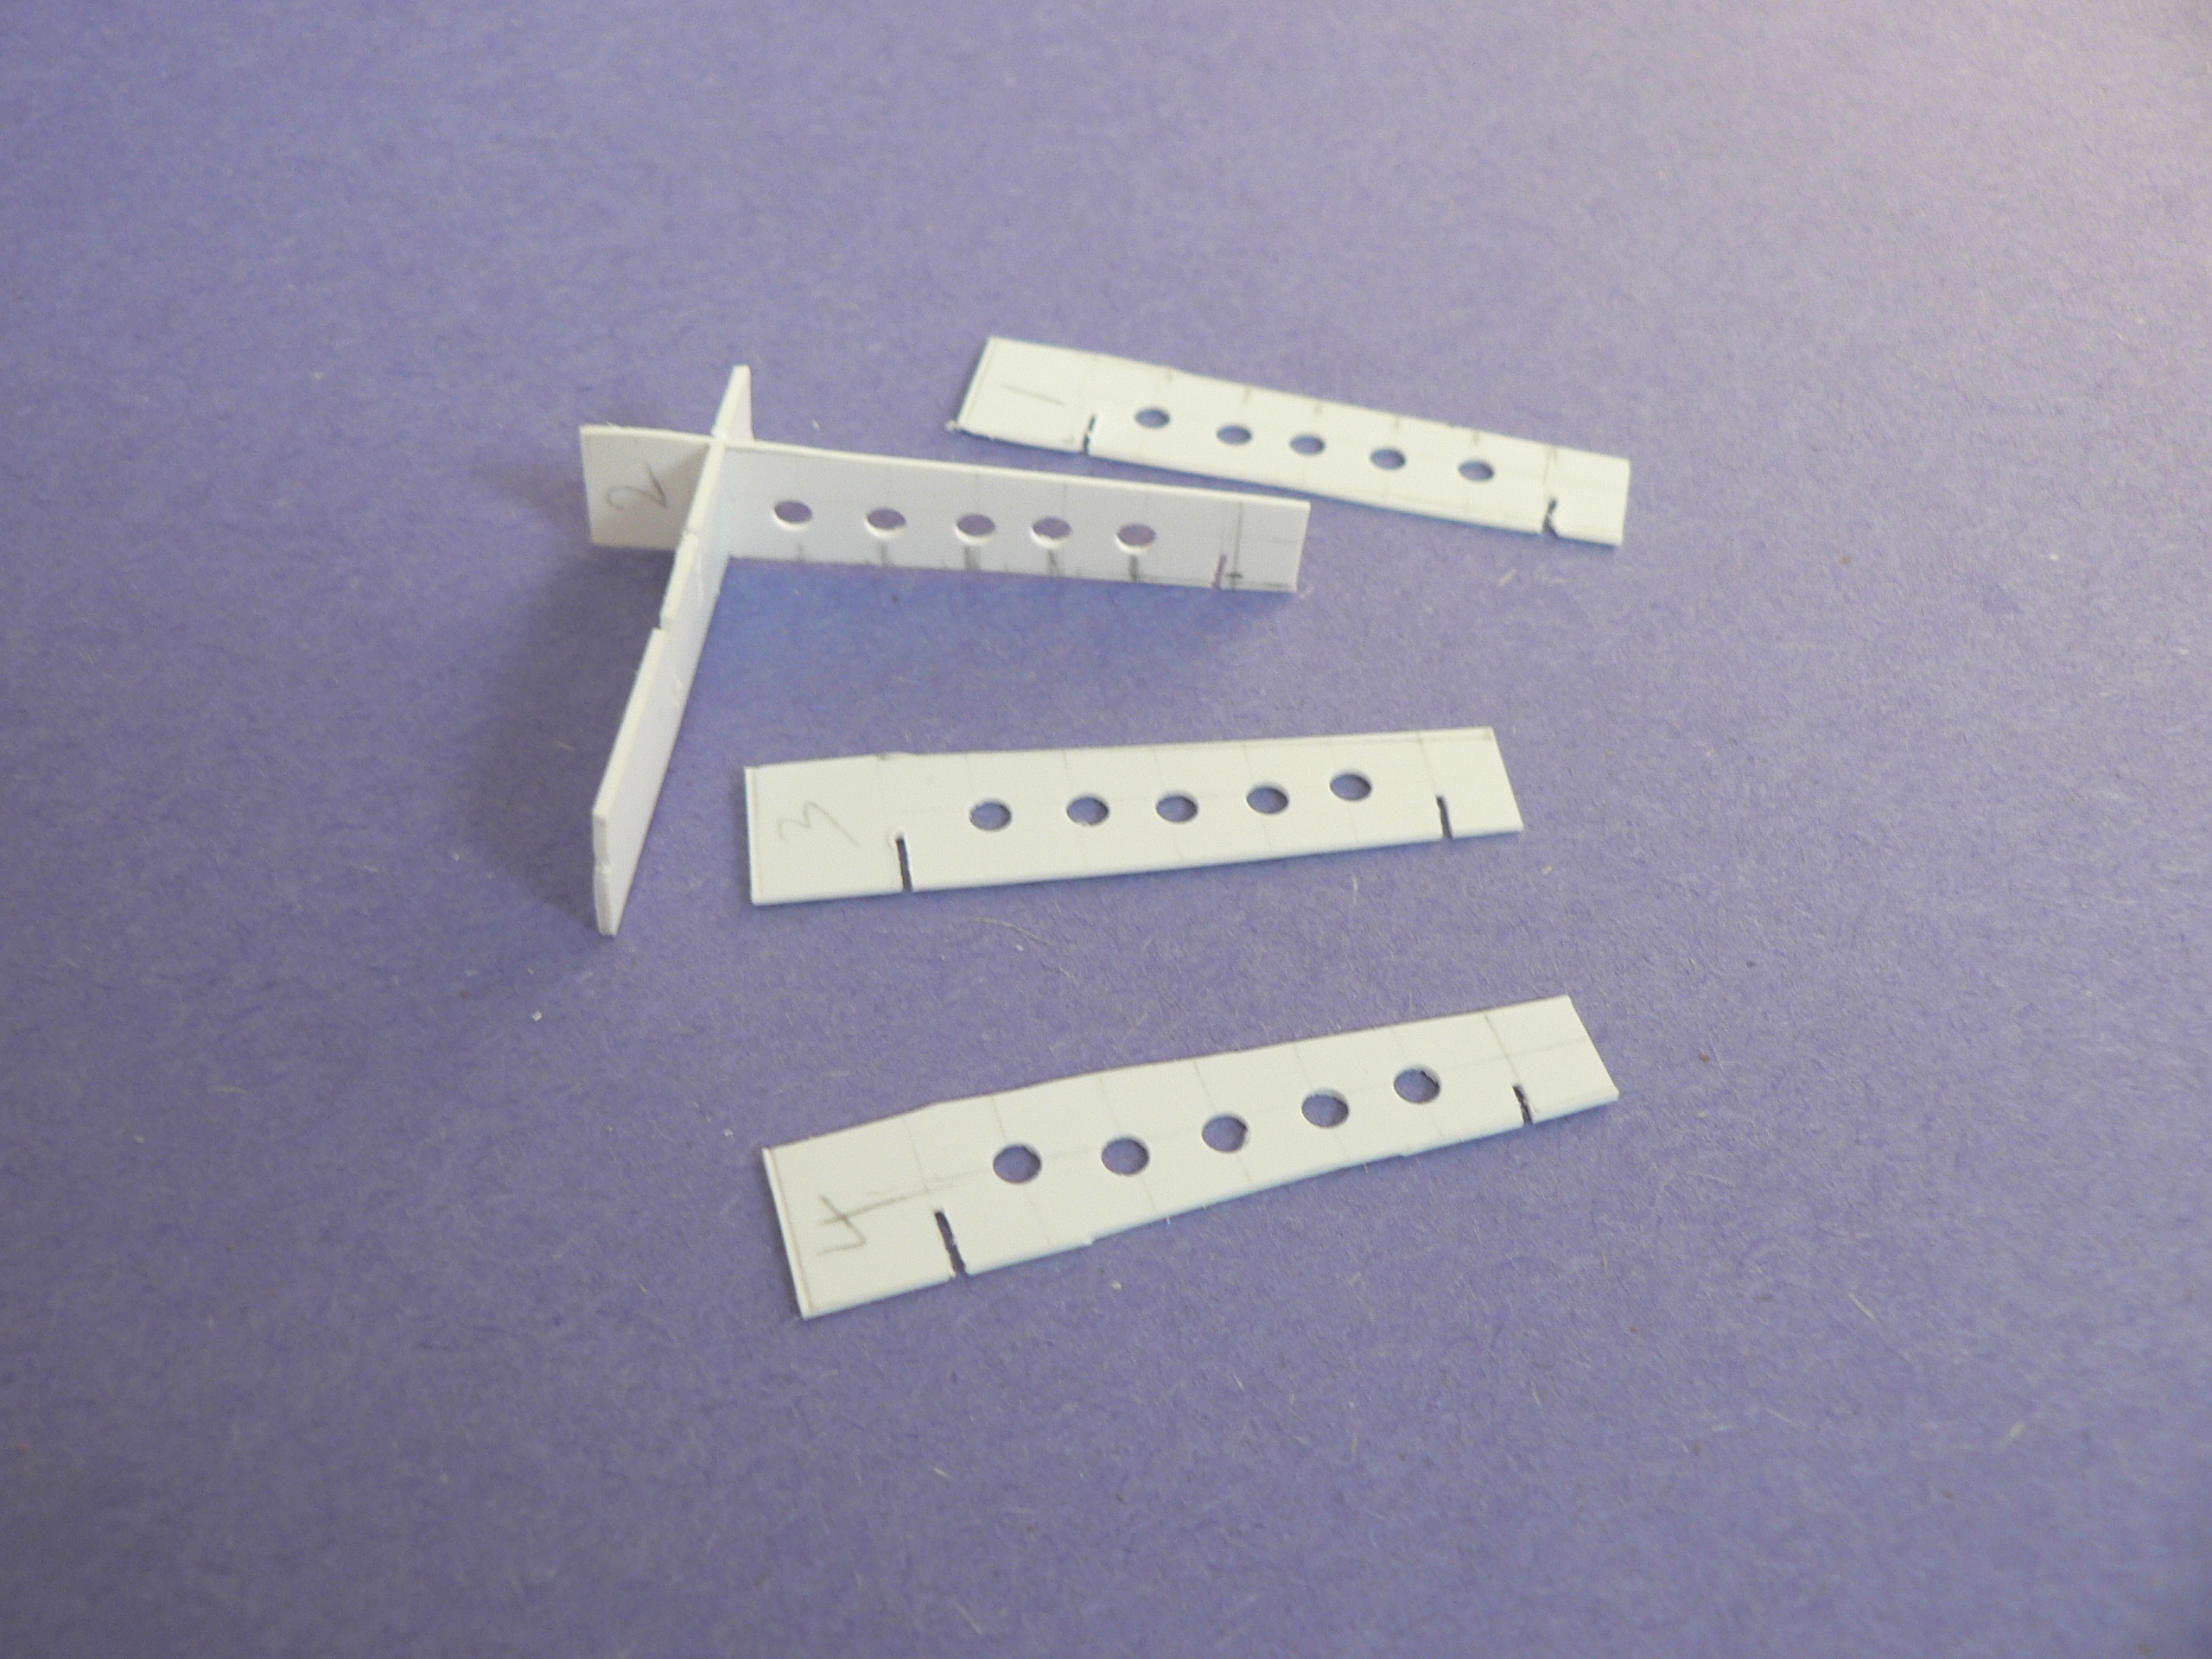
Four stringers are finished and being test fitted into the support notches. I number the stringers to make sure I keep them in the proper order.
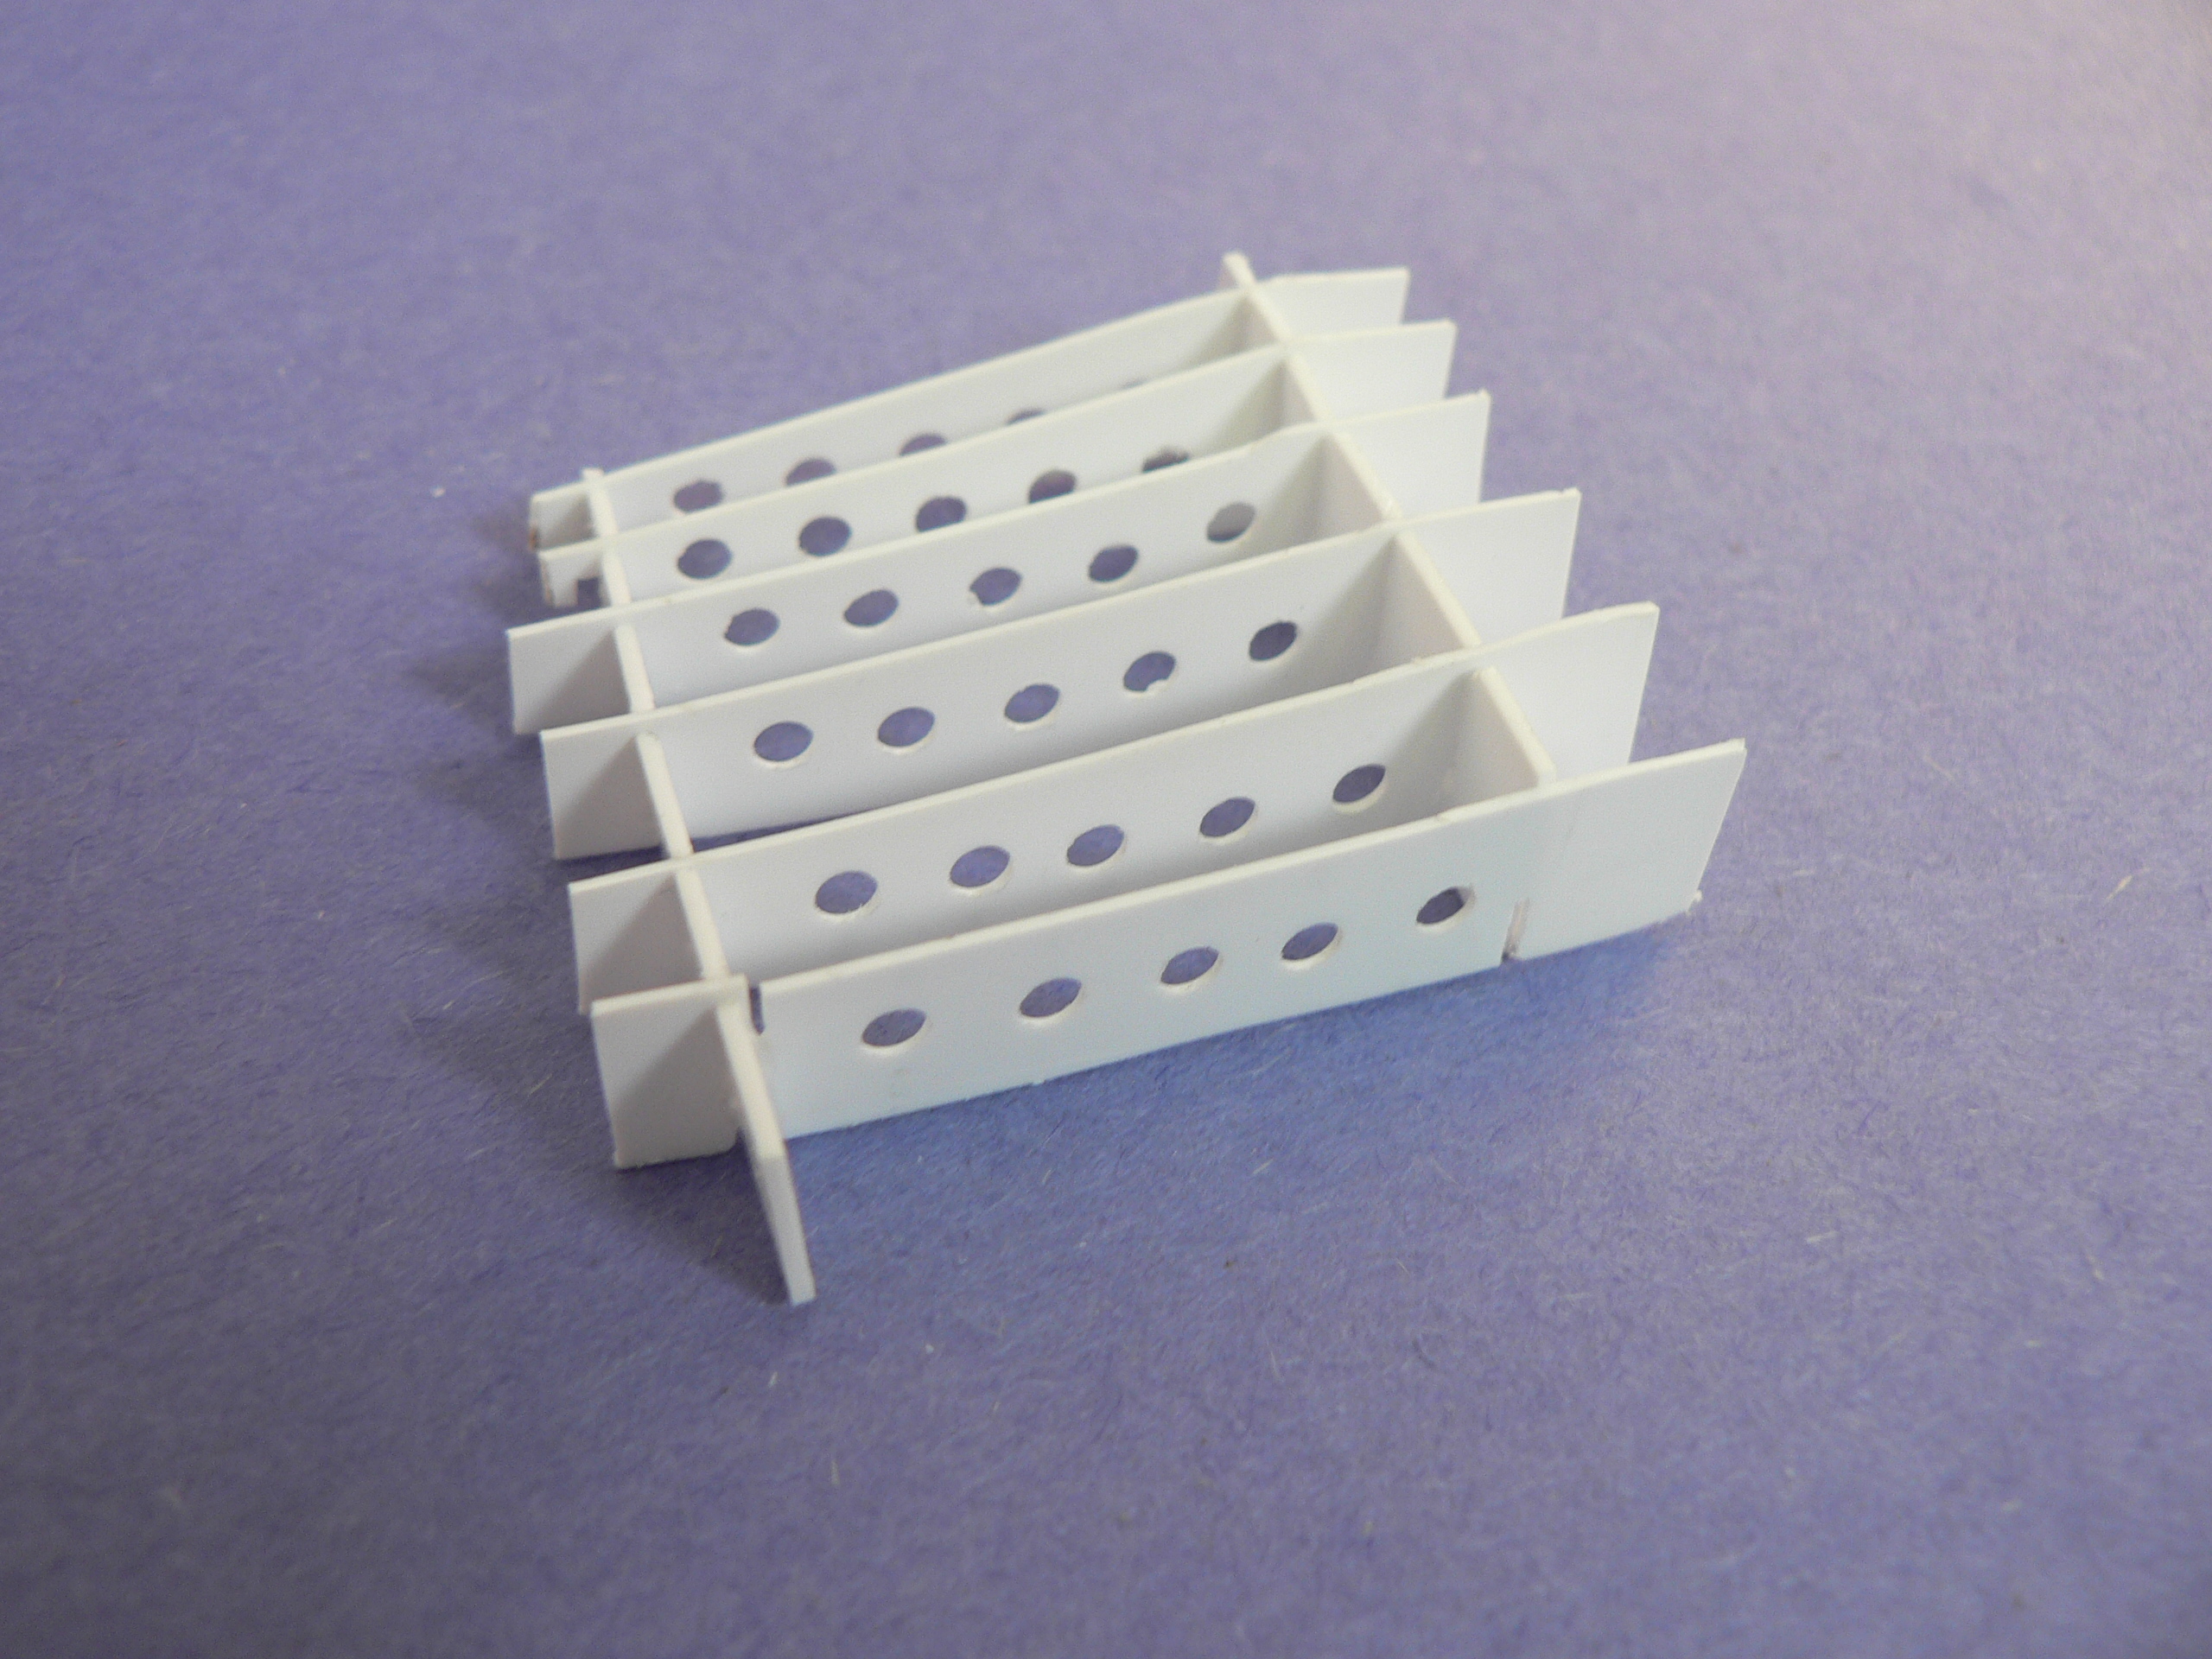
The interior framing finished, ready for some damage and additional detail.

Using cutting pliers, I damaged one of the stringers based on the reference photographs. A styrene rod was added for more detail.
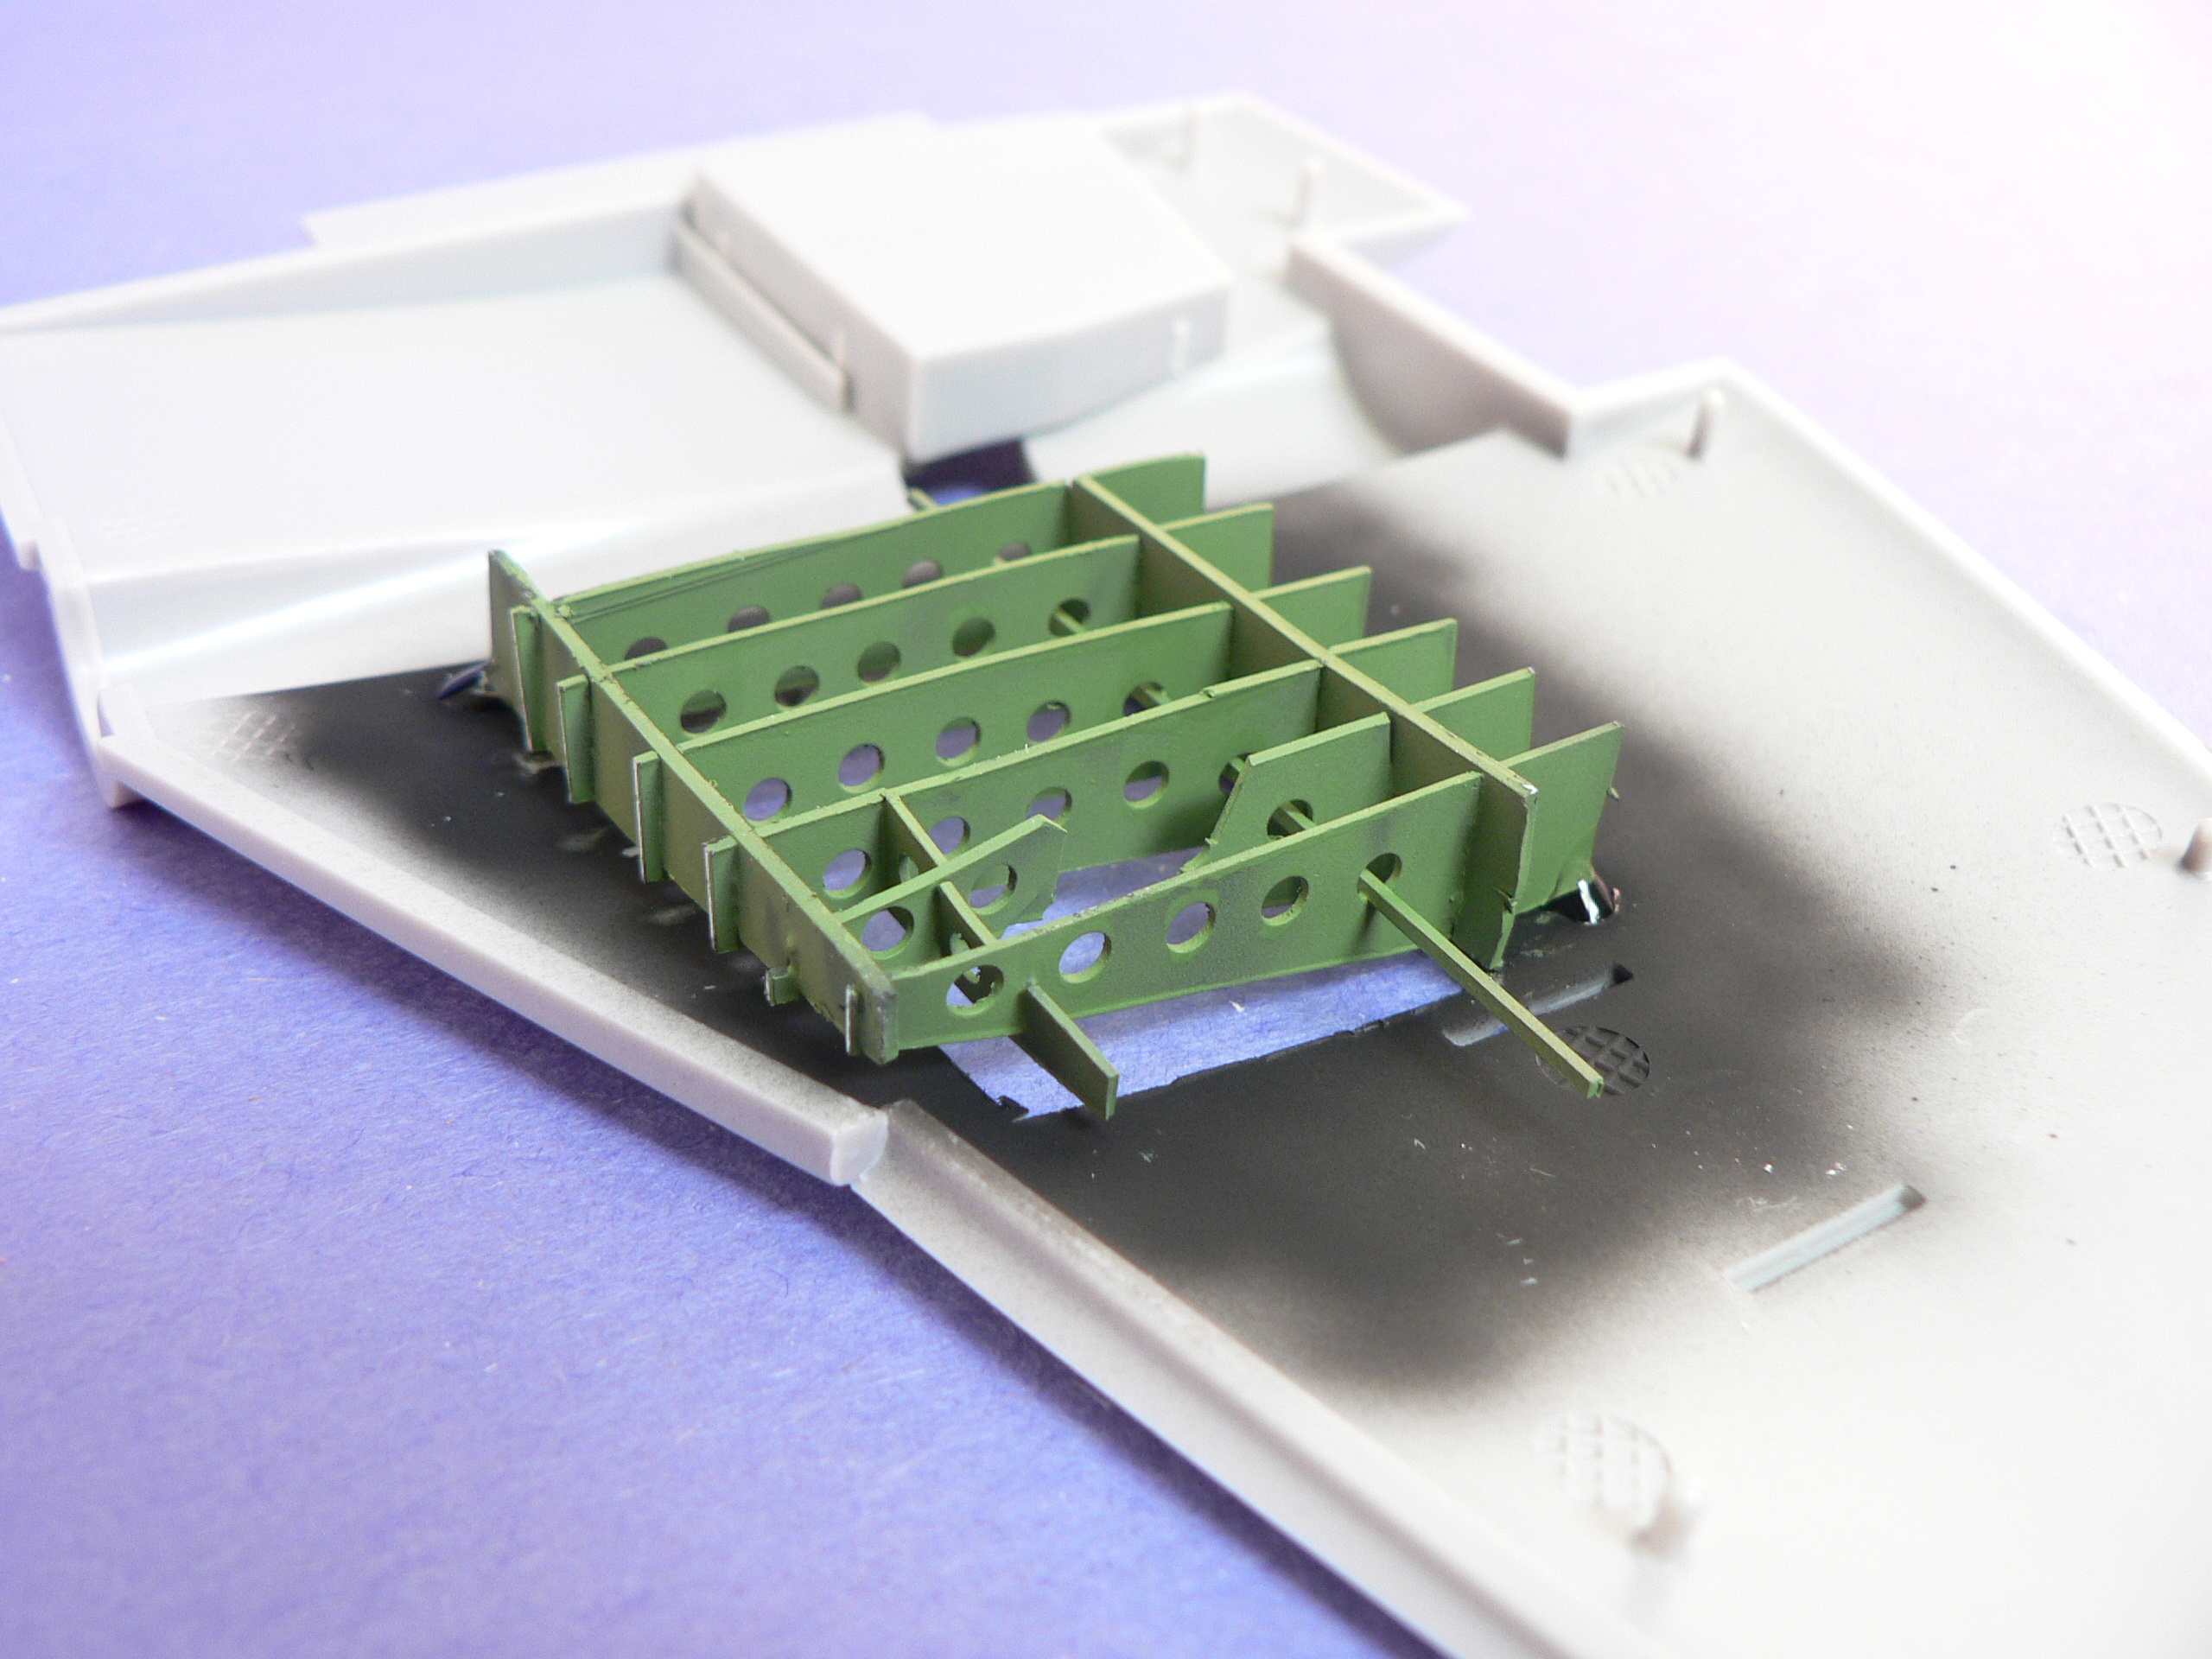
After painting the interior of the wing with Tamiya NATO black, the finished framing was primed with green and fitted in.
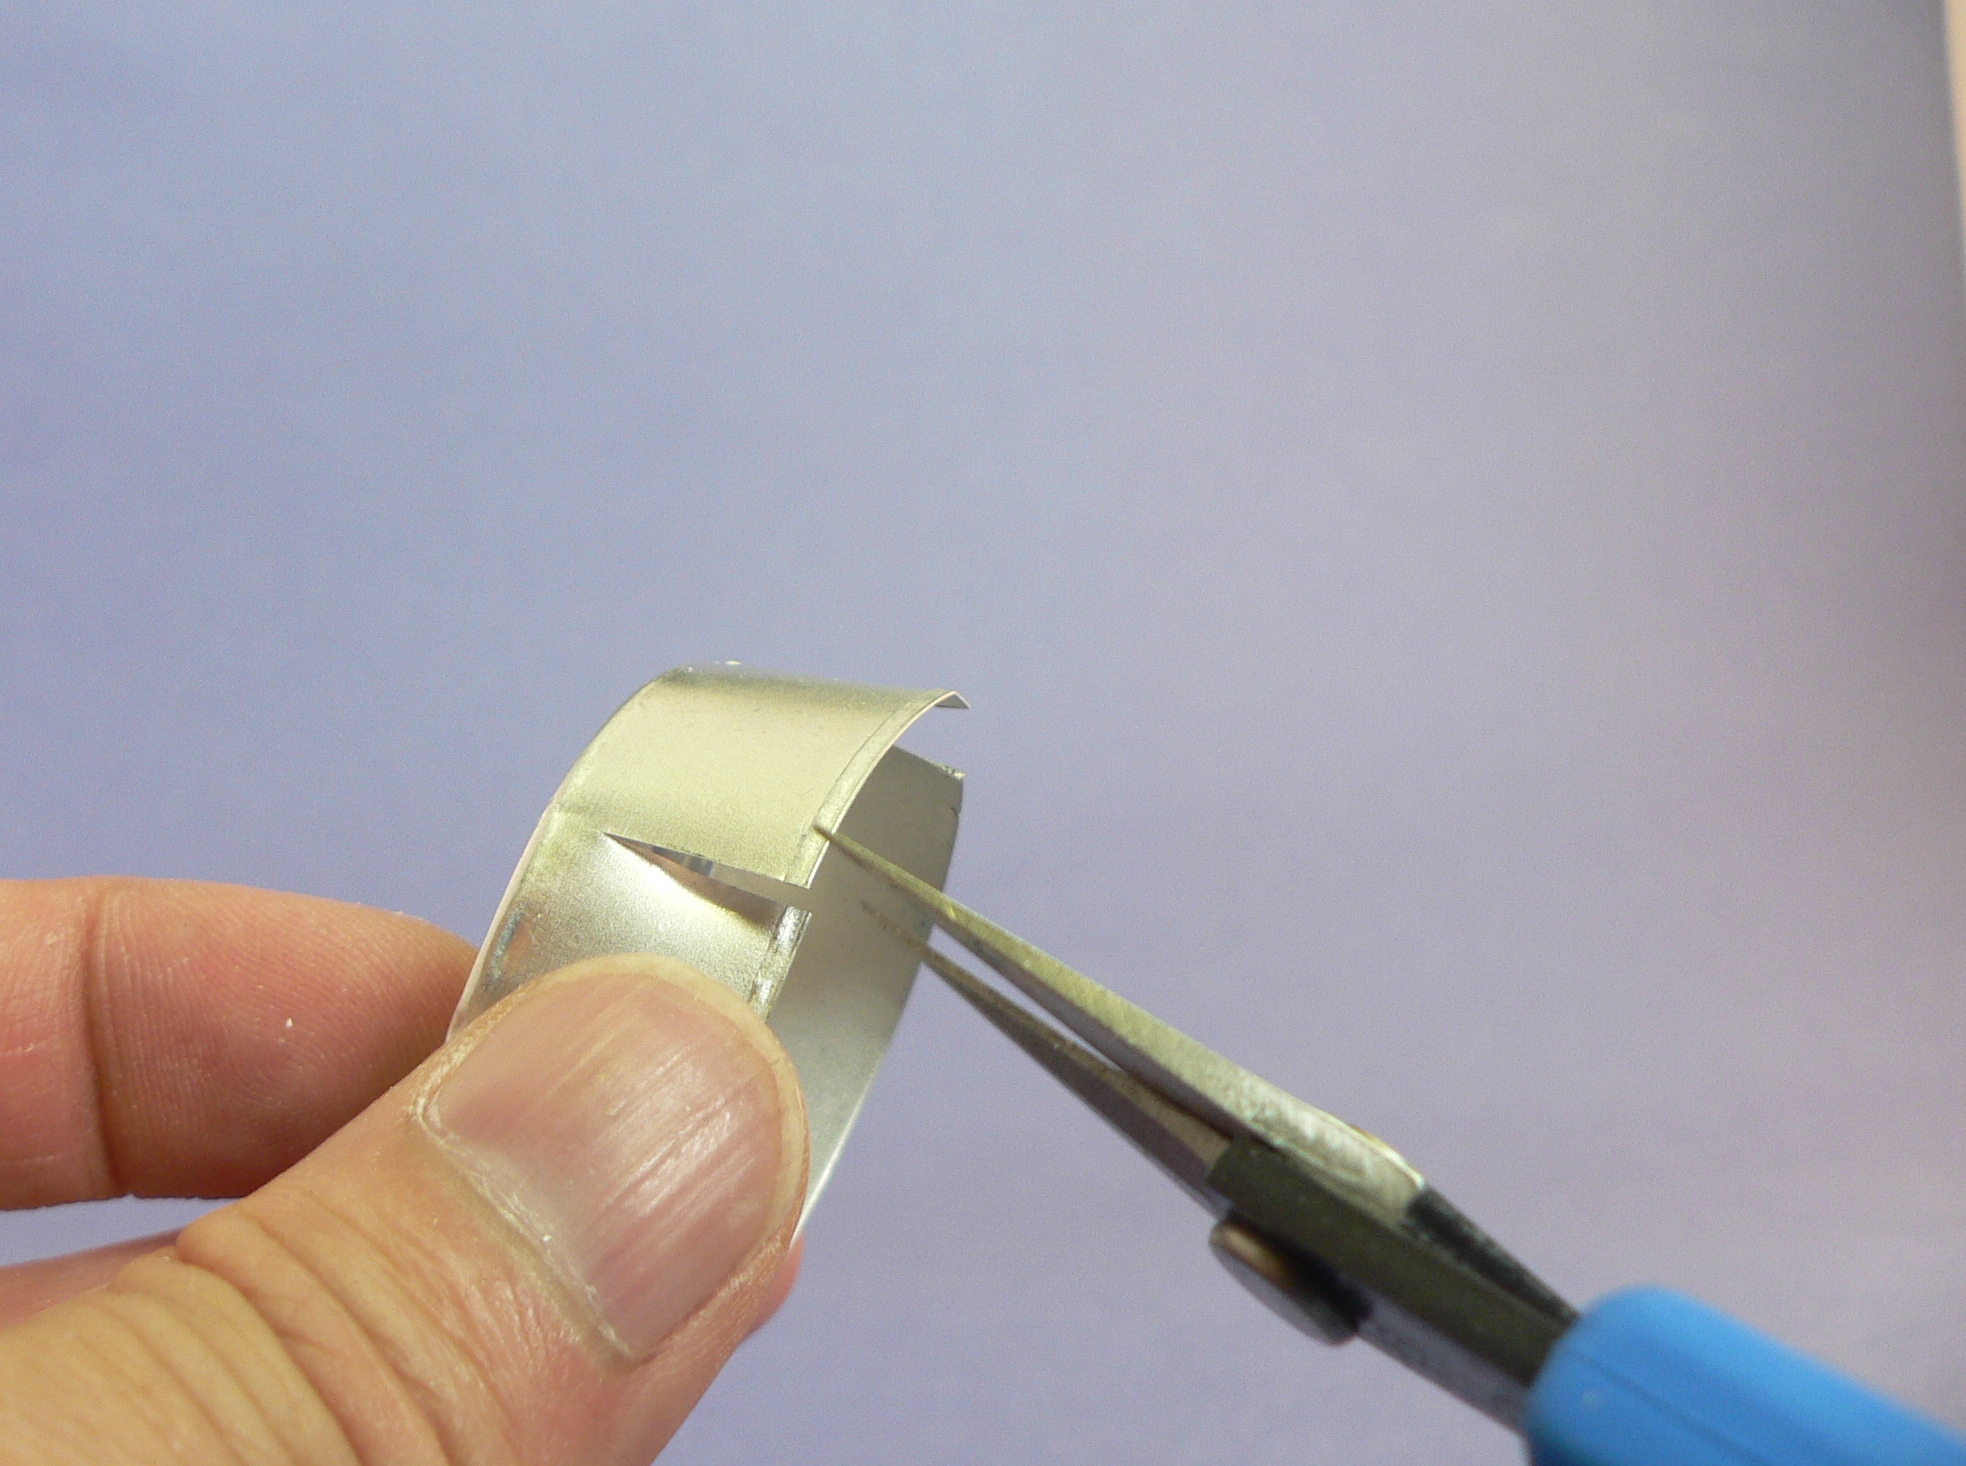
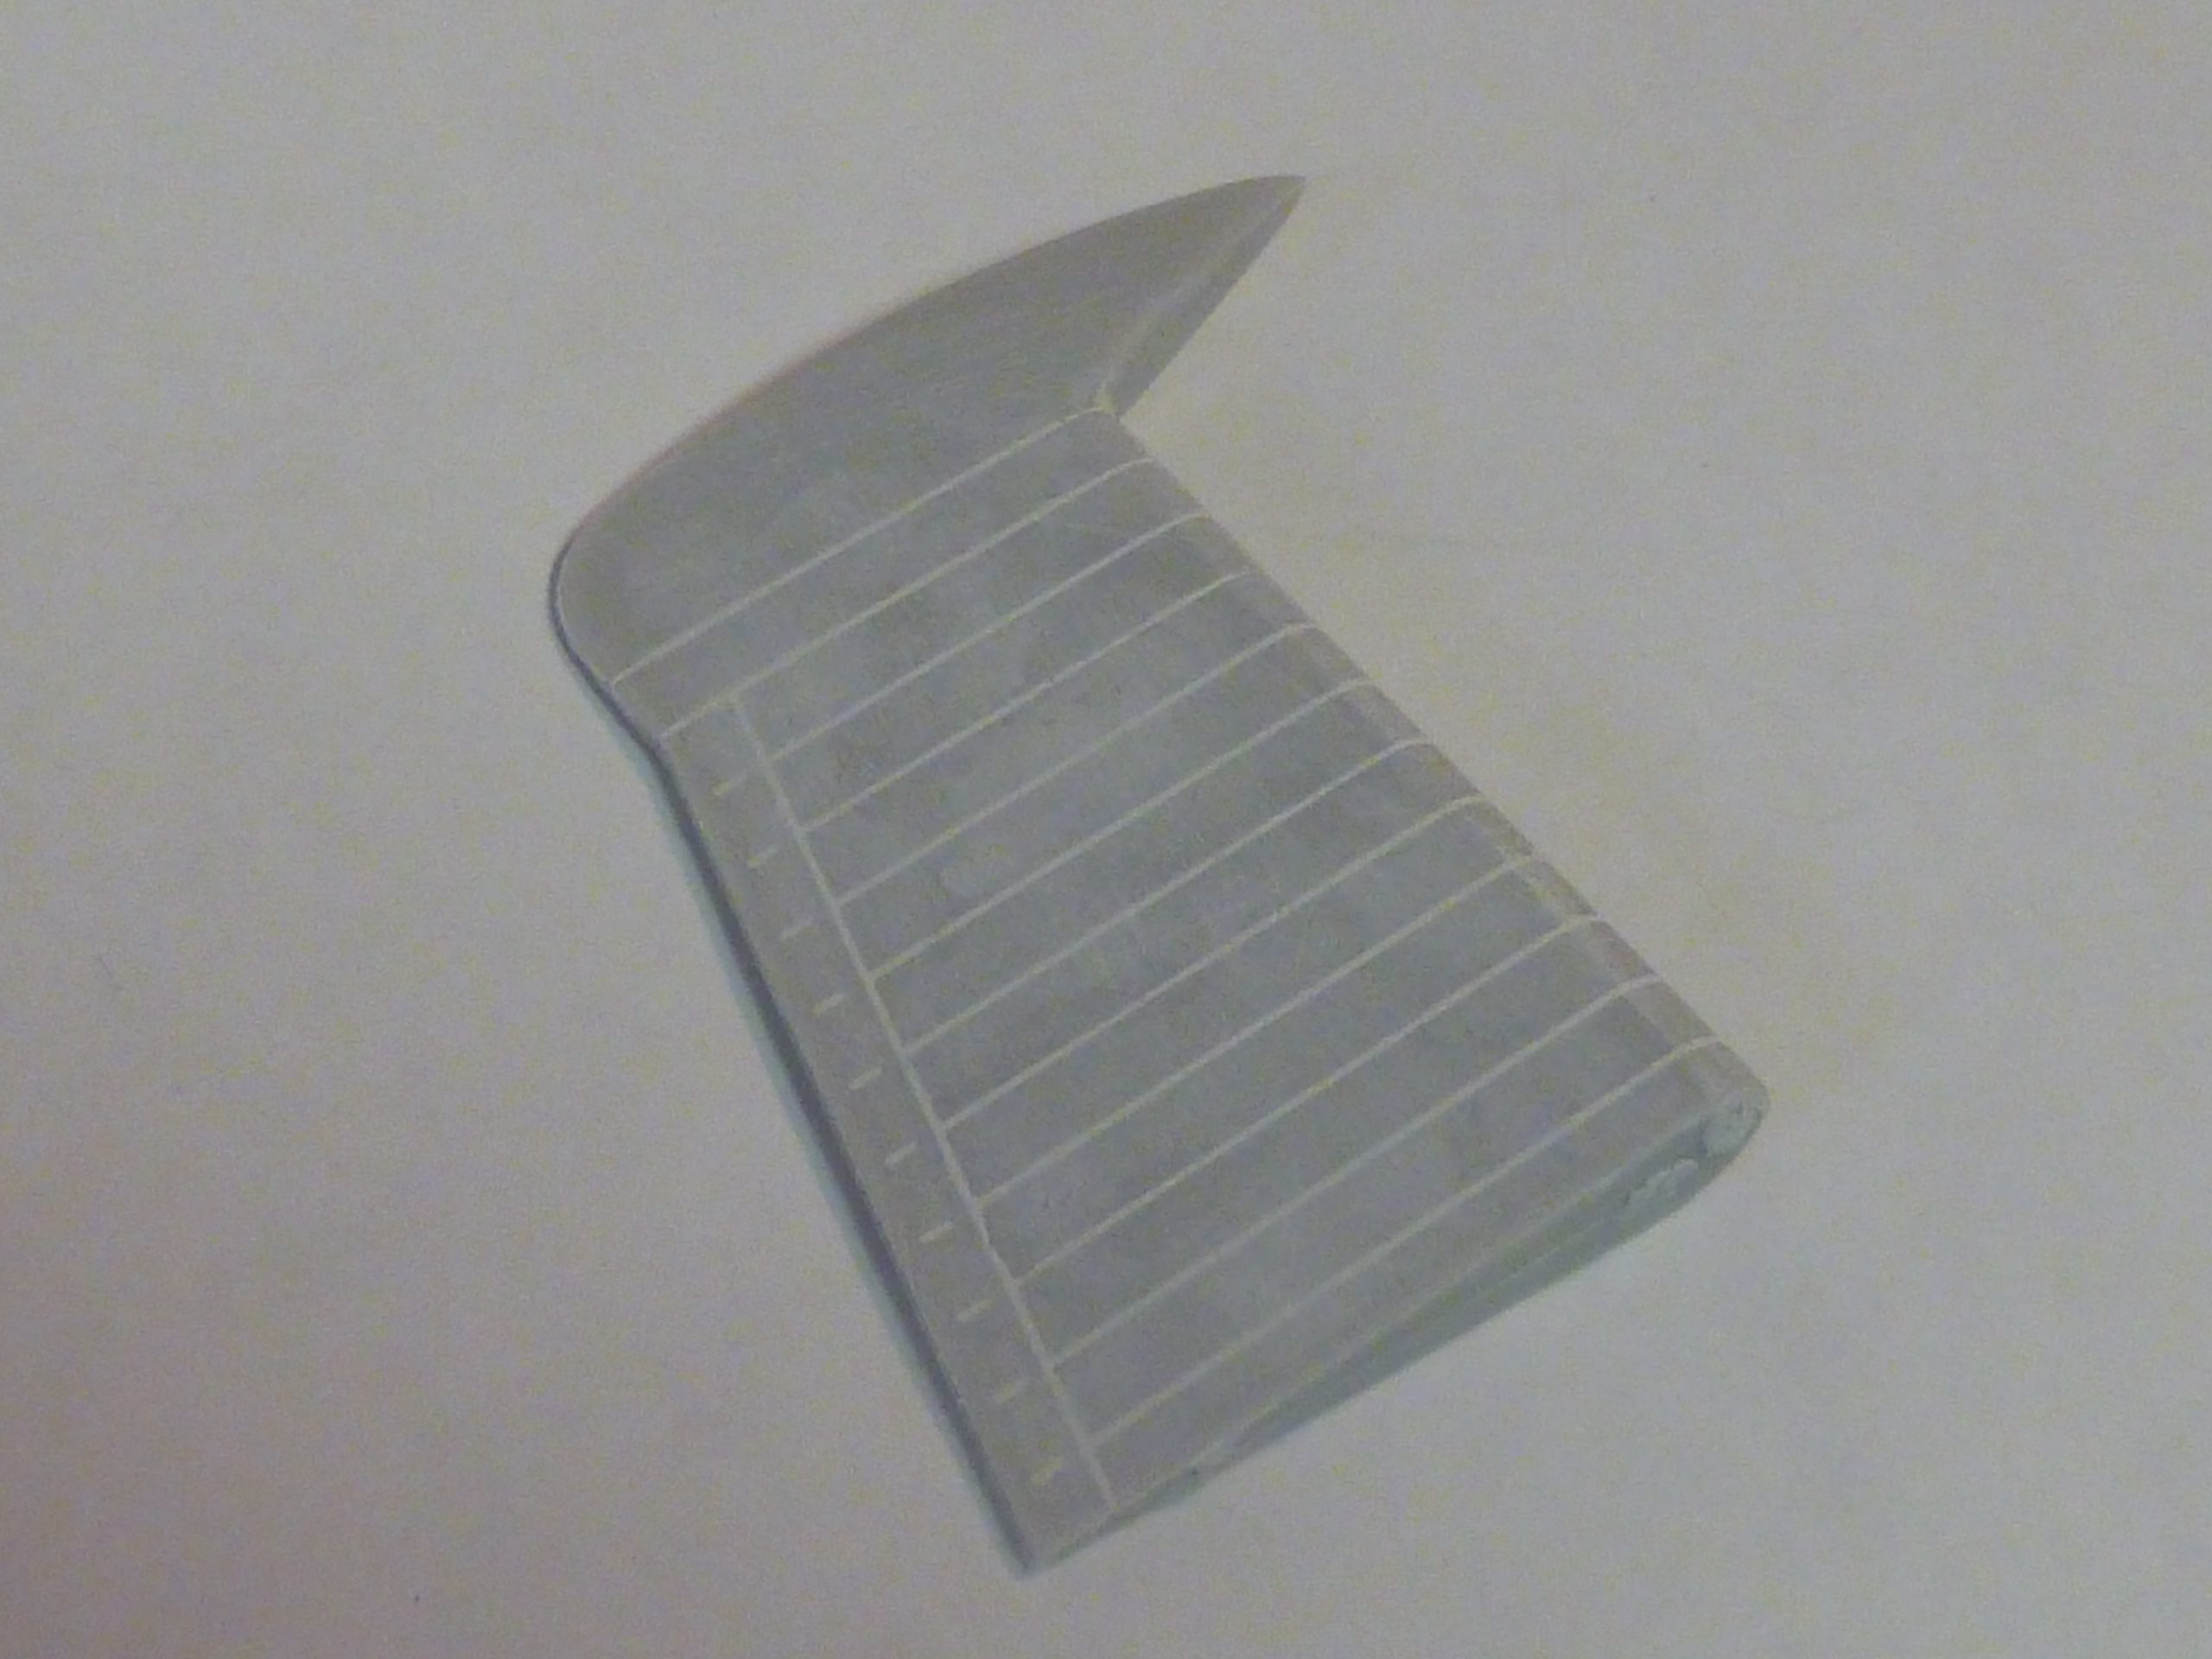
To create the twisted panels on top of the wing, I used a votive candle holder. The metal used is thin and easily shaped, but strong enough to hold its shape. I used a pair of Xuron PE scissors to cut the holder into the shape that I needed.
The damaged panel was gently rolled and then glued onto the top wing with CA glue. The interior PE flaps were cut using the same PE scissors and ‘damaged’ – bending the metal away from the impact.
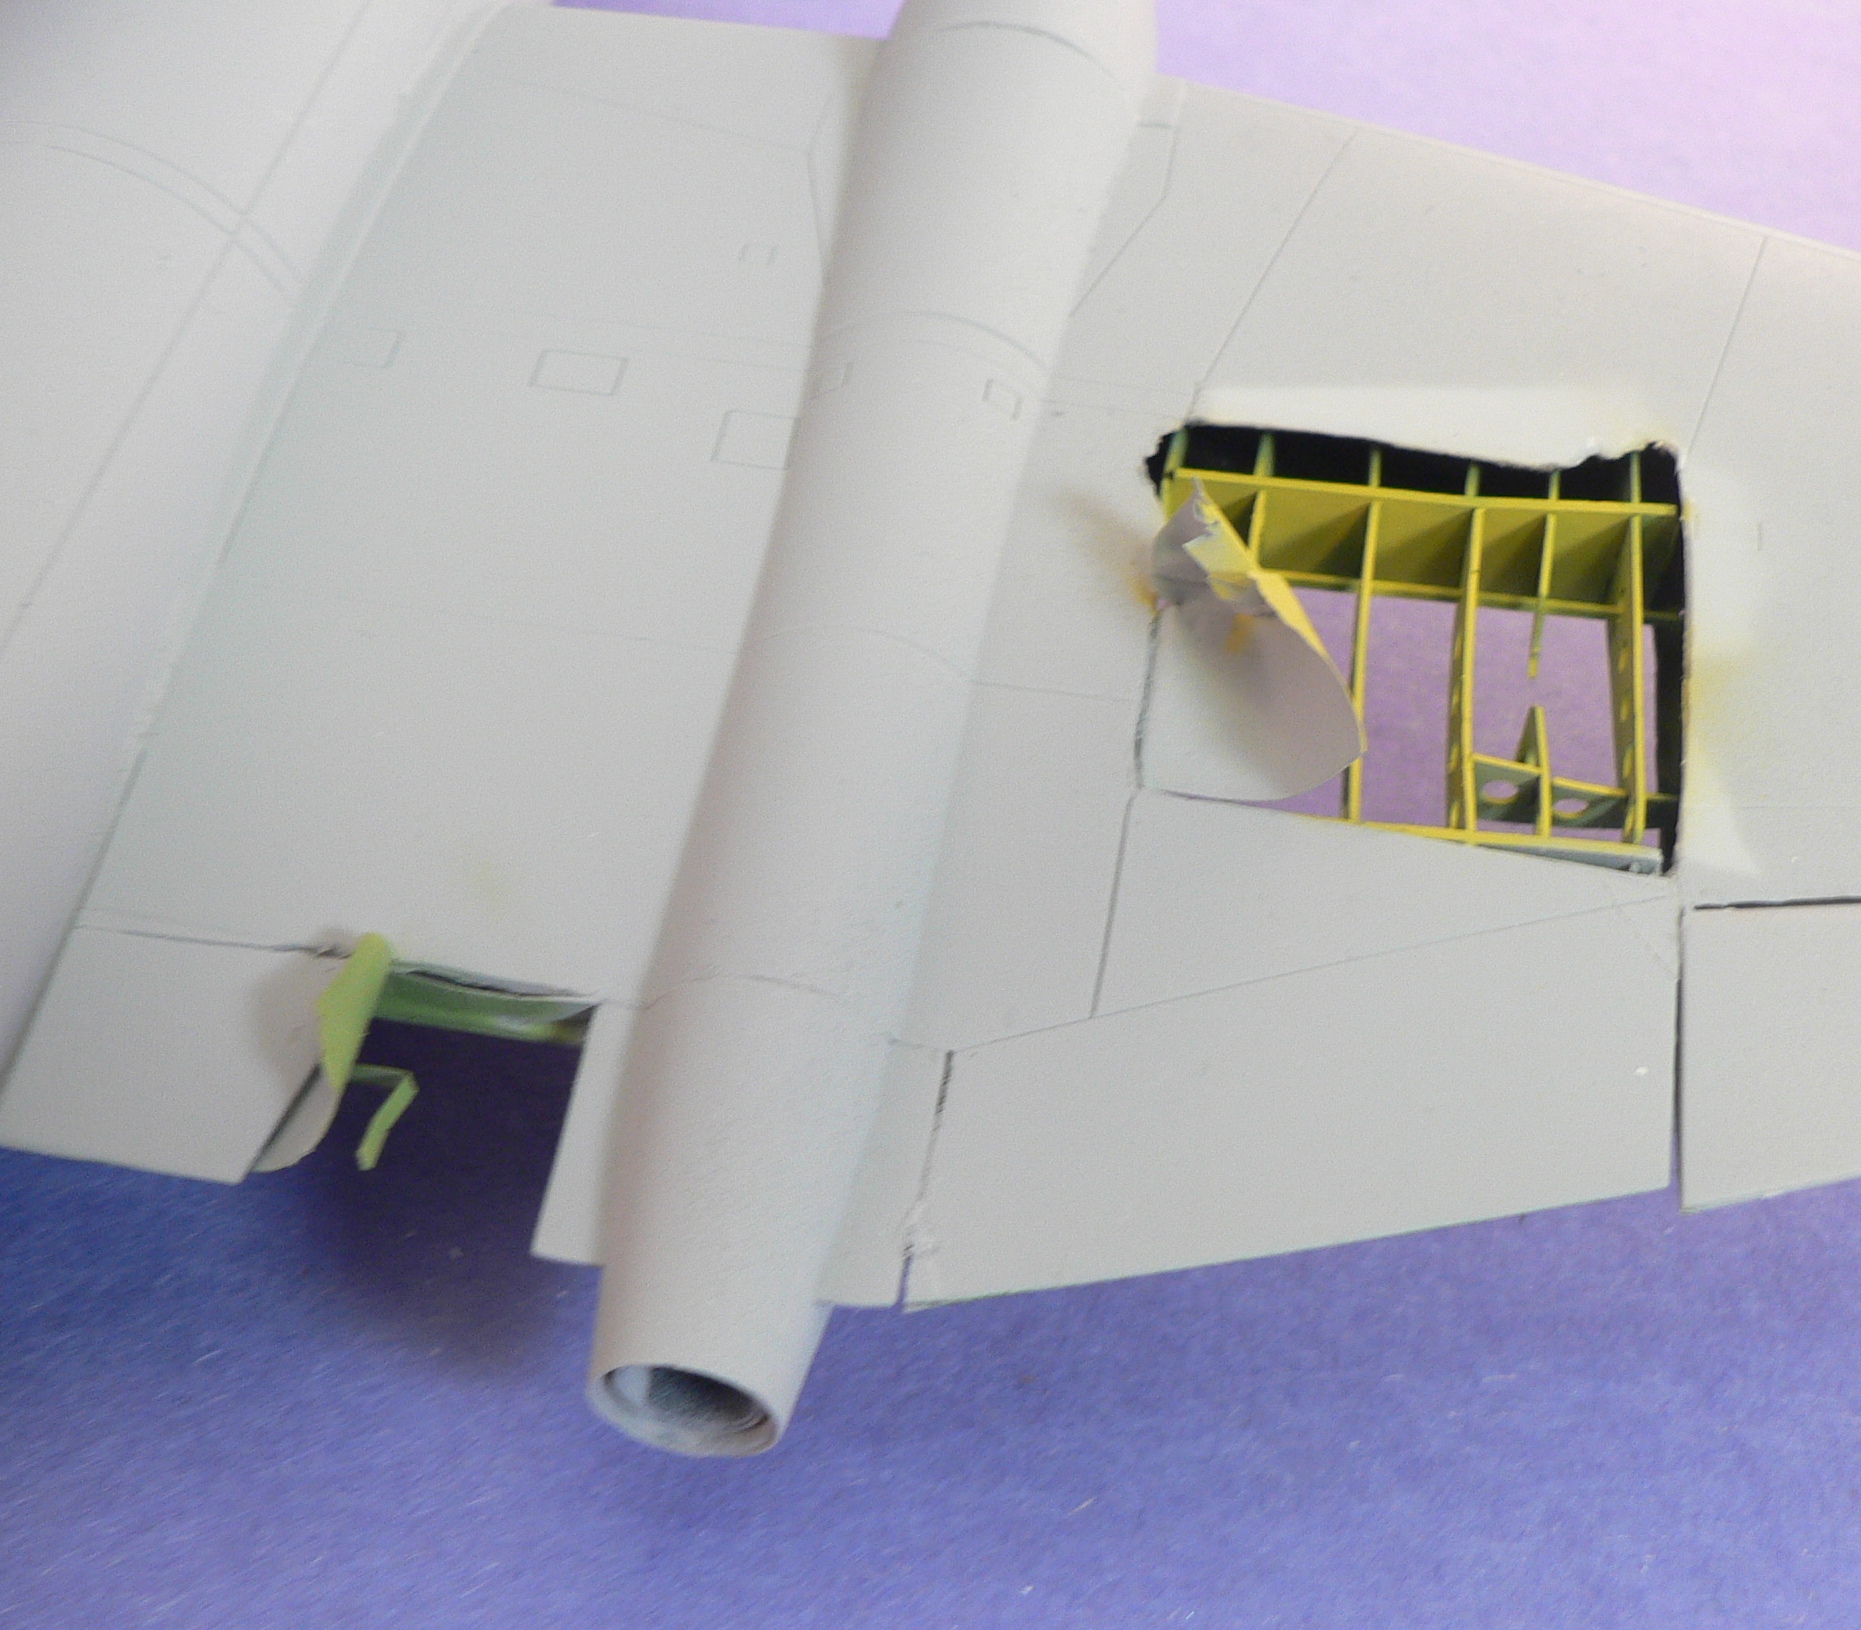
The wing area was given a coat of Tamiya white primer and the interior framing was painted with Testors Acryl Zinc Chromate.
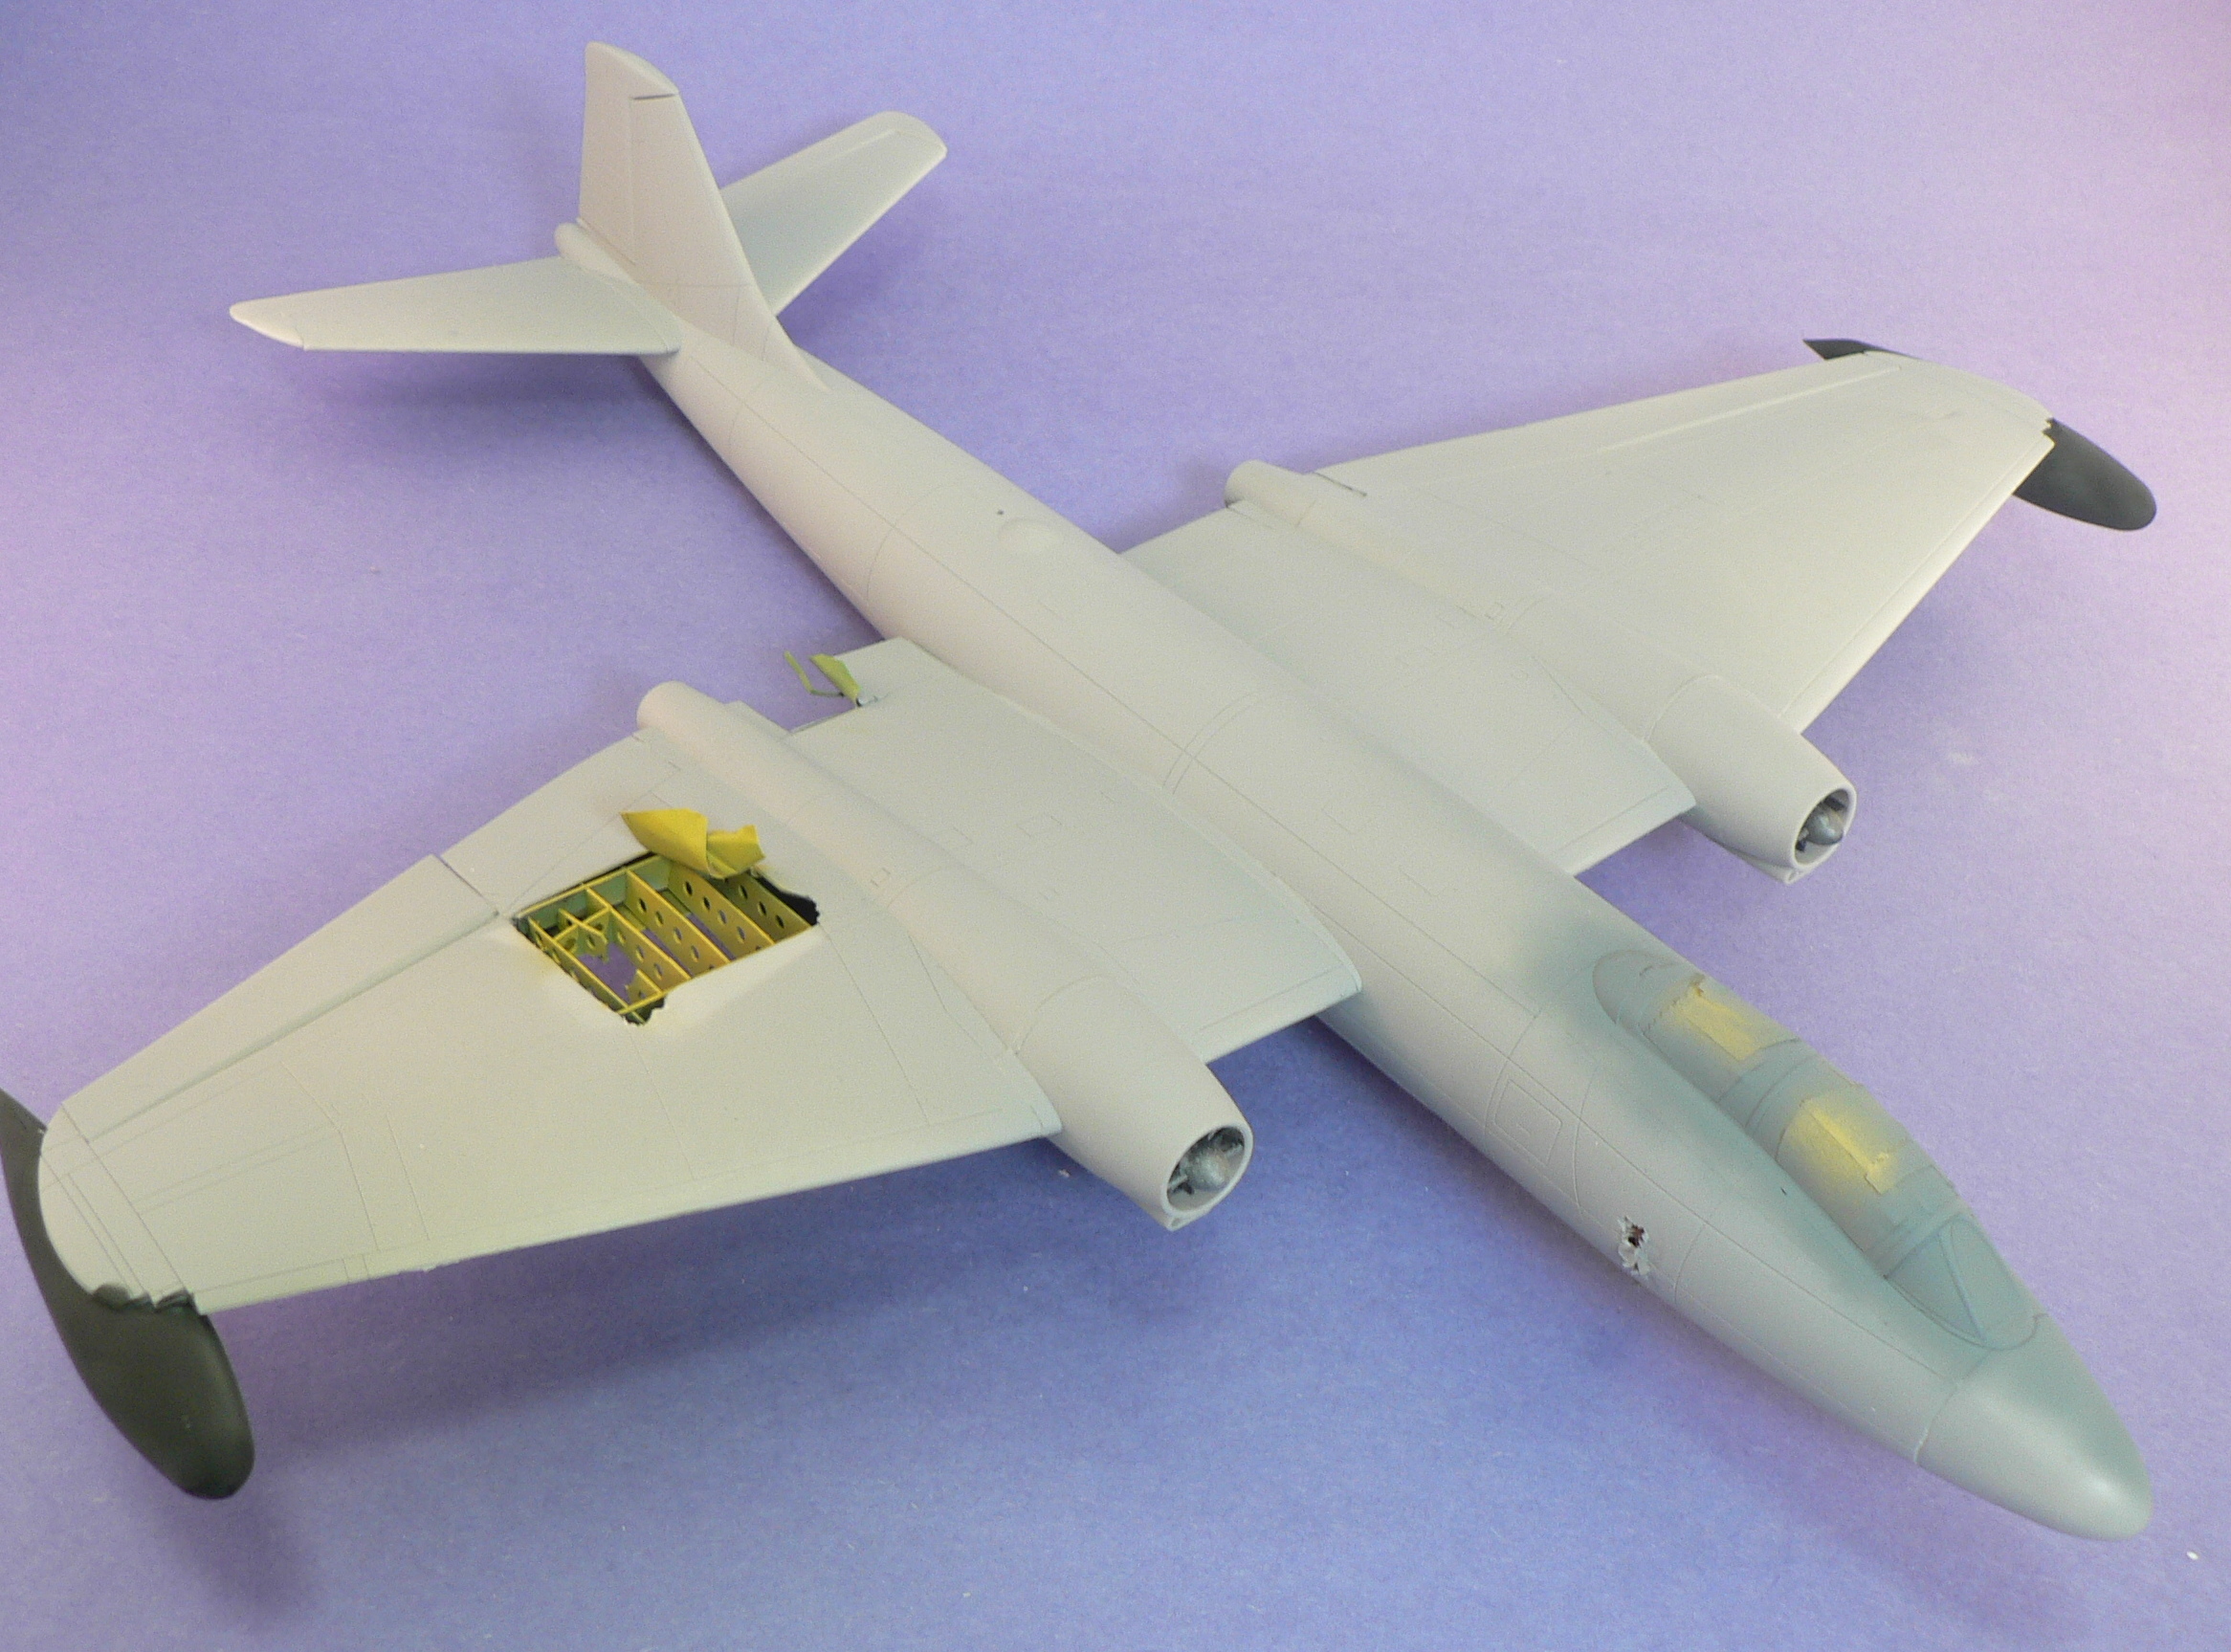
The clear cockpit covering was masked and glued down before an overall coat of Tamiya white primer was applied over the entire model. The primer was then lightly sanded down for the Natural metal finish next. I intentionally did not create a smooth layer before the metal finish, as I find that doing so creates a nice ‘oxidized’ look to the metal finish – as befitting an aircraft that was in South East Asia.
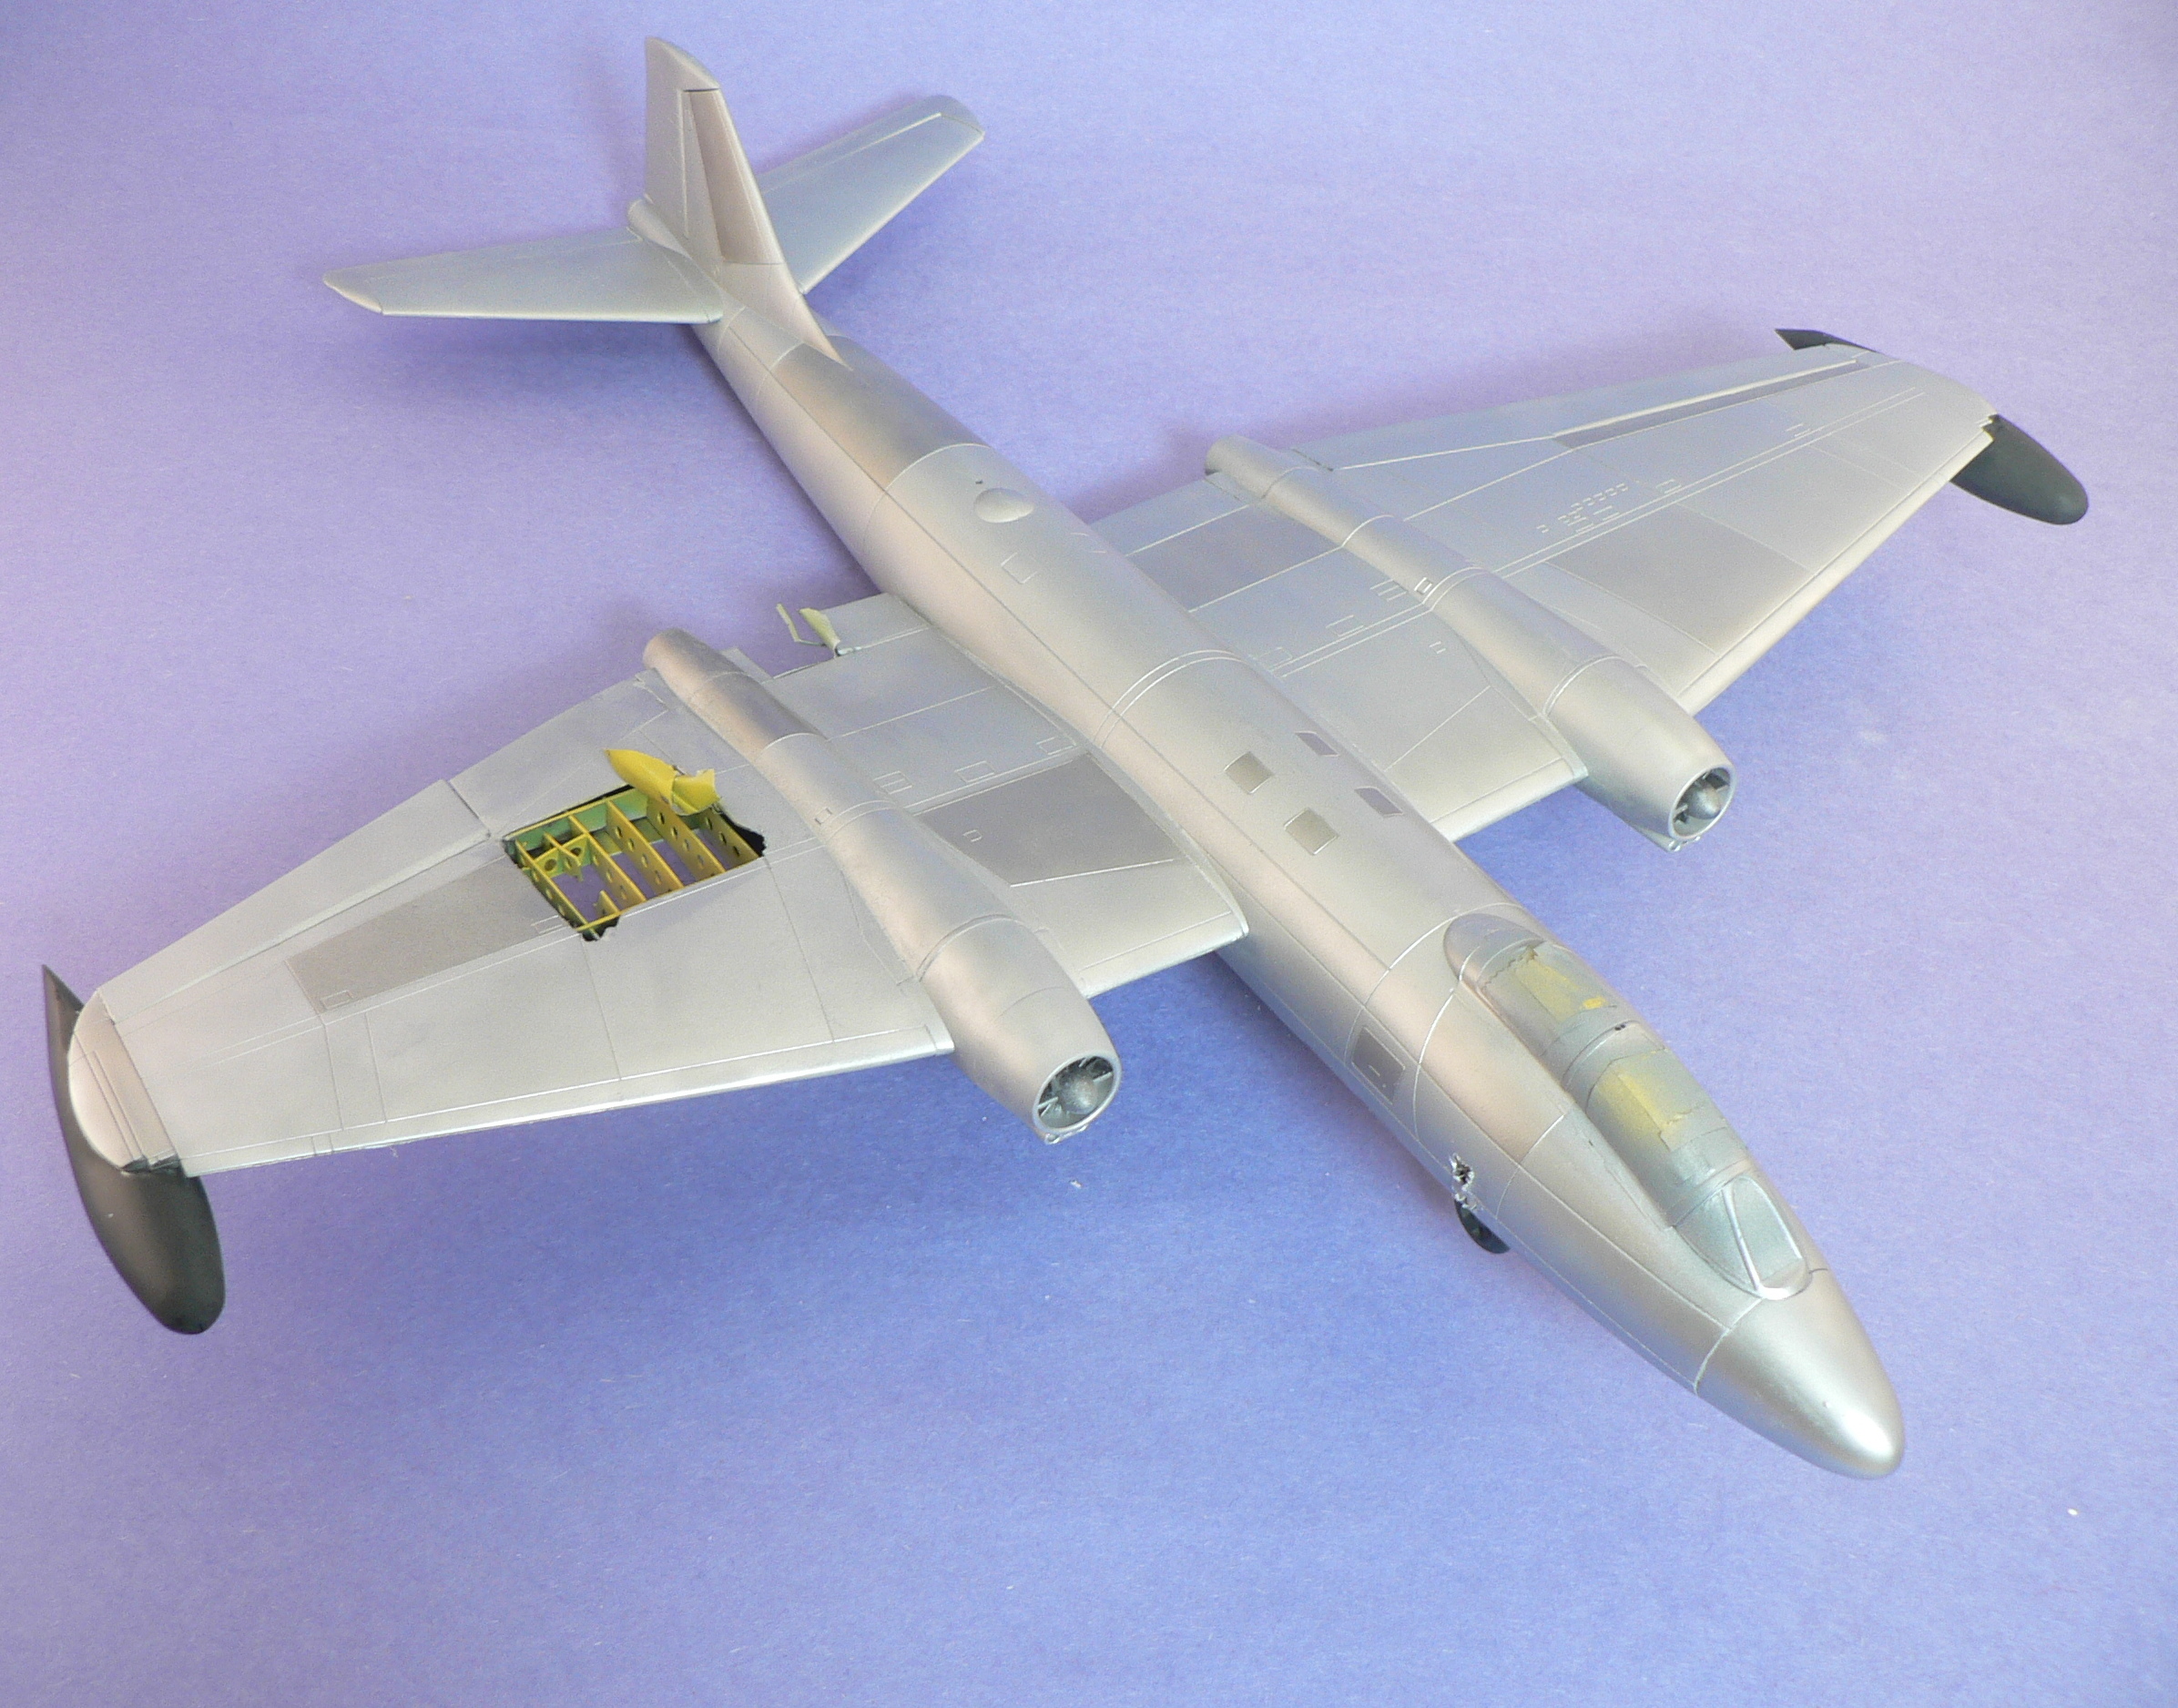
I first laid down a thin layer of Alclad II Aluminum, then I masked and painted individual panels out with Alclad Steel.
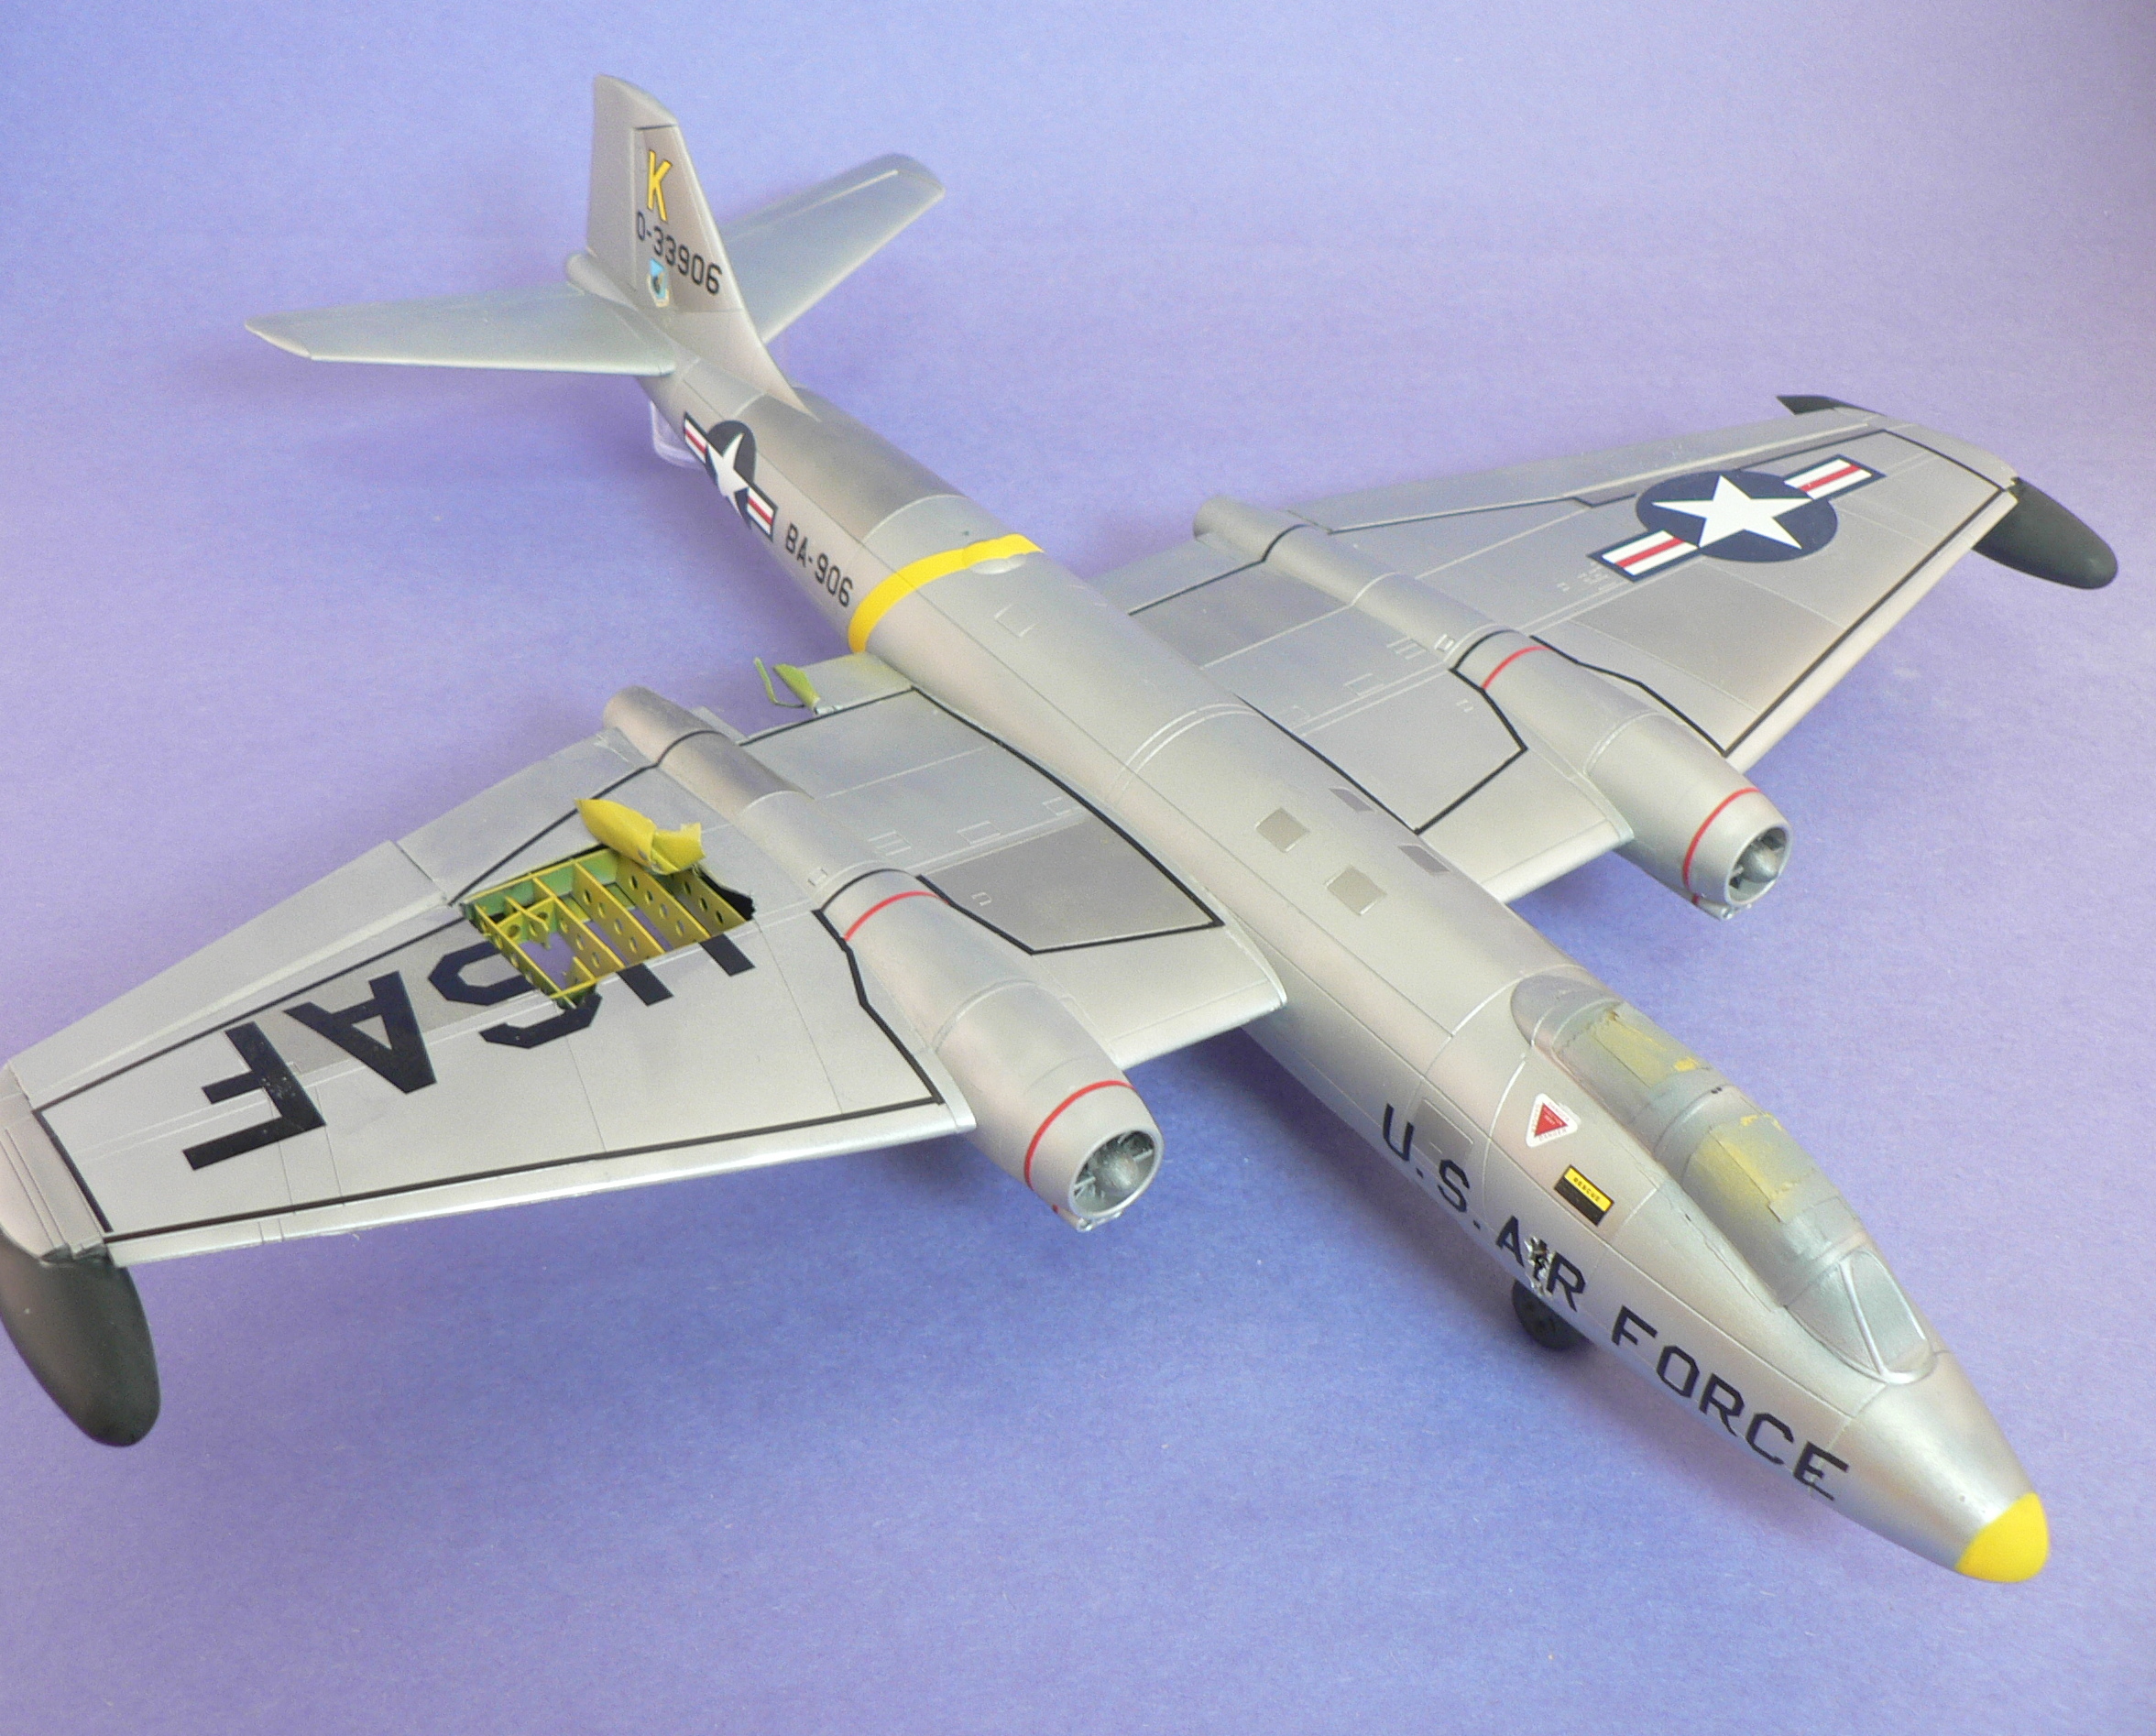
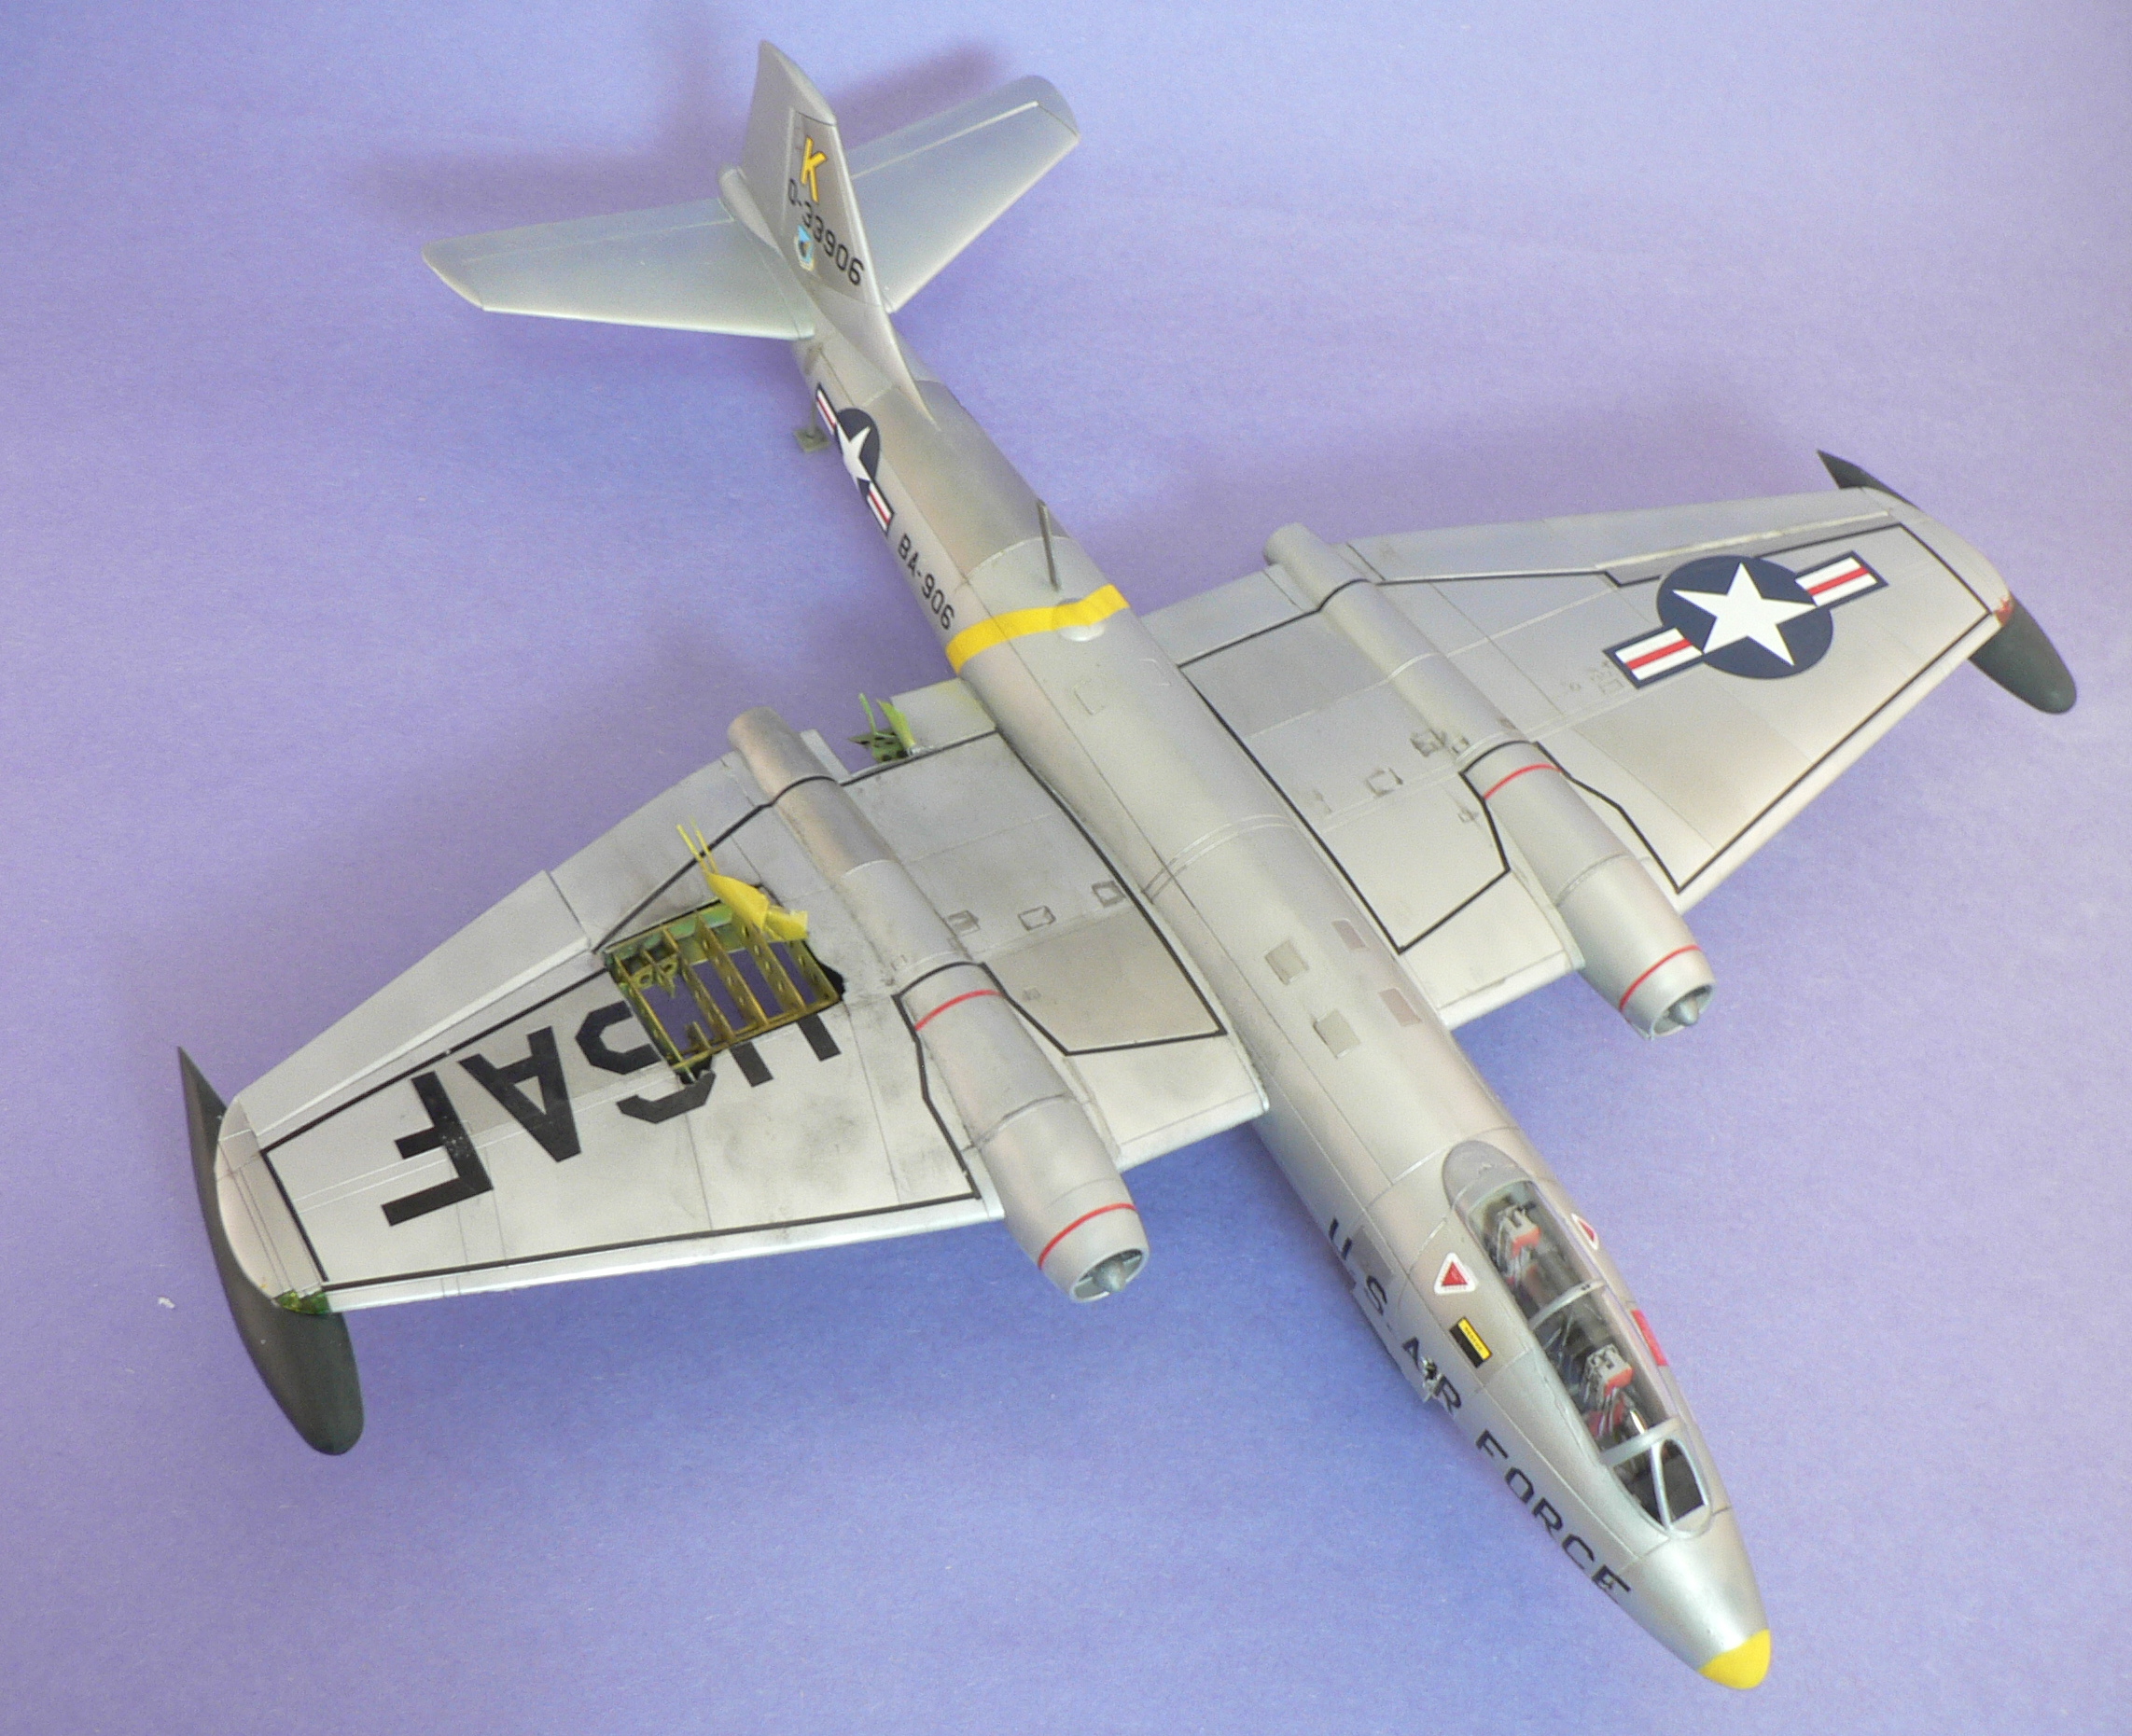
For decals, I used Zotz decal set #48040, which includes the marking for Col. Mason’s B-57B (53-3906) in Da Nang Airbase, Vietnam, 1966. The decals were nice and opaque and settled nicely with a coat of Microsol. The only thing you have to watch out for are the long black lines, apply them in small sections and use plenty of patience. I used stronger decal solution to melt the excess decals near the damaged area. The yellow around the nose and the mid-fuselage was masked and painted. This much more exact than trying use decals around compound curves, which has always given me trouble.

The paint on the engine was scrapped up a bit with sand paper to replicate the planes damage. Tamiya weathering set soot black was used to indicate the smoke and explosive damage in the framing, and all around the damaged panel. Extra scrap PE was added as per the reference photos.
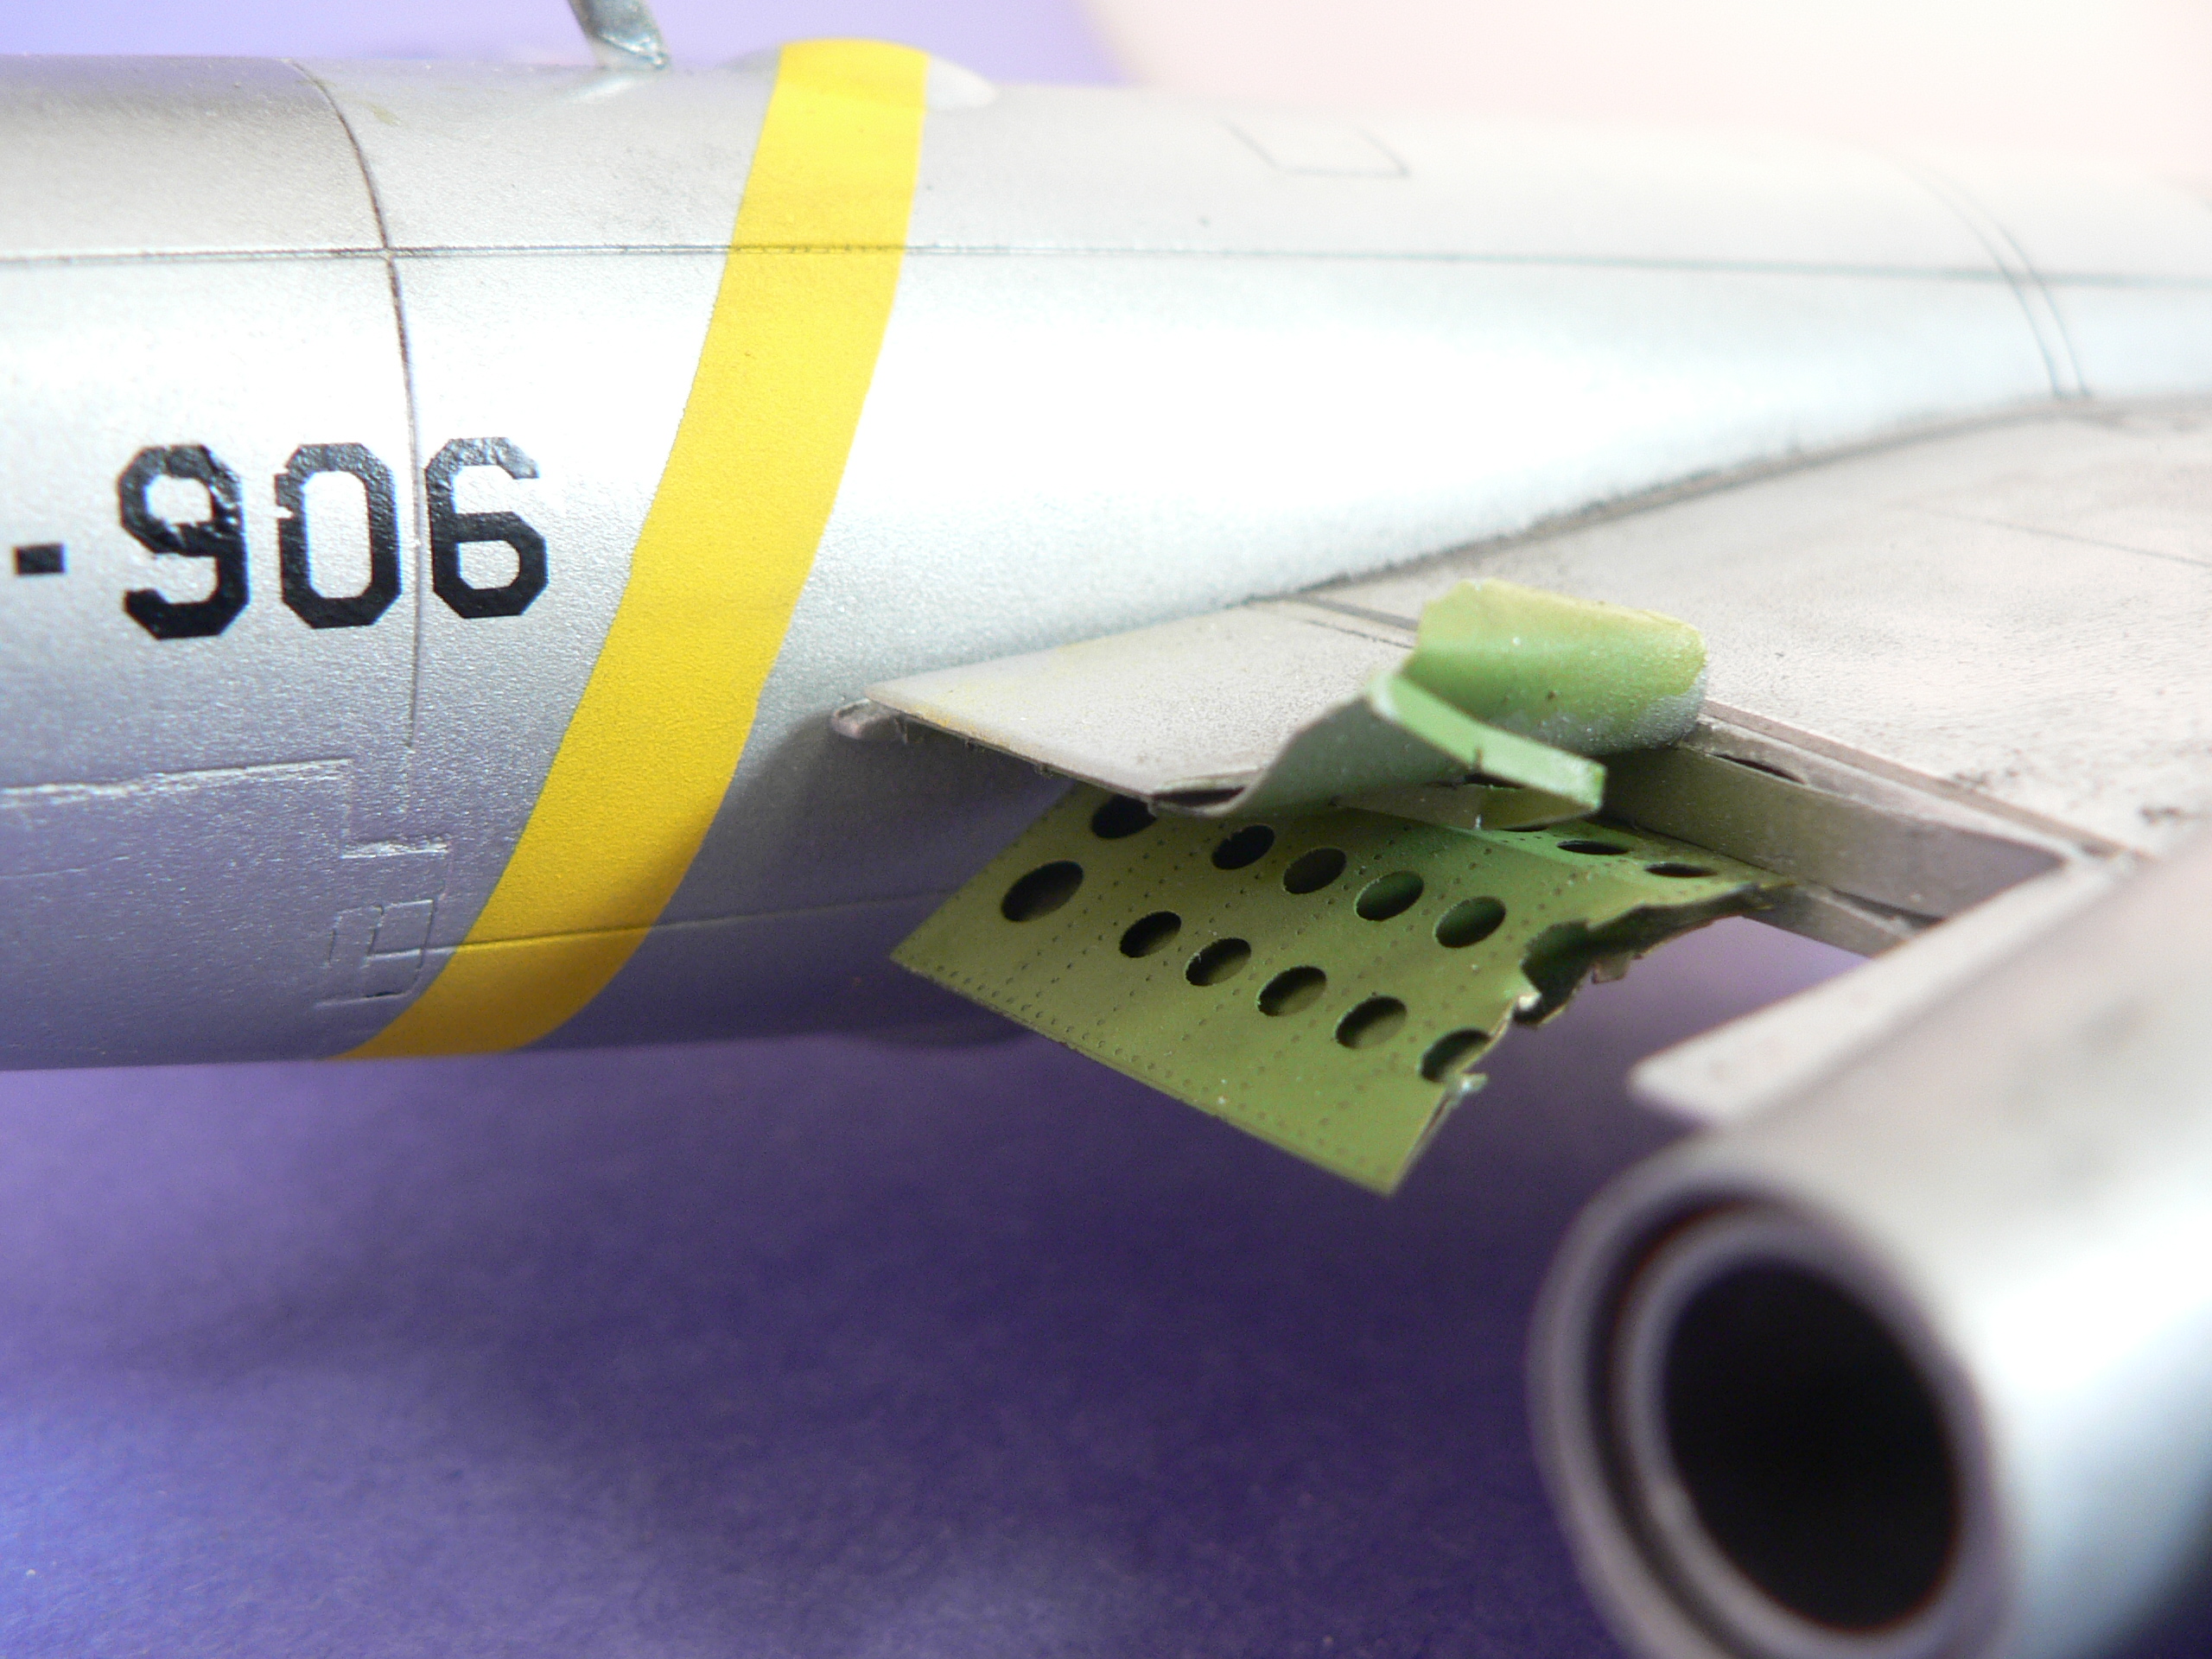
A closeup of the damaged flaps – using Eduard PE, this was actually a very simple process.
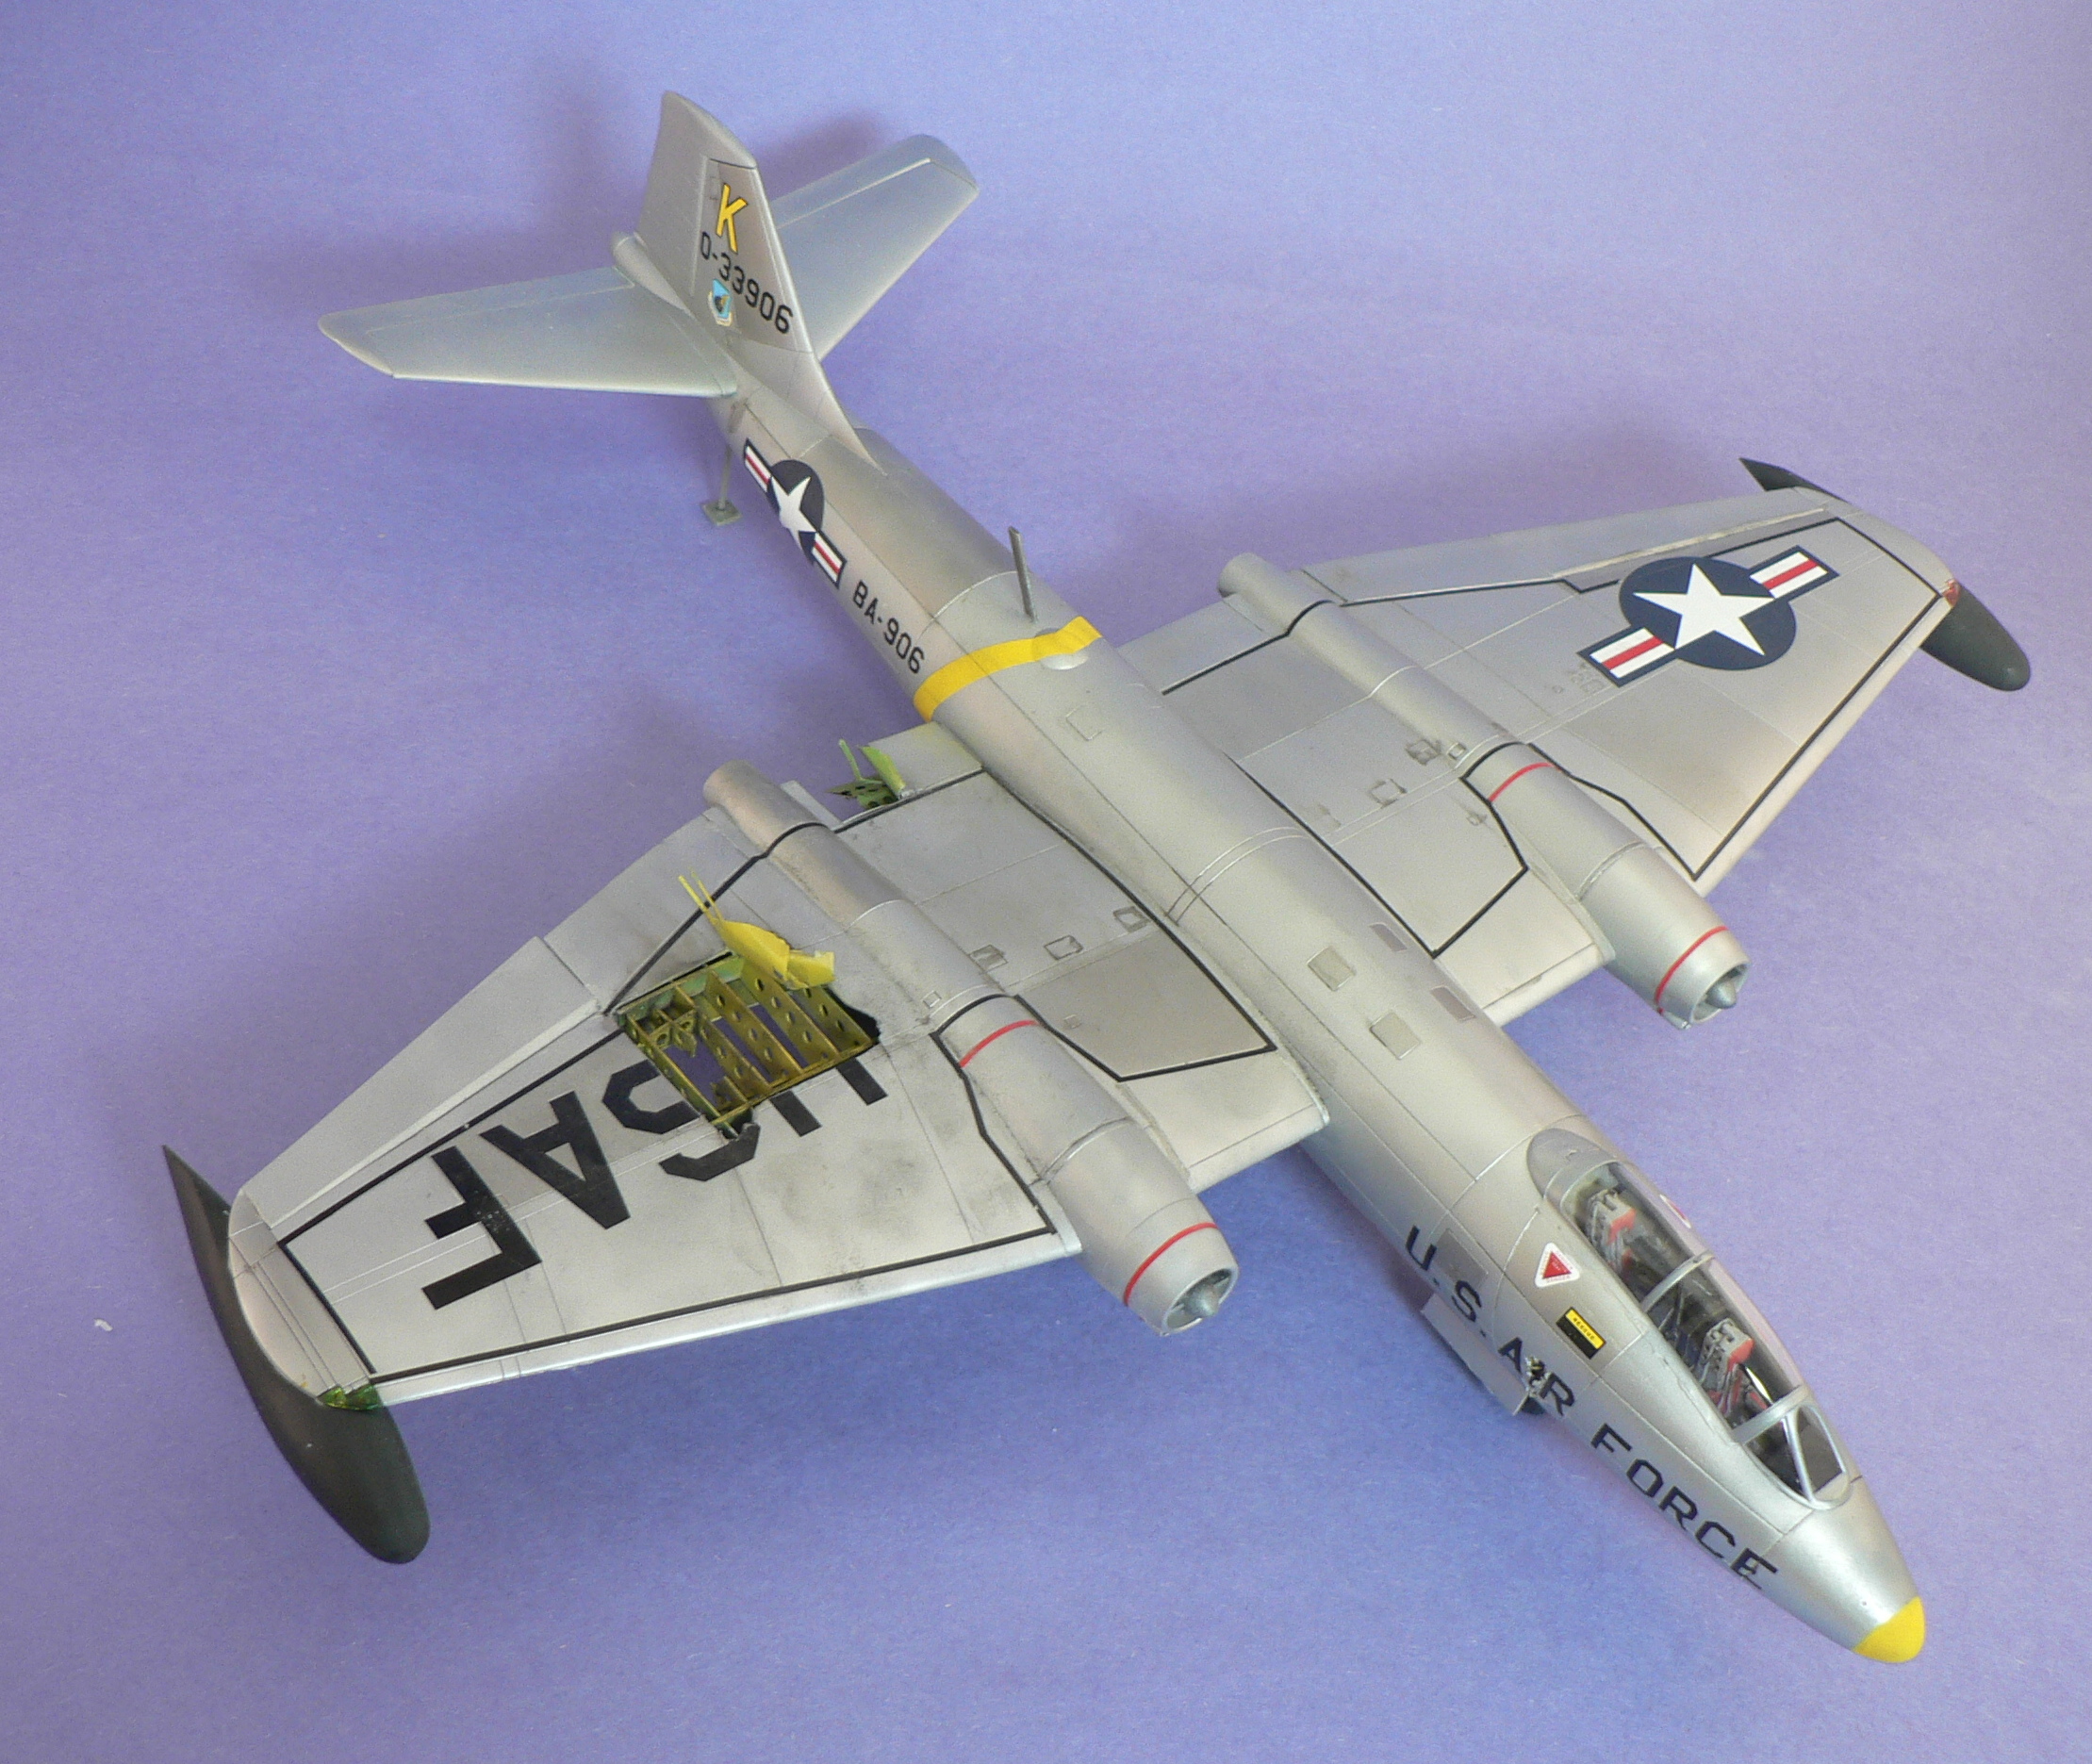
After a wash of thinned black oil paint for the panel lines, more dirt and smoke damage was added with oil paint and weathering powder. The rough surface of the underlying primers helps the powder to stay on the wing’s surface. I especially emphasized the service panels where there would have been a lot dirt accumulation.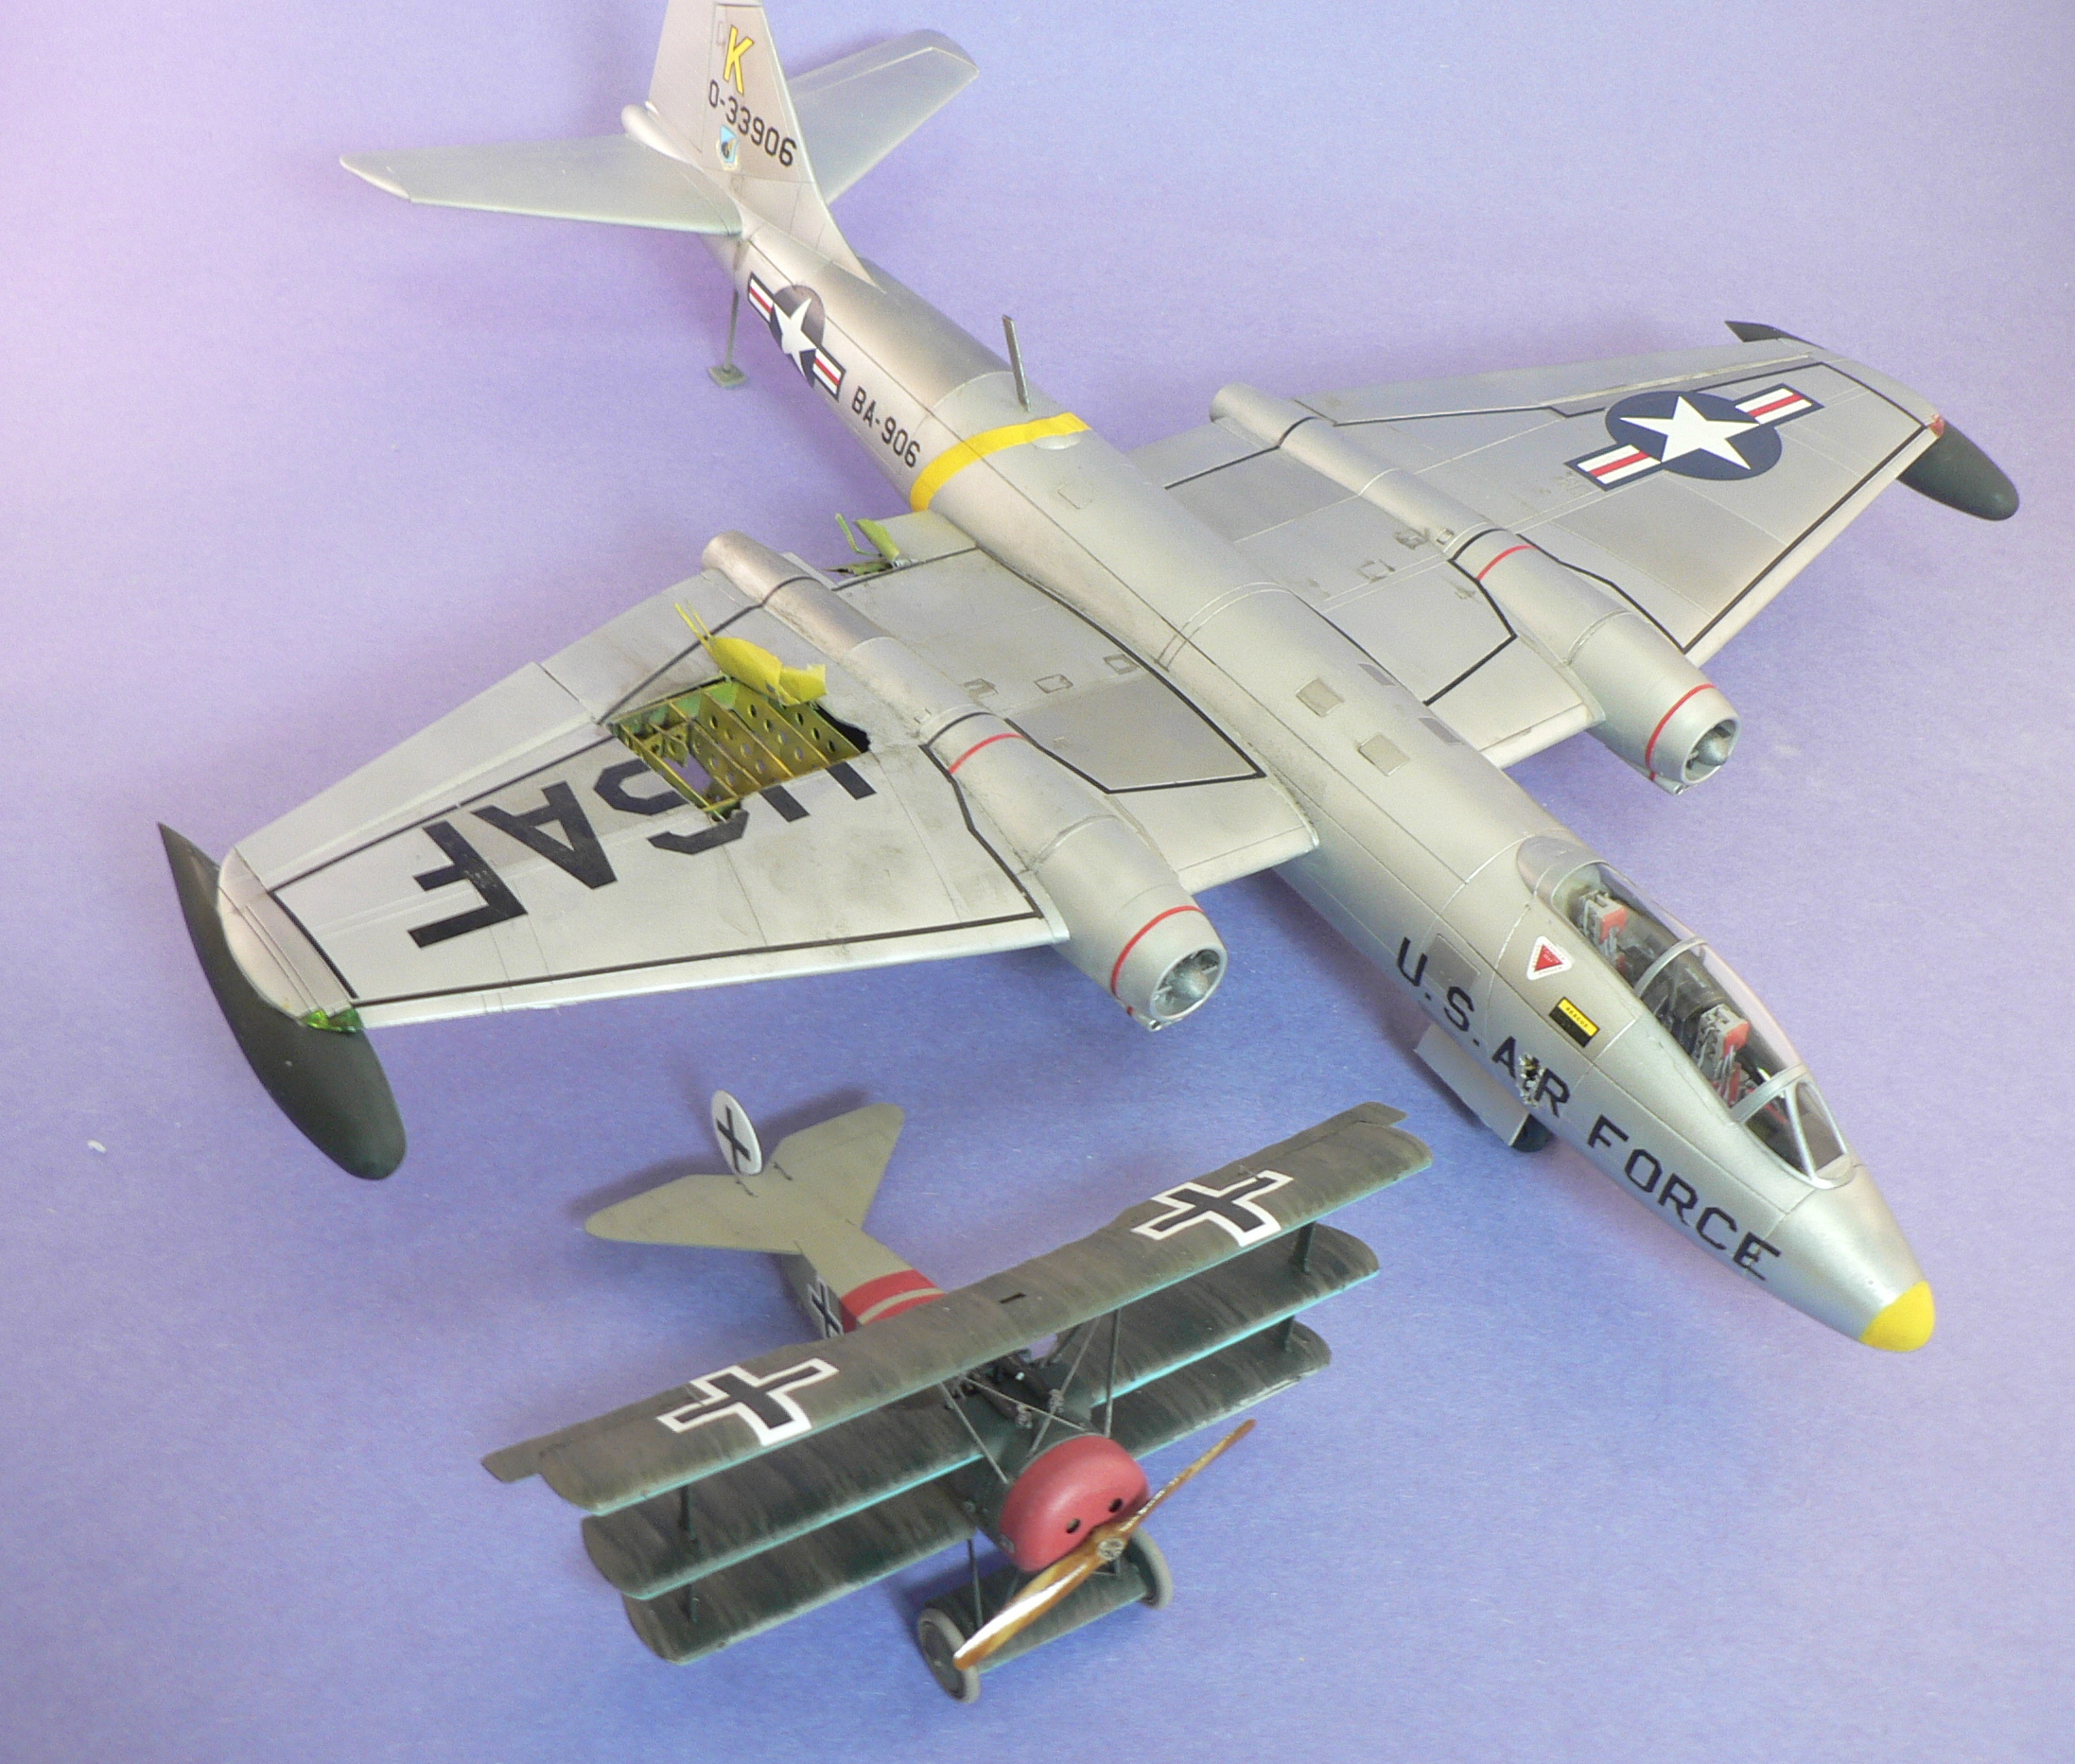
Just for fun, let’s see how big this plane is compared to a Fokker DR I.
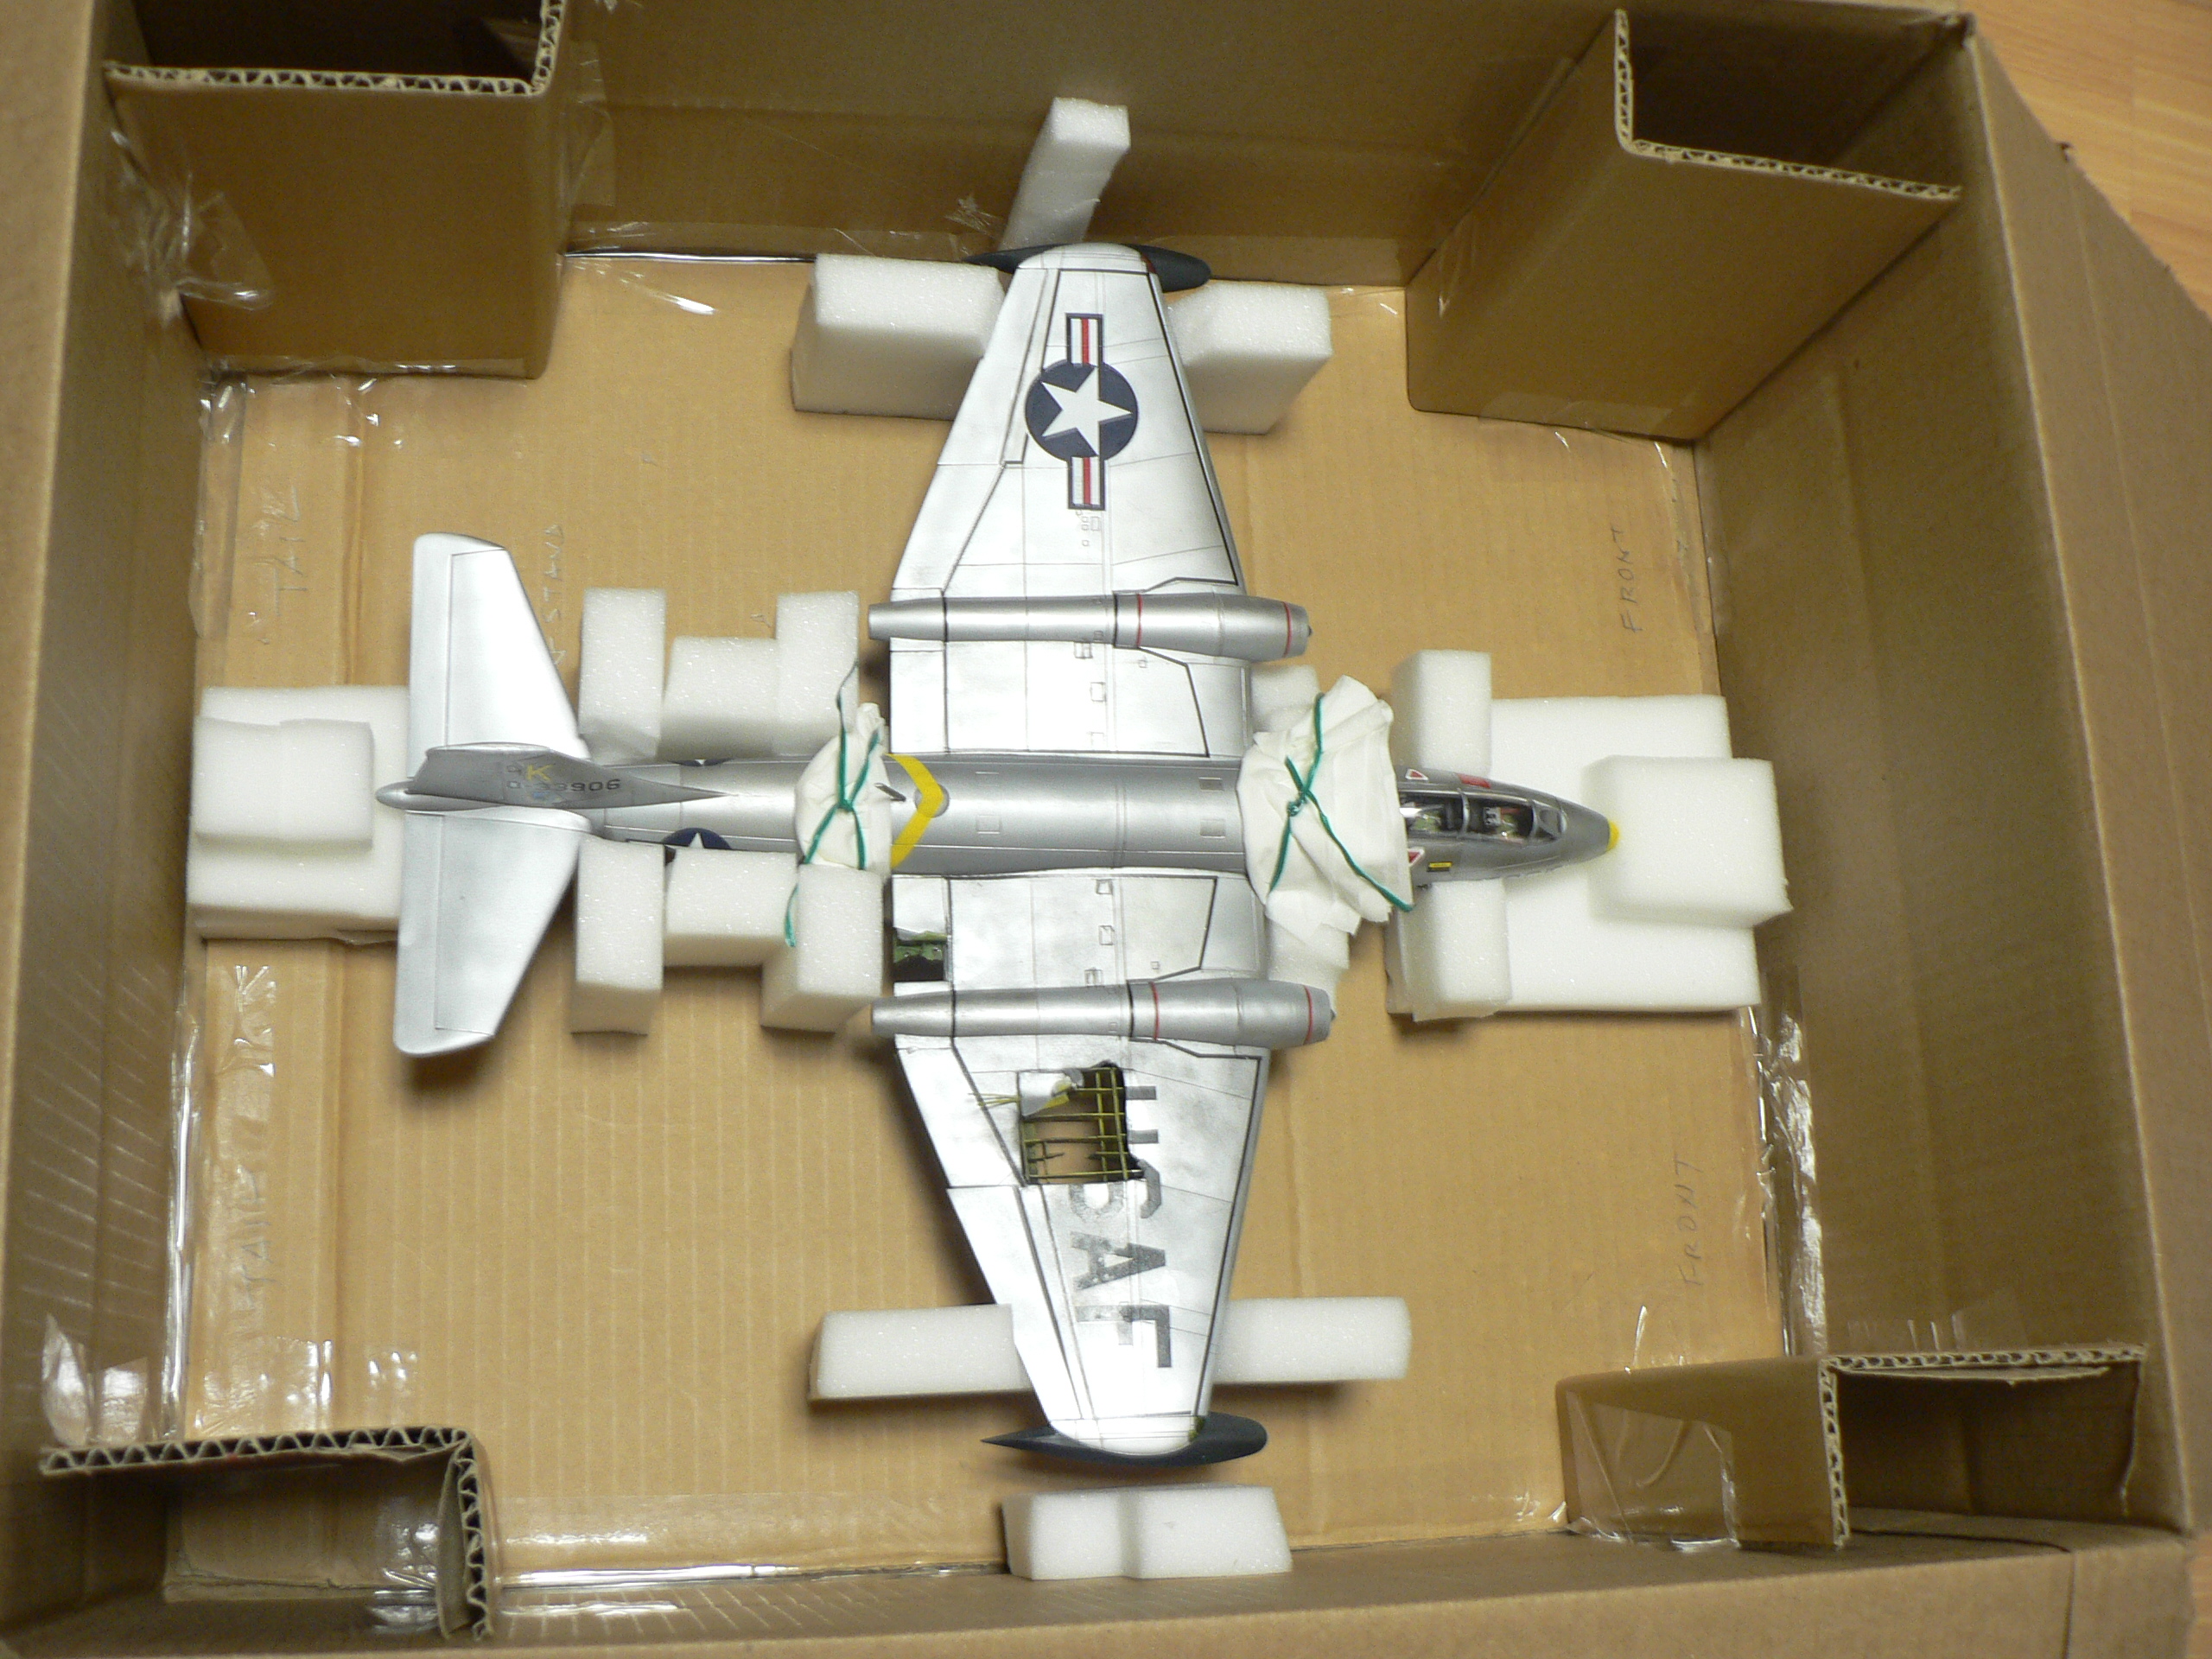
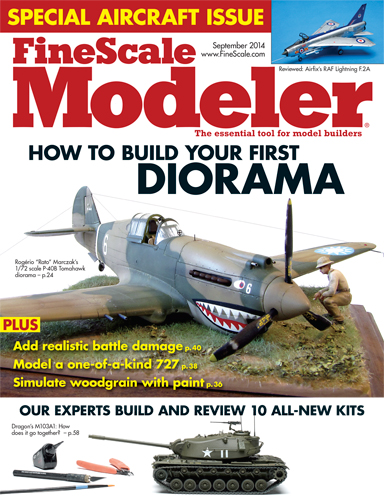
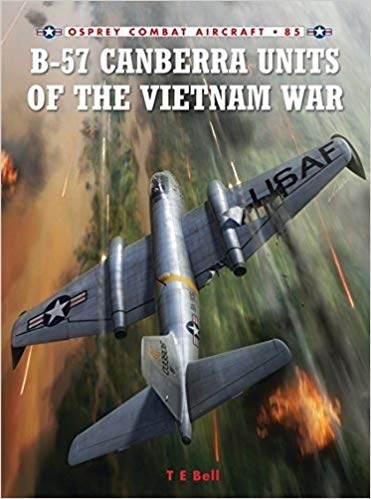
The model finished and packed up to cross country. To make sure the model survived the journey, it was elevated on soft foam that was hot glued into a cardboard box. The aircraft tied down with the wiring using tissue to protect the model from the wire. The box top also had soft foam that cut to shape and when fitted in, held the model securing and suspended. This inner box was then packed into a larger box filled with packing peanuts. This build was featured in Sept 2014 issue of Finescale Modeler and I’ve attached a picture of the book by T.E Bell which started this whole proejct.
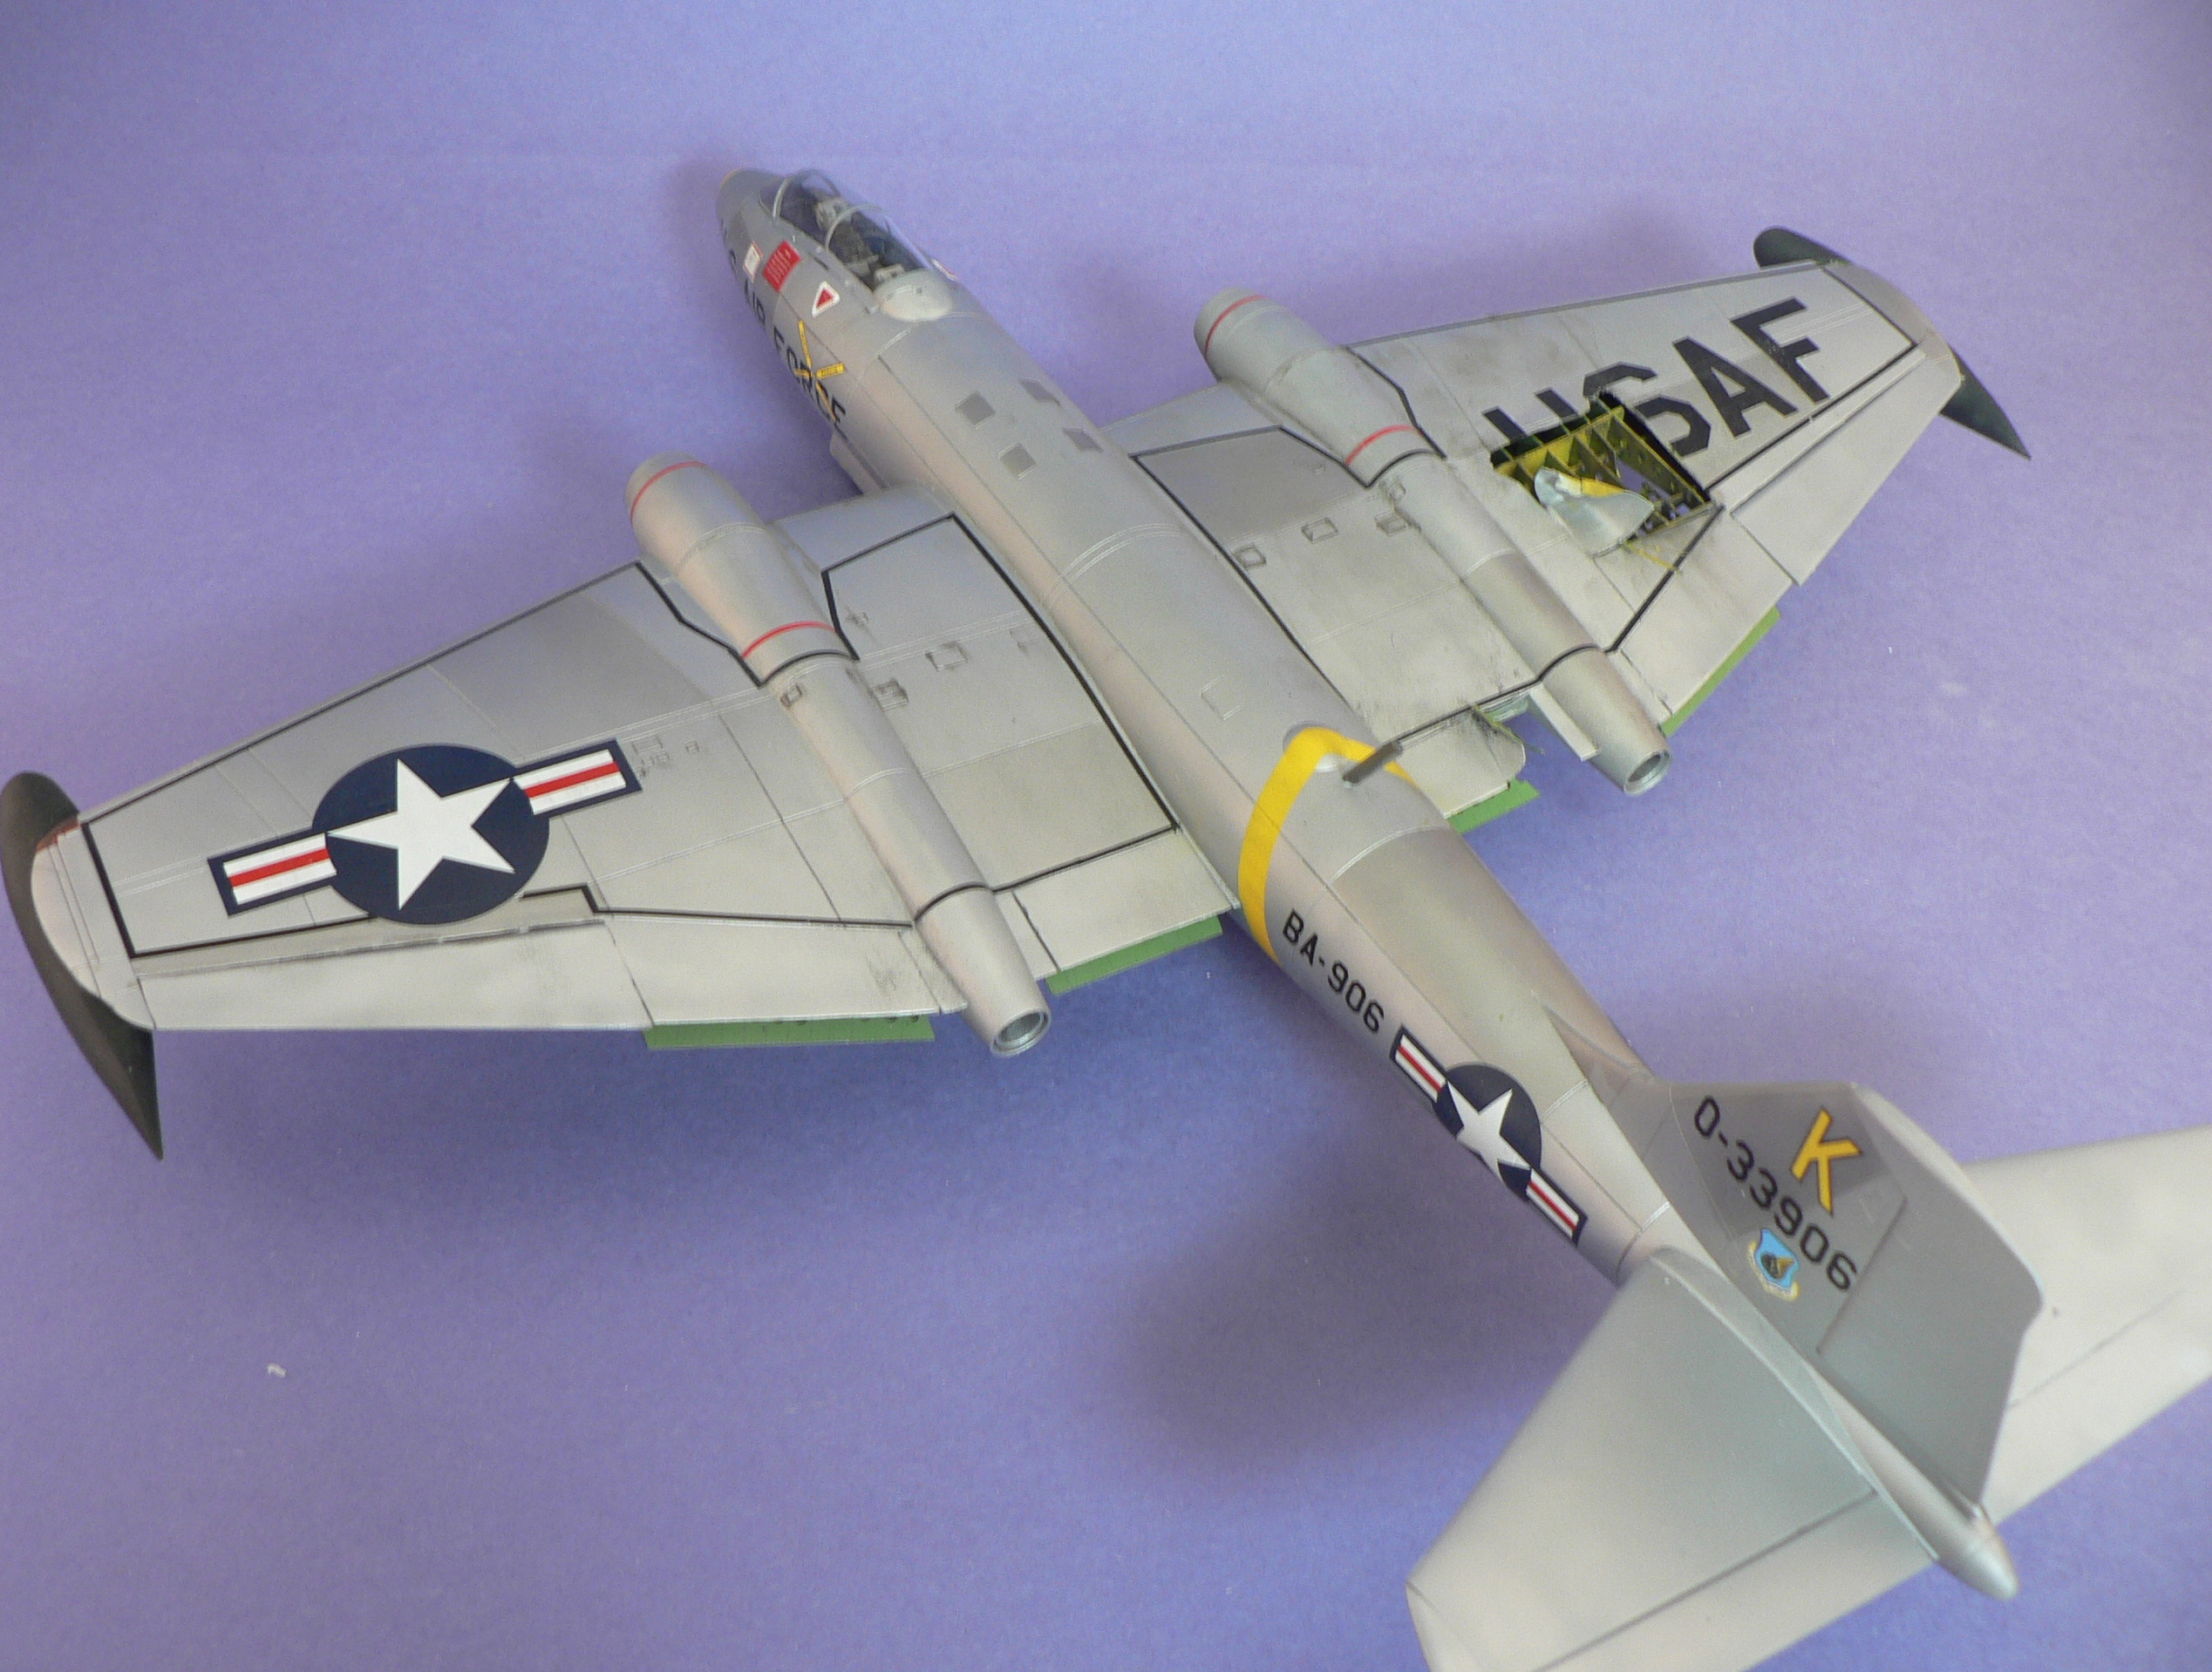
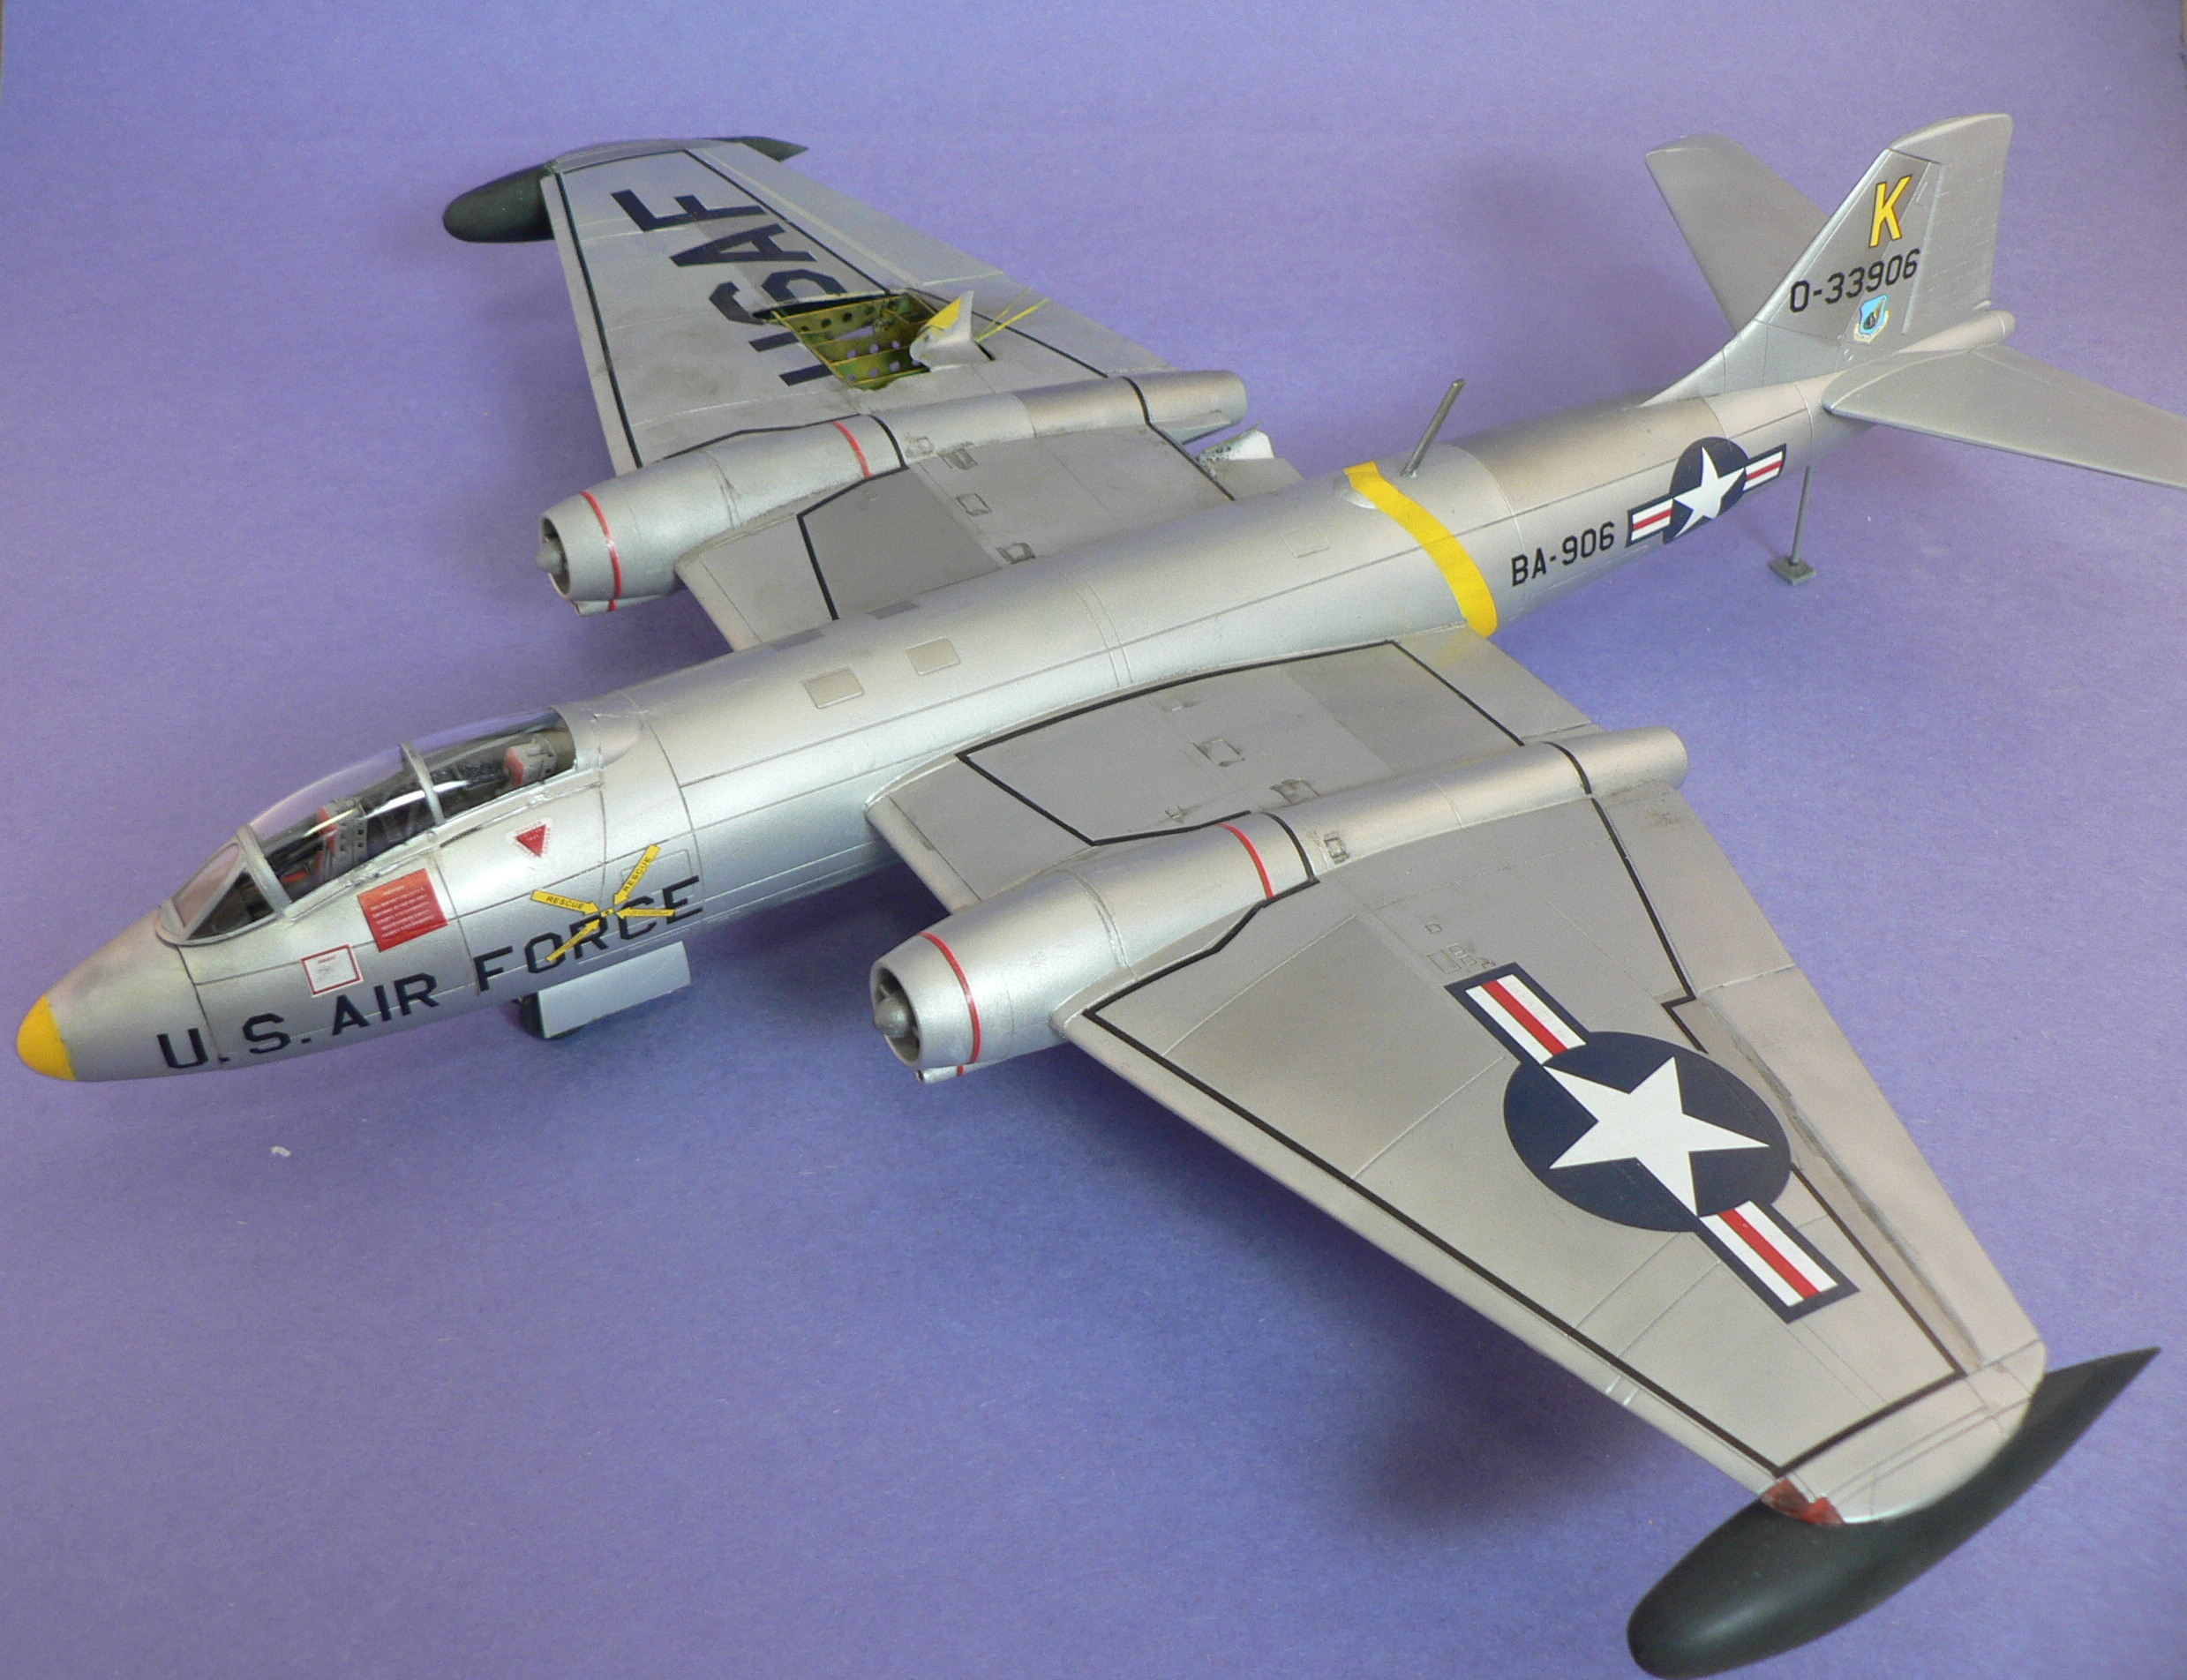
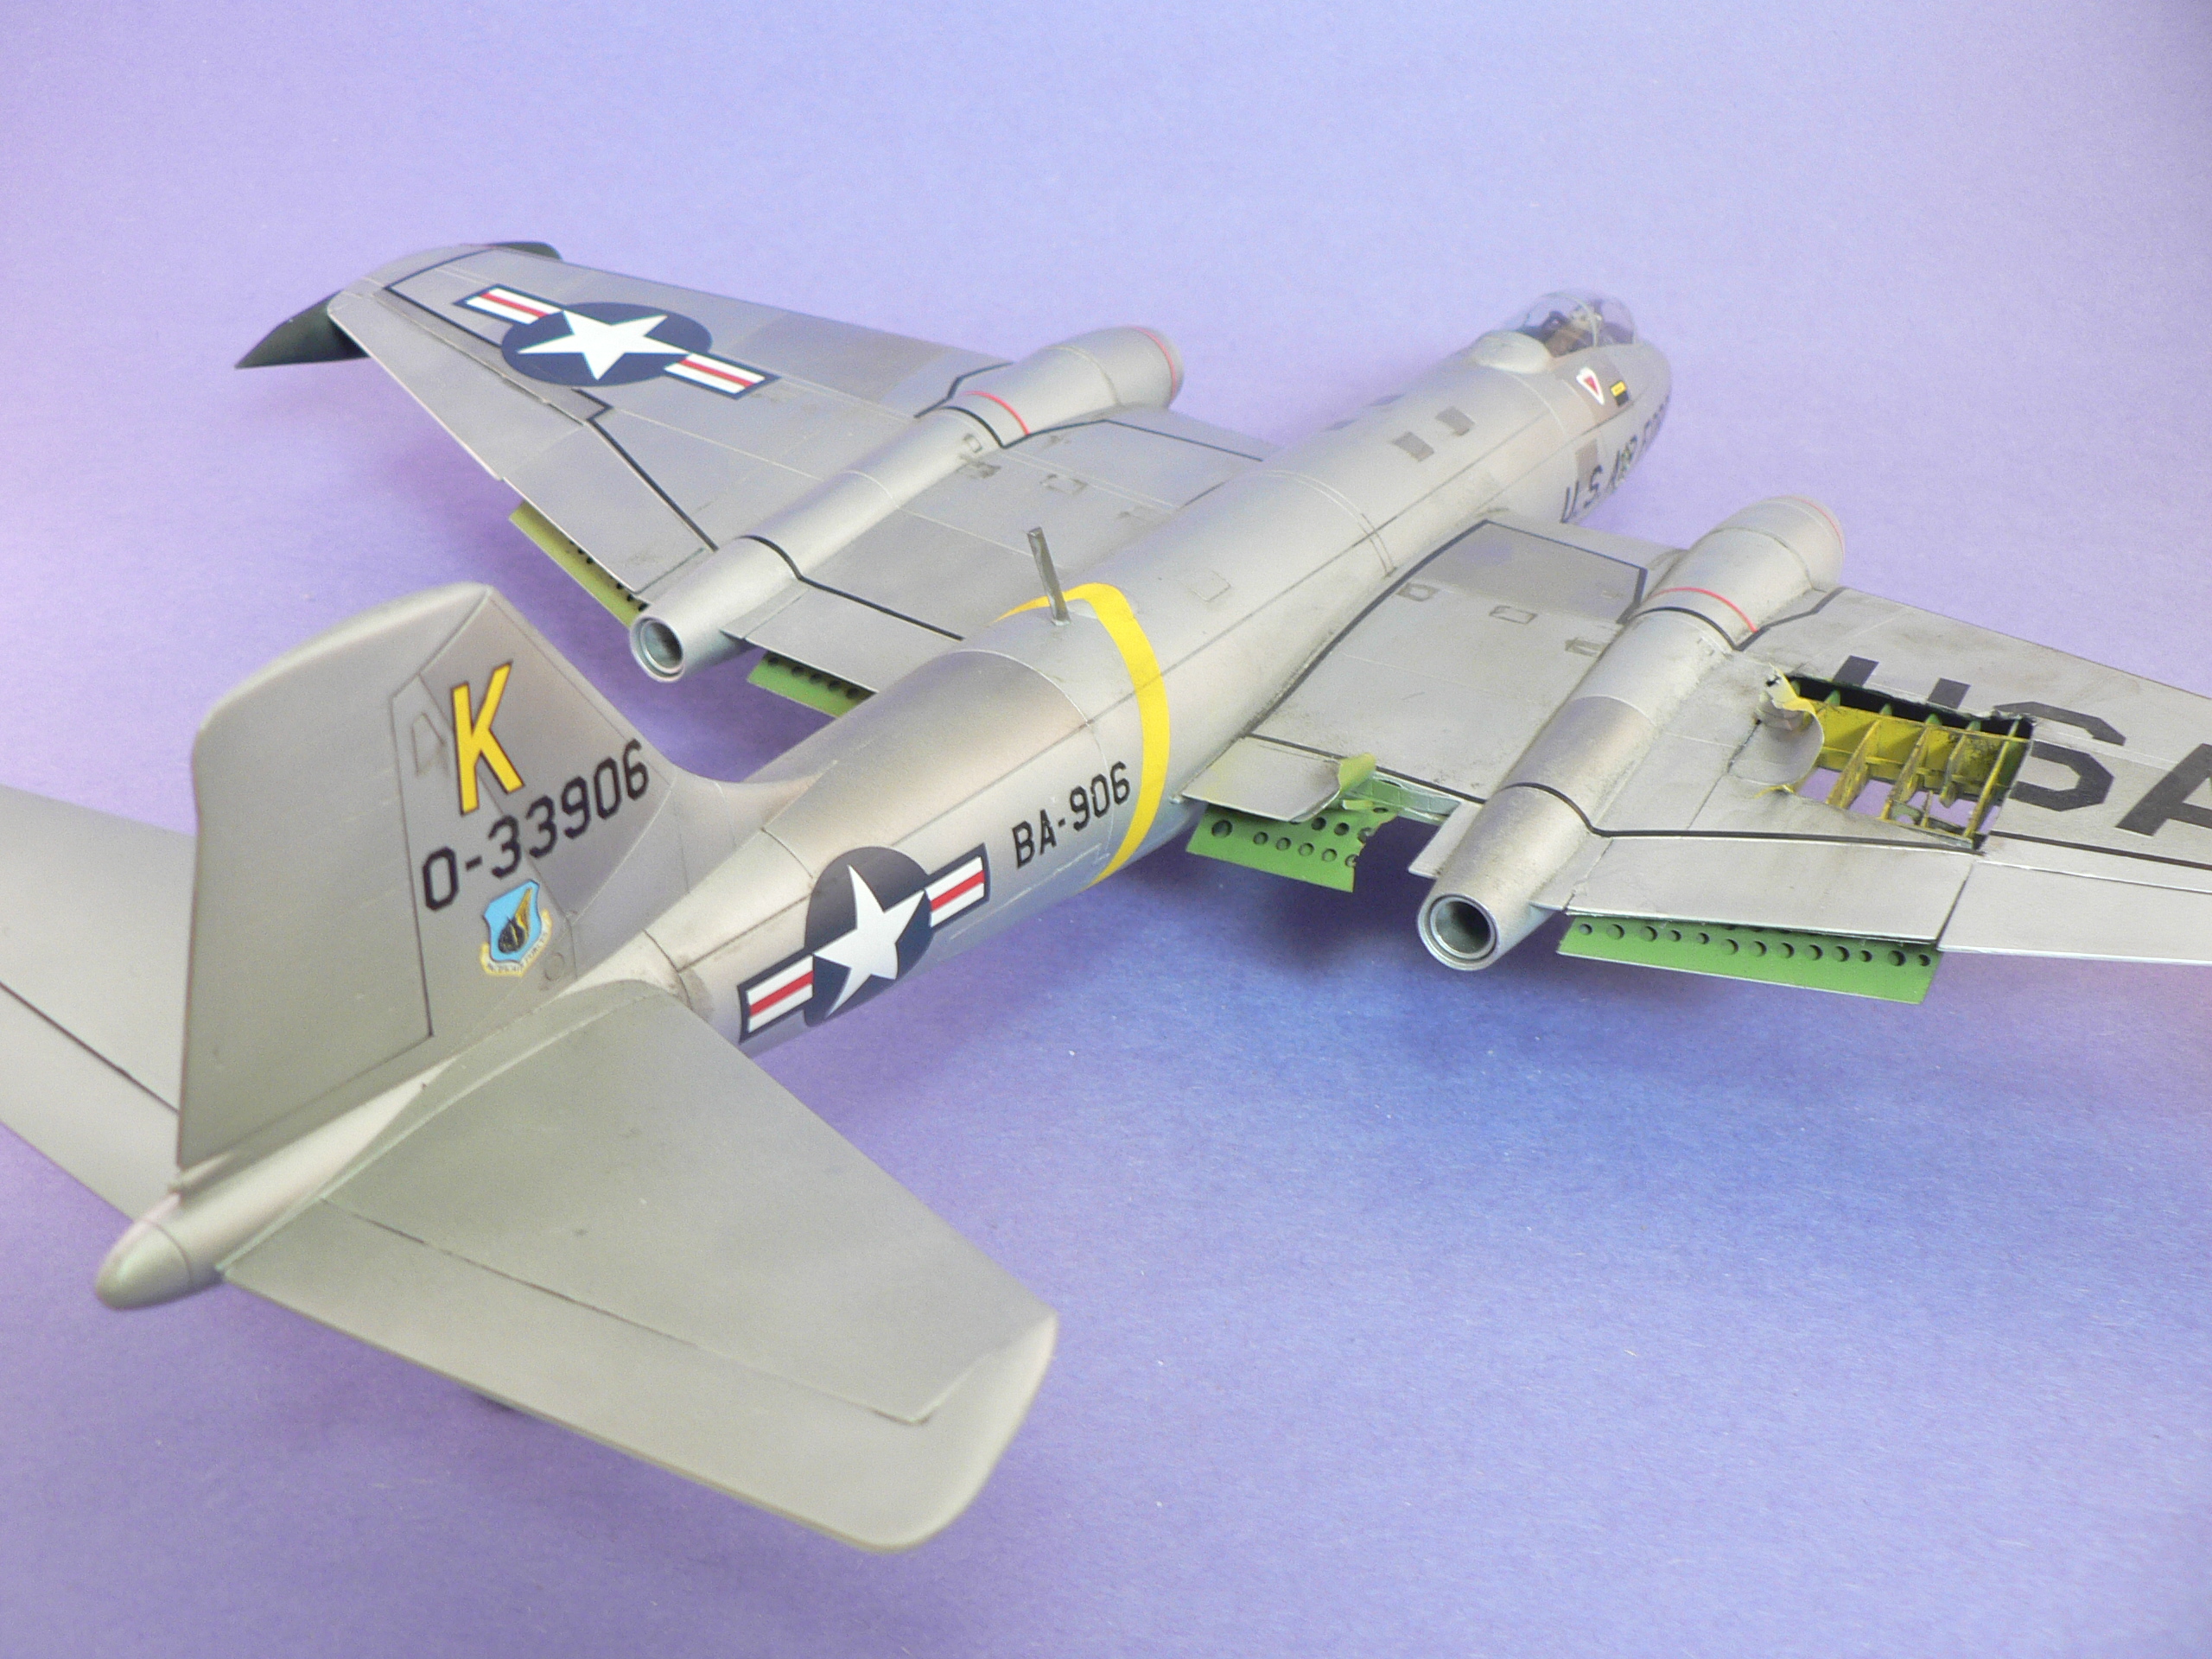
Finally, more pictures of the finished model – hope you enjoyed the build article.