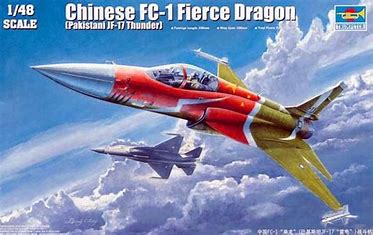
Chinese FC-1 Fierce Dragon / Pakistani JF-17 Thunder
FC-1 Fierce Dragon (Chinese designation) or JF-17 (Pakistani designation) from Trumpeter
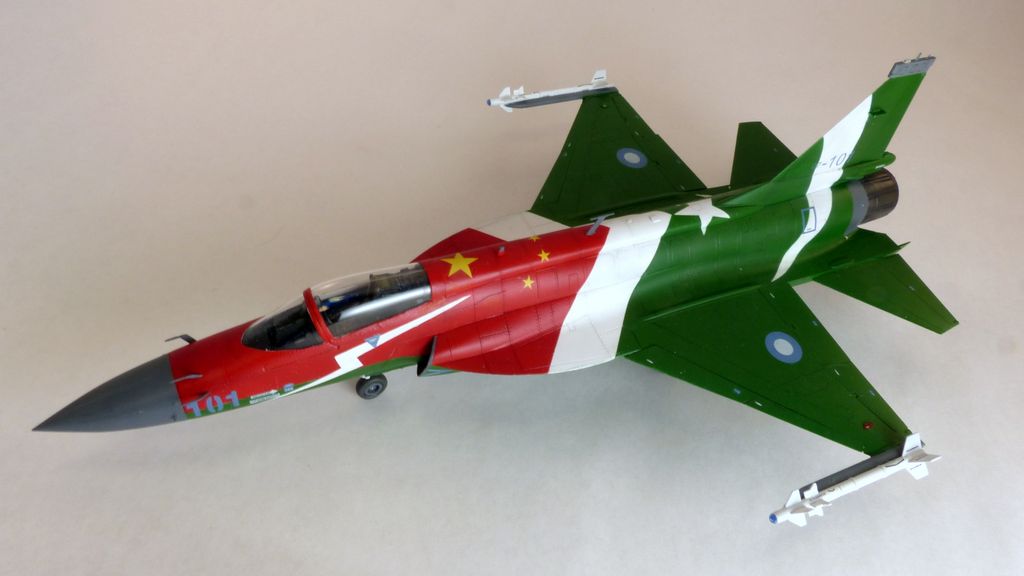
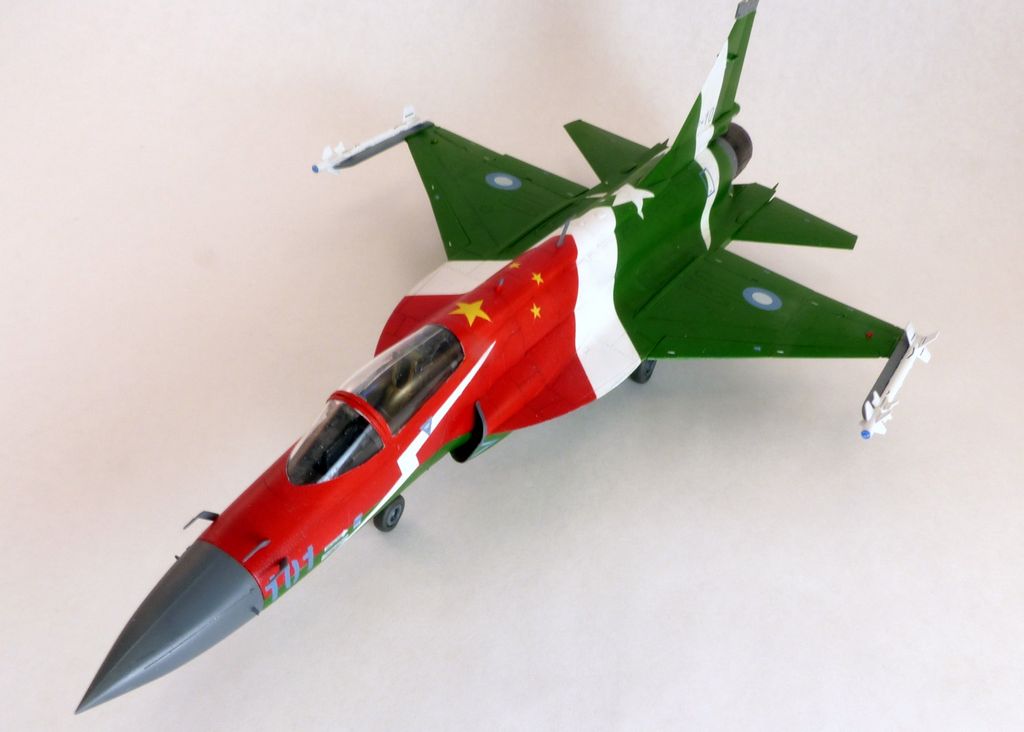
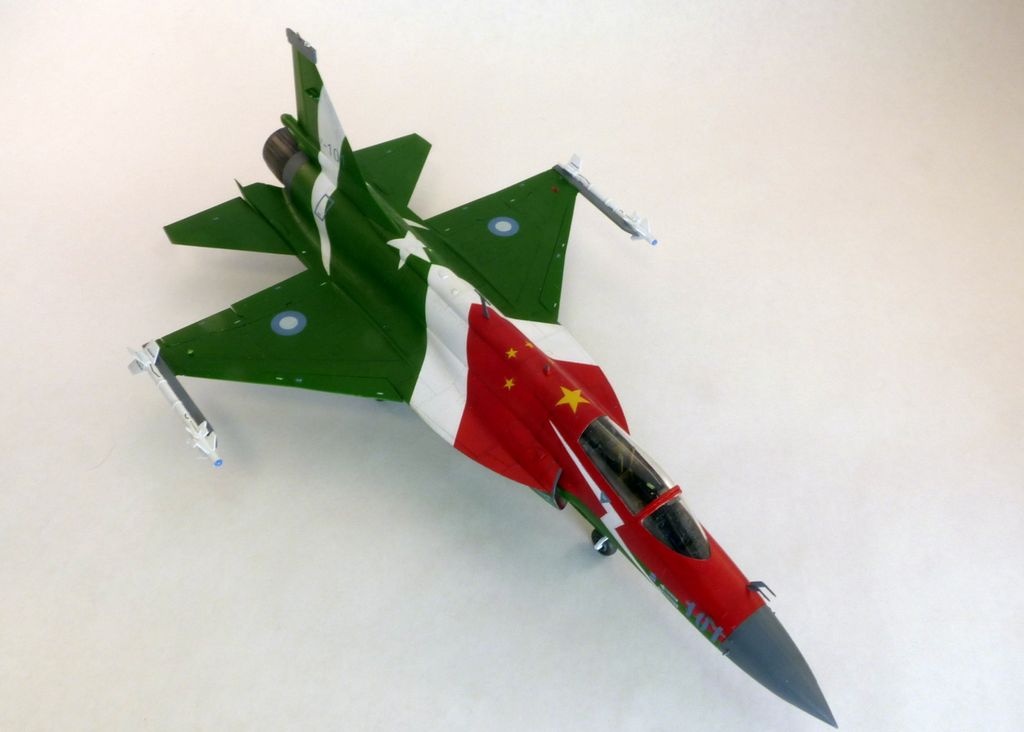
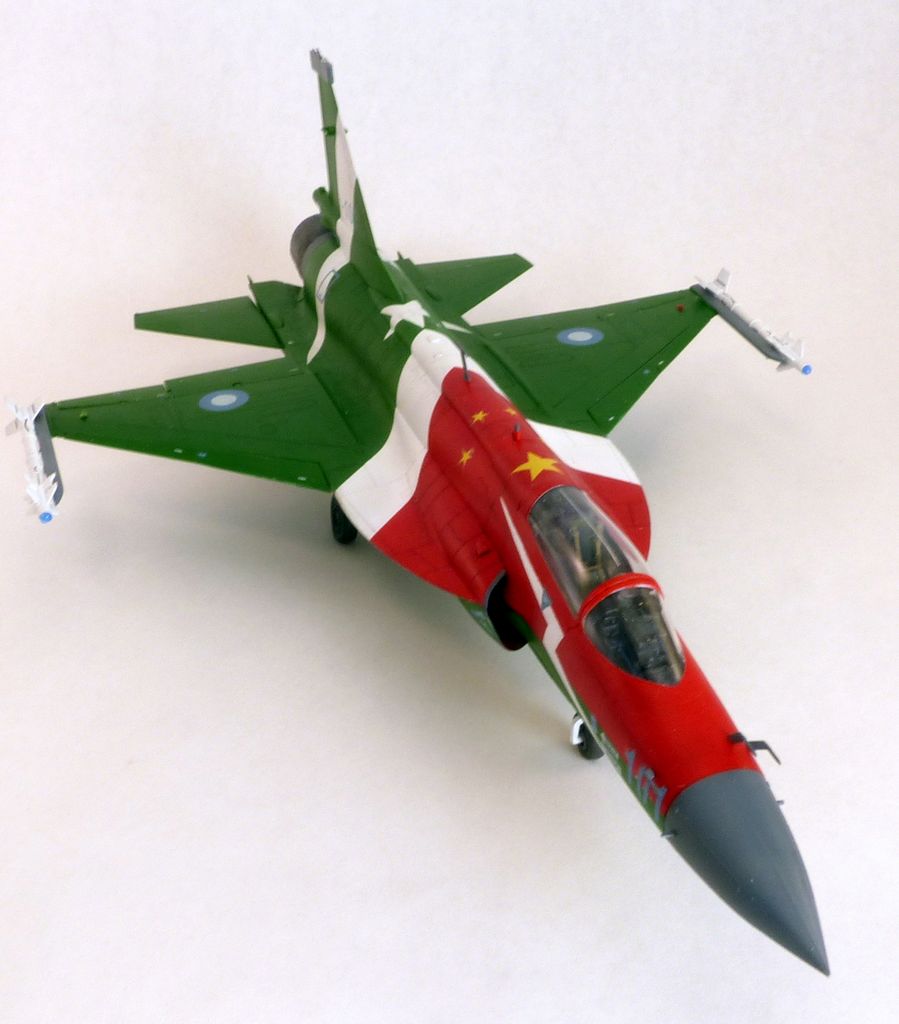
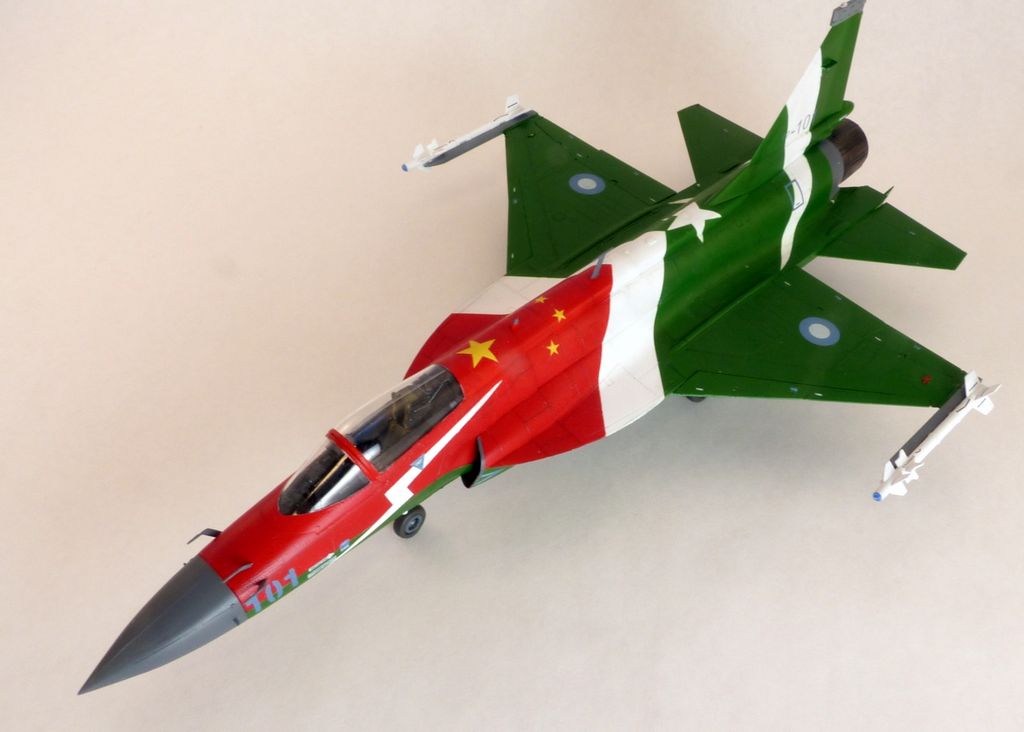
This was an interesting kit of an interesting aircraft – besides, look at the colorful paint scheme! Wikipedia will do a better job than I giving a summary of what this aircraft is all about …
The PAC JF-17 Thunder (Urdu: جے ایف-١٧ گرج), or CAC FC-1 Xiaolong (Chinese: 枭龙; pinyin: Xiāo Lóng; literally: “Fierce Dragon”), is a lightweight, single-engine, multi-role combat aircraft developed jointly by the Pakistan Aeronautical Complex (PAC) and the Chengdu Aircraft Corporation (CAC) of China. The JF-17 can be used for aerial reconnaissance, ground attack and aircraft interception. Its designation “JF-17” by Pakistan is short for “Joint Fighter-17”, while the designation and name “FC-1 Xiaolong” by China means “Fighter China-1 Fierce Dragon”.
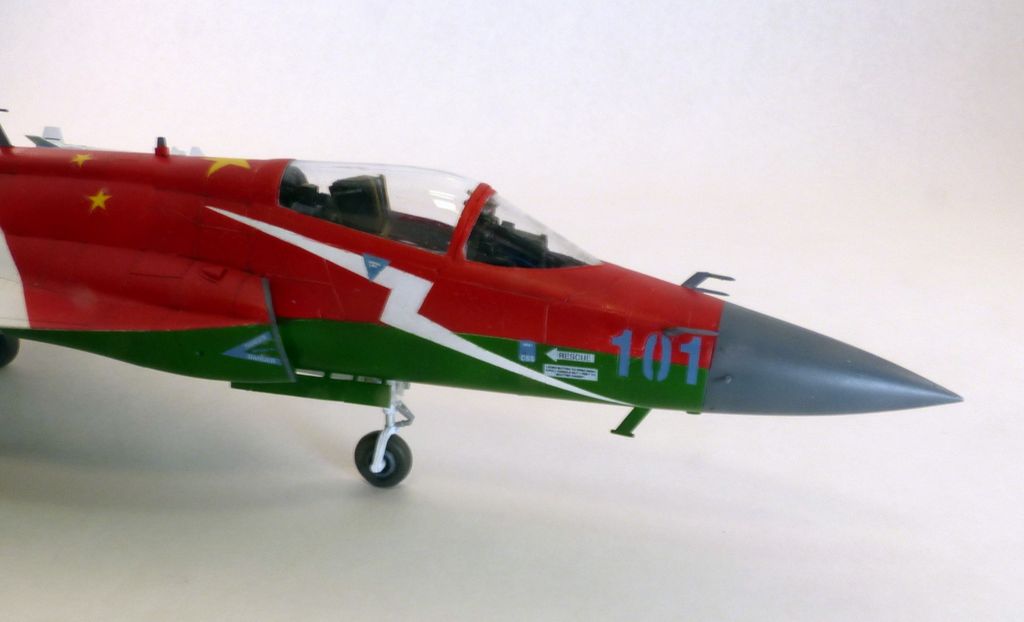
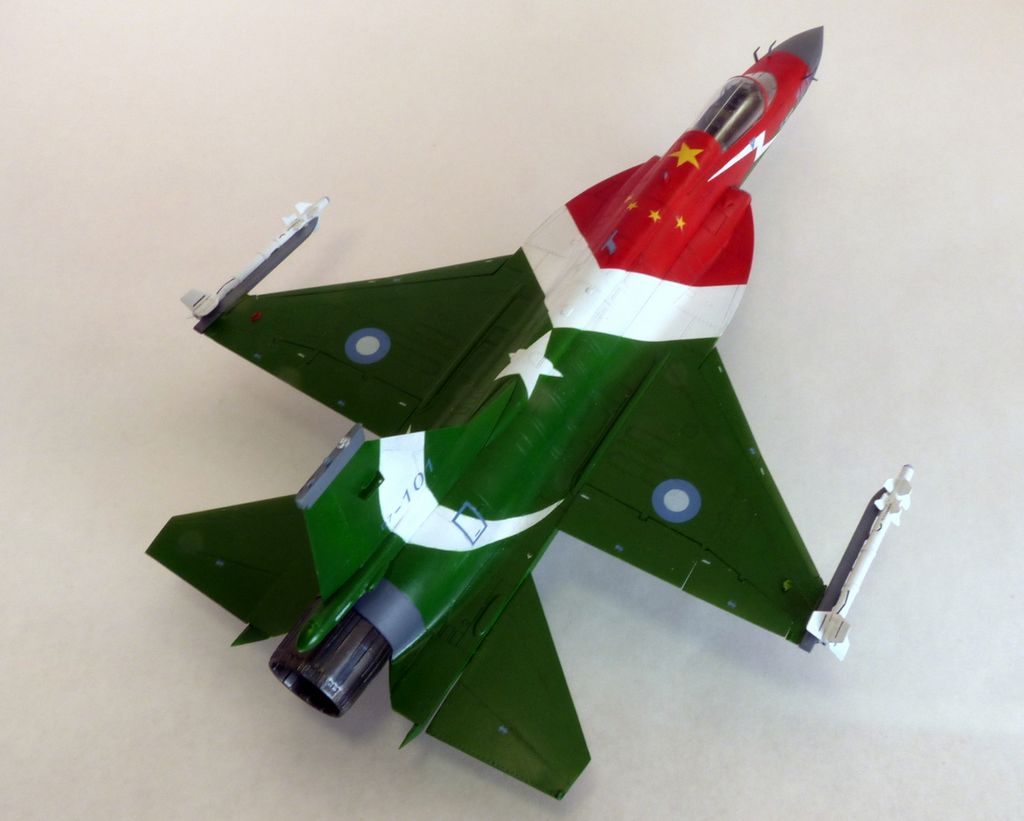
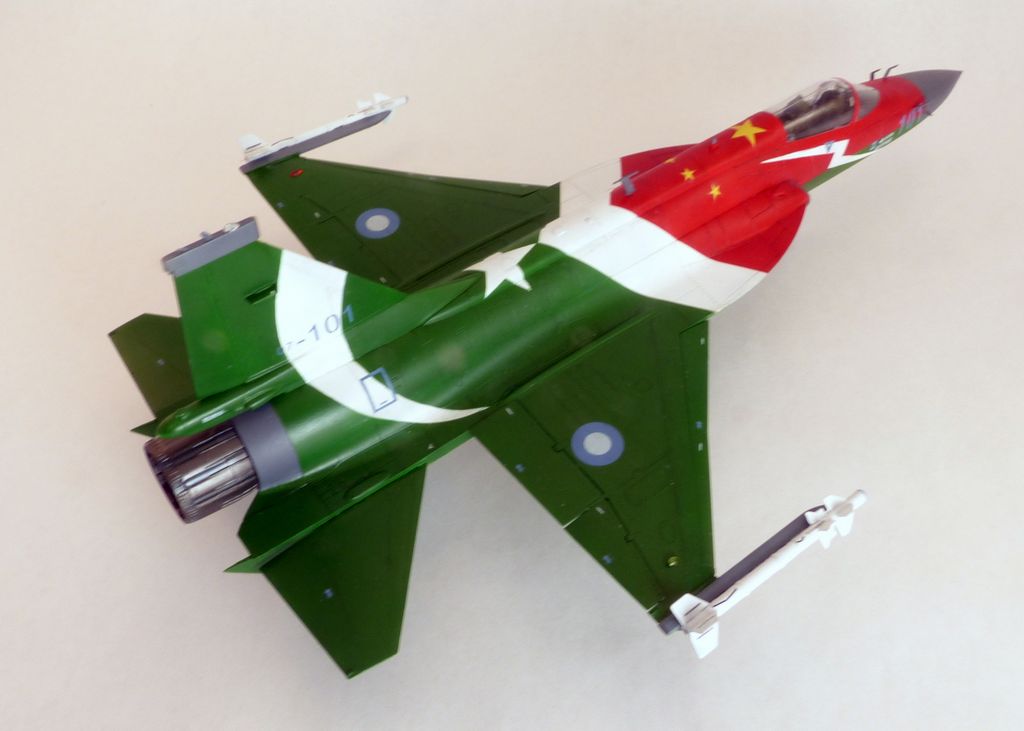
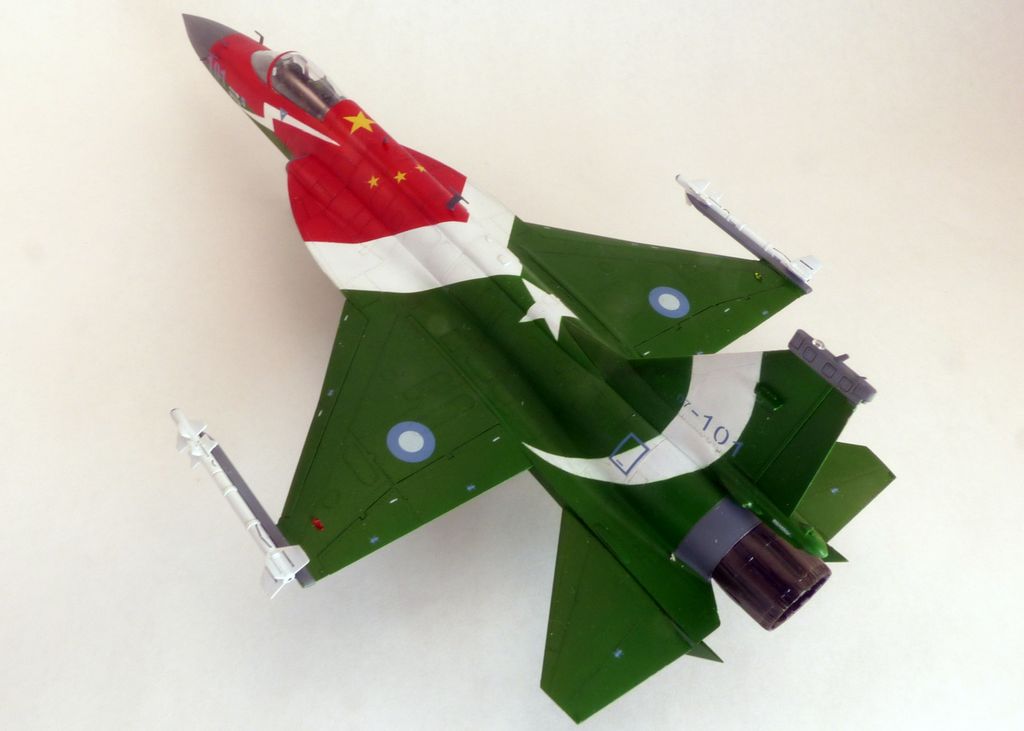
Interestingly, while PAC has made this aircraft along with its current inventory of F-16s the backbone of its airforce, China itself has not adopted this aircraft. The only customer as of this writing was Nigeria, which has ordered several planes. Since 2011, the aircraft have seen action in North West Pakistan. Now the kit itself is actually 1 of two that I know of in 1/48, the other one being Bronco. You can actually build one of 3 schemes with this kit – 2 of the other ones are normal PAC gray colors. But look the box art shows the colors used during the aircraft’s intial ‘PR’ tour in Pakistan. The kit also contains a full compliement of arament and is a very nice kit with good details.
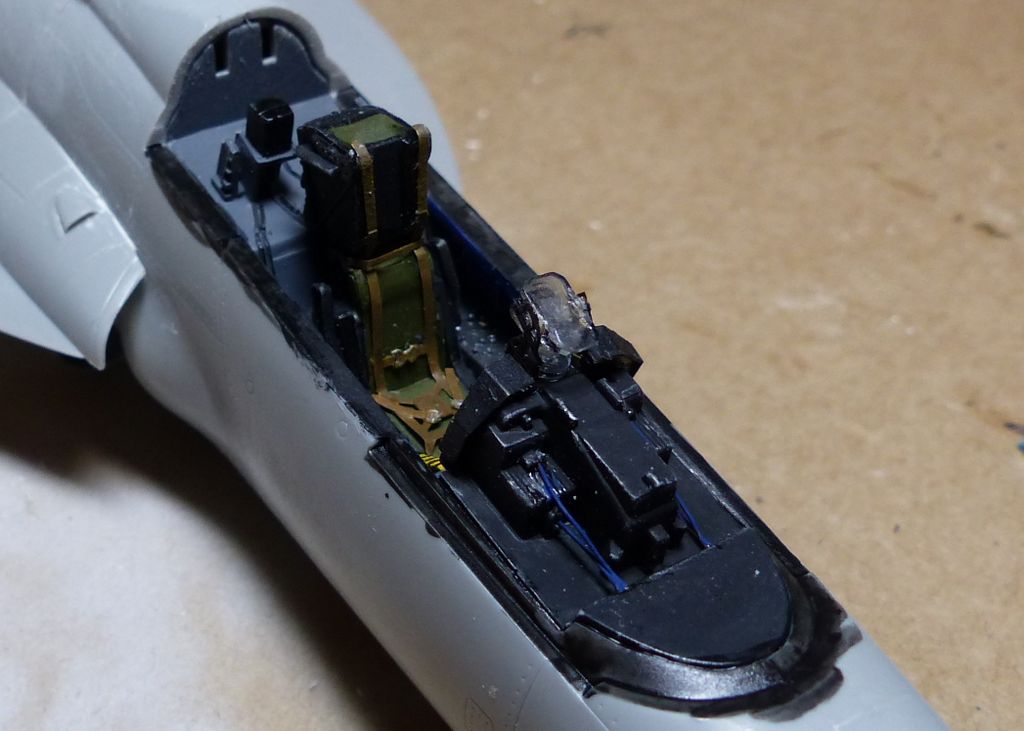
I’m building this pretty much out of the box, with just minor touches in the cockpit as the kit has a small fret of PE for seatbelts and other items.
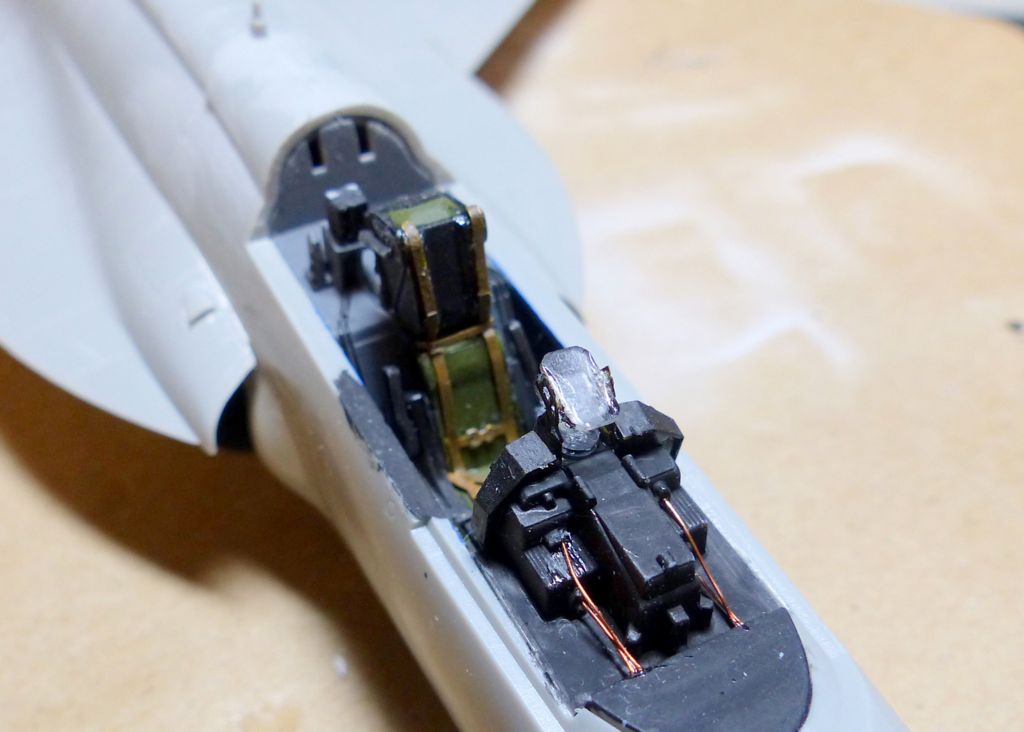
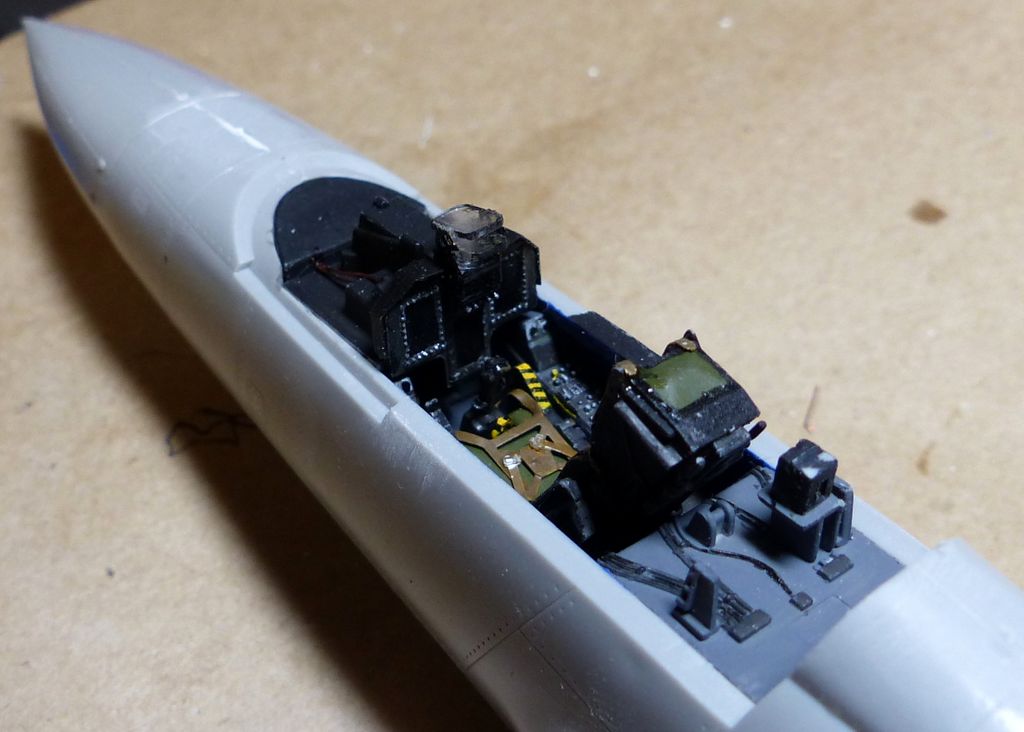
The only scratch building concession was the wiring in the back of the instrument panel. These were made with thin copper wire and then painted blue to match reference pictures.
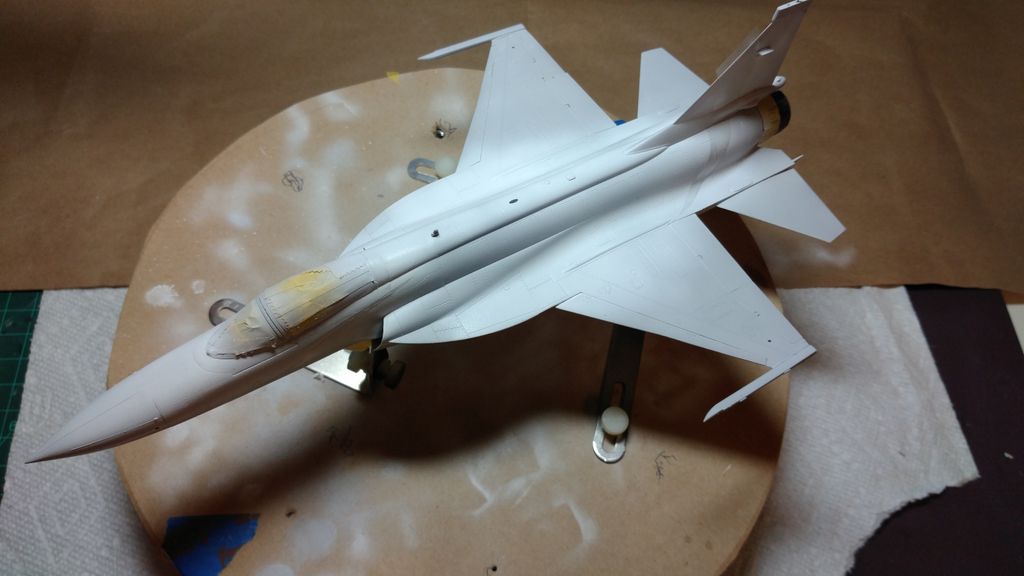
Everything builds up pretty much easily, filler was needed in certain areas, especially if you do not plan on usiing all the ammunition. If you are doing the show plane, then you will be closing most of that up. So, its quickly to the primer stage.
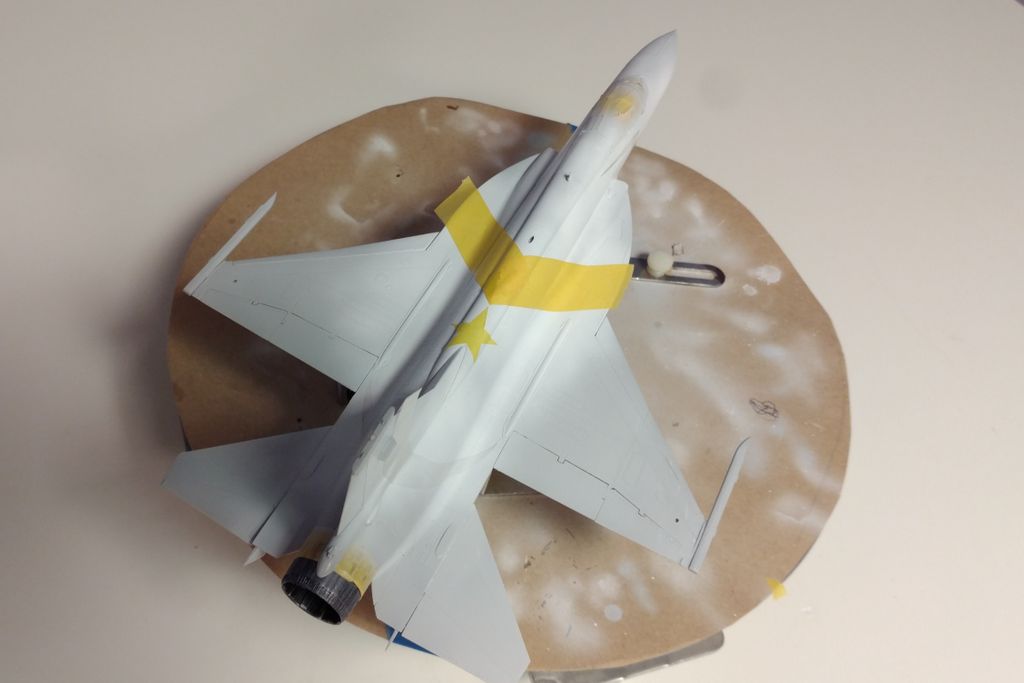
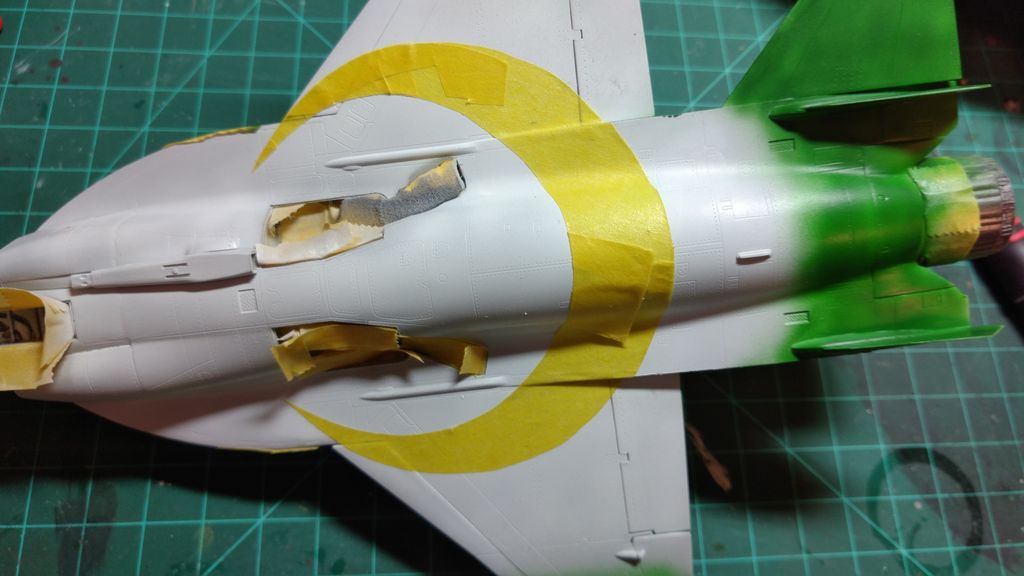
The kit does provide decals for all the white parts and the yellow lightning, however, I doubted how opaque the white decals will be over green or red paint, not to mention dealing with such a large decal over multiple angles. So after a coat of white or yellow, I used frisket paper to draw a mask based on the decals for the top cressent.
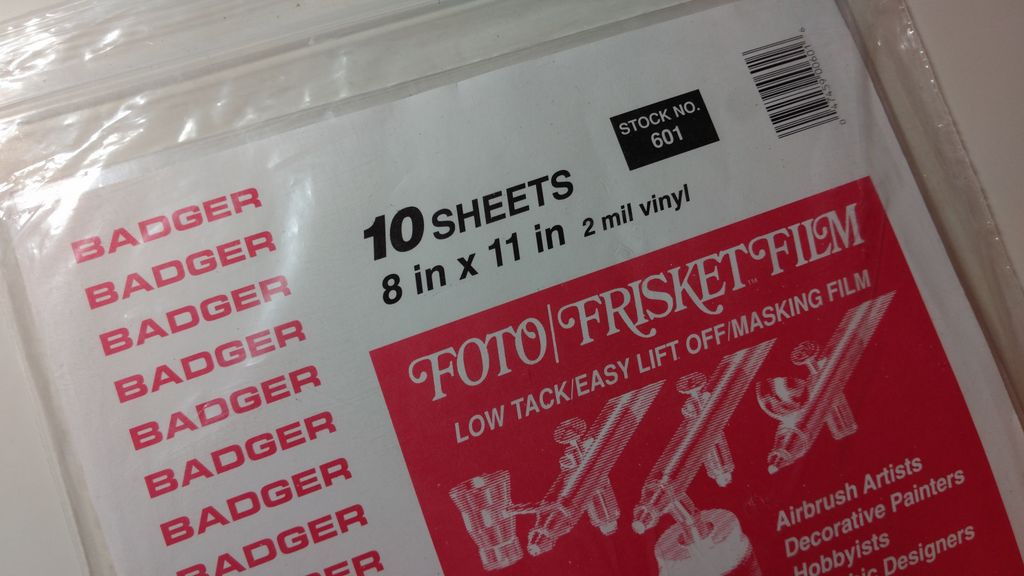

The red and Green were then applied, and all the masking were removed. There were bleed-thru at different areas that needed to be touched up due to the frisket not get a good enough seal at the multiple angled areas, with hindsight, I probably should have used Tamiya tape. So with the bottom crescent and top stripe I did switch to Tamiya tape.

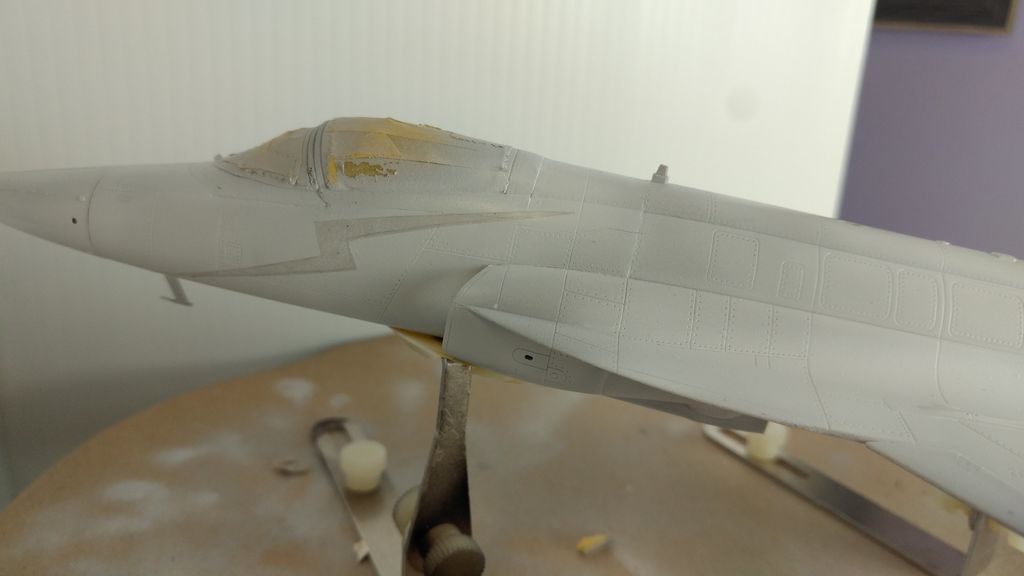
After a gloss coat was applied, all the remaining decals were applied. The recessed panel lines were subtly emphasized with diluted oil paint. Very minimal weathering was then done as this was a pristine plane.
The final coat was Microscale Satin – as gloss at this scale would be too ‘toy-like’. Satin gave it just enough of a sheen and blend in the decals and paint.