Gloster Gladiator Mk I – Roden
 This is Part 2 of an article regarding Chinese American Ace Arthur Chin. Part 1 includes a history of Arthur and his Hawk. This build uses the Roden Gladiator Mk.1 that was flown by Chin during the Sino Japenese War Featured in Scale Aircraft Modeling.
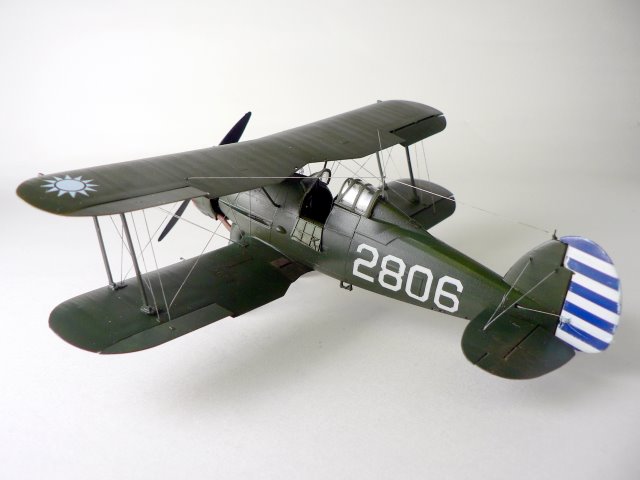
The Gloster Gladiator first entered service with the RAF in Feb. 1937. However, it was in China in early 1938 that it made its combat debut. The Chinese Government had ordered 36 Gladiator Mk I`s in October of 1937. Having no real indigenous aircraft program, their serviceable aircraft stock was rapidly declining after a few months of fighting. The first 20 Gladiators arrived in late November and were originally to be assembled at Kai Tak Airport in Hong Kong by Gloster. However, Japanese diplomatic pressure forced the British refused the Chinese this arrangement. The crates of Glosters were moved by rail and boat to Guangzhou, south China. Due to constant Japanese air harassment, the actual assembly was dispersed to multiple sites, which ranged from an air base (Tienhe) to a cemetery. By Jan 1937, all 36 planes were completed. Twenty (serial #5701-5720) were assigned to the 28th and 29th Pursuit Squadron of the 5th Pursuit Group, and the remaining sixteen (serial #5721-5736) to the 5th Pursuit Group’s 32nd Pursuit Squadron. A few were then written off due to accidents during pilot training.
Roden 1/48 Mk.1
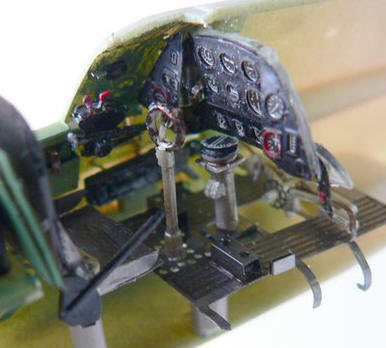
This was the first biplane I had built in years, and the first one to get fully rigged. Between this mainstream Roden kit and the limited run Classic Airframes kit, I choose to build this first, thinking it would be the easier of the two. That would have been the case until I was able to get the Eduard PE set for this kit. It’s a beautifully done set with both regular and color PE. The entire cockpit is almost replaced with PE. Of course, with such an extensive PE set, an easy build soon turns complicated
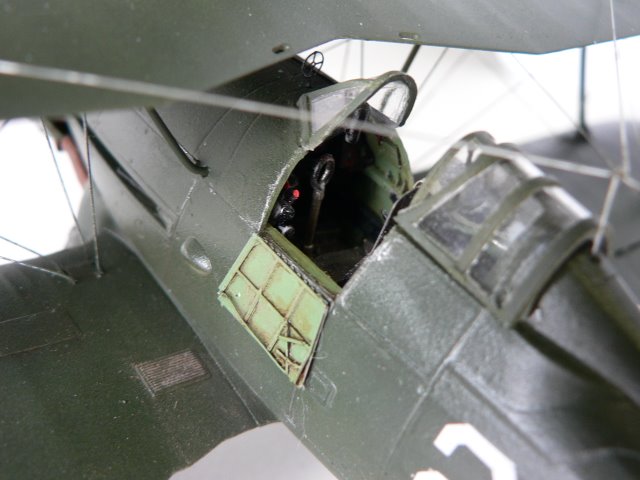
Starting the Cockpit, I followed Eduard’s instructions that discard about 95% of the kit parts including the cockpit floor. Now, I have seen a few wonderfully built cockpits with this set, by I was not able to get the floor to fit properly into the fuselage. After much sanding, bent PE, and choice words, I was able to fit the whole thing in. If I had to do it over again, I would have used the kit’s plastic floor pan, as it was much stronger structurally. But I’m sure this hardship was caused more by my skills or lack there of, rather than Eduard fault. But be forewarned that if you do go with the PE cockpit, it does complicate the build.
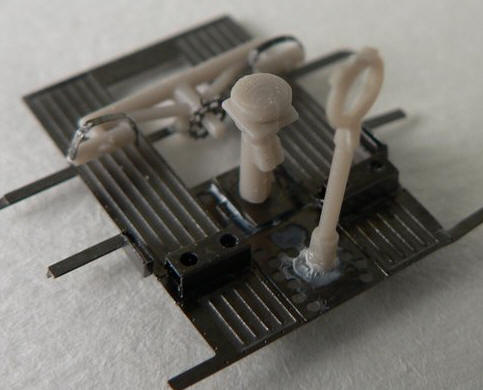
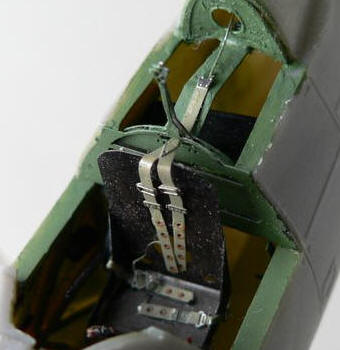
After the cockpit was built, I actually left the PE unpainted as it was already natural metal. I did give everything a wash of raw umber oil paint. The side walls were painted IJN cockpit green and it was time to close up the fuselage. The fit was excellent, minus my mishap with the PE floor pan. The area behind the cockpit is pretty bare as supplied in the kit, but the PE set provides wonderful details of how the seatbelts are attached.
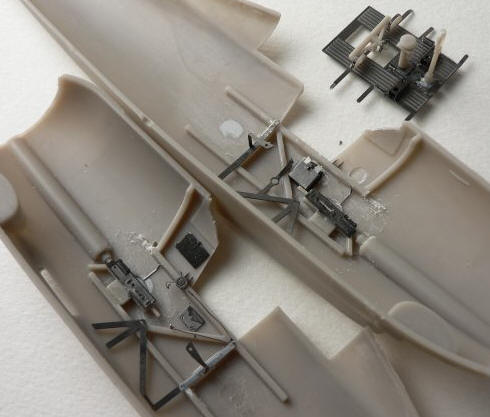
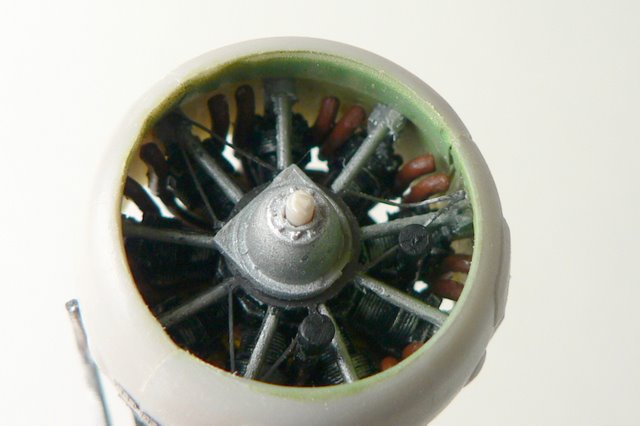
Next, the engine was built out next with no major issues; once again the fit was spot on. With a bit of PE additions, it was finished and set aside. The landing struts, however, had huge sink holes in them and needed to be filled. This I did with Squadron white putty.
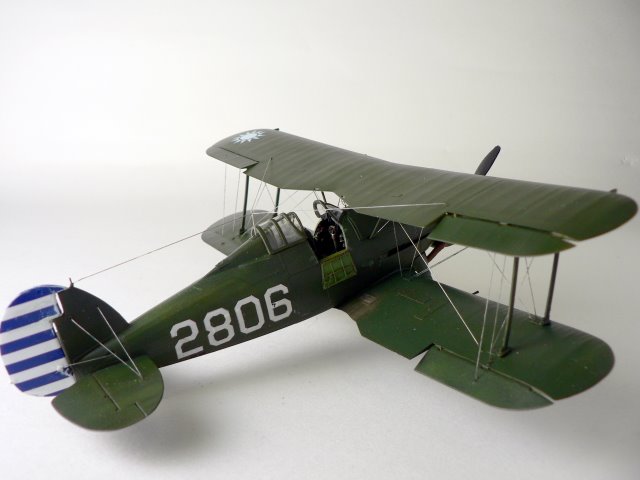
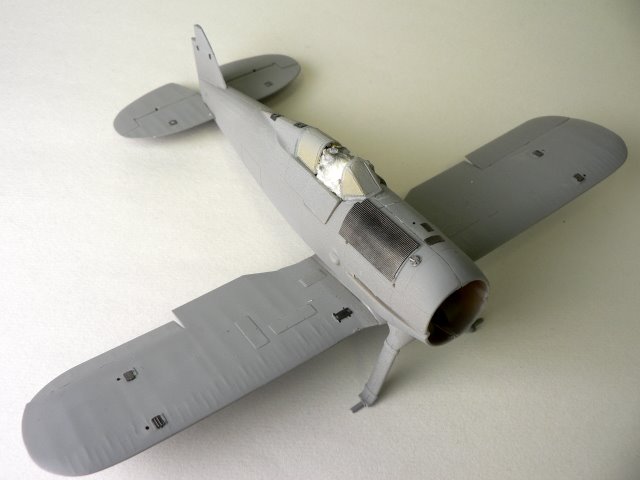
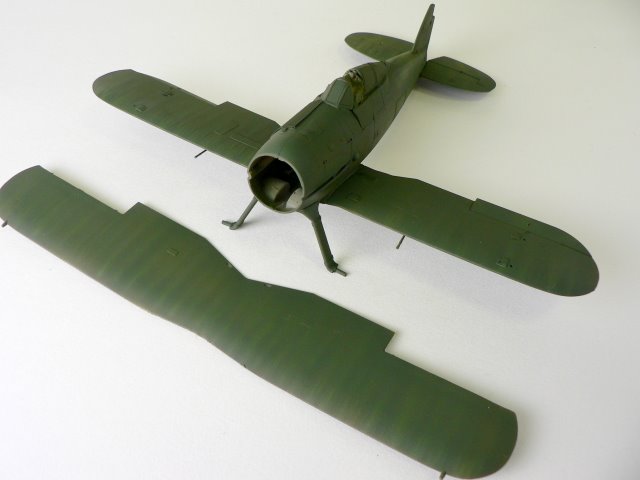
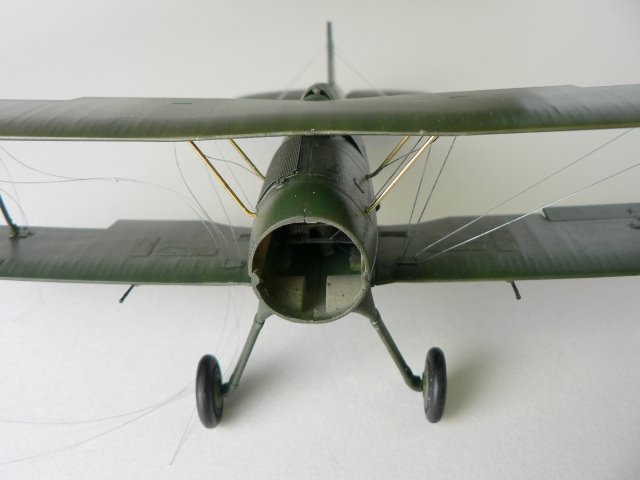
The wing was then attached and a bit of putty was needed to fill in the seams. The canopy was masked with Tamiya tape and everything was given a coat of Tamiya white primer. After cleaning up some seams, it was time to add all the small exterior plates, anchor points, and filler caps in the PE set. The external radiator was an especially nice addition, except that I did not sand out the styrene radiator first. I simply applied the PE part directly over the plastic, giving it the somewhat protruding look you see in the photographs.
The entire plane was then coated with a layer of IJN Green. I lightened the color a bit and sprayed the control surfaces to distinguish it a bit more from the general air frames and wall. The paint was lightened again by adding IJN cockpit green and using quick front to back motions with the airbrush, added streaks onto the wings. I’ve tried to confine the streaks to the high rib area. This helps break up the monotone scheme and provides some weathering to the fabric covered wings. At this point the effect is a bit stark, but a gloss coat followed by a dull coat later will even everything out.
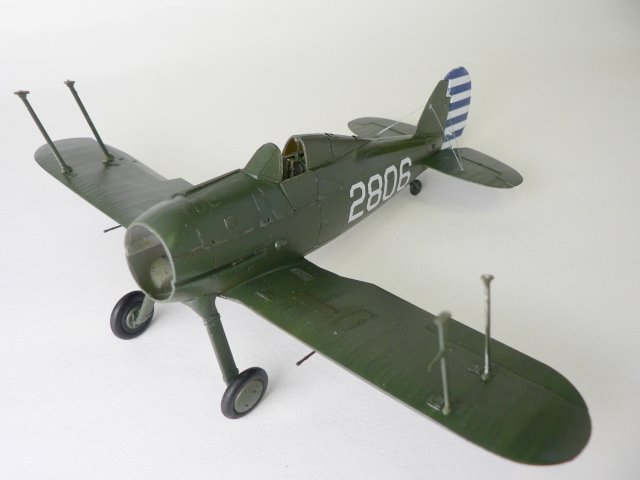
I used undiluted Future to give the plane a gloss coat. Then it was onto decals. This particular aircraft was unique and I couldn’t find any decals that would fit, so I printed everything on white decal paper. First using photoshop, I scanned in some extra Chinese stars I had and changed the blue background to green to closely match that of the wing. Then after careful cutting, I had a 12 pointed star without the blue background. The slight mismatch of the green blends in to the wings once applied. Next, the tail blue and white was applied without any major issues except for a liberal use of Micro Sol to get everything to settle down. The serials were the biggest problems as it then required quite intricate cutting, and I had to go through three sets before I got everything right. The serial number I choose was 2806. While Arthur Chin was not recorded to have downed a Japanese plane with this particular plane, the pilots were not assigned one particular plane and flew what was available. Thus I was fairly certain it was flown by him at some point.
The dreaded rigging came next. While there are many methods in doing this and I have tried stretched sprue before, I decided to use the “pull the rigging through wing” technique. I first drilled holes completely through the lower wing and partially through the upper wings. Using fishing line (monofilament), I attached CA glue to the tip of the line and secured it the upper wings with a dab of kicker. I then attached the interplane struts and attached the upper wings with CA glue. Before securing the lines, I had to secure the two wings together as the bond using just the interplane struts were quite weak. At this point, I had thought the rigging was not as difficult as I had thought. Little did I know the problem posed by trying to add the struts.
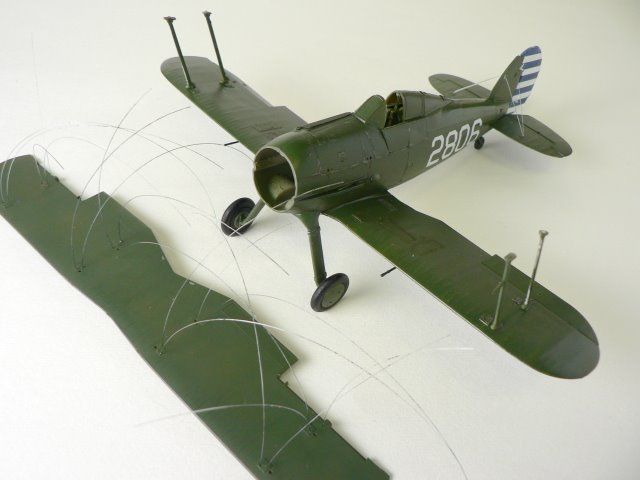
The length of the interplane struts and the carbane struts don’t quite match up between distance of the two wings. Having attached the interplane struts first, the carbine struts were now too long. I could have just cut the struts down to fit, but the upper wing would have sat to low in the planes center line, practically blocking the windscreen. In trying to fit the struts in, I only succeeded bending them and then finally snapping two of them off. I then resorted to replacing them with brass tubing, which allowed me to push the upper wing back into proper height. In addition they made the entire wing structure very solid with needing the lines for bracing.
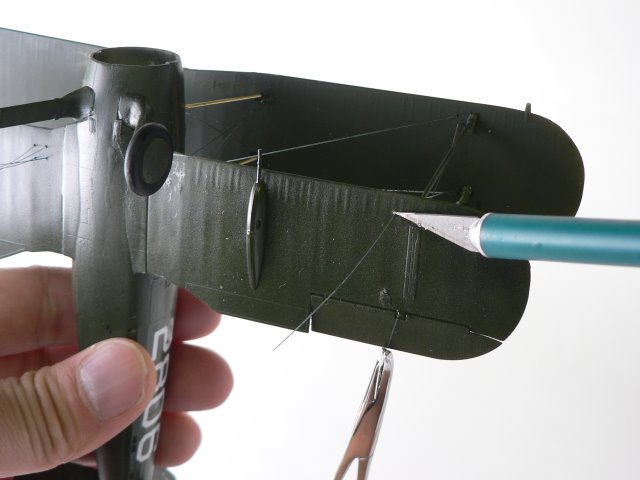
I finished off the line by pulling them though the lower wing holes, weighted them down with hemostats, applied a dab of CA and then cut them off with a sharp knife. A bit of filing and paint touch up with the airbrush finished them off. For the lines going into the fuselage, I had intentionally left the engine off, allowing me to pull the lines out from the front and securing them with CA inside the fuselage. In the meantime, two of the lines had sagged and I was desperate as to fix them. I then recalled reading about trick of using a heat source to tighten up rigging made with monofilament of stretched sprue. So I lighted a match, let it burn for a few seconds to bring up the head, blew it out and passed it under the line. It’s like magic watching that line tighten up!
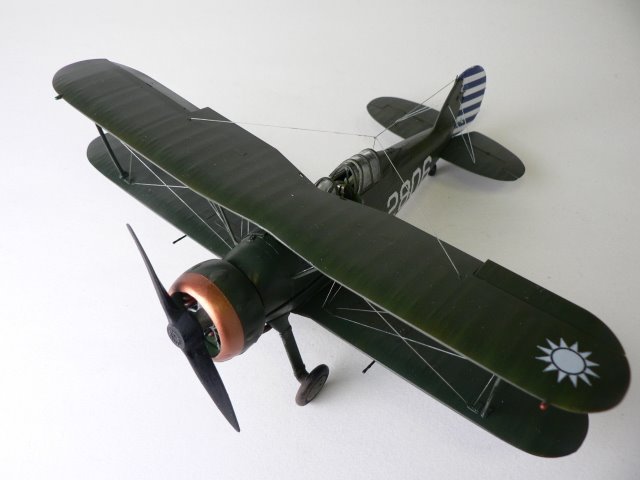
I painted the engine cowling separated with IJN Green and Tamiya copper and attached it at this point. The ailerons are provided as separate pieces, so it was very easy to pose them a bit offset. The exhaust was attached and putty used to blend in the seam. I painted them with a mixture of copper and brown pigment powder to simulate the rusted piping. Almost all the assembly was now done and I gave the whole plane a wash of sienna and black oil paint. After letting it dry overnight, I sprayed down the gloss with some Microsol flat, leaving a satin finish. Off came the masking for the canopy, glued in the PE doors – replacing the much too thick kit part, and attached the antenna to complete the model.