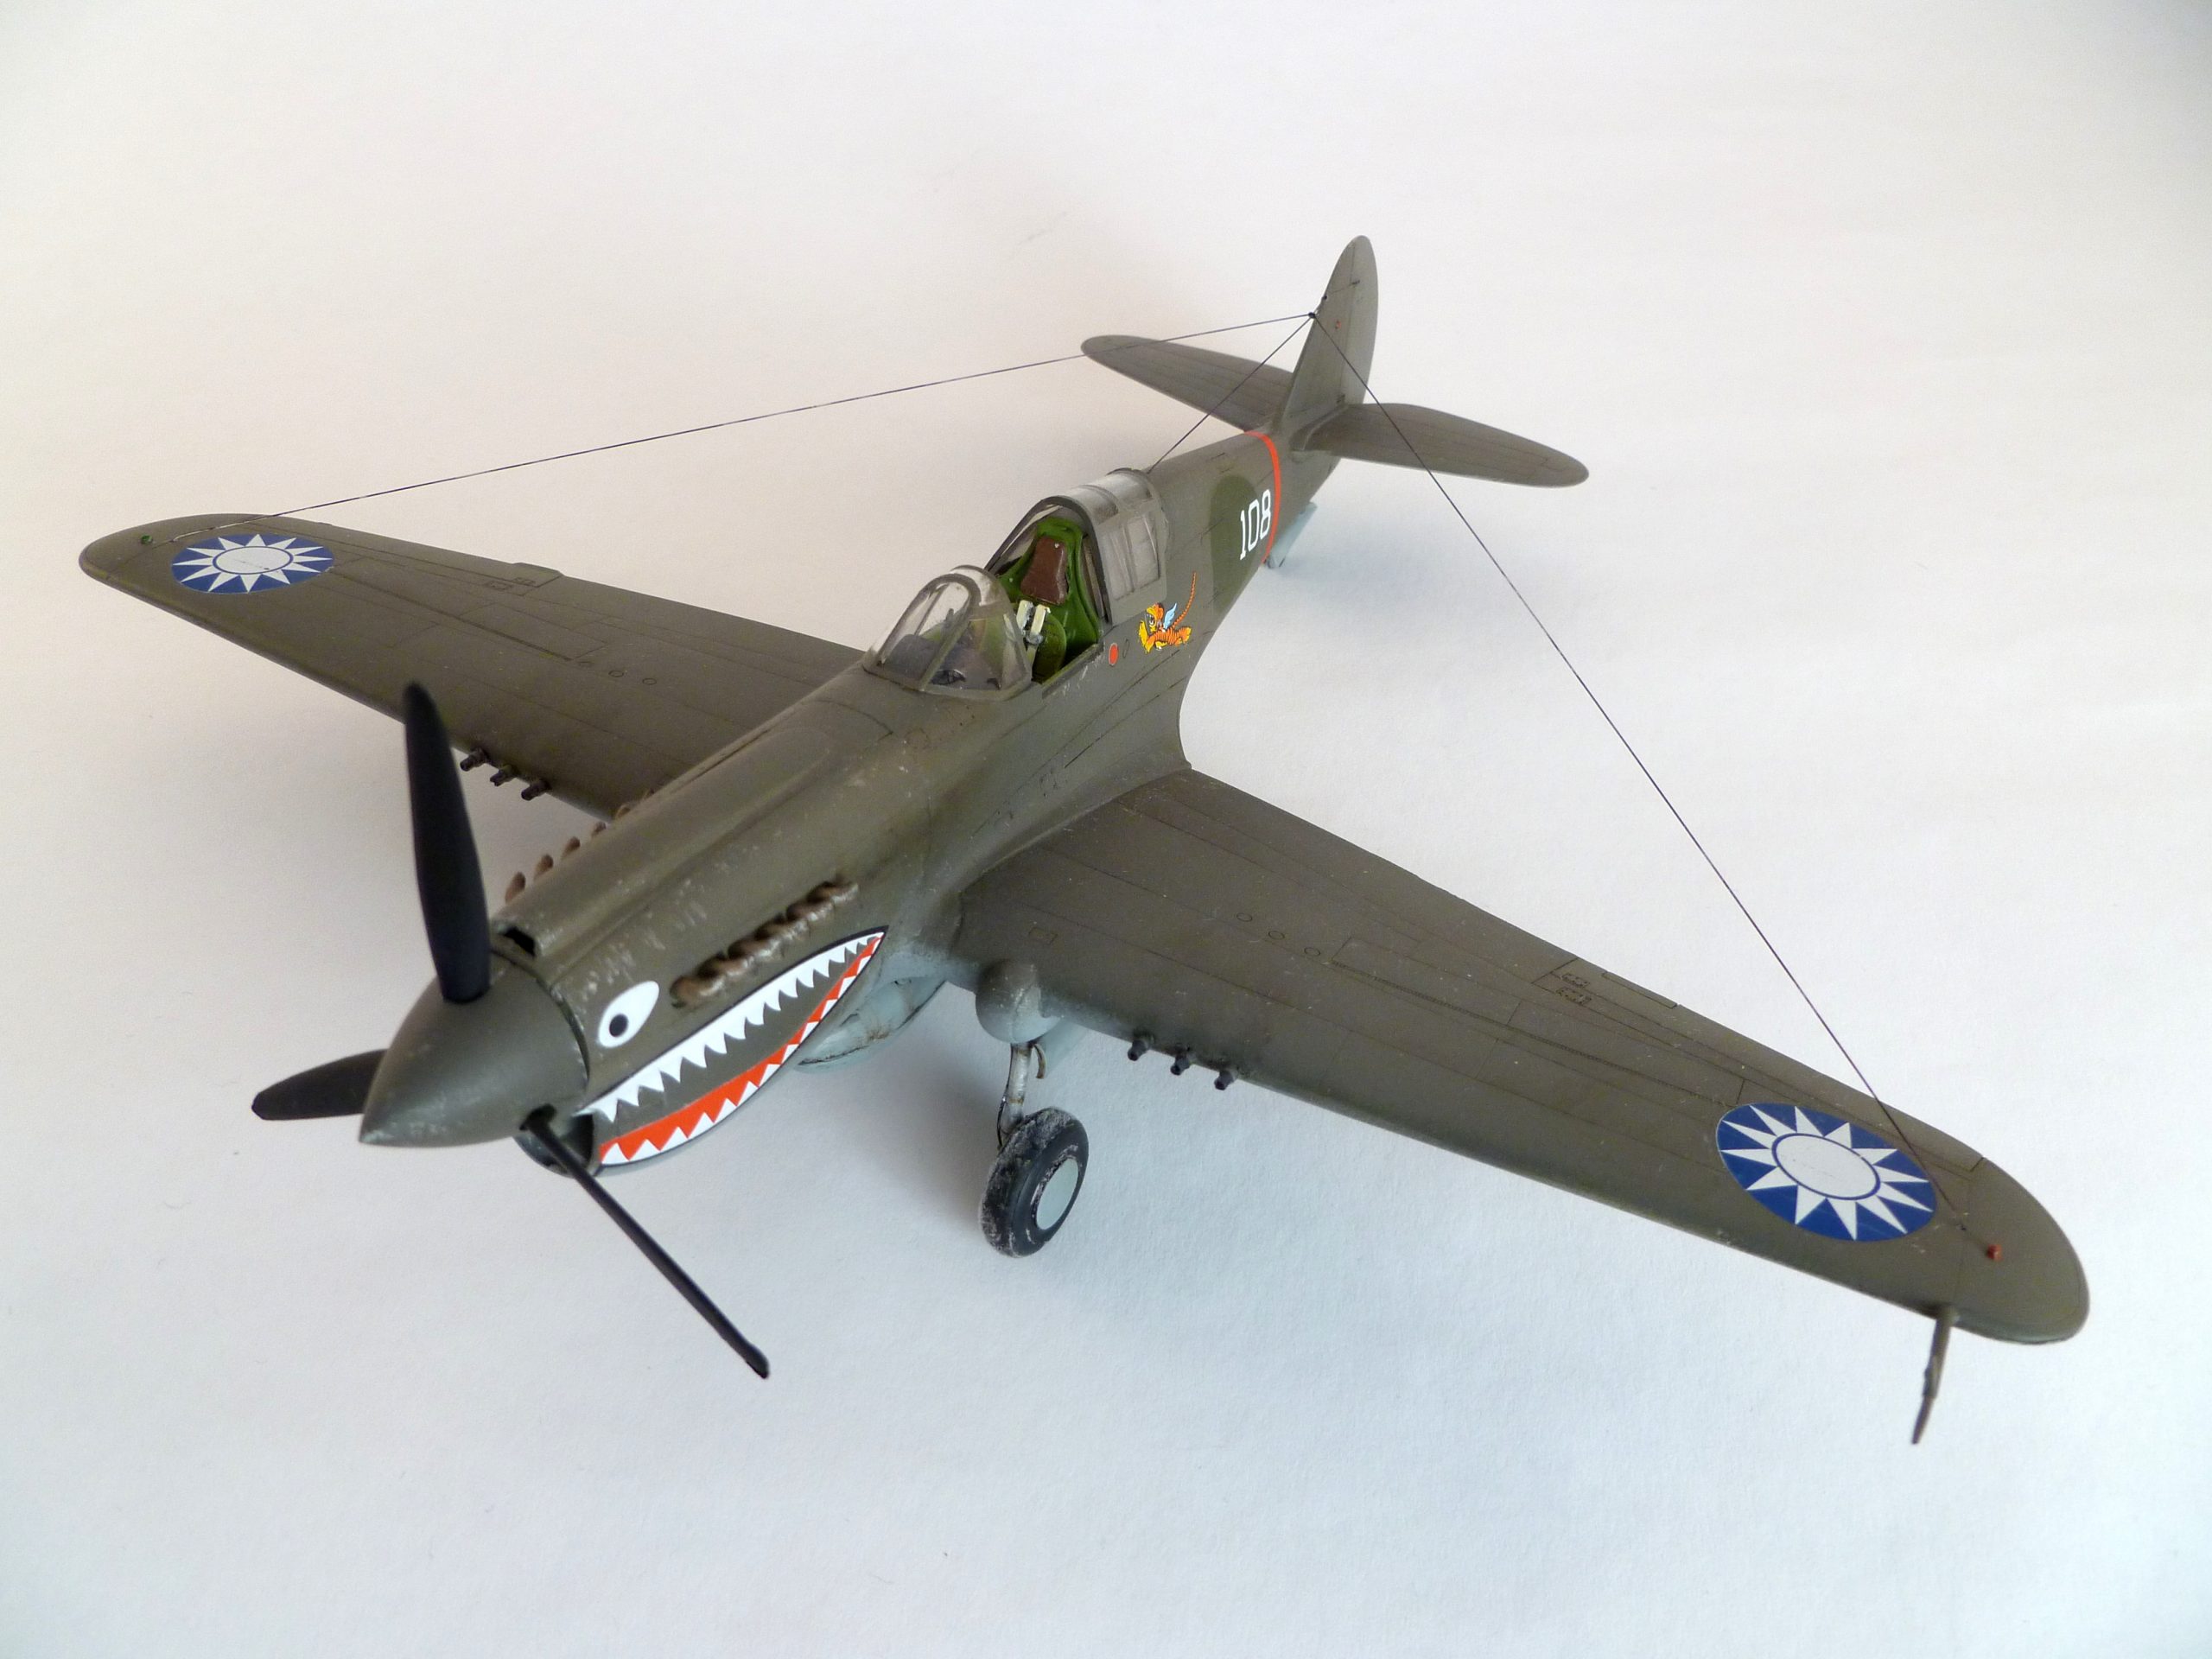
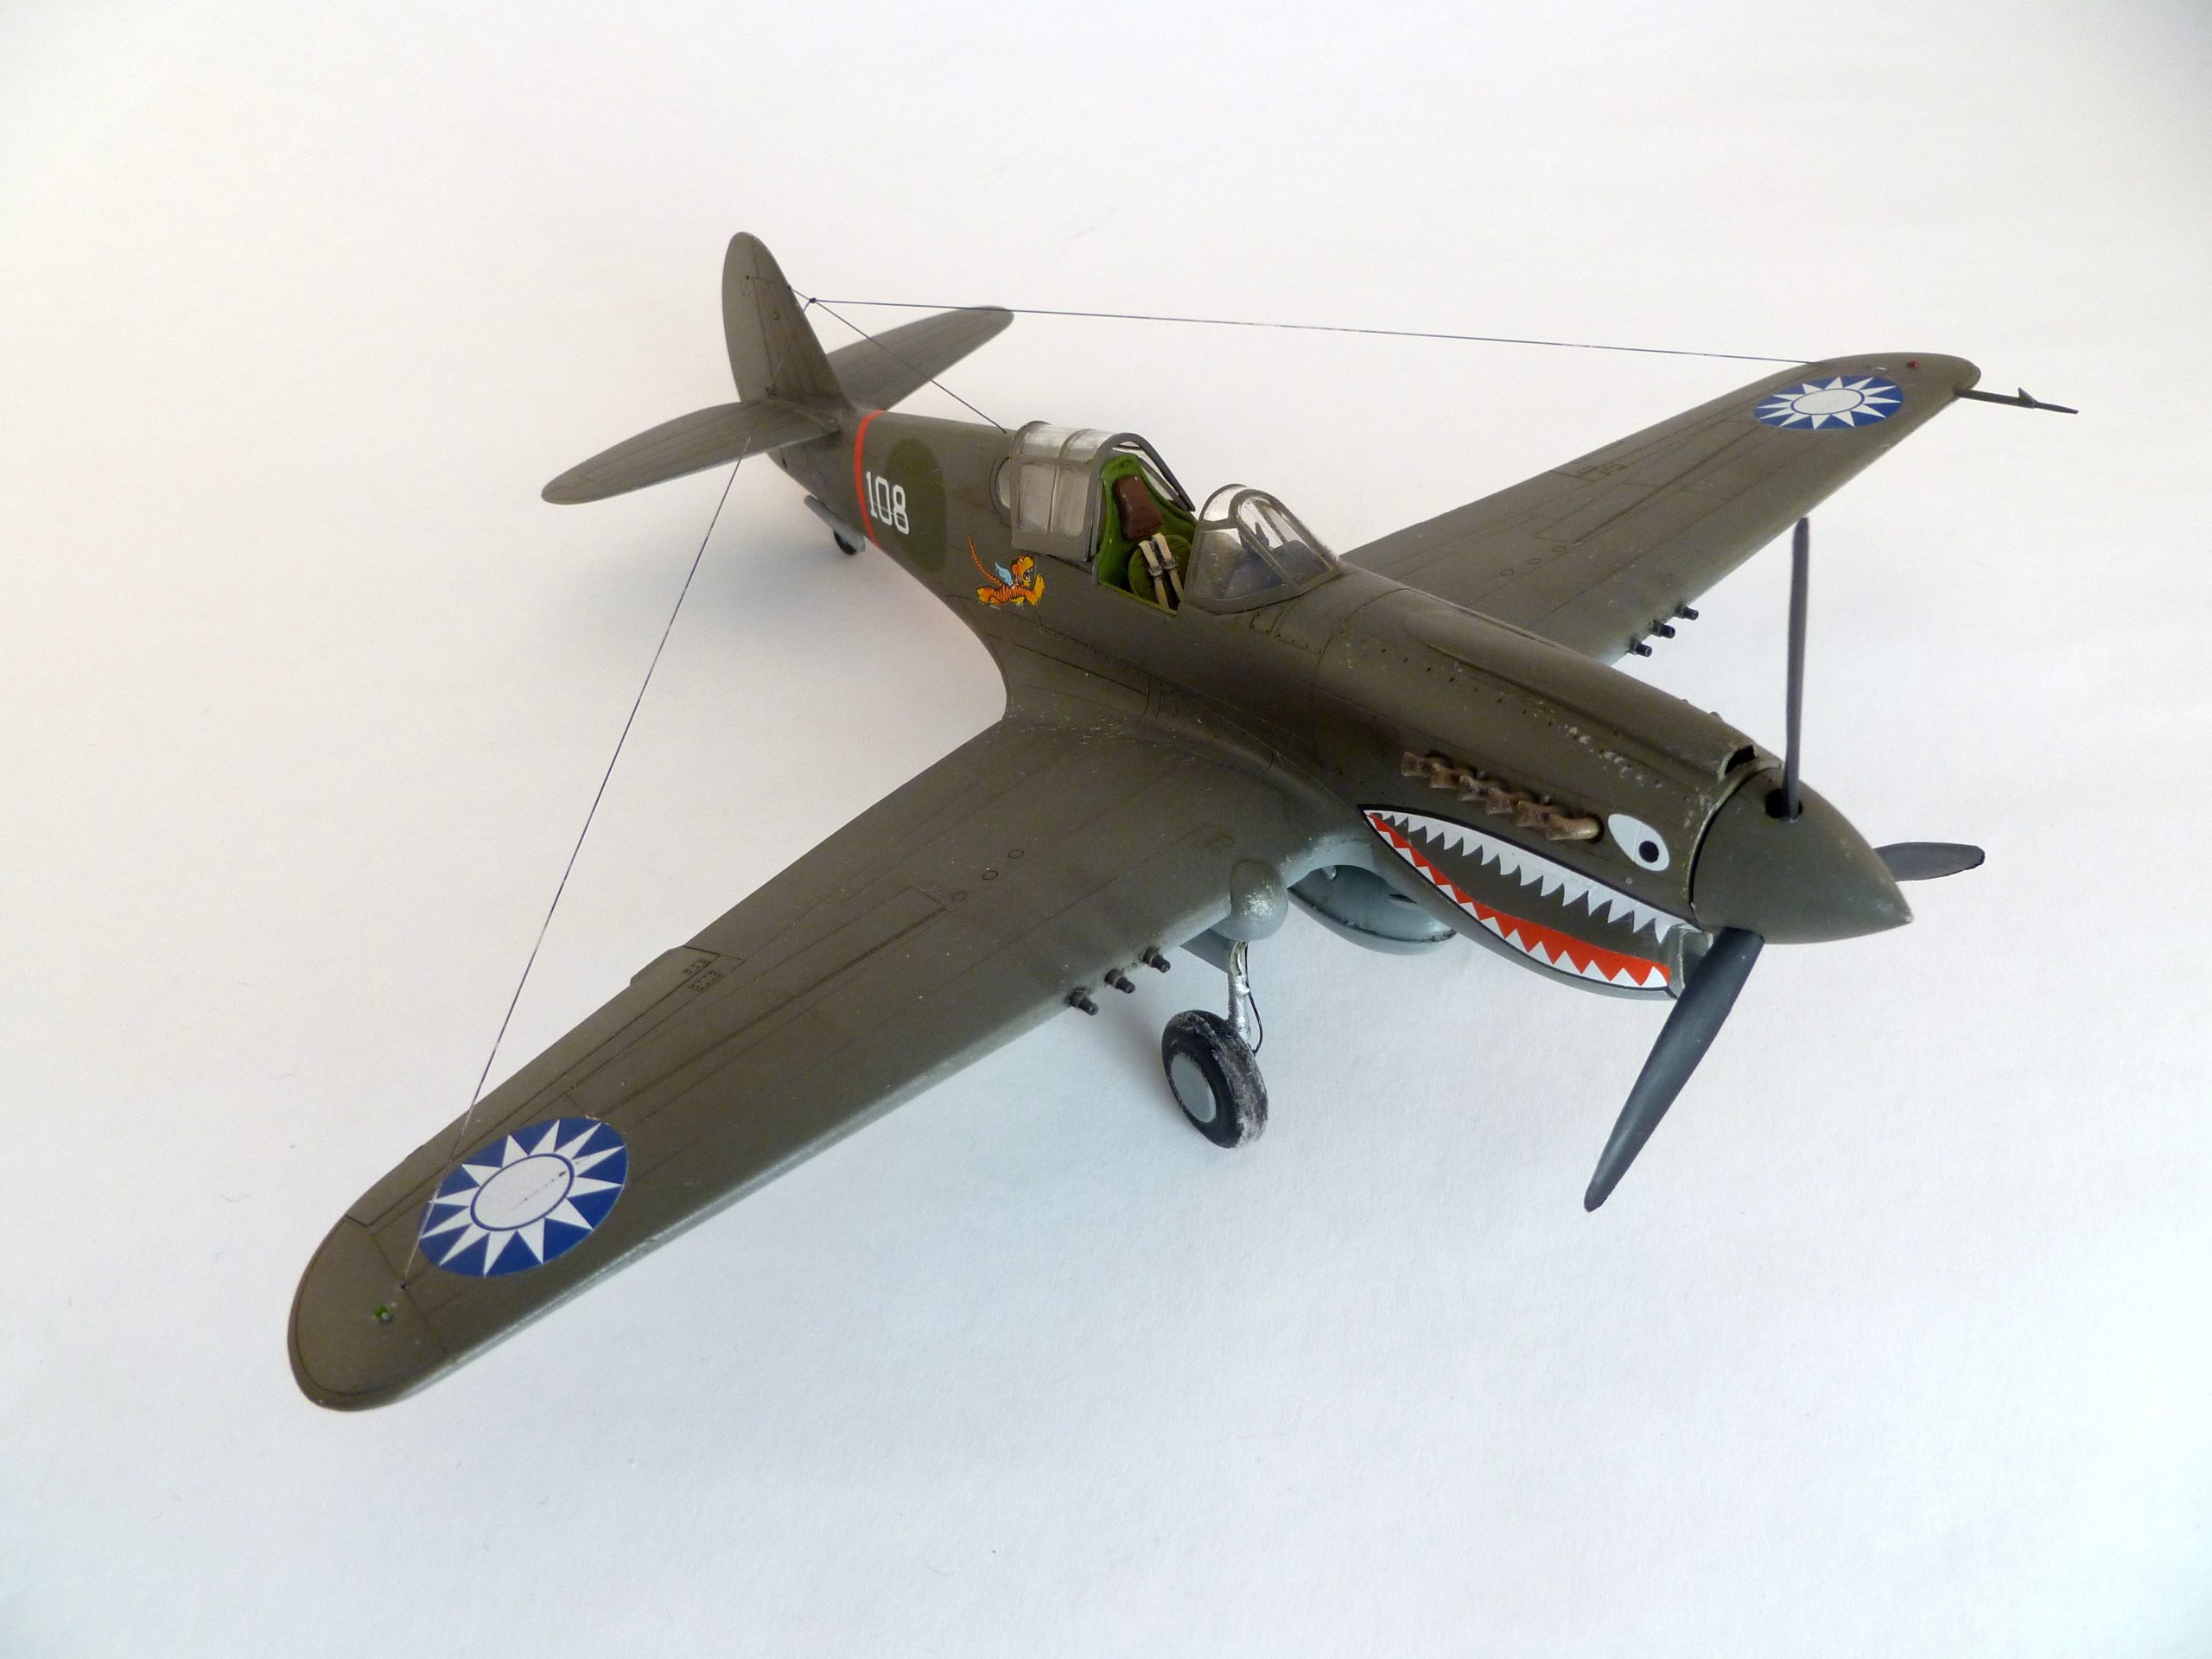
P-40E – 4th in the “Tex” Hill Series – Amtech

This is the Amtech P-40E, “Tex” Hill special Limited Edition.
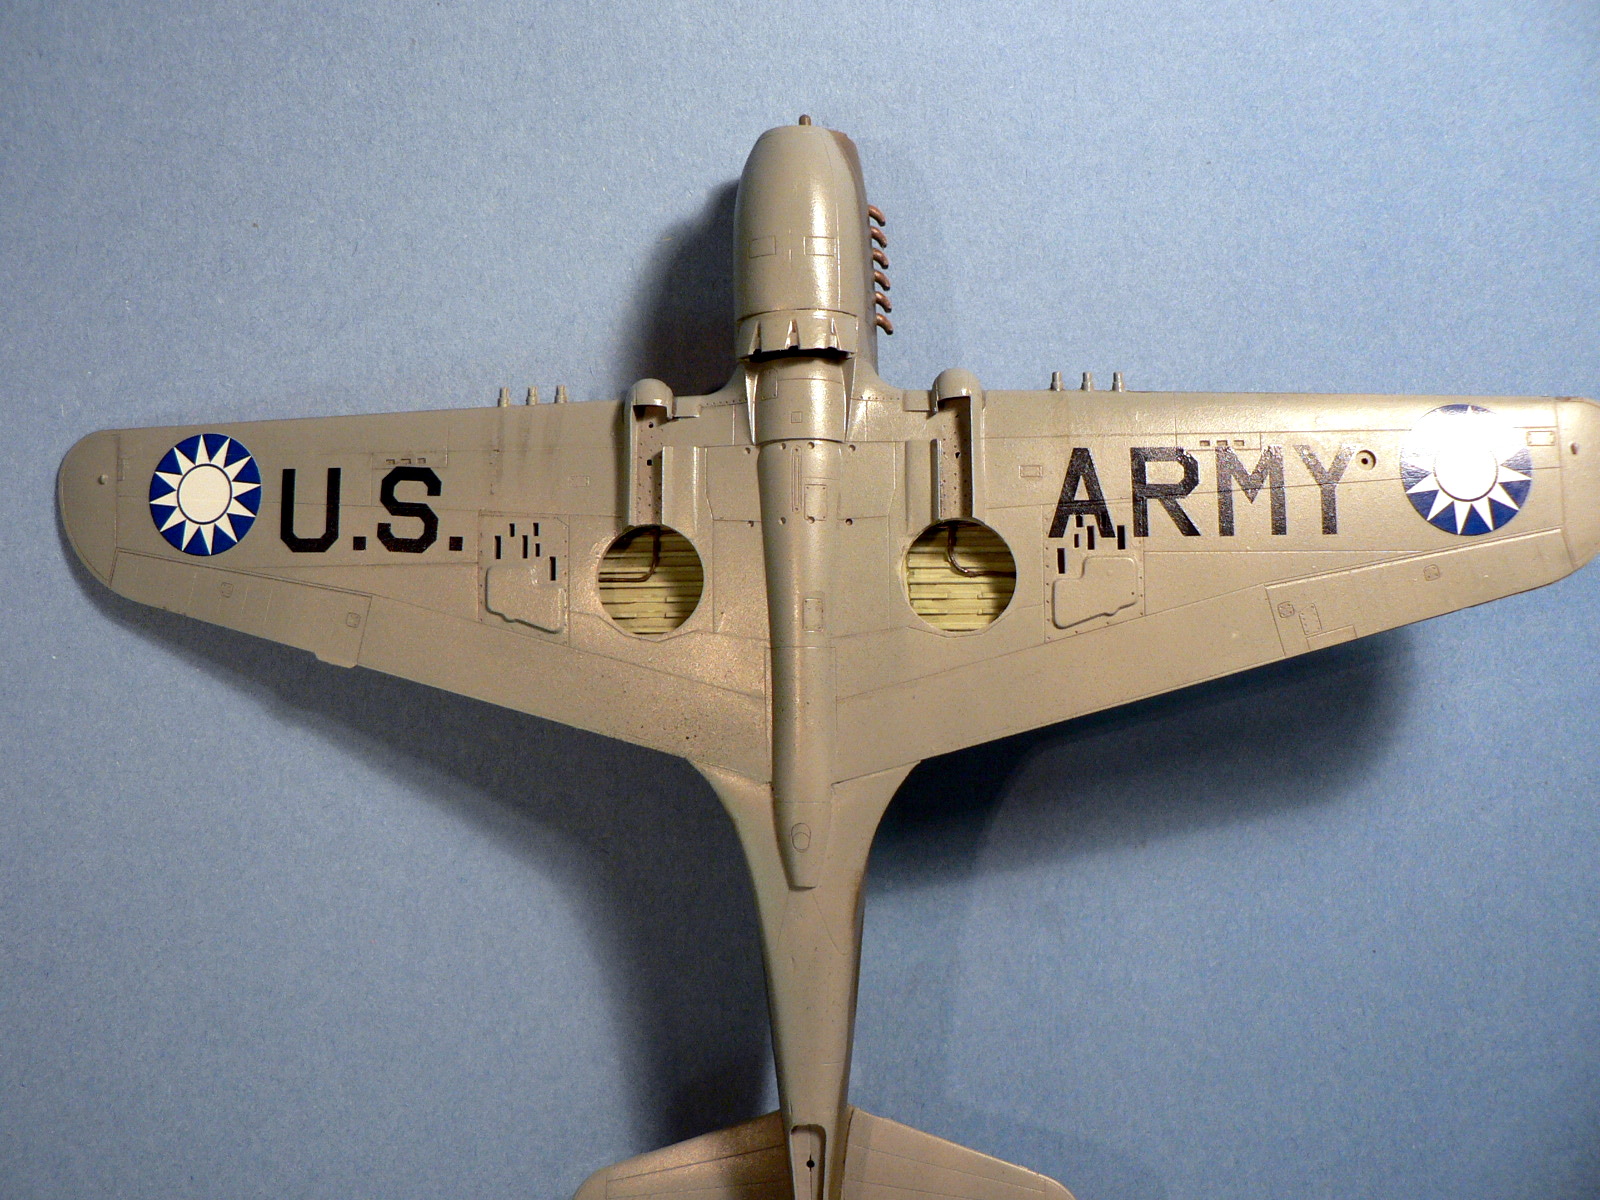
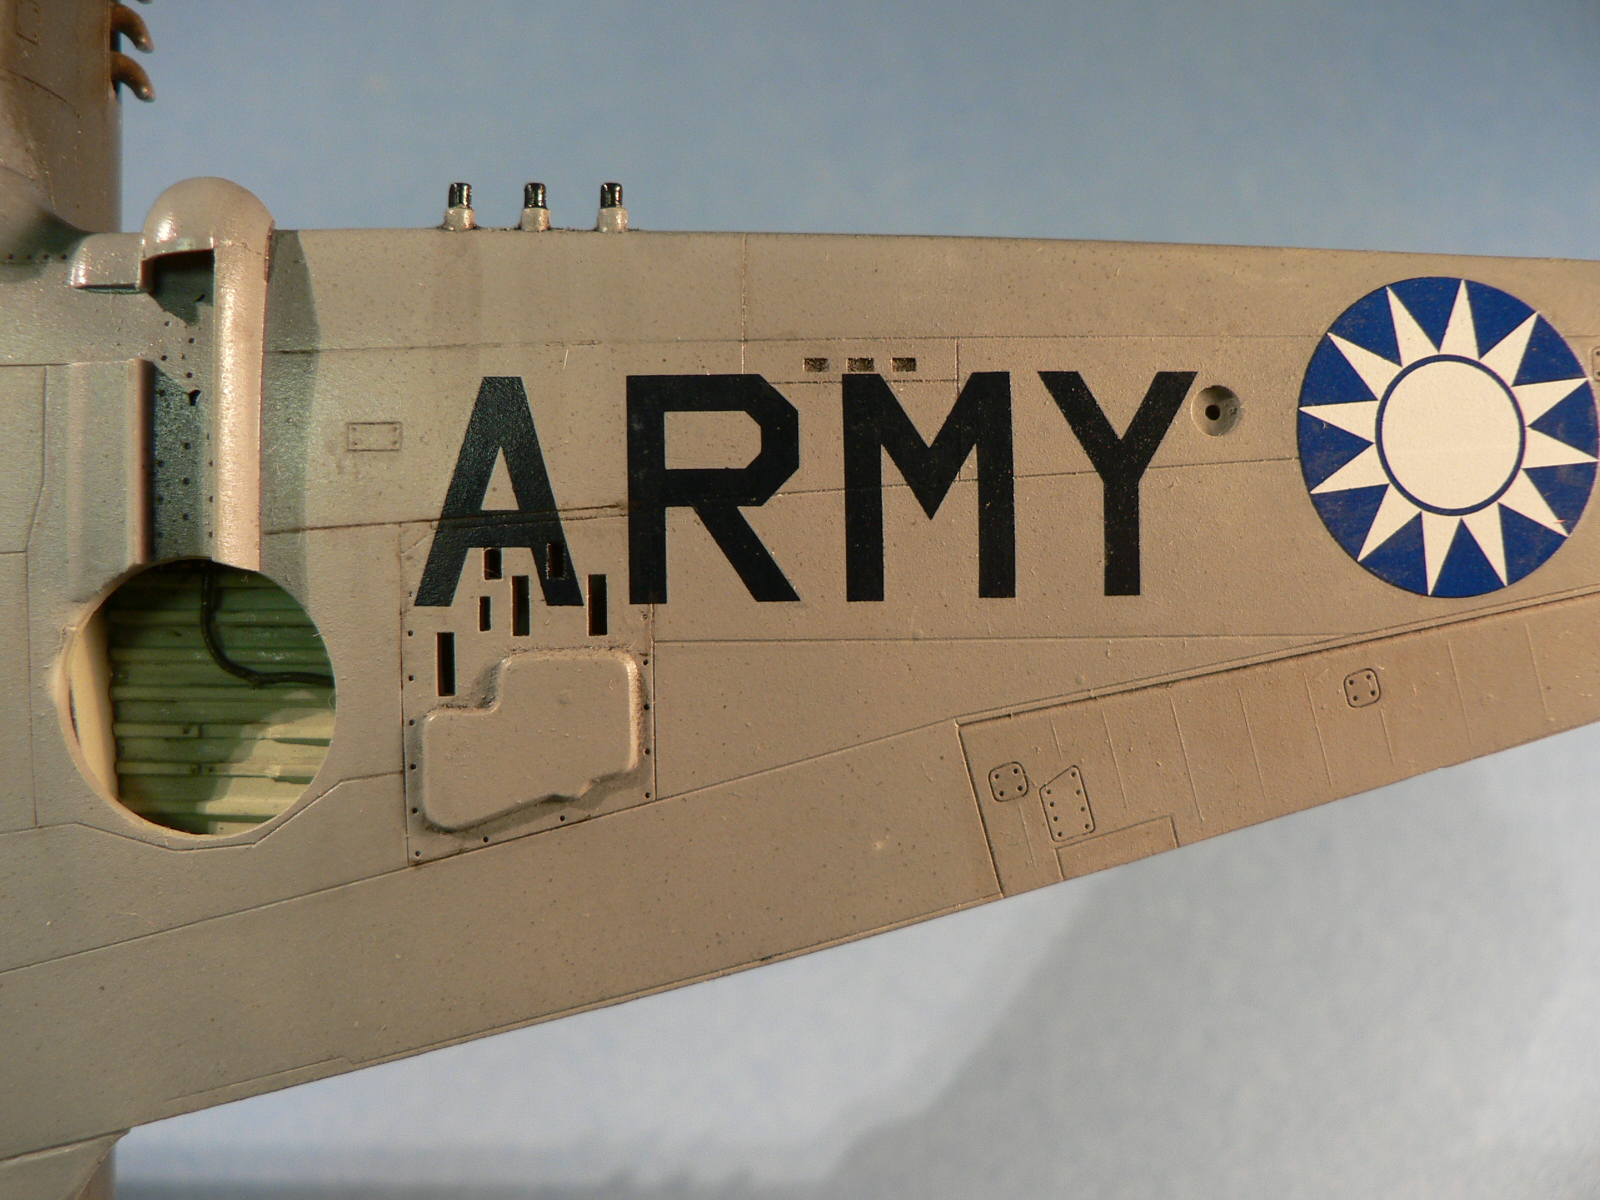
This is a reboxing of their P-40E kit with decals for 3 of the AVG P-40E’s that participated in their raid on the Salween River Ridge in Burma. The successful raid help stopped he Japanese advance into China. The kit also includes a Tex Hill signed print, a signed and number print of the raid by the artist, and a second set of fuselage that corrects a molding error on the first set
Amtech had previously issued a P-40E kit based on an AMT kit that was never produced. They have reissued the kit here as a “Tex” Hill limited edition. What’s ‘limited’ about it? First, it has a decal sheet to cover 3 of the aircraft that participated in the Salween River missions. Being the “Tex” Hill edition, it of course has #108 to cover the plane that he was in. In addition, there is a signed print with Gen. Hill’s picture and the story in his own words. There’s also a signed and numbered print of the raid by aviation artist Terrill Clements.
When initially released, this kit was plagued by a bad mold where the fuselage rear is misaligned, Amtech thus includes in the kit, a second duplicate sprue (left-most) with the problem corrected.
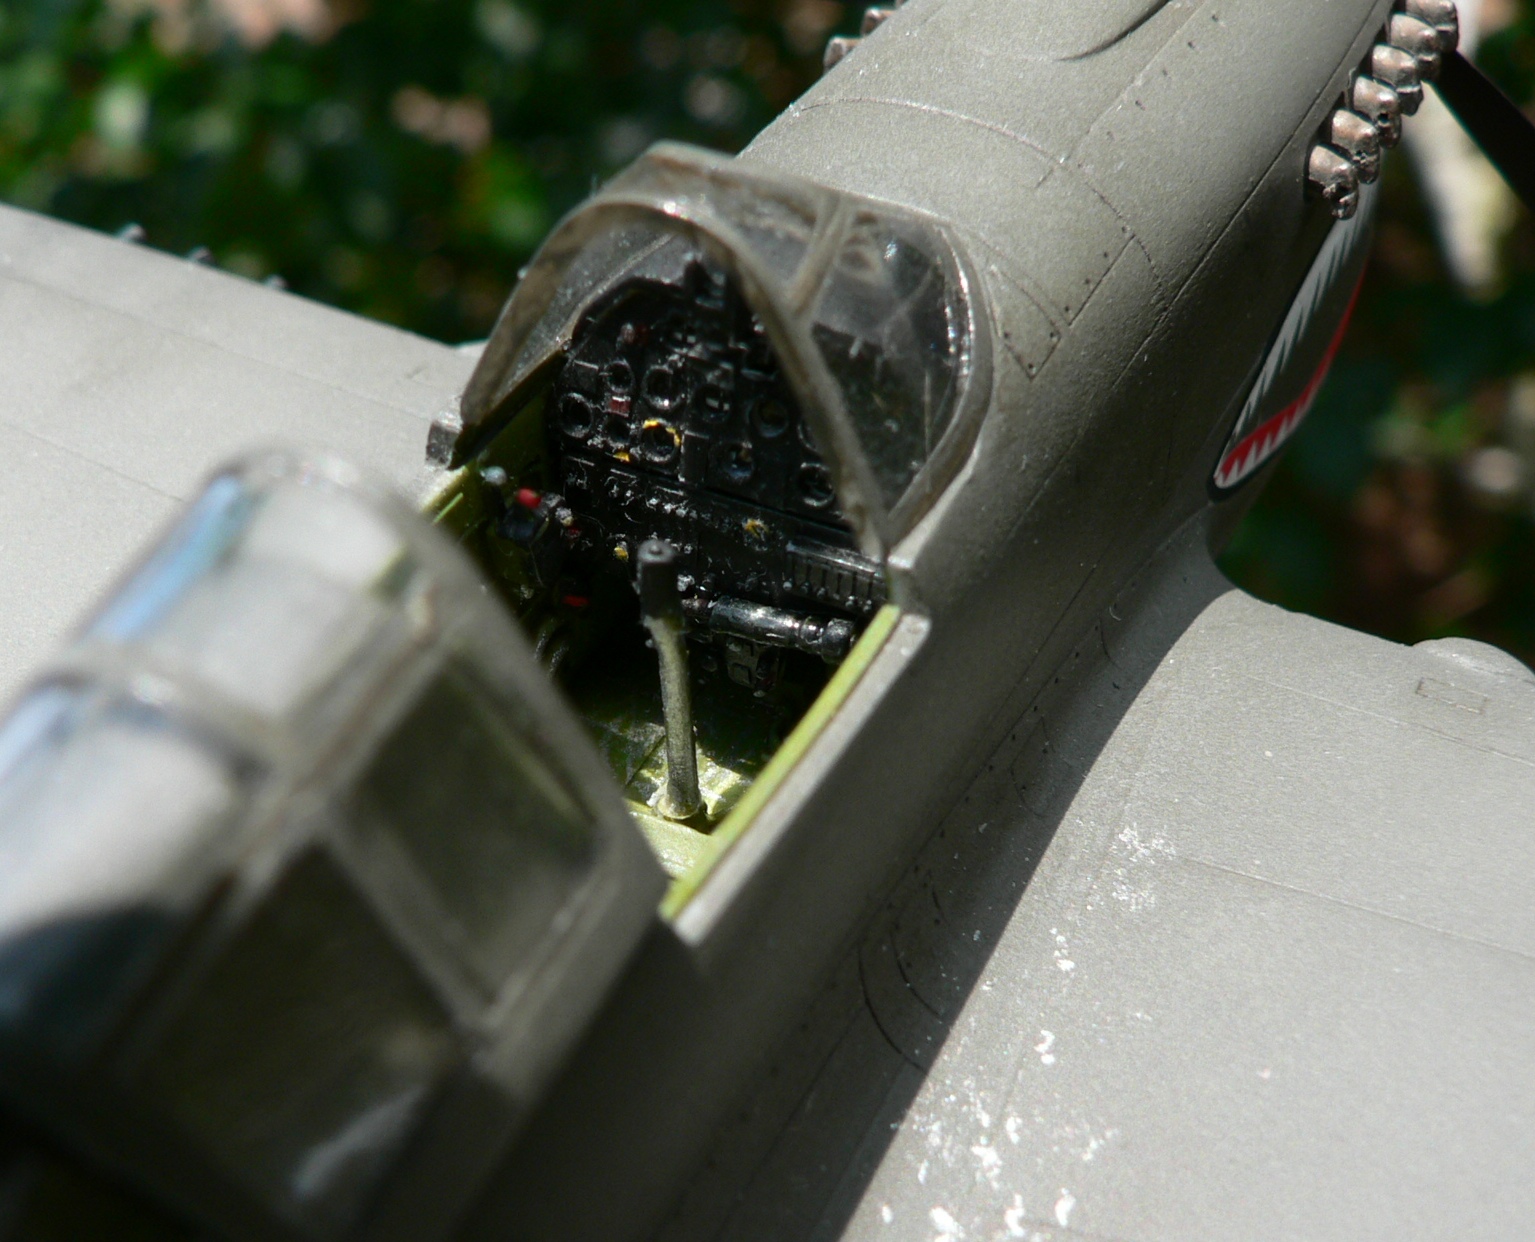
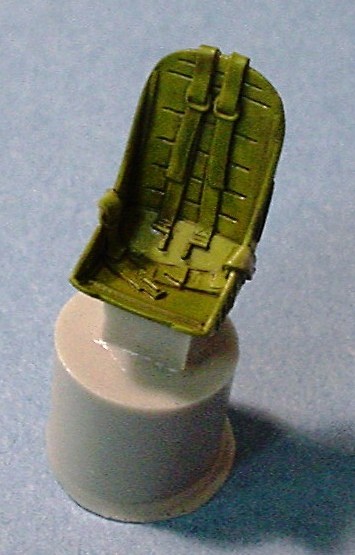
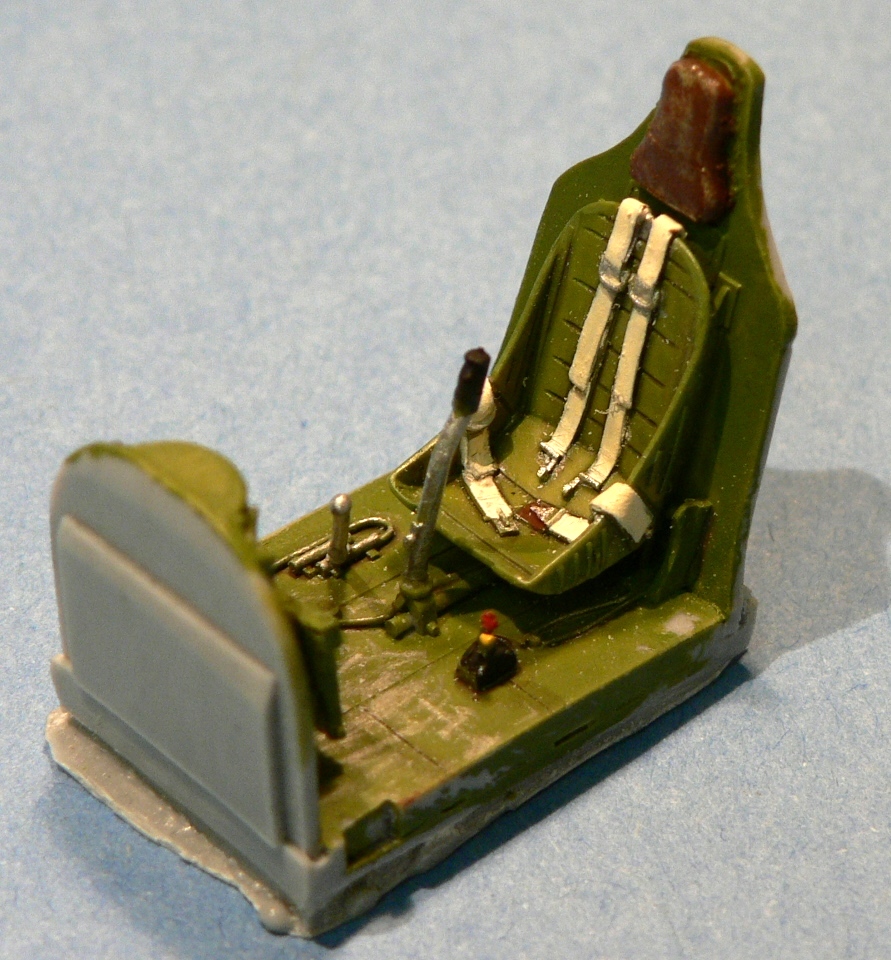
Starting with the cockpit, I’ve decided to spurge a bit with the Cutting Edge Resin cockpit set. The set’s detail is wonderfully molded. Unlike the Revell P-40B, this kit’s actual cockpit isn’t too bad, this set is just much, much better – especially in the seat and panel area. The construction starts with this set. After a washing with soapy water to remove release agent residual, I painted the side walls and seat with Model Master Acryl Interior green followed by a wash of thinned Tamiya smoke which helped pop out the great details. Adding some miscellaneous pieces, careful painting, dry brushing, and finally a silver pencil around the edges will really bring the pieces to life.
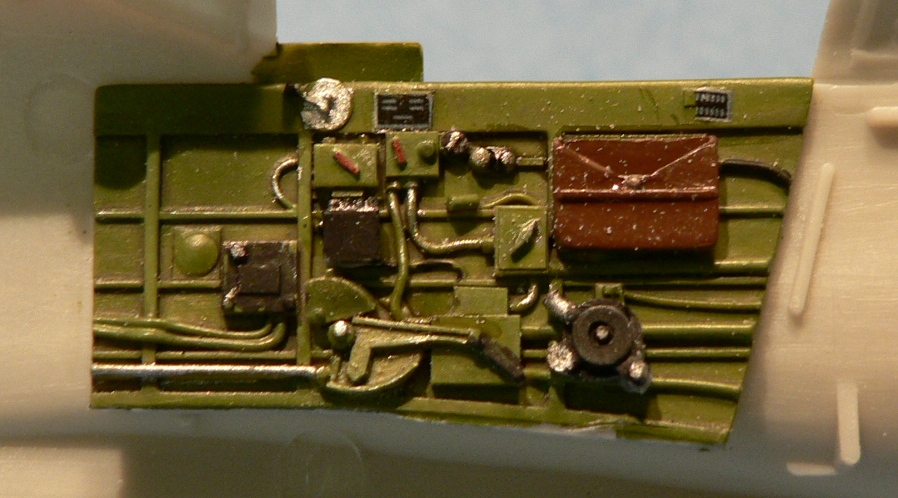
The instrument panel consists of 3 pieces, a blank backing piece that is to be painted white. A clear acetate film with printed instrument faces is glued on top of this back panel. The front panel with molded details is then sanded down from behind until the instrument holes are opened up. This is then glued to on top of the acetate. Finally some picking out the details is done with a 000 brush, the lower panel was added and electrical wiring used for the map light’s stem.
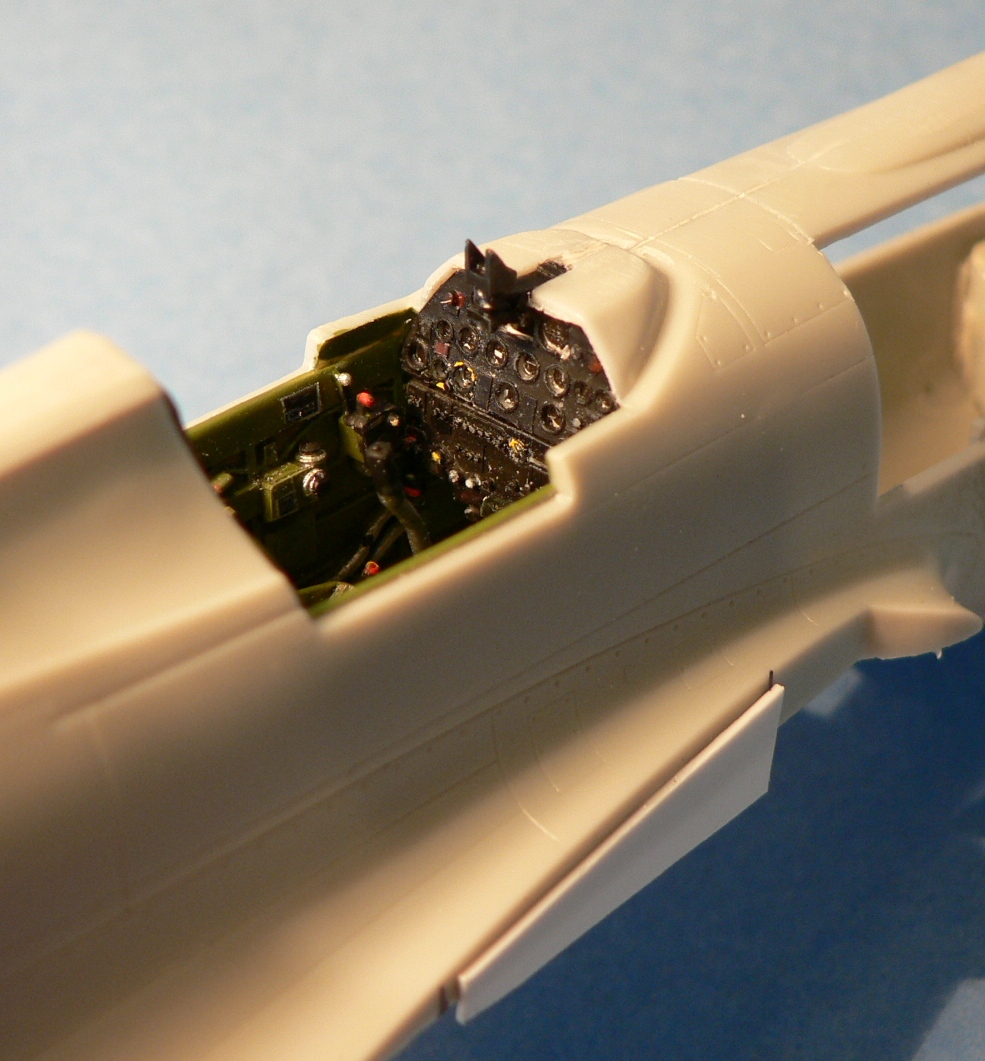
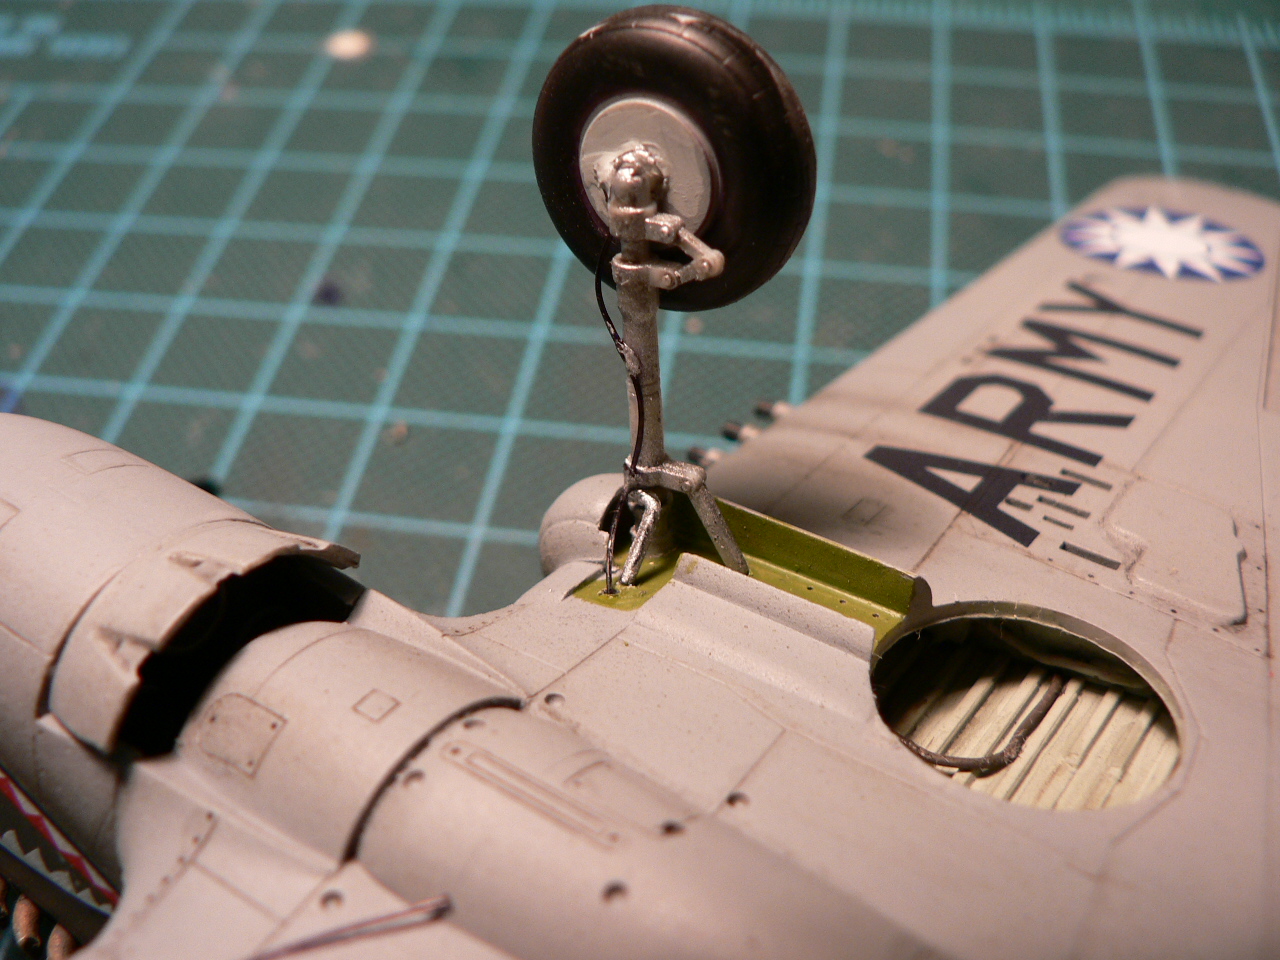
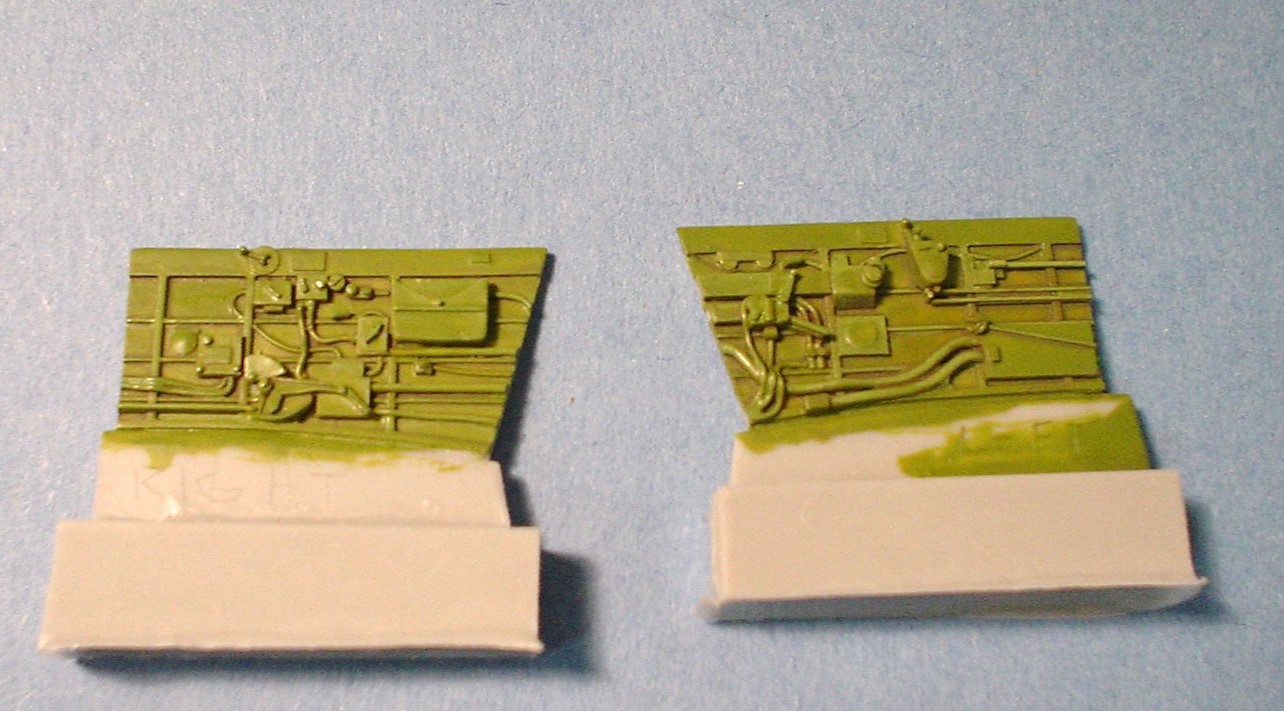
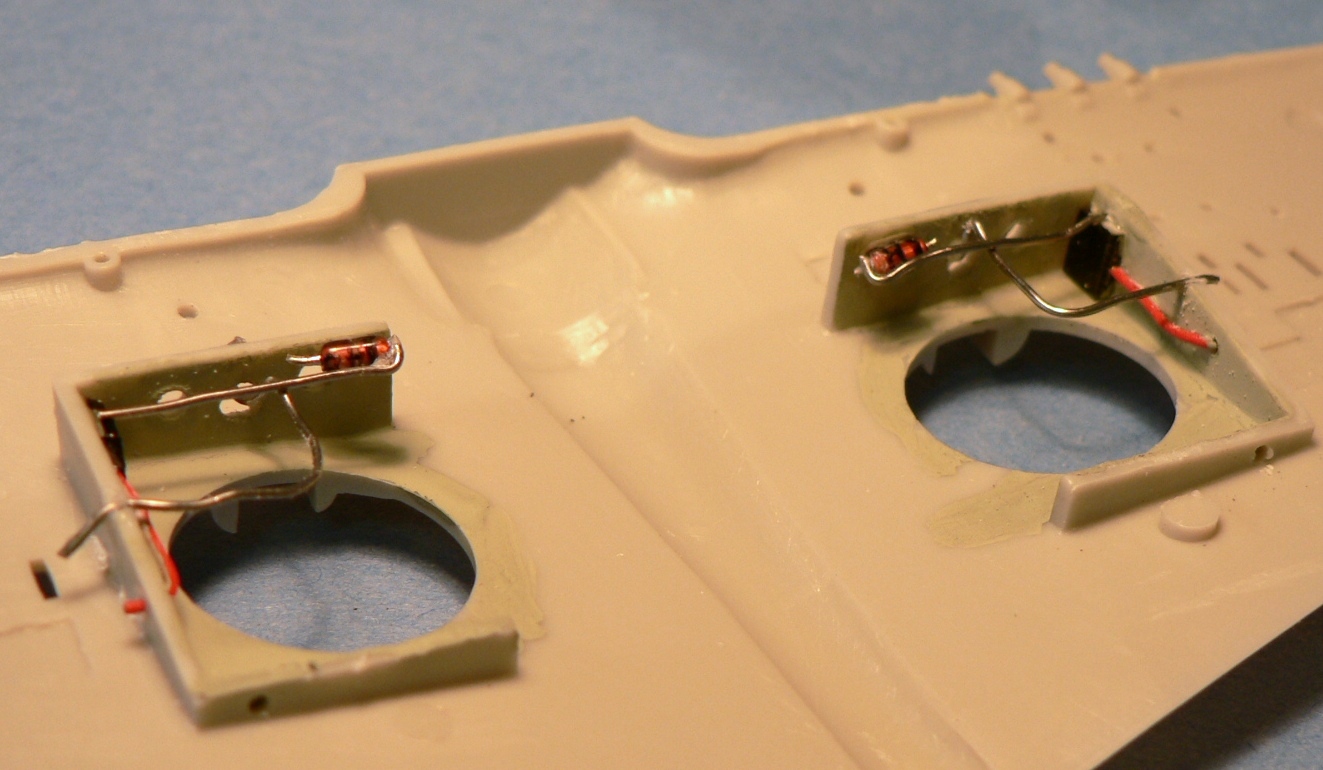
The finished cockpit was installed after gluing the two halves of the aircraft body. Before closing up and installing the wings, I decided to add a little detail to the wheel well. I repoduced some of the piping from references with wiring, plastic card, electrical components and solder. This was inserted into holes drilled through the side walls. The kit provides only 3 sidewalls, so I glued a plastic card to the wing root area to blank off the 4th side.
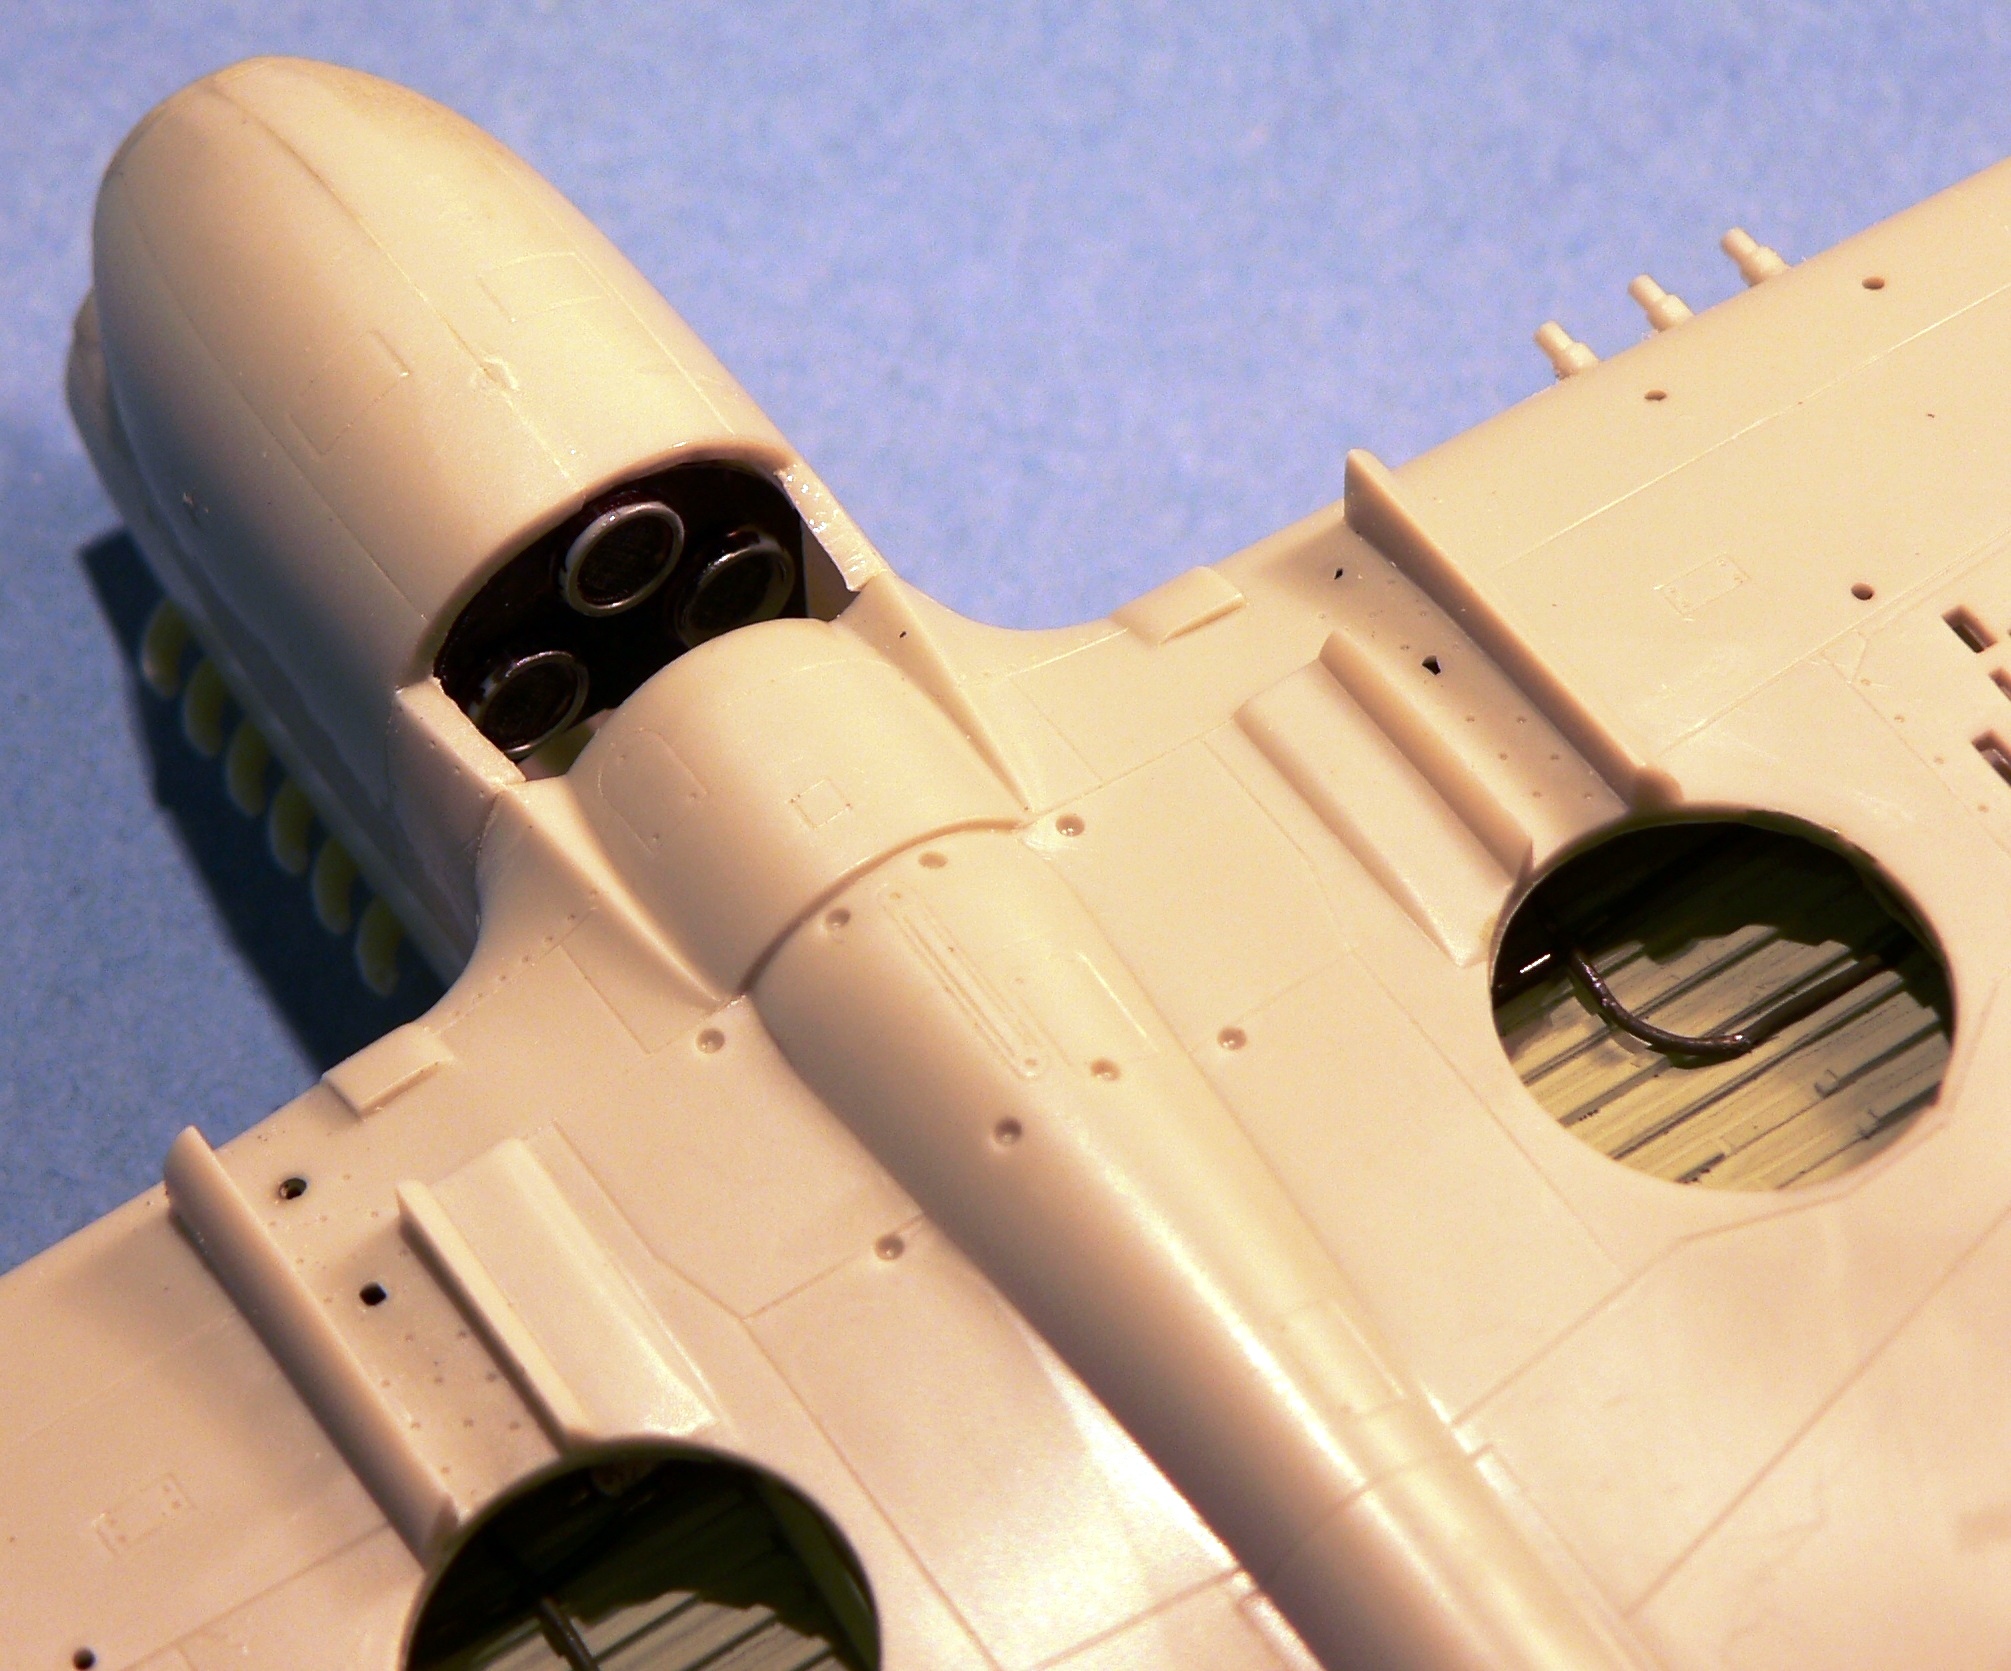
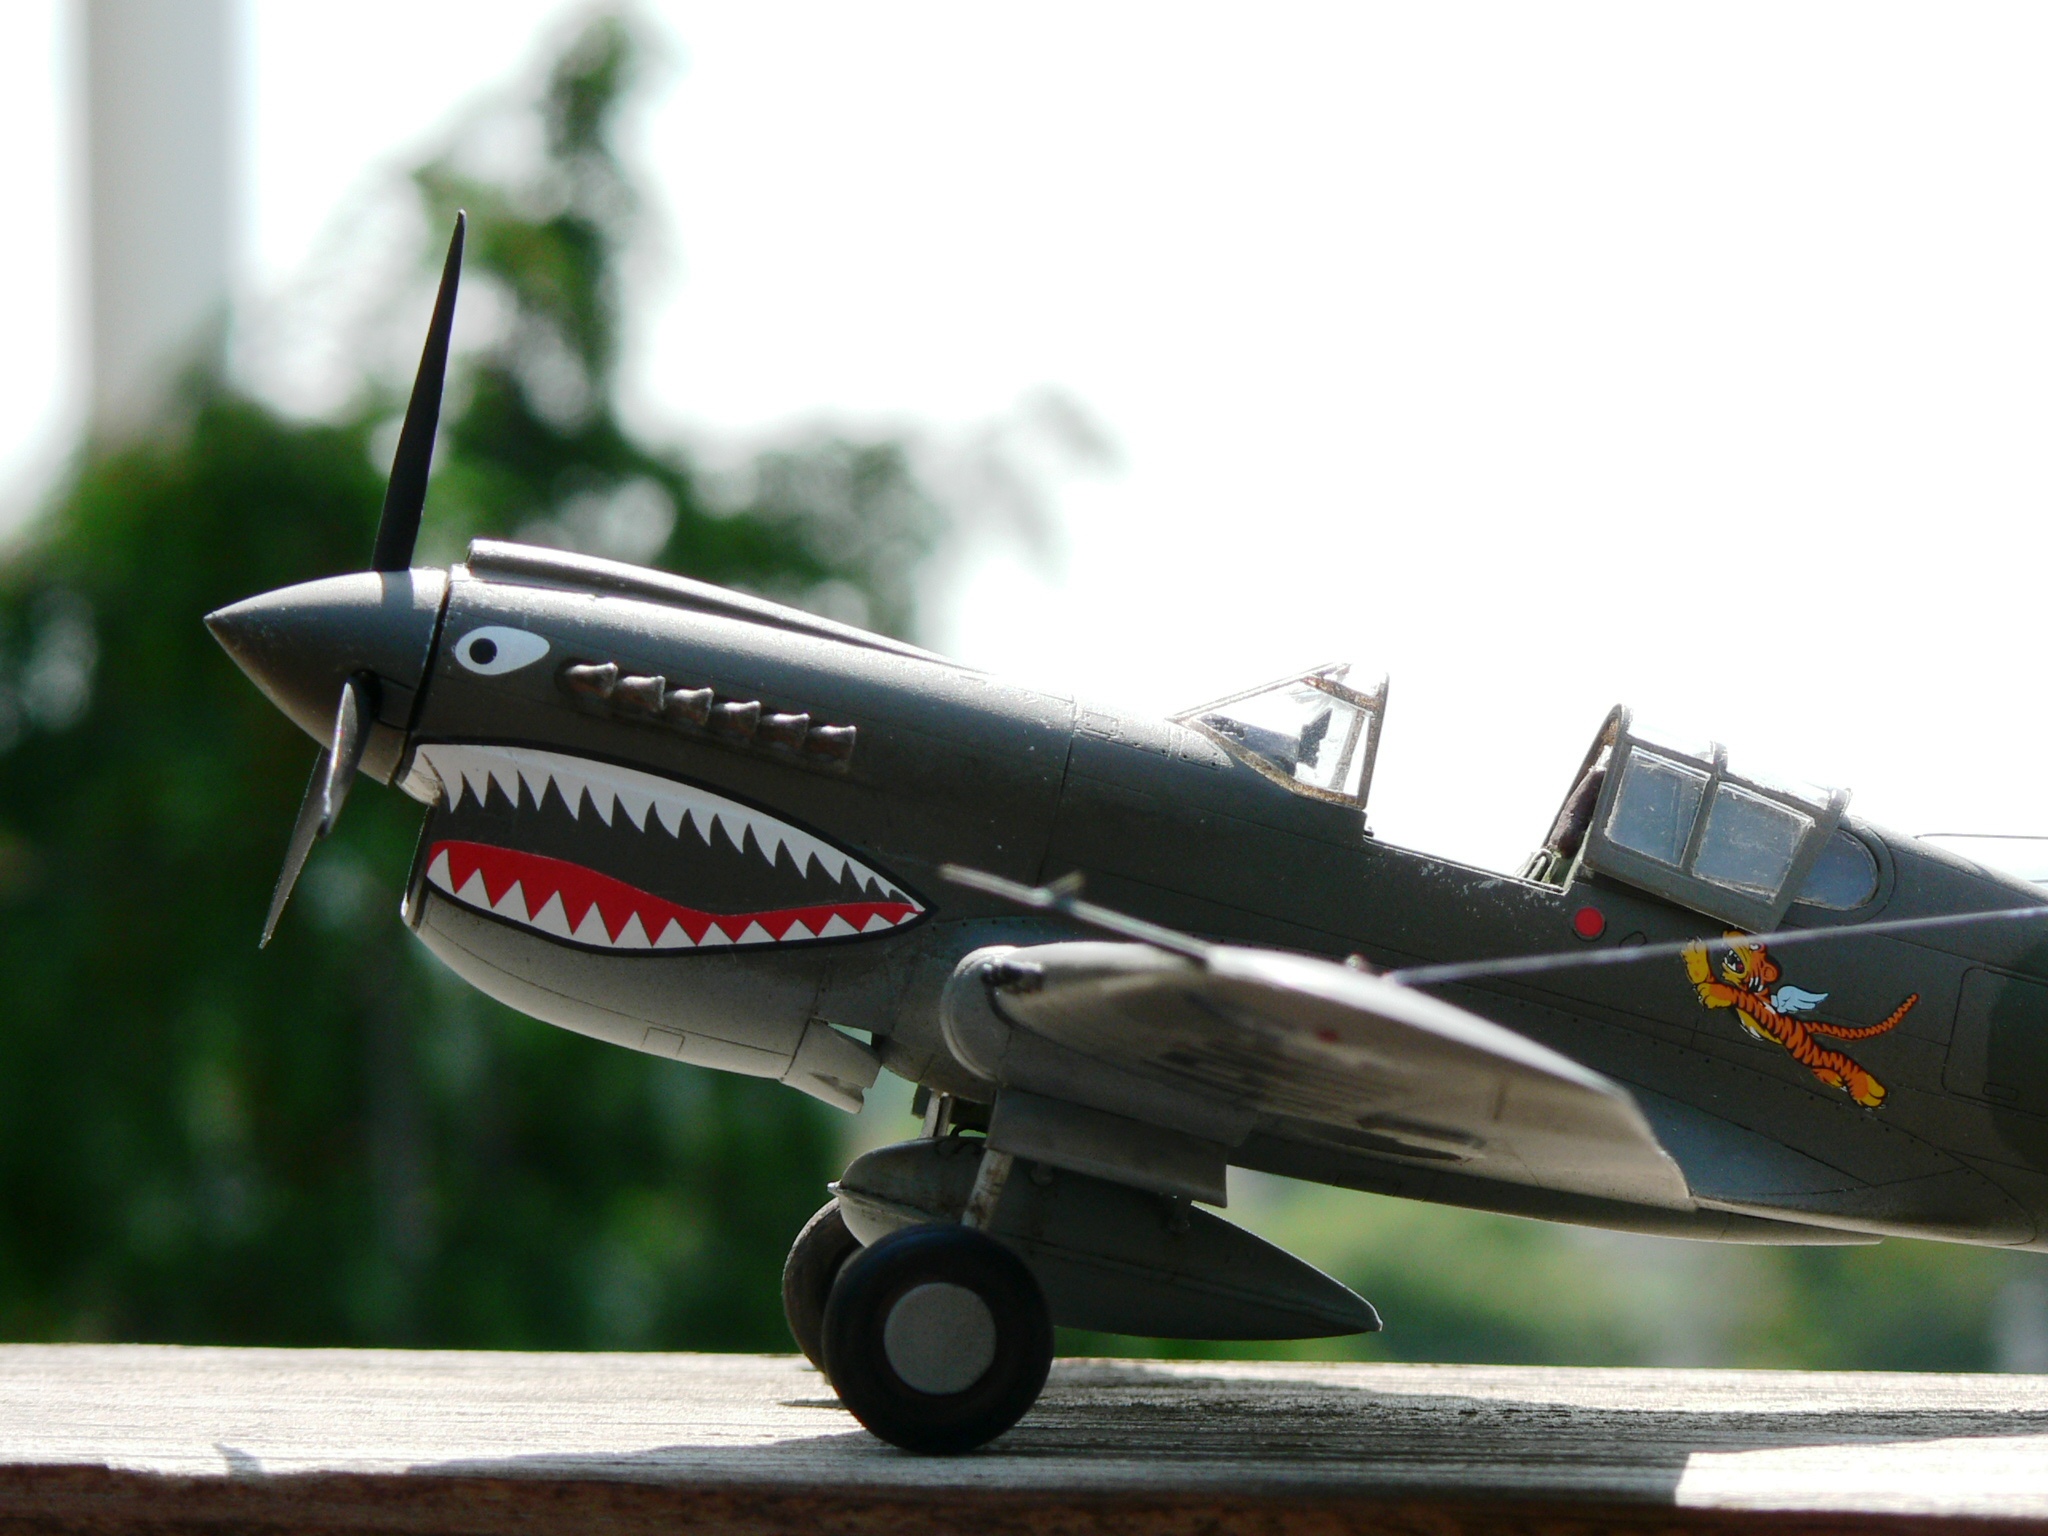
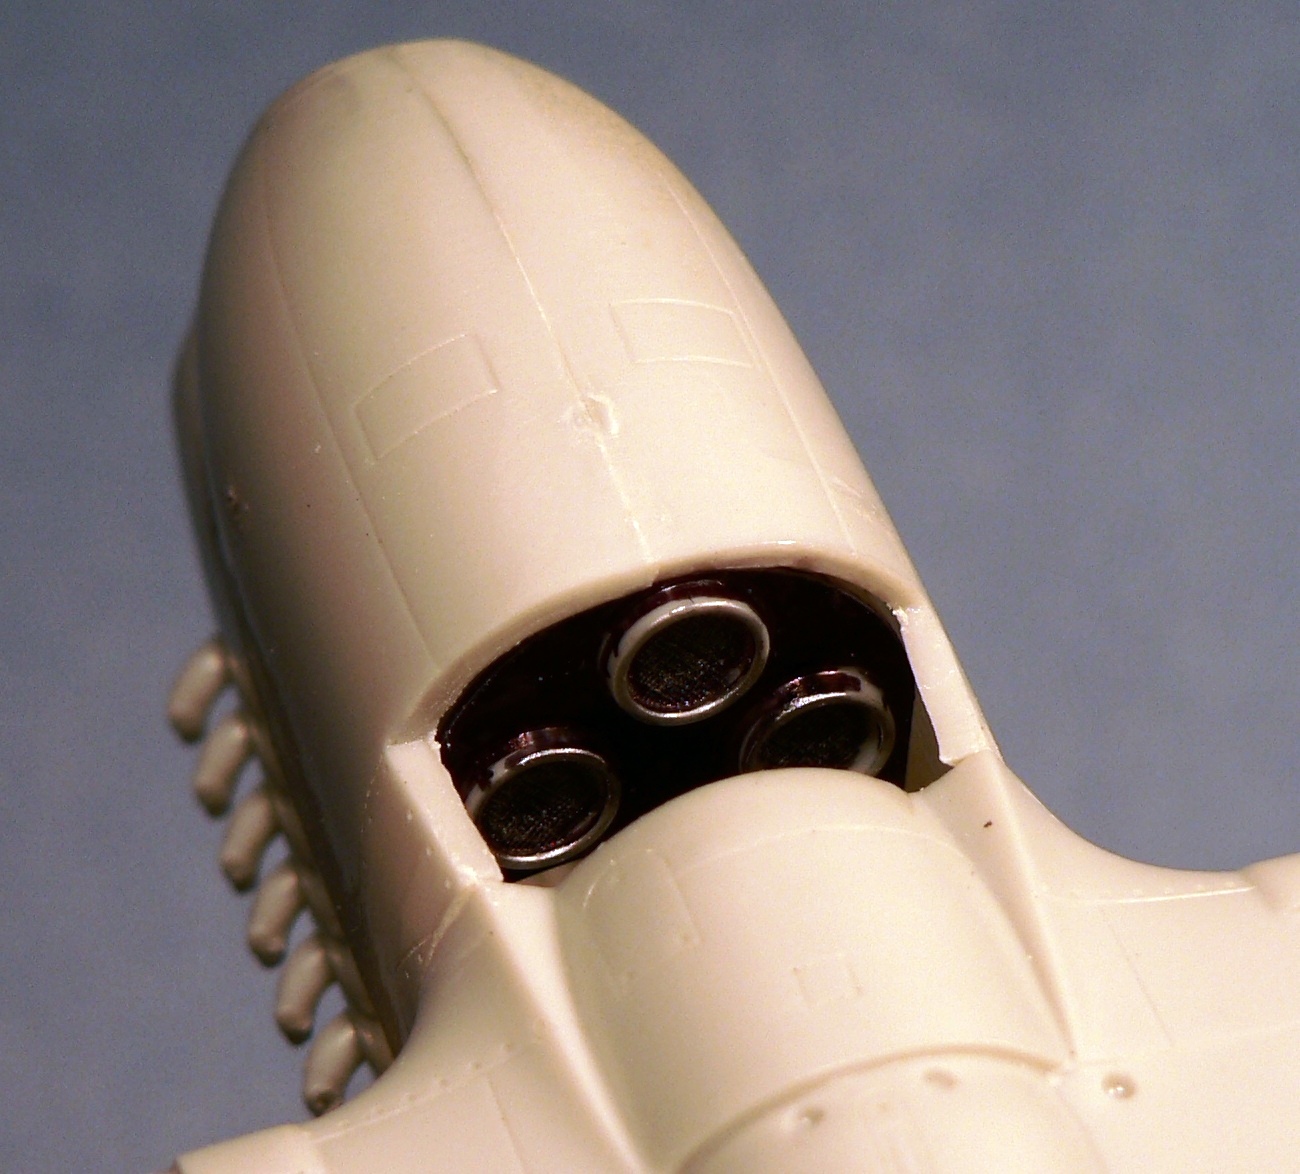
After the wings were and cowling plates were attached, major filler and sanding work ensued as fairly large gaps were at all the joints. In addition, the soft plastic created several bumps due to the pressure of the ejection points, these needed to be sanded down. Before I closed the nose up completely, I realized that the cowl flaps are molded as open on this kit, allowing a significant gap to be seen into the engine area. I could have just painted the whole area black and that would pretty much hide everything. Based on reference photos, it was clear that the coolers tubes were plainly visible through the flaps. I contemplated scratch building those when I noticed the spare sprue with the ‘deformed’ fuselage and an extra cooler plate. Since these were meant to be installed in the front of the air scoop, their 3 coolers protruded just a bit over a plate, in the back, you should be able to see 3 round cylinders. However, it is dark enough in the back opening that I just painted over the plating with black and highlighted the 3 heads with silver. Once installed, it was convincing enough and sure was a lot less work.
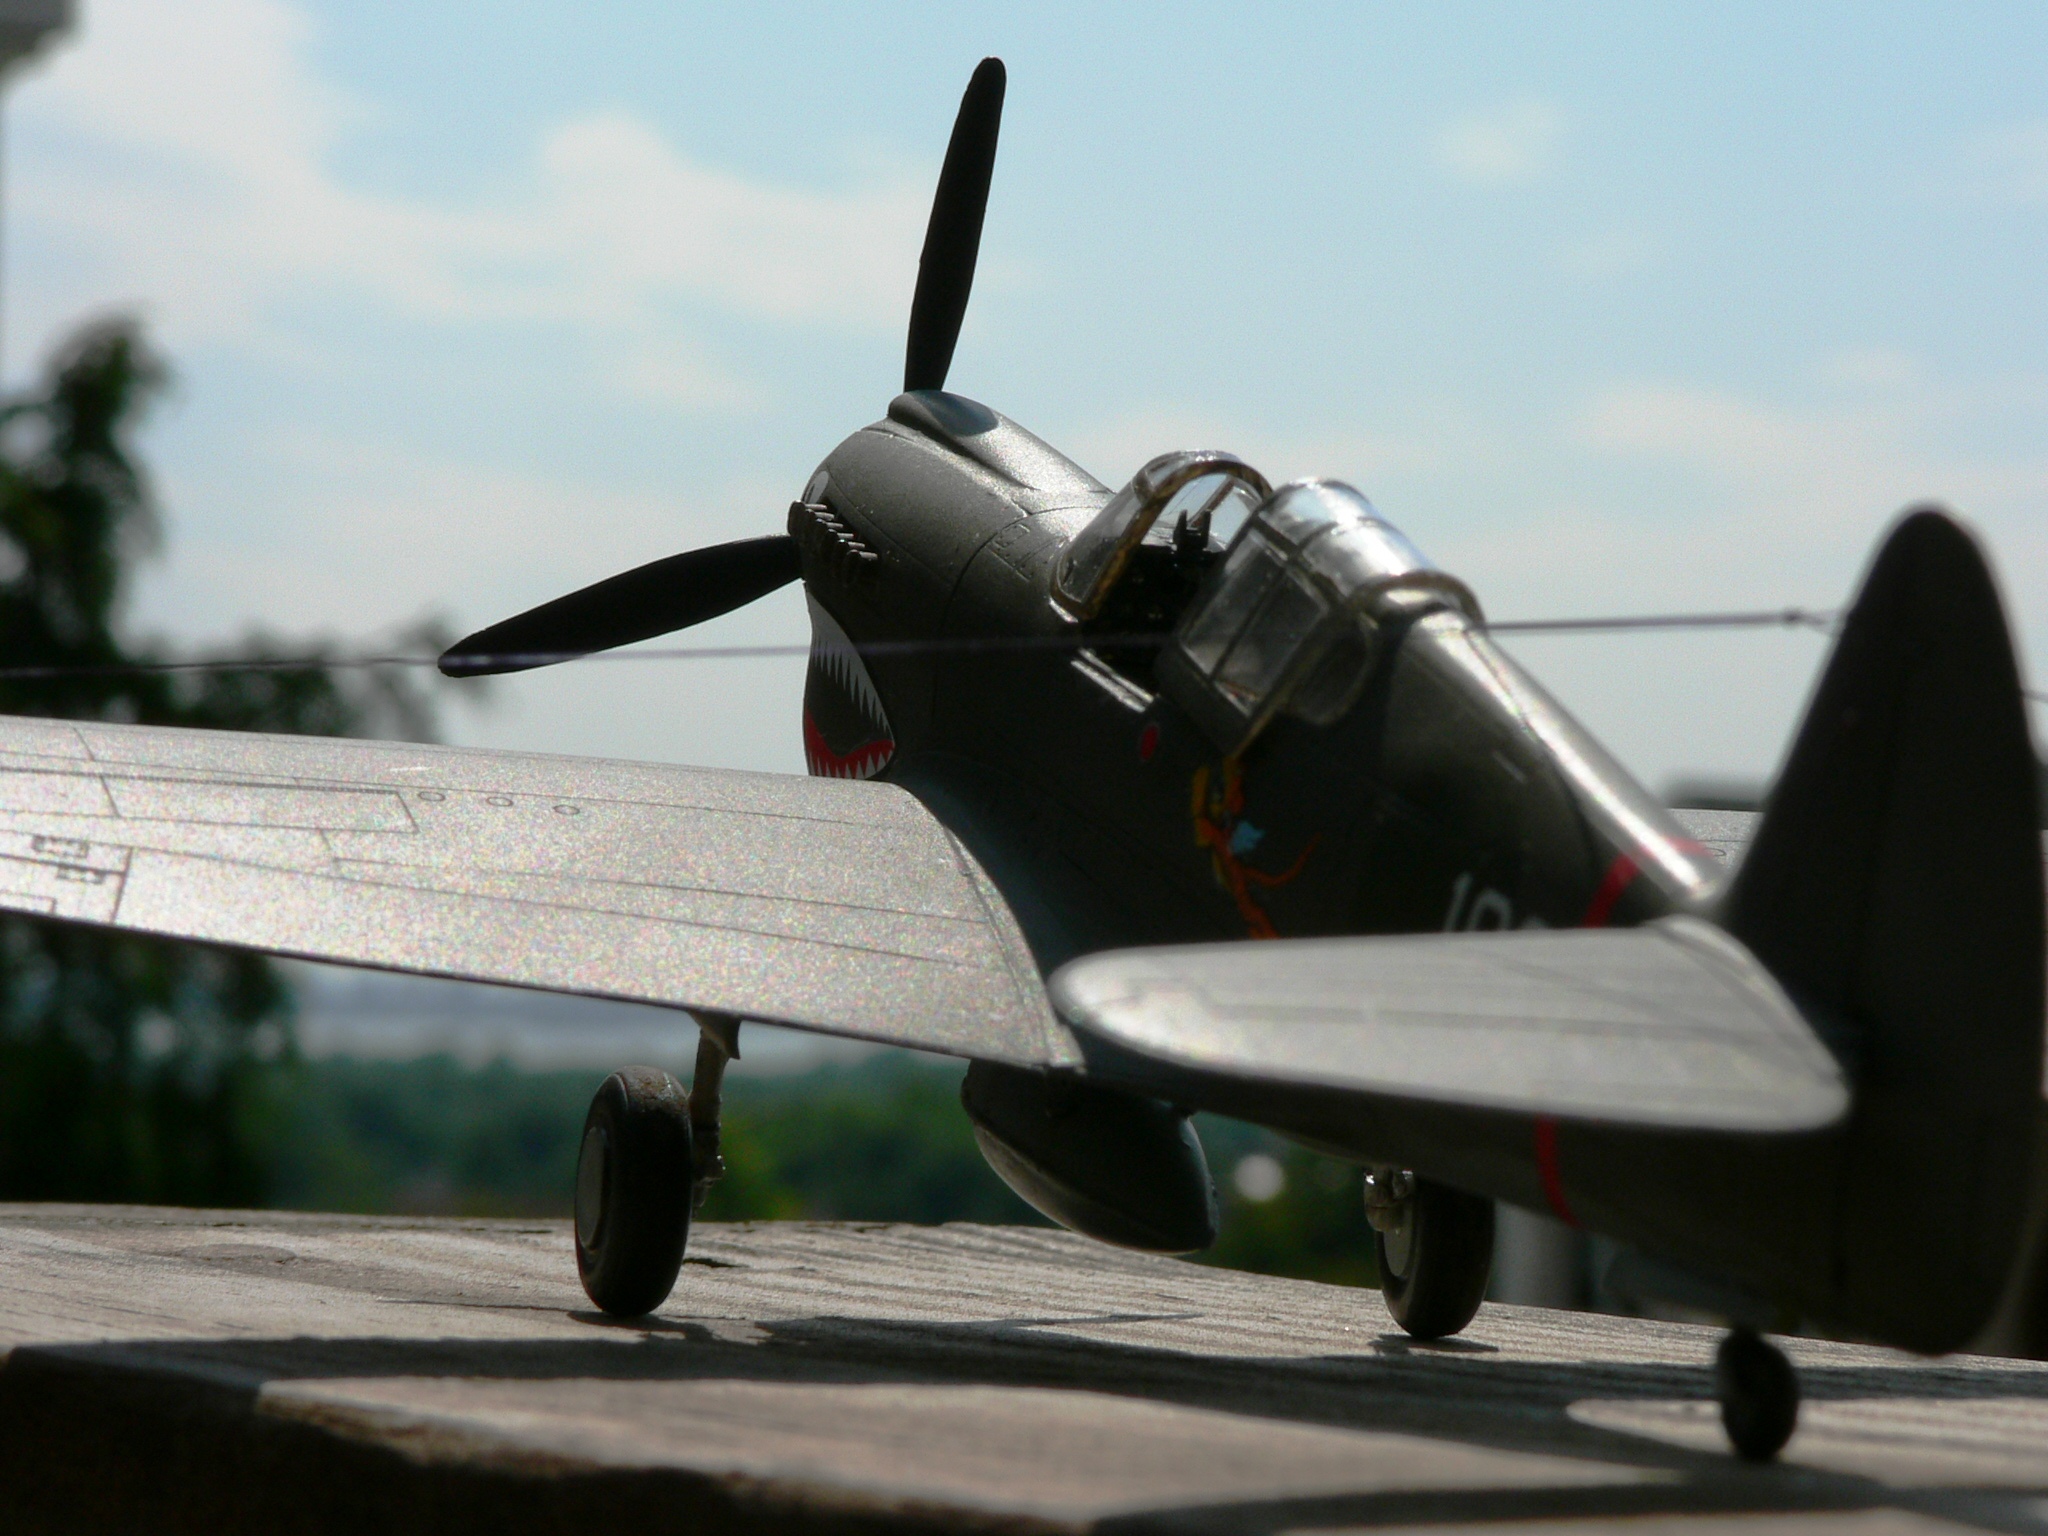
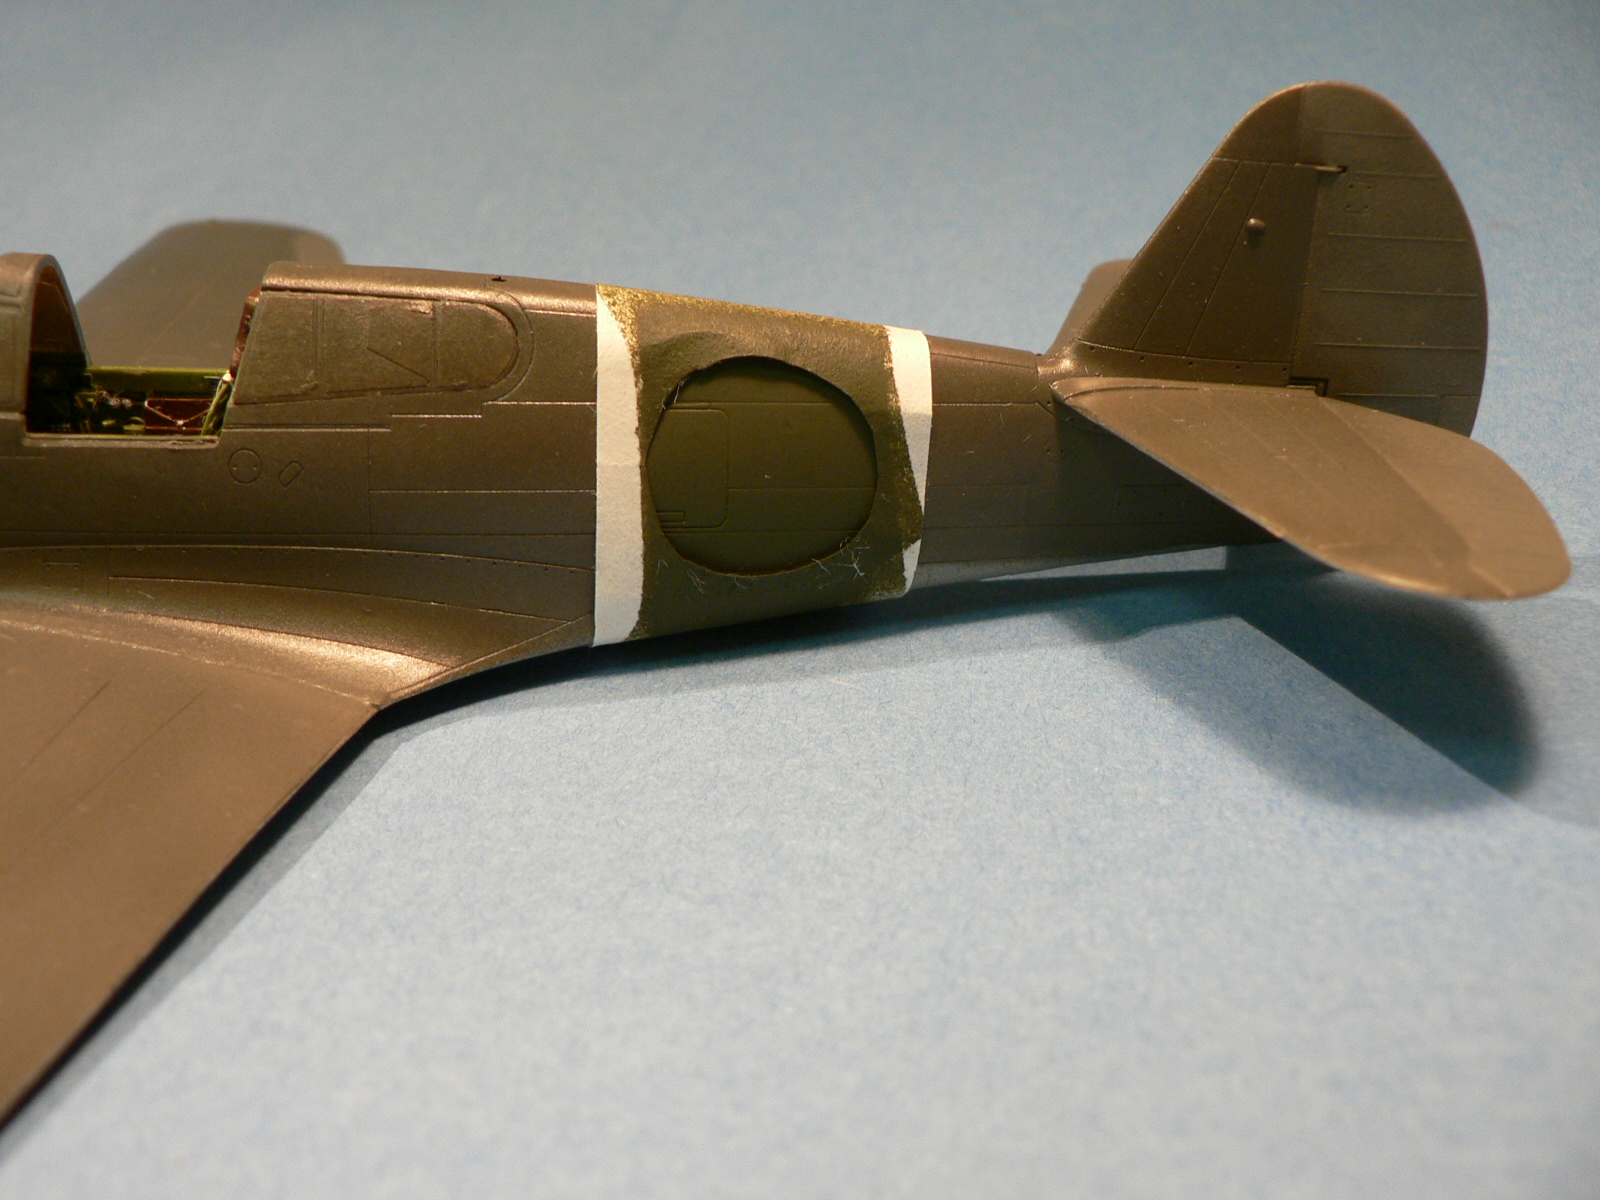
At this point, the model was ready for some Tamiya gray primer from an aerosol can. After which Testors Model Master Light Gray was airbrushed on the bottom, followed by Olive Drab on top. The kit supplied a dark green decal for the sides where the AVG over painted the US stars, I elected to paint that in using masking tape as a template. I also selectively used a lighter shade of the OD on the moving surfaces to denote different fading. This was kept to a minimum as these planes were in use for less than a year before being repainted for the 23rd Fighters Group when the AVG were disbanded. A coat of future was then applied and the plane was ready for an oil wash. I use black on the bottom and Burnt sienna on top.
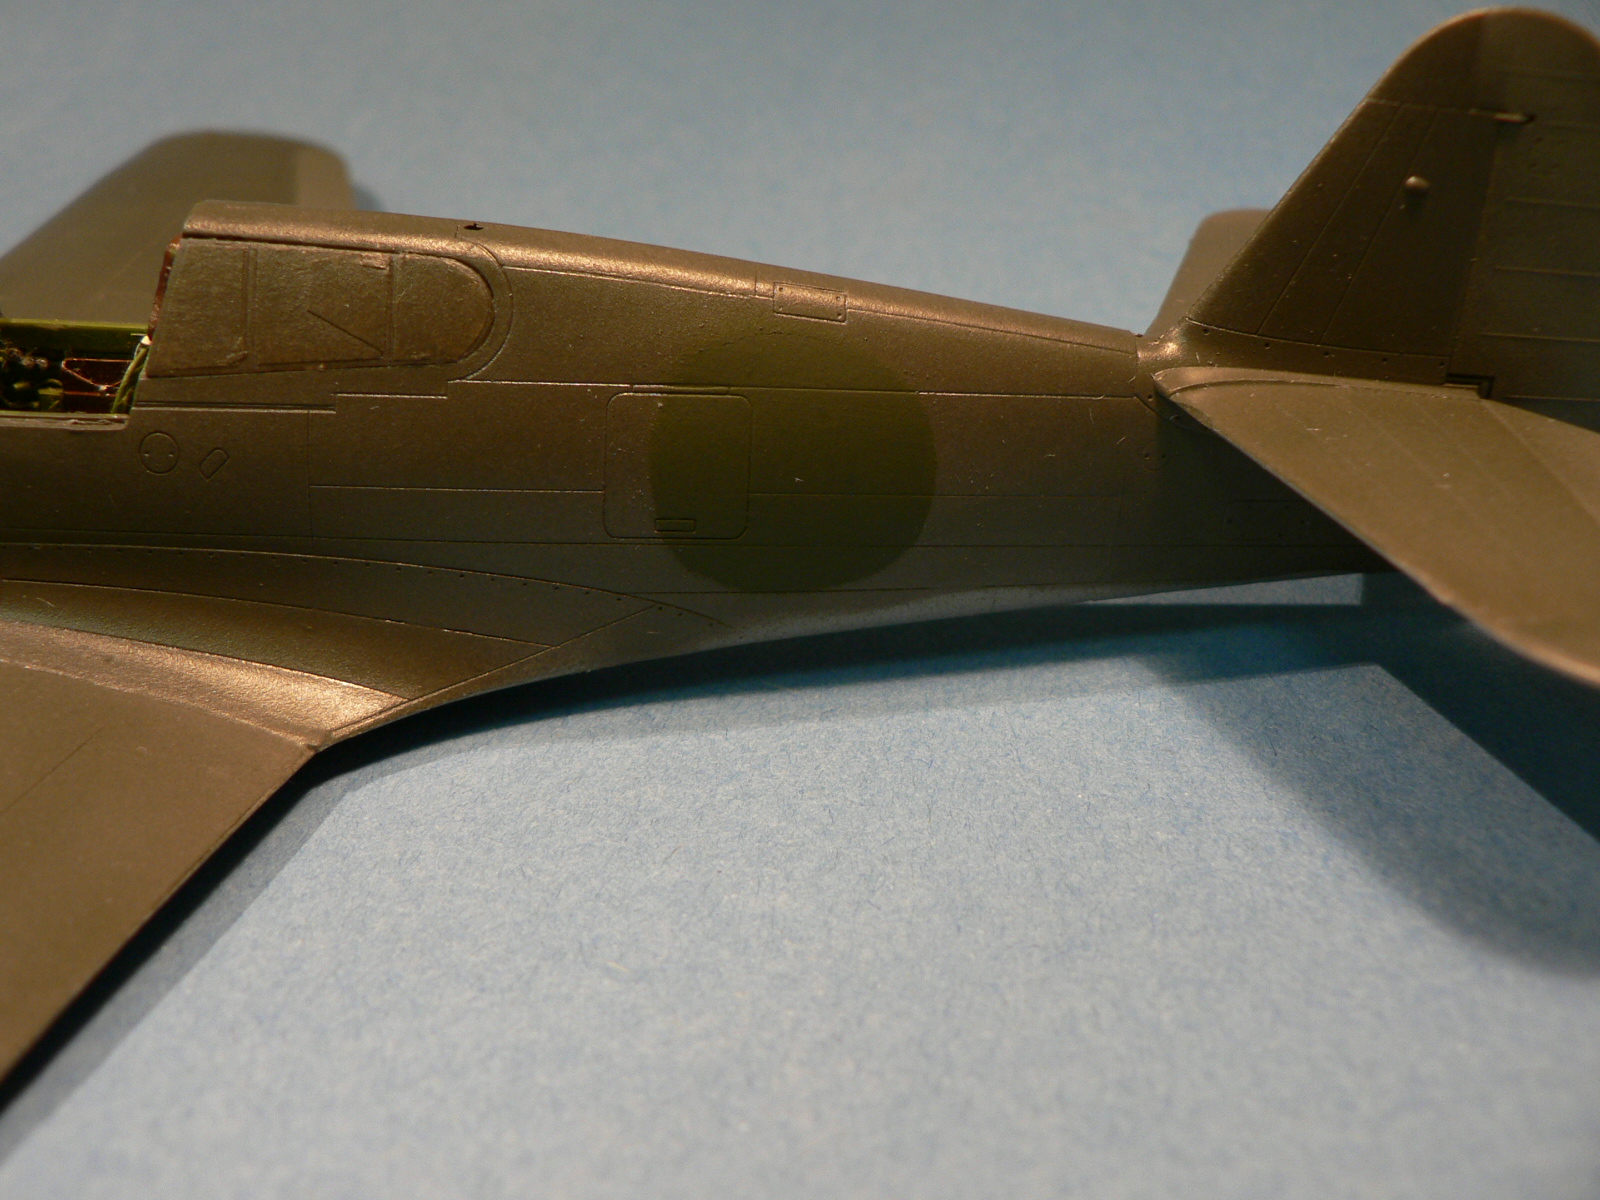
At this point, decals were added followed by more oil wash. This was followed by a coat of PollyS flat to even everything out. At this point, details like landing gears and brake wiring from fishing wire were added. The exhaust was painted using a mix of silver, brown, and tan followed by a black oil wash. Flat black were painted at the end to simulate their hollowness, quite effective at this scale and a lot cheaper than a set of aftermarket resin exhausts!
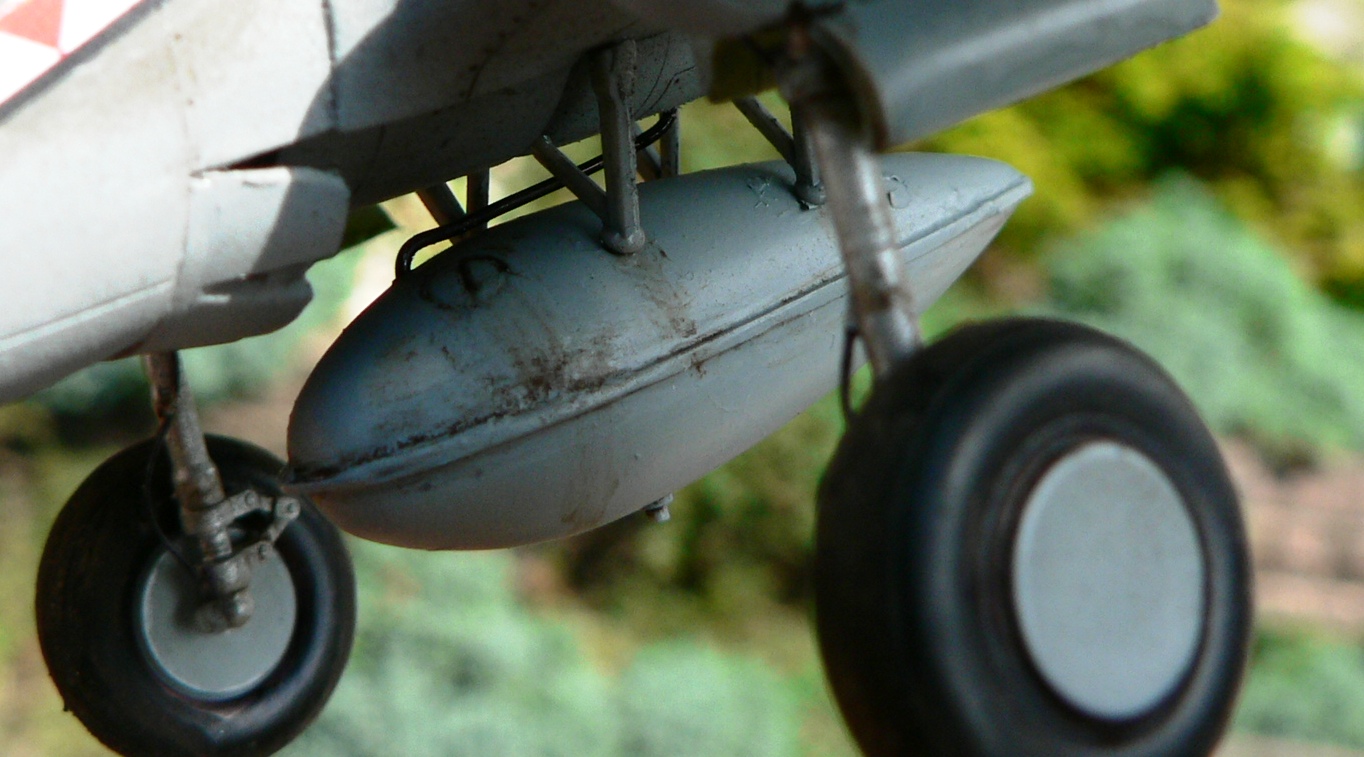
The landing gear doors were a bit of a problem as the small doors had no visible support for installing it in the open position, so I scratched built a support using sprue. The clear parts were then unmasked. I used some dry brushing with silver paint to add fine scratches; again this was done sparingly to show a used but not worn plane. I used a sharpie marker to quickly ‘paint’ some fishing wire black, and was attached into holes drilled into the plane using CA glue. Finally the fuel tanks were added and weathered with sienna oil to simulate spilled stains. The plane was now finished